Working with PC
Supports Windows 11 / 10 / 8.1 / 8 / 7
Hardware Connection
- Connect the 5 V 3 A Micro USB power adapter to the screen's power port.
- Connect the screen's HDMI port to your PC's HDMI output using an HDMI cable. Windows will automatically detect the display.
- Connect the screen's touch interface to your PC's USB port using a USB cable. Windows will automatically recognize the touch function.
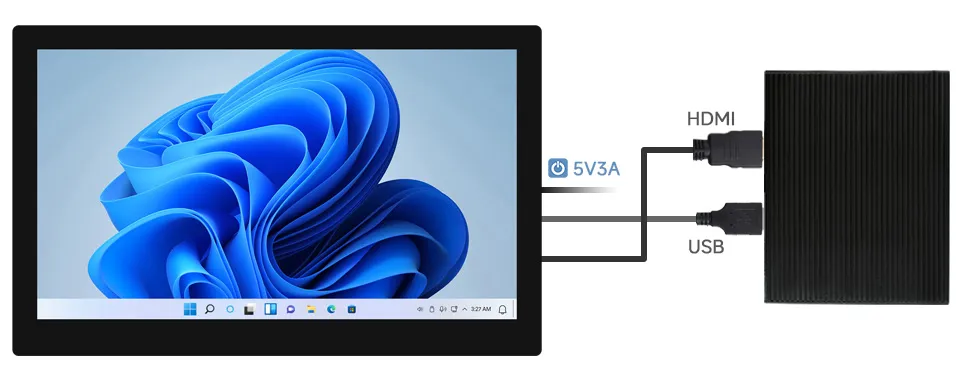
Some PCs do not support HDMI plug-and-play; a system restart usually resolves this.
If the USB port cannot provide sufficient power, the LCD may flicker. Please use the included 5V 3A power adapter connected to the screen's Power port.
Windows 11 Touch Setup
If your PC has multiple displays connected, you may need to reassign touch coordinates to the 10.1HP-CAPQLED-B.
-
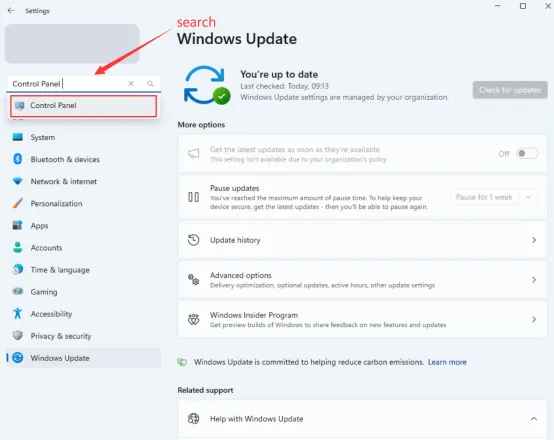
Type "Control Panel" in the Windows search box and open the Control Panel.
-
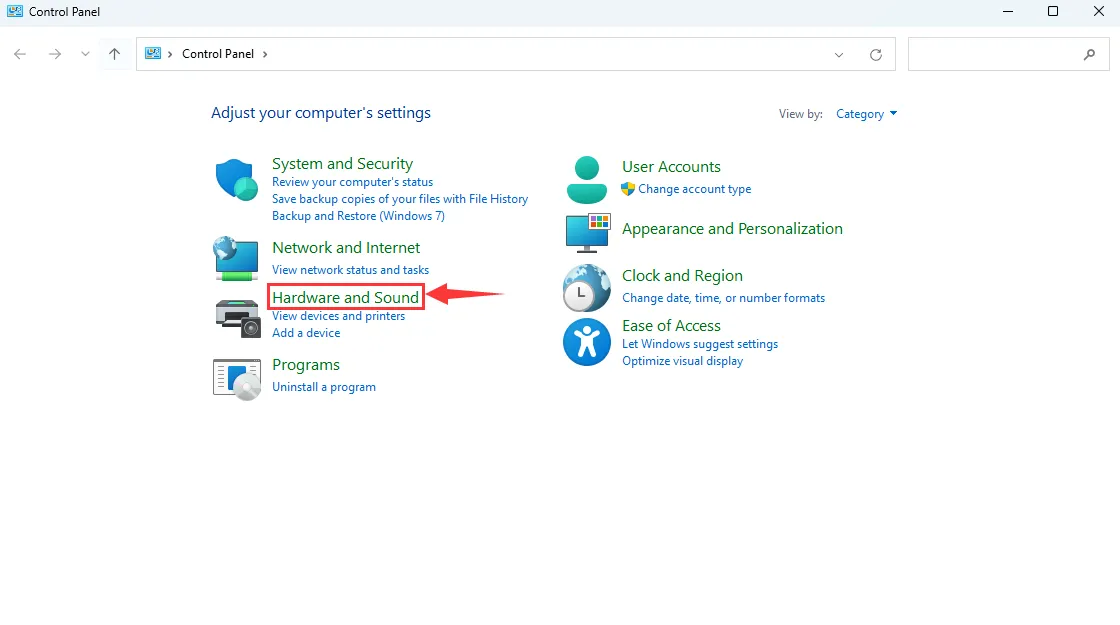
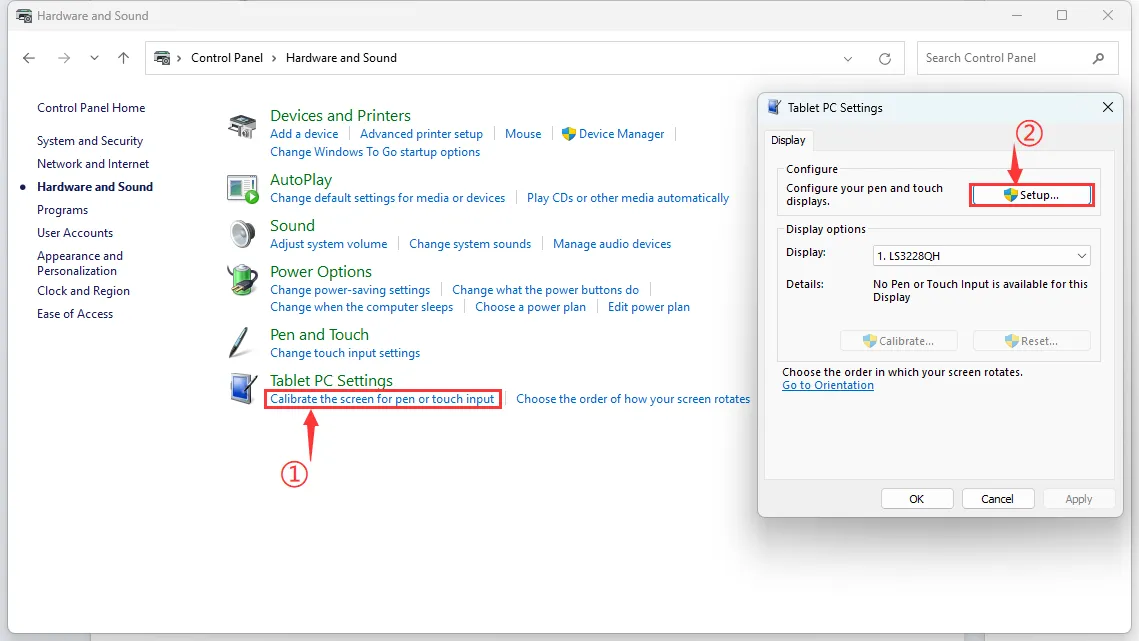
Select "Hardware and Sound" > "Tablet PC Settings".
-
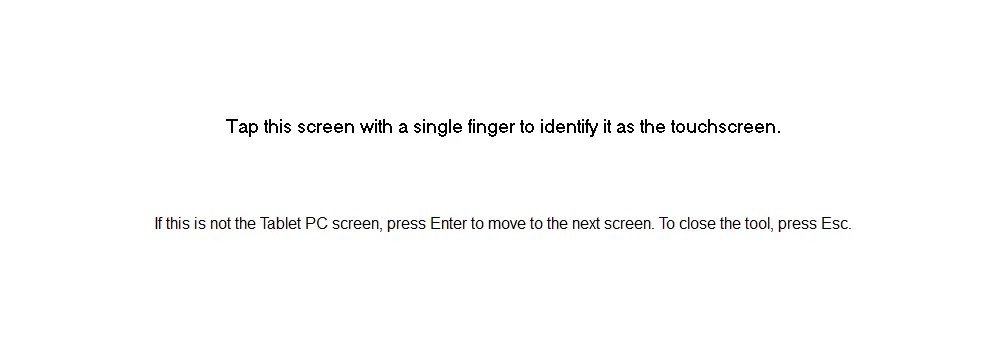
Under "Calibrate the screen for pen or touch input", click "Setup". In the pop‑up Tablet PC Settings dialog, click "Setup" again. The screen will display the prompt shown below. Touch the touch panel with your finger, and the PC will identify it as the touchscreen.
 info
infoNote: If the screen is blank, press the "Enter" key; the text prompt will switch to the next screen. (The screen displaying the text prompt will be designated as the touch screen.)
Windows 10 Touch Settings
-
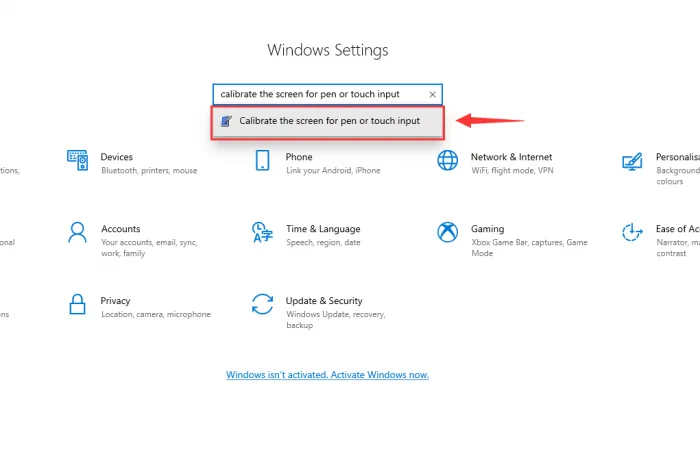
Open Windows Settings, type and click "Calibrate the screen for pen or touch input" in the search bar (as shown below).
-
In the "Tablet PC Settings" dialog, click "Setup".

-
Click "Setup", follow the on‑screen instructions to touch the 10.1HP-CAPQLED-B, and complete the touchscreen assignment.