Working with Raspberry Pi
Hardware Connection
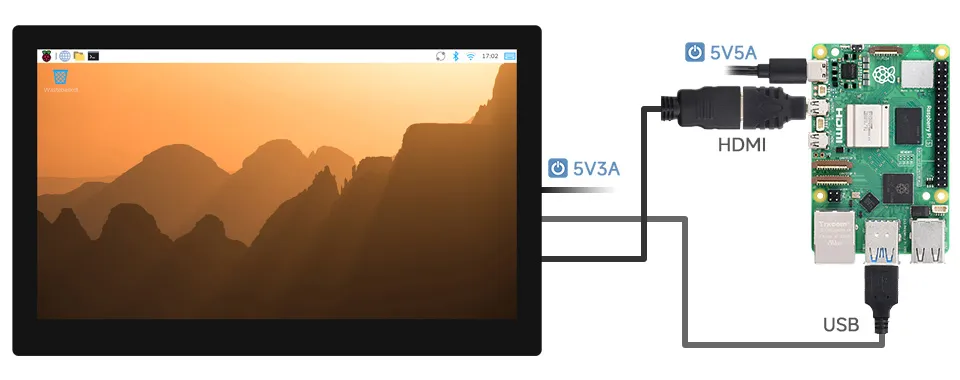
Raspberry Pi 5
- Connect the 5 V 3 A power supply to the screen's power port.
- Connect the screen's HDMI port to the Raspberry Pi 5's Micro HDMI port using an HDMI cable.
- Connect the screen's touch interface to the Raspberry Pi 5's USB port using a Micro USB cable.
Software Setup
-
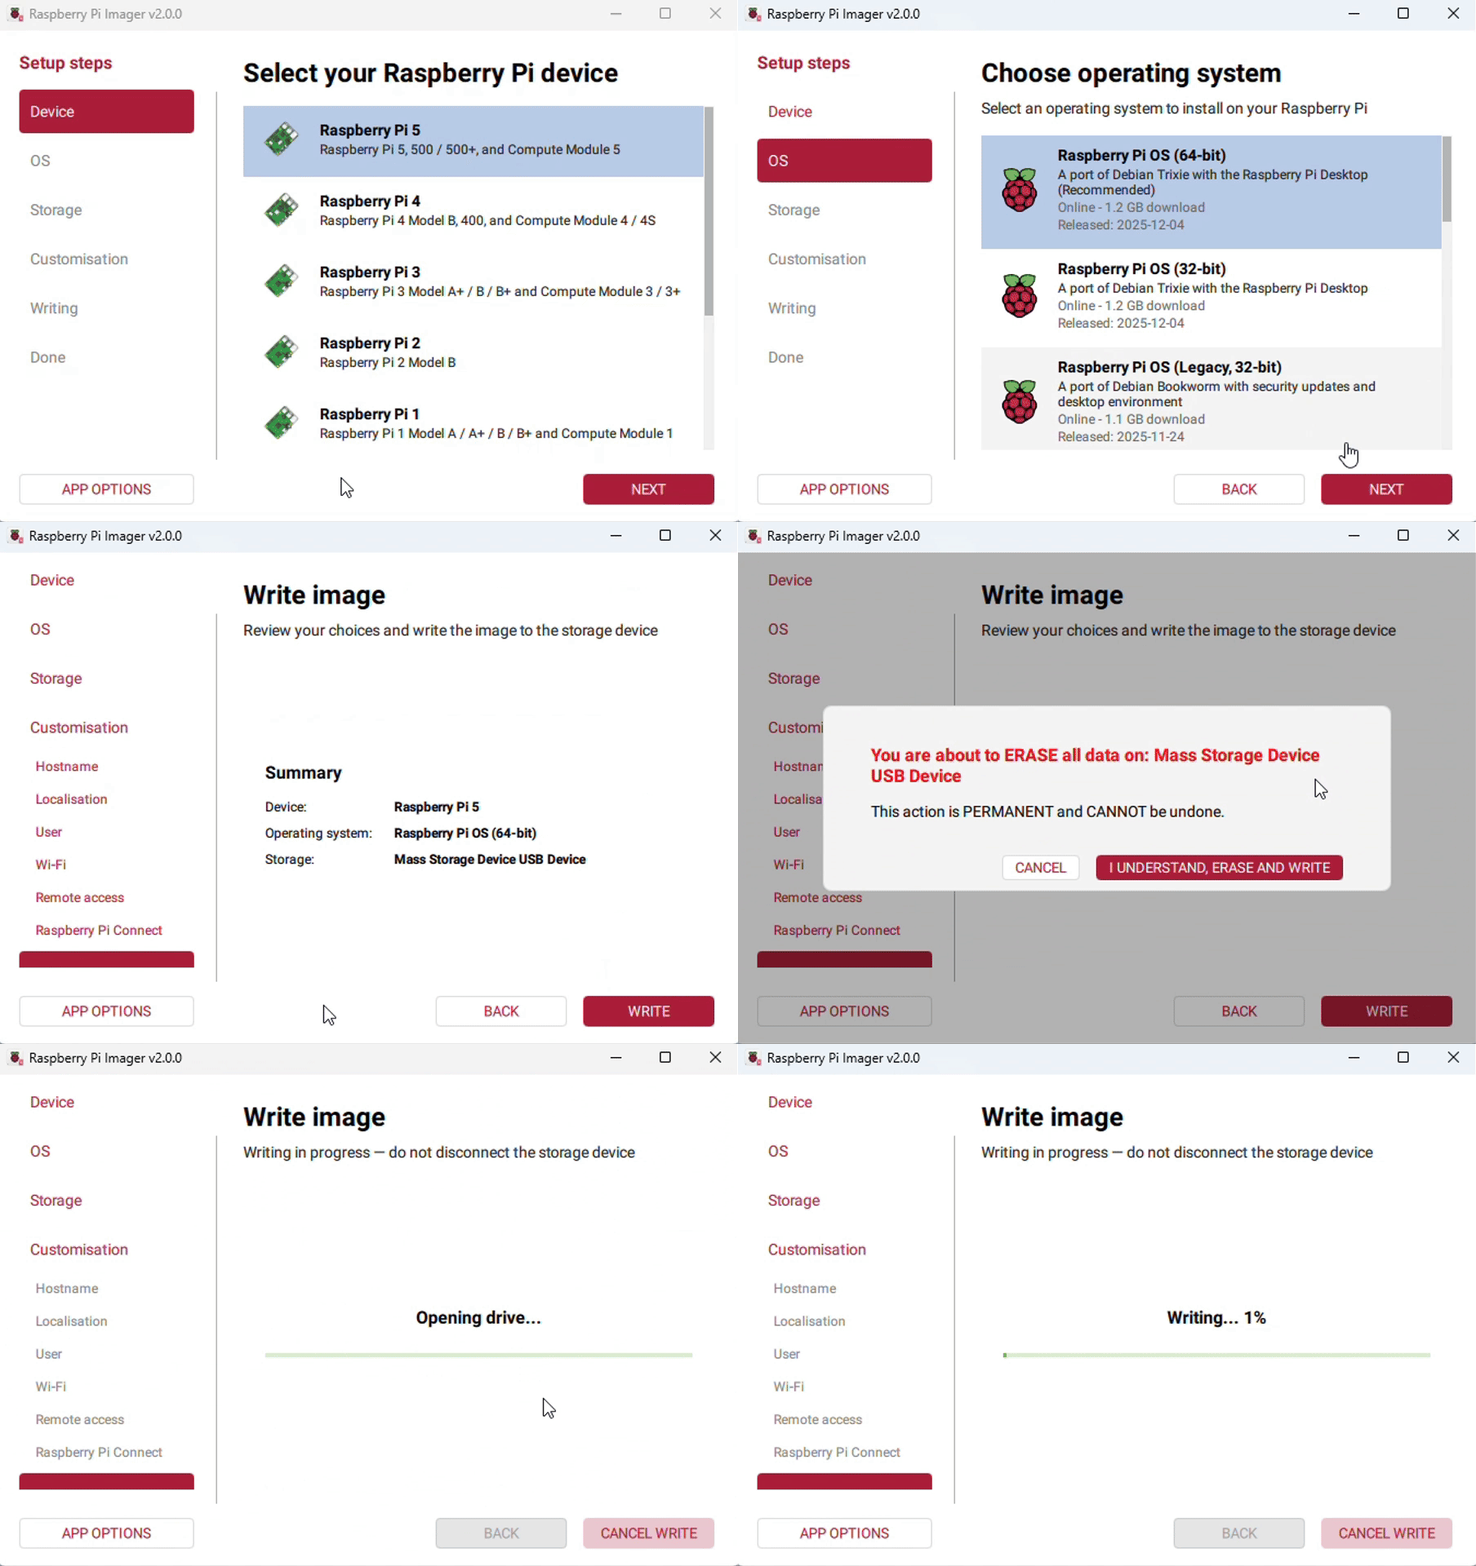
Connect the TF card to your computer, download and use Raspberry Pi Imager to flash the latest Raspberry Pi OS.
-
After flashing, open the
config.txtfile in the root directory of the TF card, add the following configuration at the end of the file, save, and safely eject the TF card.max_framebuffer_width=1280max_framebuffer_height=720hdmi_group=2hdmi_mode=87hdmi_timings=1280 1 160 32 40 720 1 20 6 30 0 0 0 60 0 70400000 3 -
Insert the TF card into the Raspberry Pi and connect a 5V power supply to the display. After the system boots, display and touch functions will work normally.
Software Brightness Adjustment on Linux
Use a DDC/CI program to adjust the monitor brightness. This example uses the ddcutil tool.
Install ddcutil
sudo apt-get install ddcutil -y
Detect DDC/CI‑capable monitors
sudo ddcutil detect
Adjust monitor brightness
Replace <value> with a number between 0 and 100.
sudo ddcutil setvcp 10 <value>
Example: Set brightness to 50%
sudo ddcutil setvcp 10 50
For more features and command details of ddcutil, refer to the official documentation:
http://www.ddcutil.com/commands/