Working with Raspberry Pi
Hardware Connection
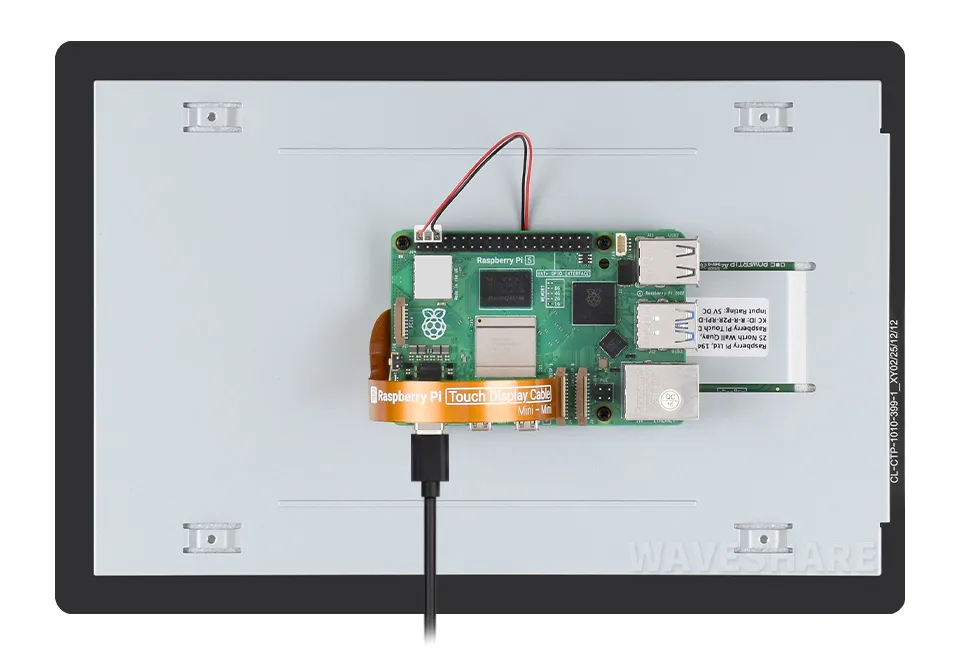
Raspberry Pi 5
-
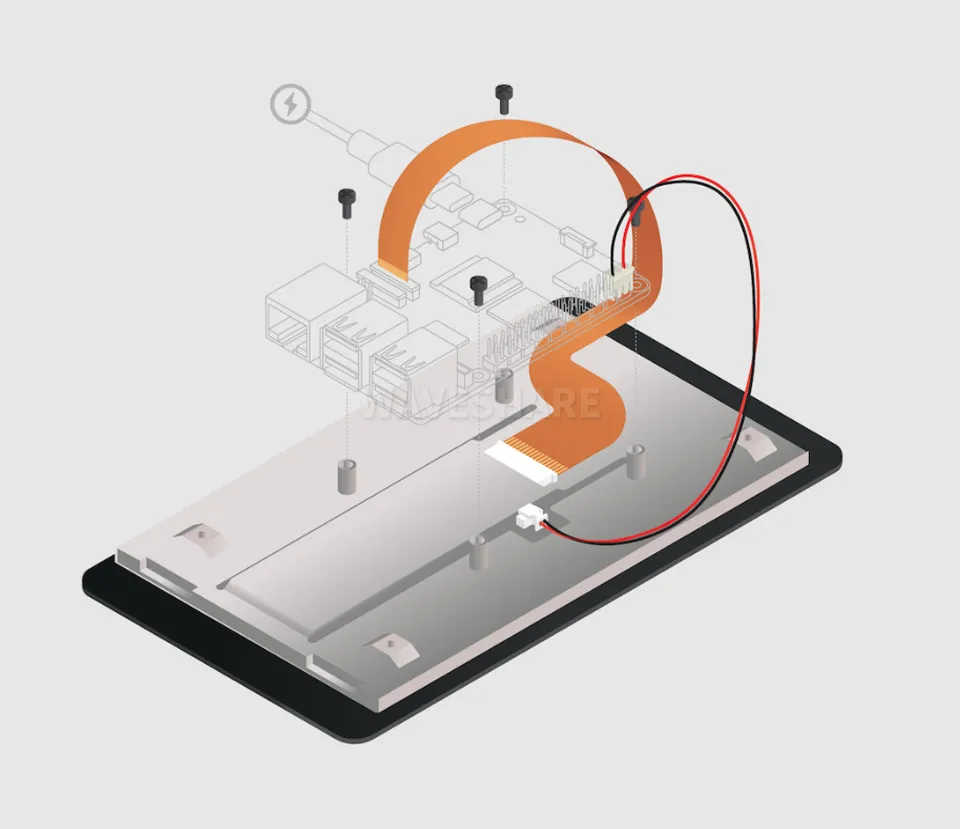
Use a 22PIN Mini-to-Mini DSI cable to connect to the
DISPinterface on the Raspberry Pi 5. Insert the other end of the DSI cable into the Touch Display 2 FFC connector, then slide the retaining clip back into place to secure the cable, with the gold contacts facing up.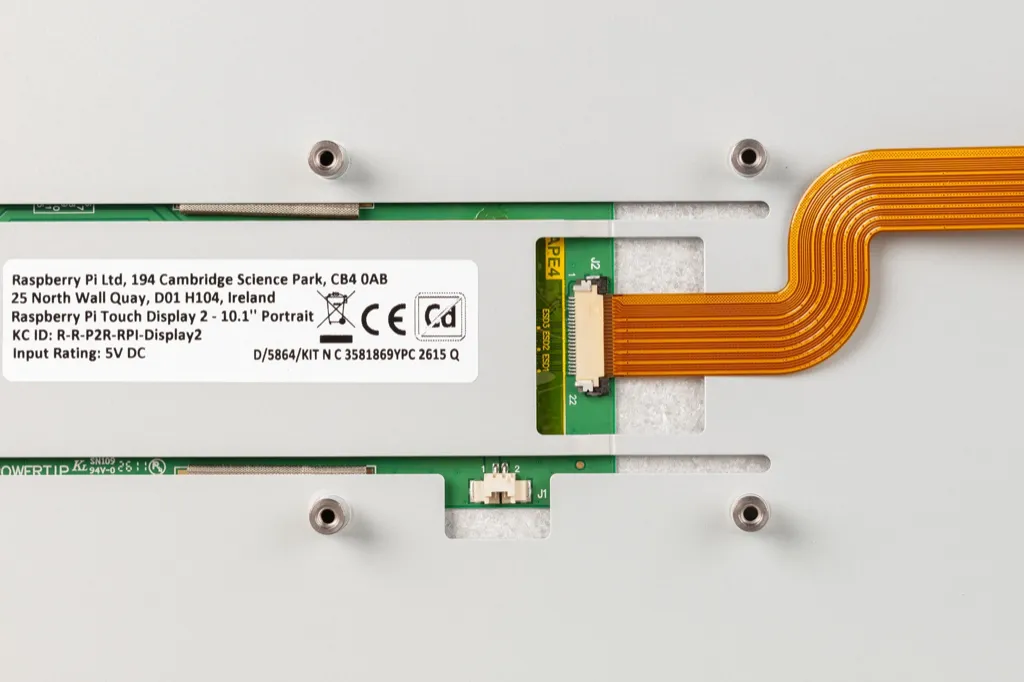
-
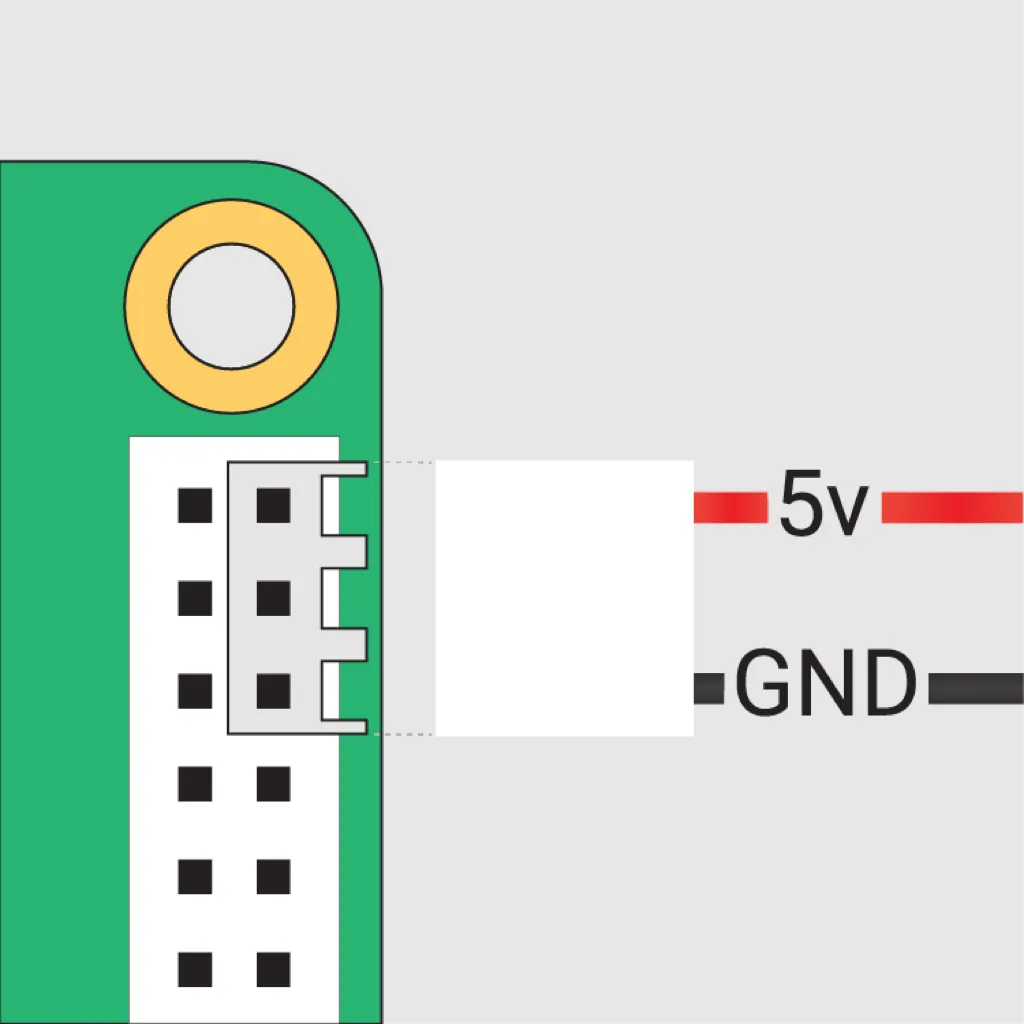
Use the GPIO power cable to connect the display's power interface to the 5 V and GND pins on the Raspberry Pi 5.
-
Use the mounting holes and screws on the back of the display to secure the Raspberry Pi 5.
-
Check the cable direction and GPIO power cable polarity before powering on.
Compute Module IO Board
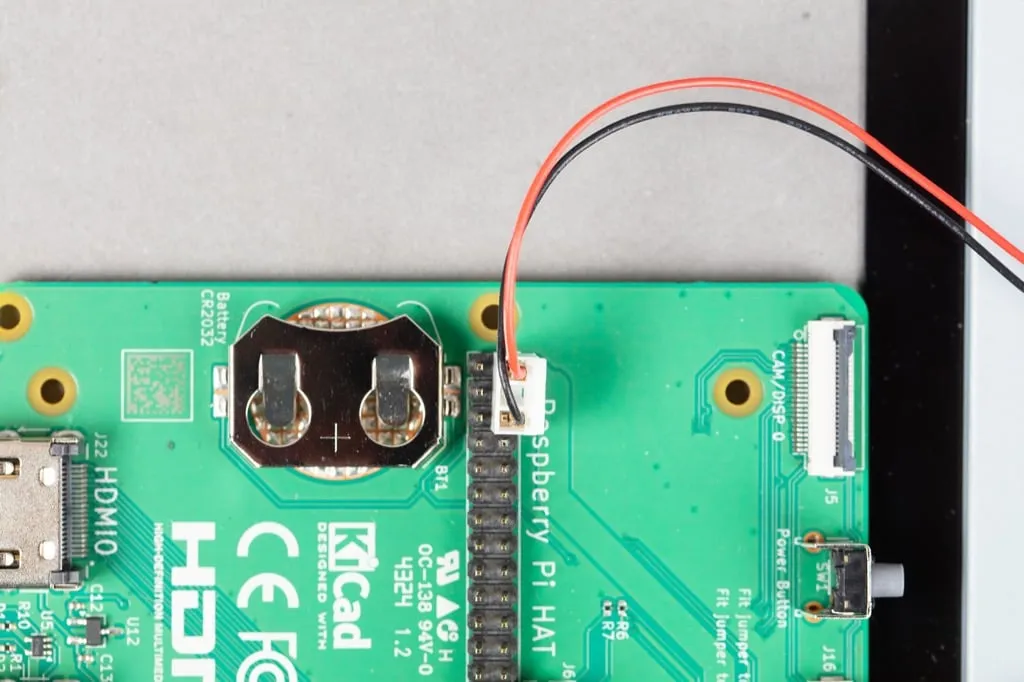
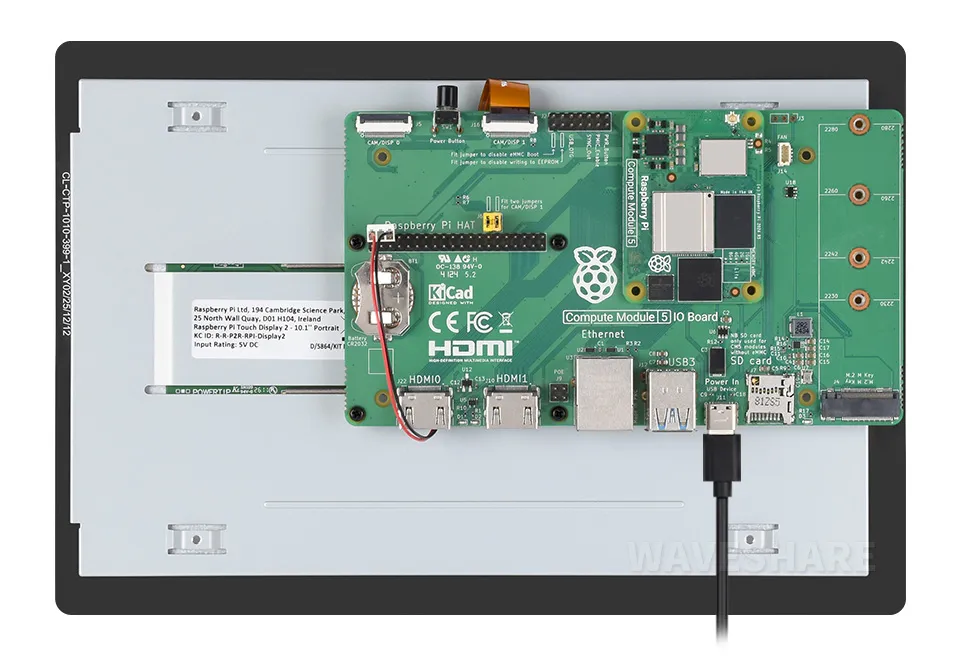
- Use a 22PIN Mini-to-Mini DSI cable to connect to the IO Board. Insert the other end of the DSI cable into the Touch Display 2 FFC connector, then slide the retaining clip back into place to secure the cable, with the gold contacts facing up.
On the CM5 IO Board and newer models, either interface labeled DISP can be used.
On the CM4 IO Board and earlier models, only the DISP1 interface can be used.
-
Use the GPIO power cable to connect to 5 V and GND.
-
Use M2.5 screws to secure the Compute Module IO Board to the display.
Software Setup
Raspberry Pi 5
Raspberry Pi 5 and newer models can usually automatically detect the display. Before first use, it is recommended to update the system and bootloader:
sudo apt update
sudo apt full-upgrade
sudo rpi-eeprom-update -a
After restarting the Raspberry Pi, the display should automatically show the desktop during boot and respond to touch.
Compute Module
The Compute Module does not automatically detect the DSI display. You need to edit /boot/firmware/config.txt and add the following overlays:
dtoverlay=vc4-kms-v3d
#DSI1 Use
dtoverlay=vc4-kms-dsi-ili79600-10-1inch
#DSI0 Use
#dtoverlay=vc4-kms-dsi-ili79600-10-1inch,dsi0
Save the file and reboot:
sudo reboot
The display may take about 1 minute for Raspberry Pi OS to output the image on the screen.
Backlight Brightness Adjustment
-
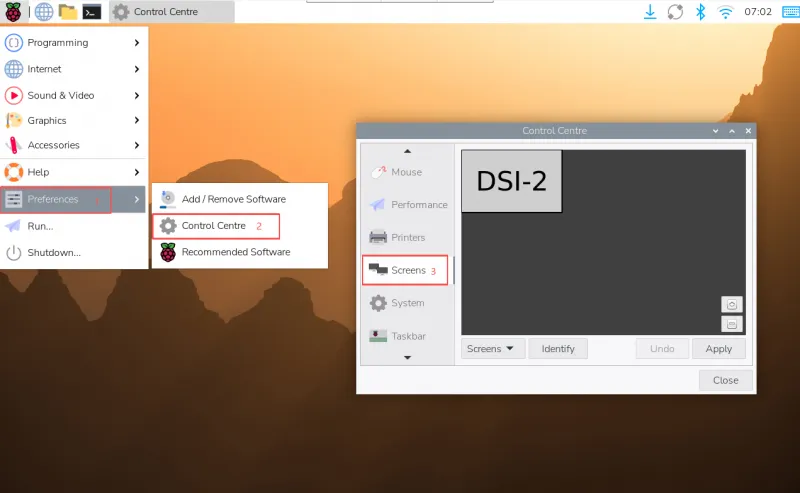
Click the top-left menu, go to "Preferences" > "Control Center", and select "Screens".
-
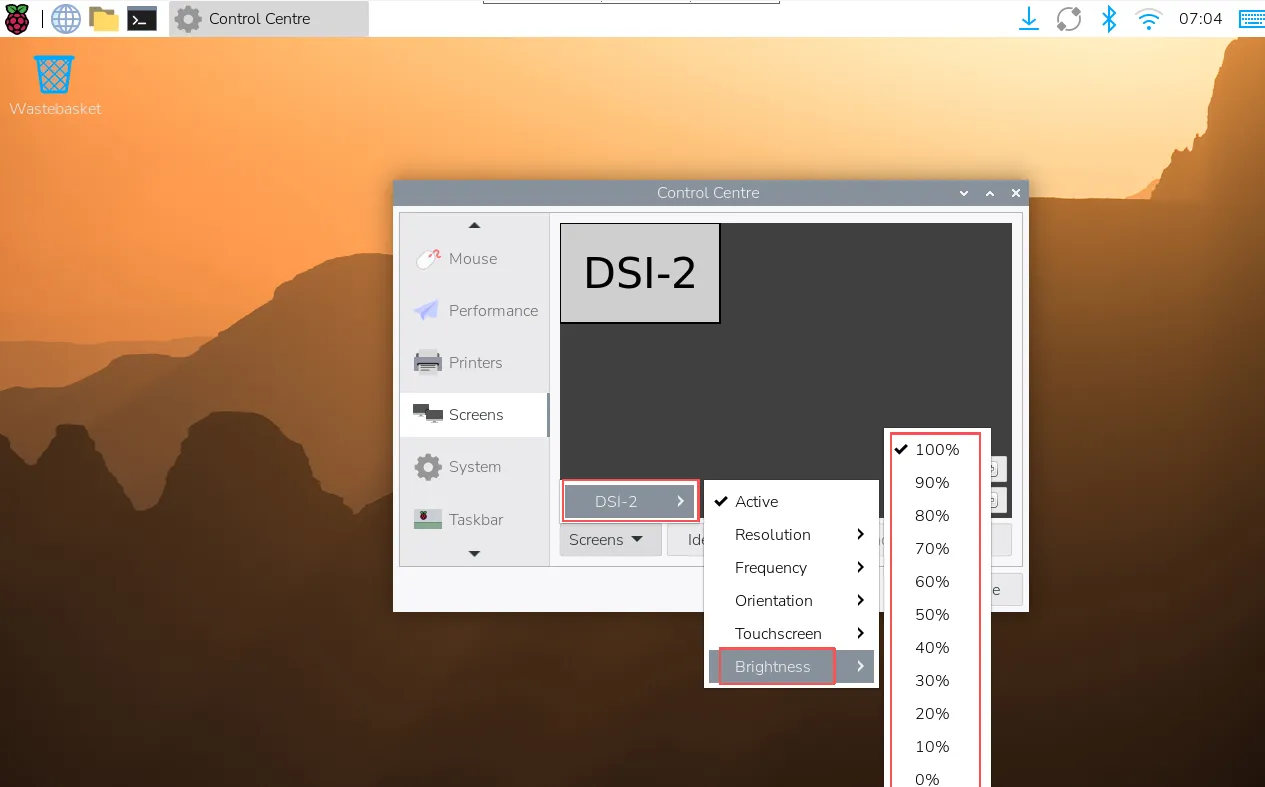
Go to "Screen" > "DSI-2" > "Brightness", check and adjust the desired backlight brightness. The brightness changes immediately.
Trixie Display Rotation
GUI Rotation
-
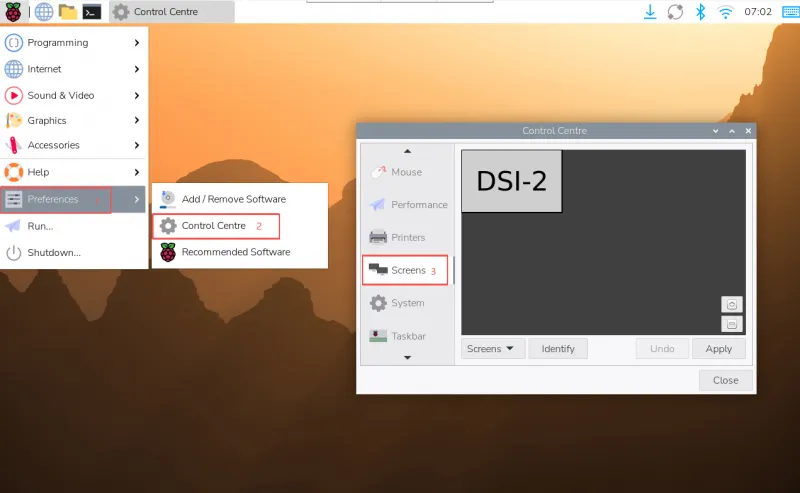
Click the top-left menu, go to "Preferences" > "Control Center", and select "Screens".
-
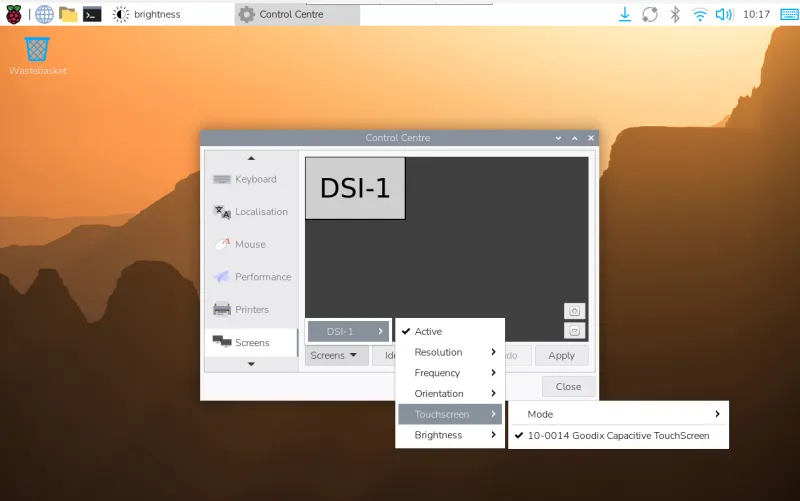
Go to "Screen" > "DSI-1" > "Touchscreen", and check the corresponding touch device.
-
Go to "Screen" > "DSI-2" > "Orientation", select the desired orientation, and click "Apply" to synchronously rotate both the display and touch.
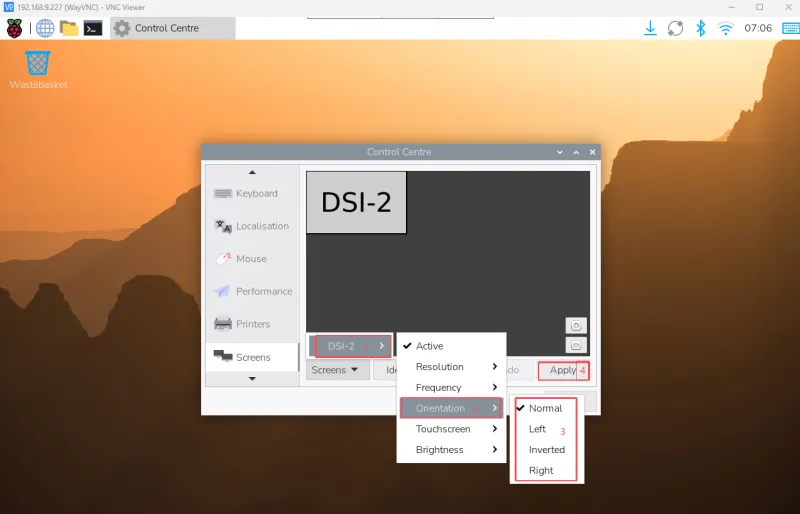
The actual display identifier may be DSI-1 or DSI-2; use the one detected by the system.
Lite Version Rotation
Display Rotation
For Raspberry Pi OS Lite (without GUI), you can set the display rotation by modifying the boot parameters.
Edit cmdline.txt:
sudo nano /boot/firmware/cmdline.txt
Add the corresponding rotation parameter at the beginning of the file, save, and reboot for the change to take effect.
# Display rotation 90 degrees
video=DSI-1:1200x1920M@60,rotate=90

# Rotate display 180 degrees
video=DSI-1:1200x1920M@60,rotate=180

# Rotate display 270 degrees
video=DSI-1:1200x1920M@60,rotate=270
- When using both DSI and HDMI displays simultaneously, the
cmdline.txtmethod cannot rotate the DSI display separately from the HDMI display. - The
cmdline.txtmethod only configures the display orientation and cannot automatically synchronize the touch orientation. To adjust the touch orientation, additional configuration for Touch Rotation is required.
Touch Rotation
Edit the configuration file:
sudo nano /boot/firmware/config.txt
Add touch rotation parameters to the corresponding device tree overlay:
dtoverlay=vc4-kms-dsi-ili79600-10-1inch,swapxy
Select parameters based on the actual installation orientation:
| Parameter | Description |
|---|---|
invx | Inverts the touch X-axis (left/right) |
invy | Inverts the touch Y-axis (up/down) |
swapxy | Swaps the touch X/Y axes (90° rotation) |
disable_touch | Disables the touch function |
Multiple parameters can be used simultaneously, separated by commas.
For example:
dtoverlay=vc4-kms-dsi-ili79600-10-1inch,swapxy,invy
Save the file and reboot the Raspberry Pi:
sudo reboot
The touch rotation parameters need to be combined based on the display installation orientation:
swapxy: Swaps the touch X/Y axesinvx: Inverts the touch X-axisinvy: Inverts the touch Y-axis
If the touch orientation does not match the display orientation, you can adjust it by combining the above parameters.
Touch Mode Selection
Raspberry Pi OS Trixie supports two touch modes, which can be toggled in "Screen Configuration" > "Touchscreen".
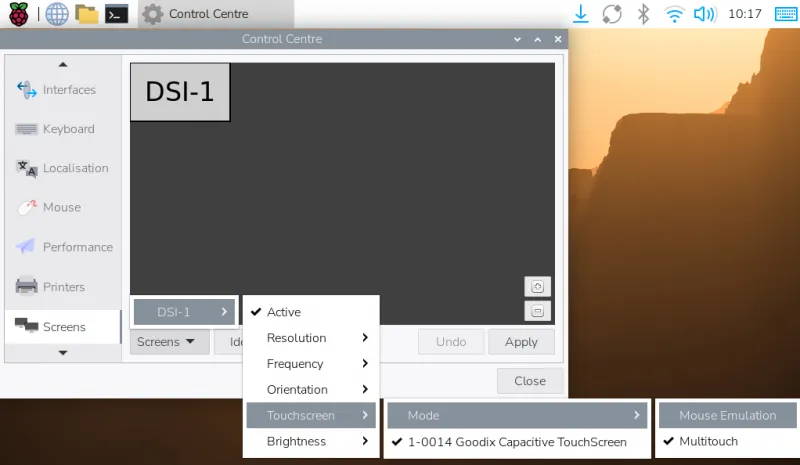
Mouse Emulation
- Single tap = left mouse click.
- Long press = right mouse click.
- Supports double-click.
- Does not support page scrolling or multi-touch.
Multitouch
- Supports multi-touch.
- Supports page scrolling.
- Does not support double-click or long-press right-click.
On-Screen Keyboard
Raspberry Pi OS Trixie comes with the Squeekboard on-screen keyboard integrated by default.
- The keyboard automatically appears when text input is possible and hides when input is not possible.
- You can also manually show or hide it using the keyboard icon in the top-right corner of the taskbar.

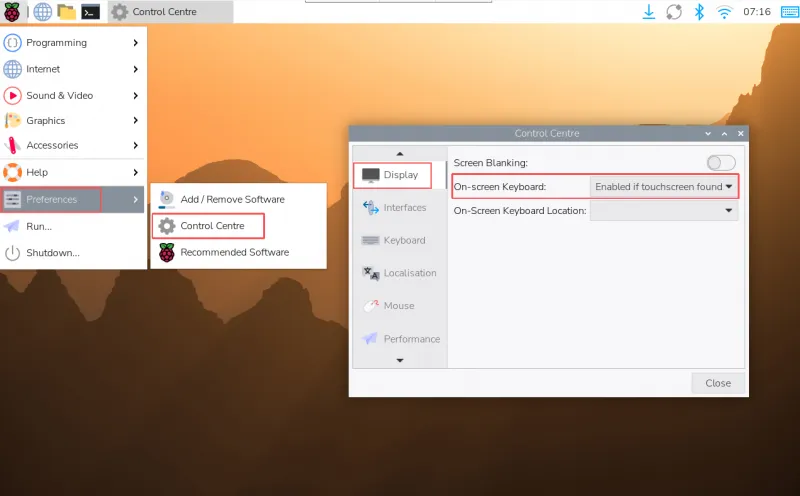
In Trixie, you can set the on-screen keyboard to show or hide via "Preferences" > "Control Center" > "Display".