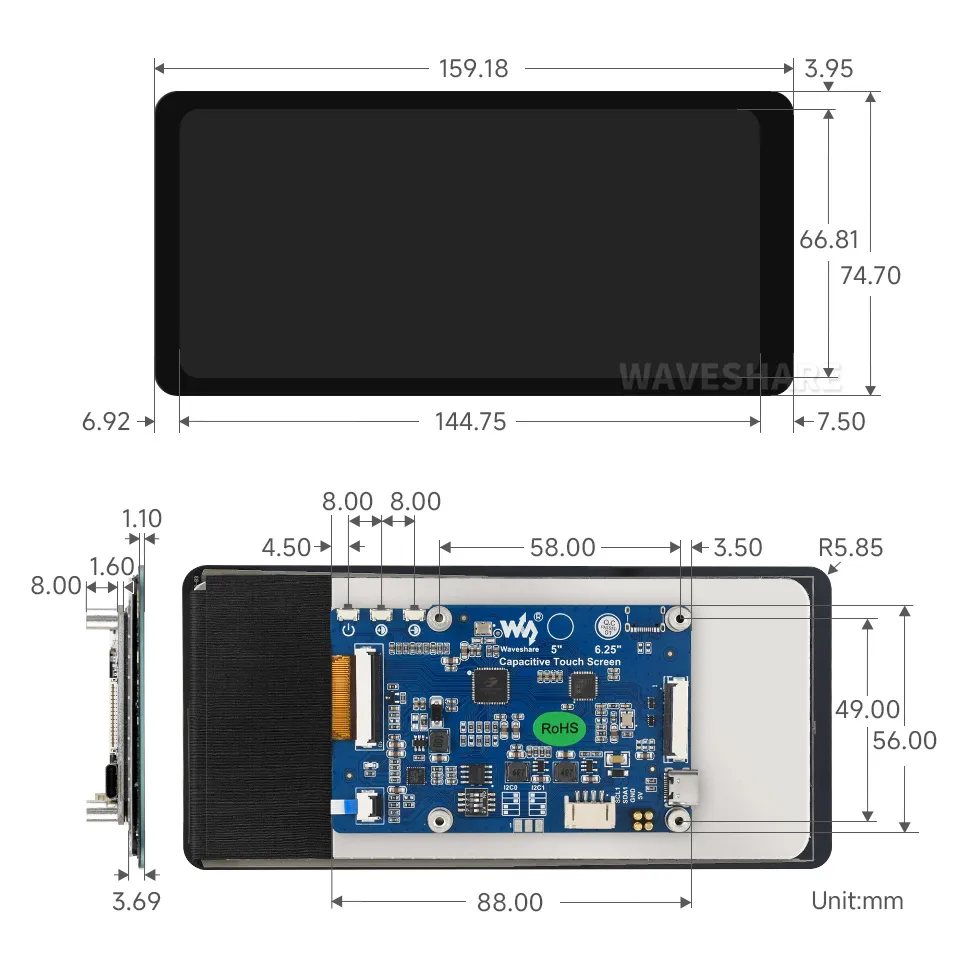
6.25inch DSI LCD (B)
| SKU | Product |
|---|---|
| 35000 | 6.25inch DSI LCD (B) |
Features
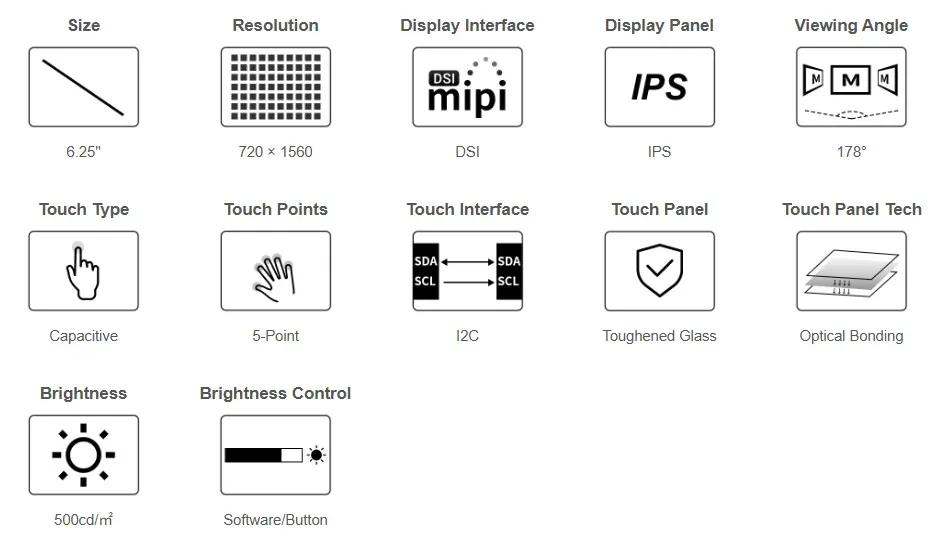
- 6.25inch DSI touchscreen with 5‑point capacitive touch.
- IPS display panel with hardware resolution of 720 × 1560.
- Portrait display by default; display orientation can be switched via system display settings.
- Optical bonding process with toughened glass touch panel, 6H hardness.
- DSI display interface, I2C touch interface.
- Compatible with Raspberry Pi, supporting plug‑and‑play (driver-free) on Raspberry Pi OS new systems.
- Backlight brightness adjustable via software or onboard buttons.
Electrical Specifications
| Parameter | Min | Typical | Max | Unit | Note |
|---|---|---|---|---|---|
| Input Voltage | 4.75 | 5.00 | 5.25 | V | Note 1 |
| Input Current | TBD | 400 | TBD | mA | Note 2 |
| Operating Temperature | 0 | 25 | 60 | ℃ | Note 3 |
| Storage Temperature | -10 | 25 | 70 | ℃ | Note 3 |
- Note 1: Exceeding the maximum input voltage or improper operation may cause permanent damage to the device.
- Note 2: Input current must be ≥400mA, otherwise it will cause startup failure or display abnormalities. Prolonged abnormal operation may cause permanent damage to the device.
- Note 3: Do not store the display in high‑temperature, high‑humidity environments for extended periods. The display must operate within the specified limits to avoid damage.
Interface Introduction
Power Supply and Touch Communication
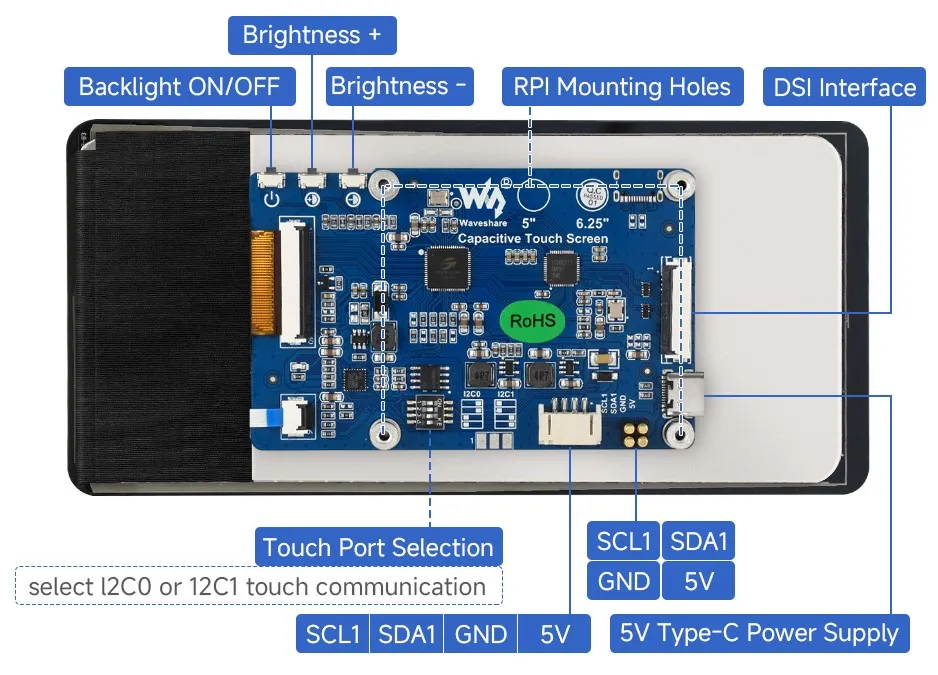
In the default I2C0 mode, the DSI ribbon cable carries the display and touch signals, and no separate SDA1 or SCL1 connection is required.
The screen has relatively high power consumption, and powering it through the DSI ribbon cable alone is insufficient; you must additionally connect a 5 V power supply. Choose any one of the following power supply methods:
| Power Supply Method | Connection Requirements | Notes |
|---|---|---|
| Spring pogo pins | The Raspberry Pi is secured to the back of the screen, and the pogo pins contact the 5V and GND of the GPIO | Installing additional standoffs may leave the pogo pins suspended; in this case, power can be supplied via the 4PIN or Type-C |
| 4PIN Interface | Connect the 5V and GND of the mainboard to the corresponding 5V and GND of the screen | Wire according to the PCB markings, not by wire color |
| Type-C Interface | Connect a 5 V power supply to the screen's Type-C interface | Power supply only; does not transmit touch signals |
Switching to I2C1 Touch Communication
- After powering off, switch the DIP position of the "touch interface selection switch" in the figure above to I2C1.
- Using the pogo pins or 4PIN, connect SDA1 and SCL1 to the I2C1 pins of the Raspberry Pi GPIO respectively. When using pogo pins, ensure proper contact.
- Add
,i2c1to the end of the screen'sdtoverlayline inconfig.txt, save, and reboot.
The power supply method is the same as above, and the DSI ribbon cable still carries the display signal. When using Type-C power, you must still connect SDA1 and SCL1 via the pogo pins or 4PIN.
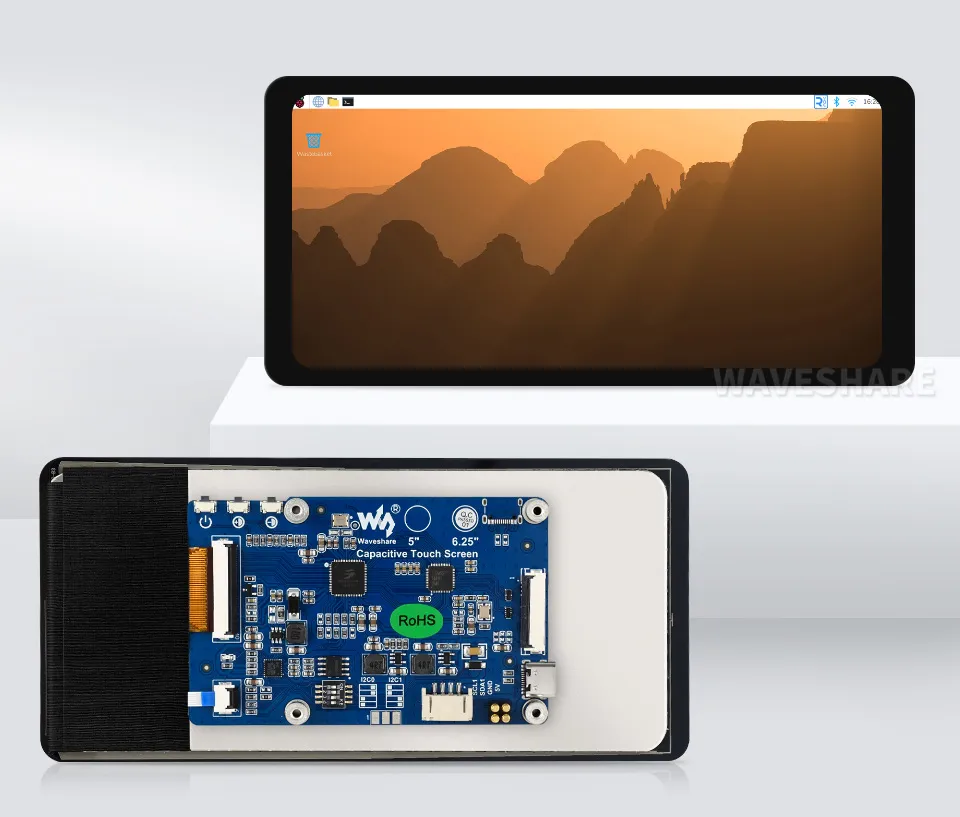
Dimensions