Working with App Lab
Arduino App Lab is an all-in-one development environment for the Arduino UNO Q, used to create, run, and manage applications on the UNO Q.
In Arduino App Lab, an application is called an App. An App can consist of multiple functional modules, such as Arduino Sketch, Python script, Linux application, containerized application, and AI model. This allows users to use both the Linux computing power and the Arduino real-time control capability of the UNO Q within the same project.
UNO Q adopts a dual-architecture design, featuring two computing units on-board: MPU and MCU:
| Architecture | Runtime Environment | Suitable Tasks |
|---|---|---|
| MPU | Debian Linux | Python, Linux applications, AI inference, image processing, network applications |
| MCU | Arduino Core on Zephyr OS | GPIO control, sensor acquisition, actuator control, real-time I/O, Arduino Sketch |
The role of Arduino App Lab is to integrate these two development flows, allowing users to use both Linux applications and Arduino programs in the same project.
For example, the Linux side can handle camera image processing, AI inference, and network communication, while the MCU side controls sensors, LEDs, relays, motors, and other peripherals.
If you only need traditional Arduino Sketch development for the MCU part of UNO Q, you can also use Arduino IDE 2.x.
Running the Example Program
When using Arduino App Lab for the first time, it is recommended to run an official example program to confirm that UNO Q is properly connected and that Arduino App Lab can upload and run applications correctly.
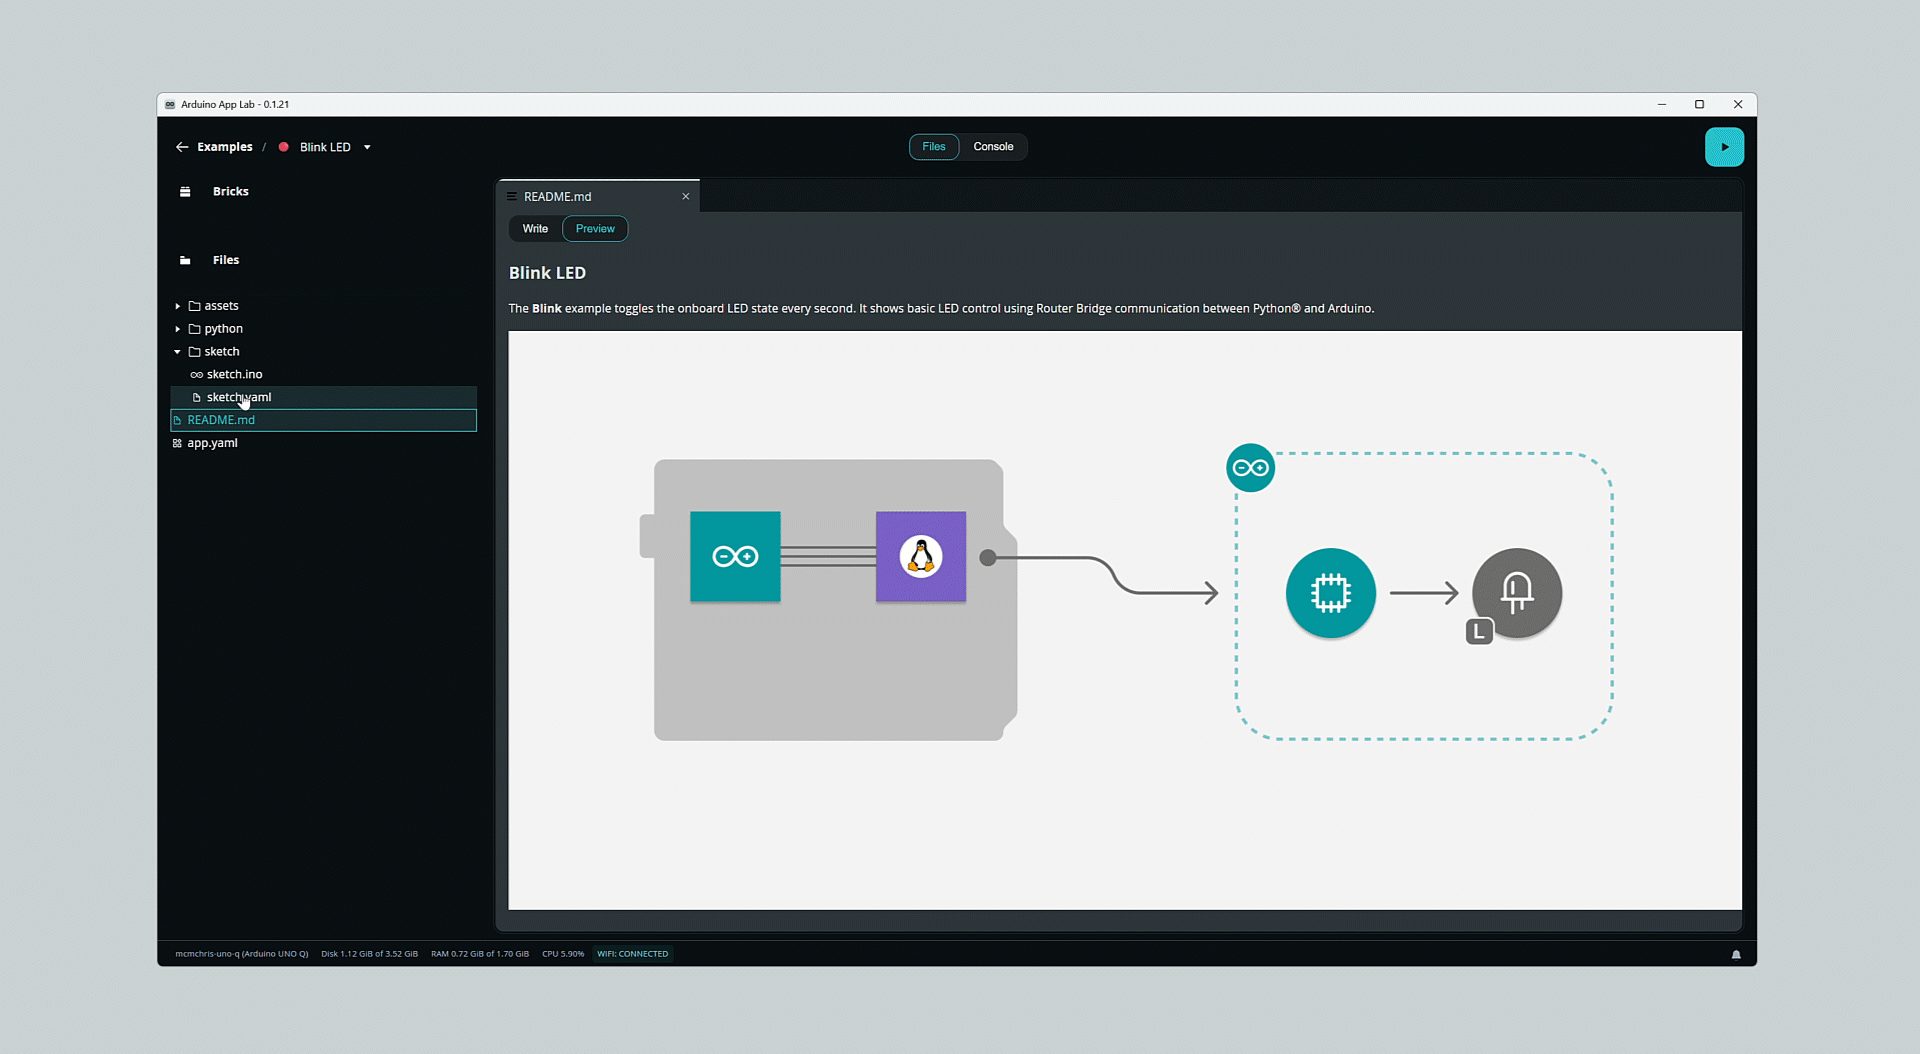
The Blink example is used below for illustration.
Operation Steps
-
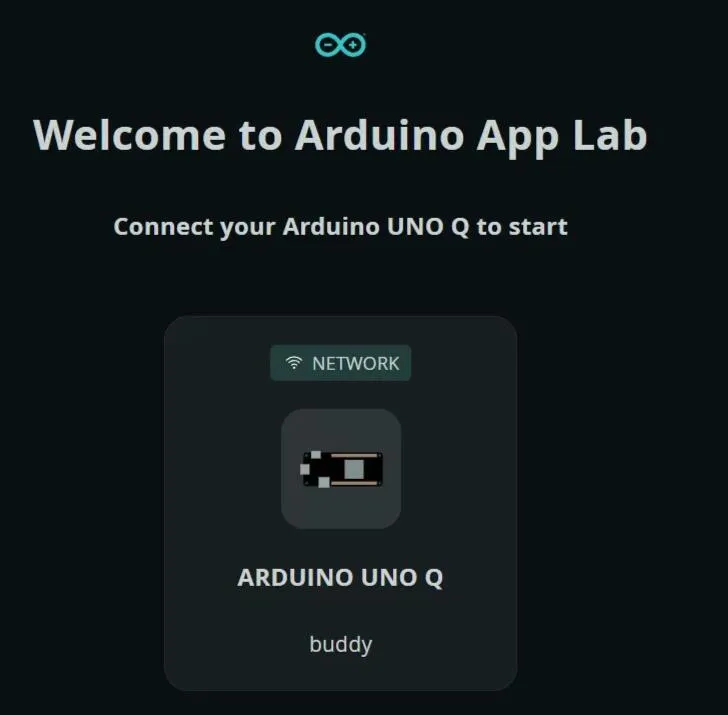
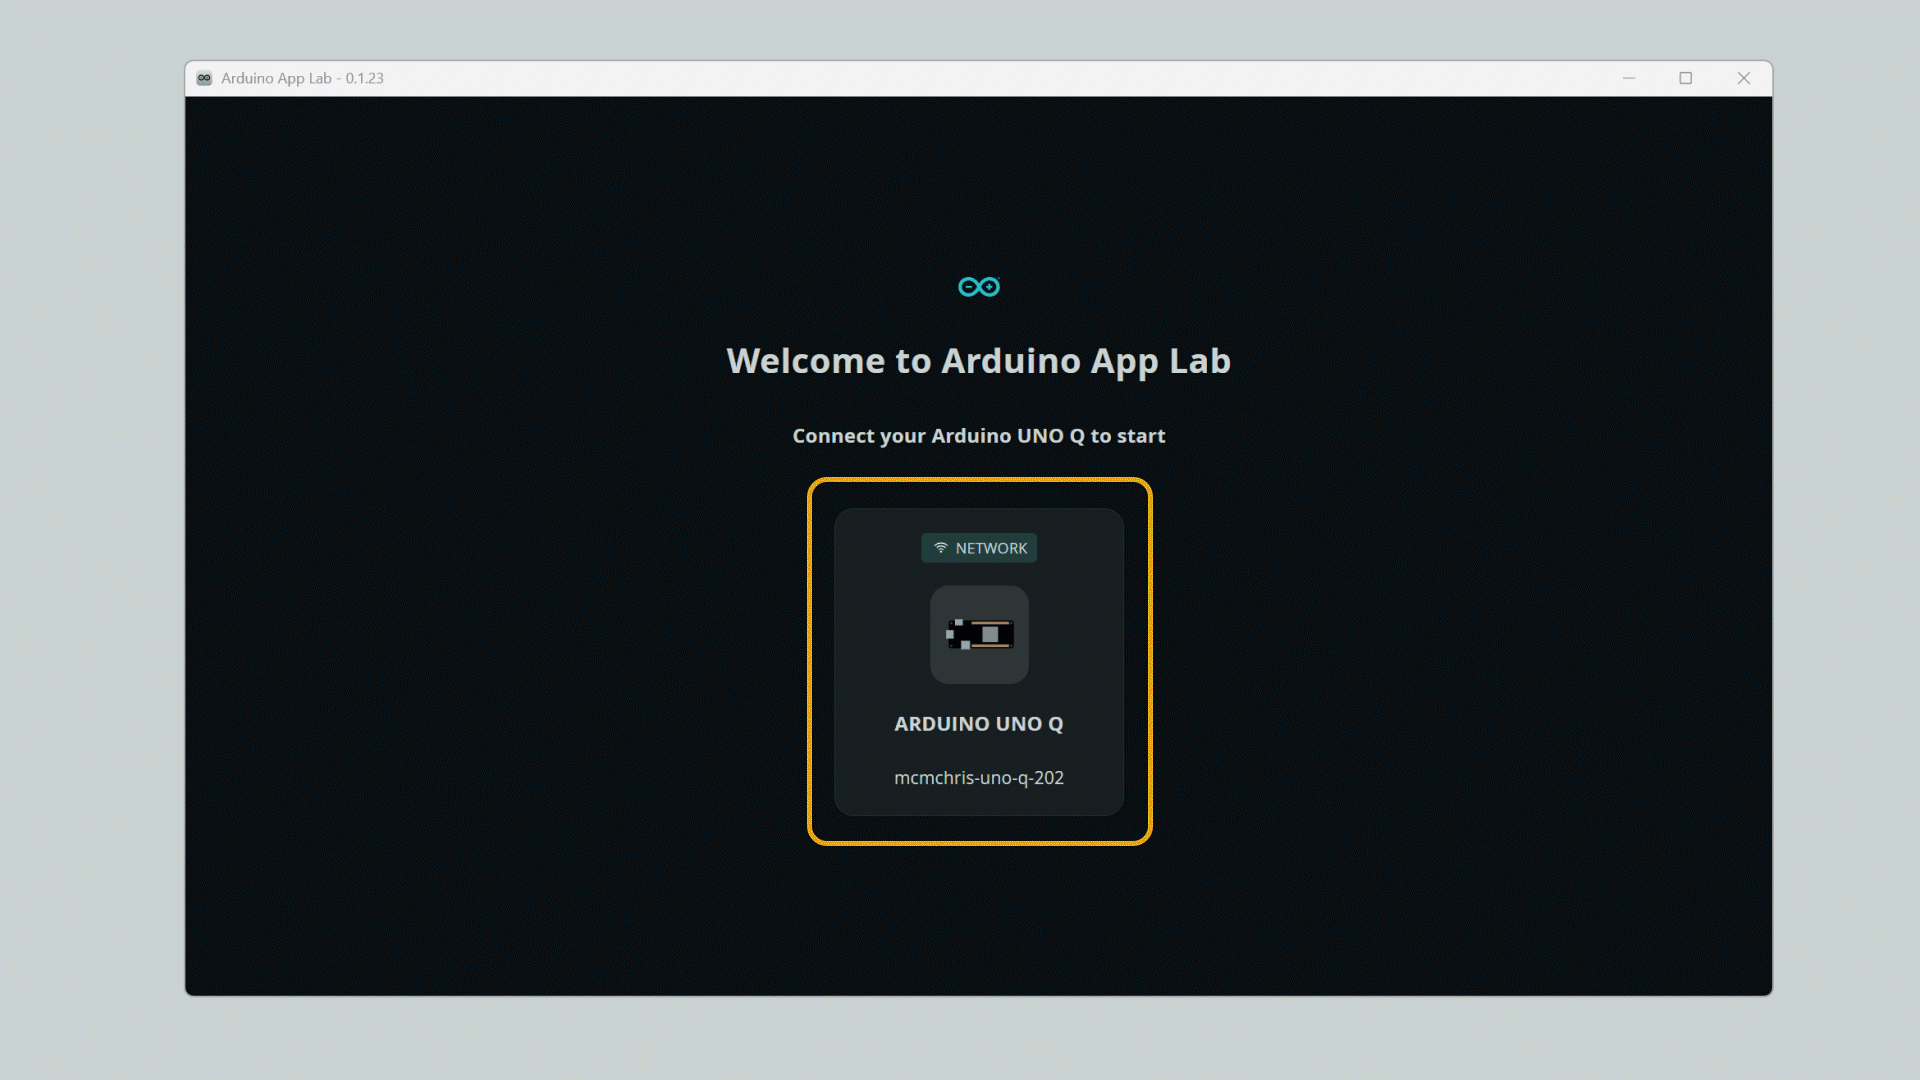
Open Arduino App Lab and connect to Wi-Fi.
-
Select the connected UNO Q from the device list.
-
Enter the password to log into the device.

-
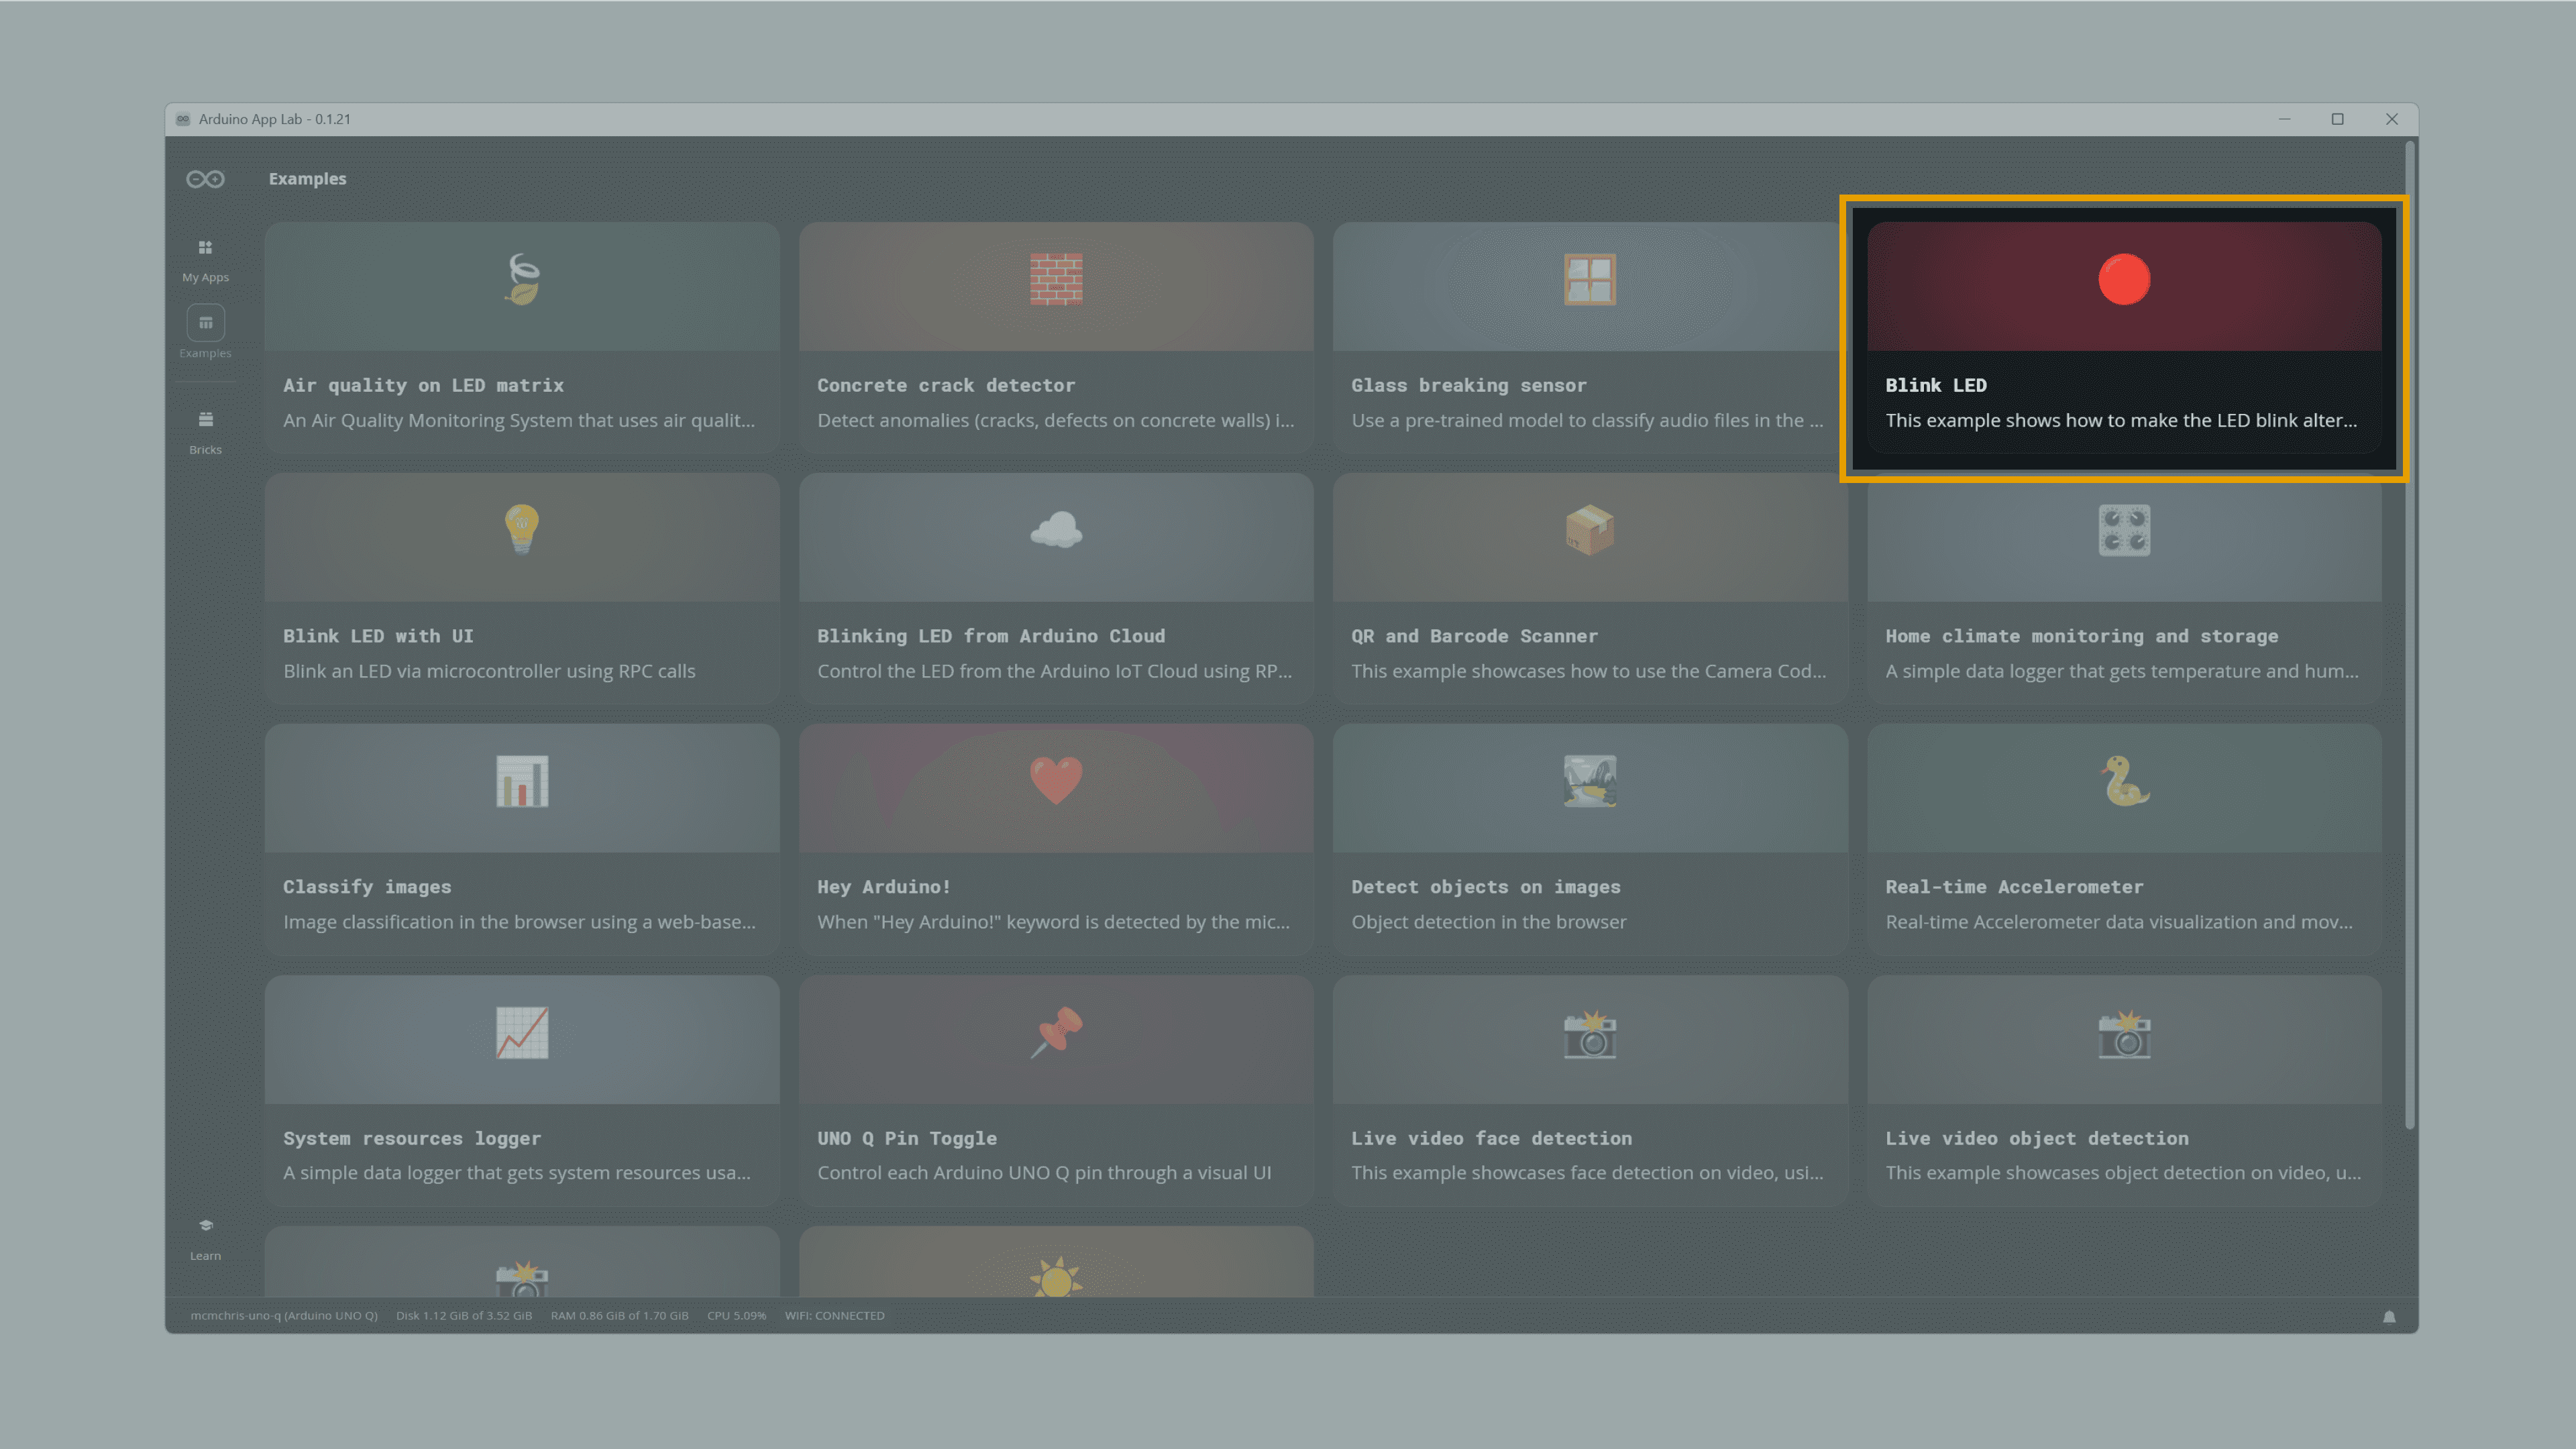
Go to the Examples page.
-
Locate and open the Blink LED example.
-
Read the example description to understand how the App works.
-
Click the Run button in the top-right corner.
-
Wait for the App to upload and run.
Operation Result
After the program runs, the red LED in the UNO Q onboard RGB LED will blink at the following rhythm:
On for 1 second → Off for 1 second → repeat
- The Blink example controls the red LED in the UNO Q onboard RGB LED. This LED is controlled by the STM32 microcontroller via an Arduino Sketch.
If the Blink example runs correctly, the basic development environment for UNO Q and Arduino App Lab is configured successfully. You can then continue testing examples for the LED matrix, Python/Linux applications, Bridge/RPC, or AI.
Creating an App
Operation Steps
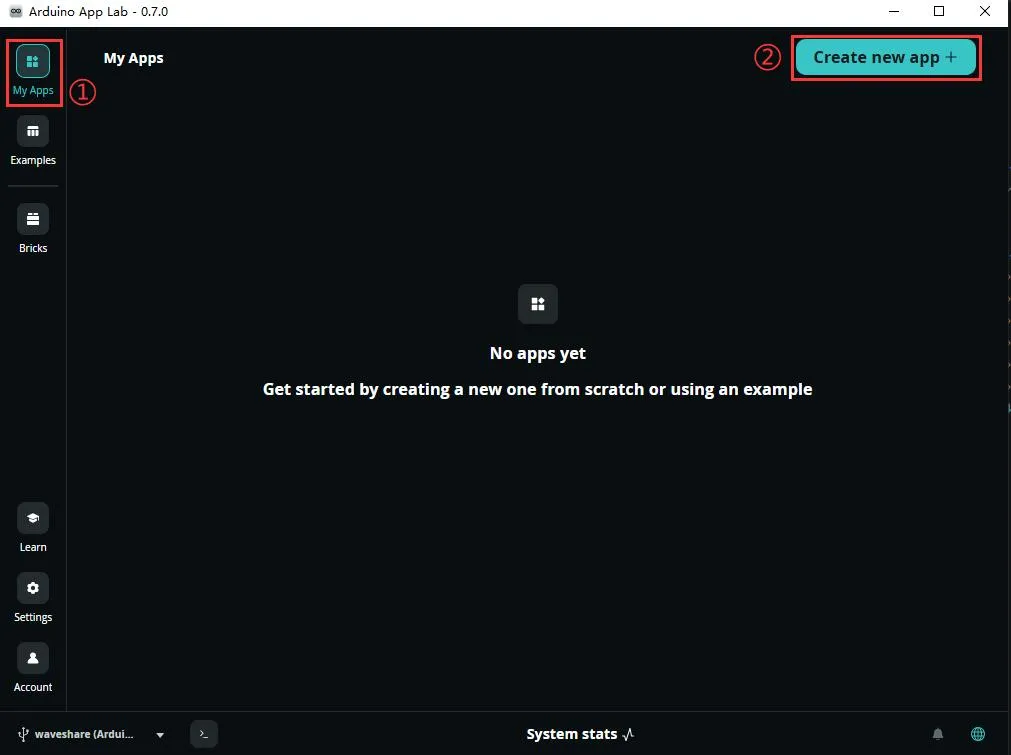
-
Click My Apps to enter the App management interface.
-
Click Create new app in the top-right corner to create a new application.
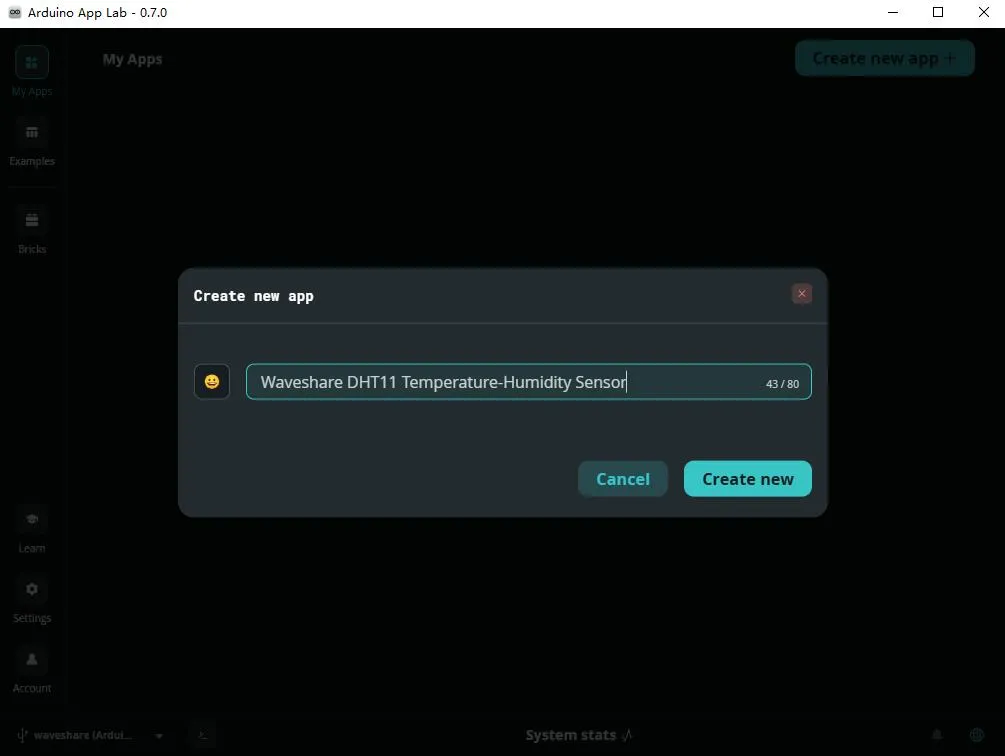
-
Enter the App name (you can also select an icon from the left side of the input box). After configuration, click Create new to confirm.
-
Connect a DHT11 Temperature and Humidity Sensor to the UNO Q.
Arduino UNO Q pin connections:
DHT11 Arduino Function VCC 5V Power input GND GND Power ground DOUT D2 Communication pin -
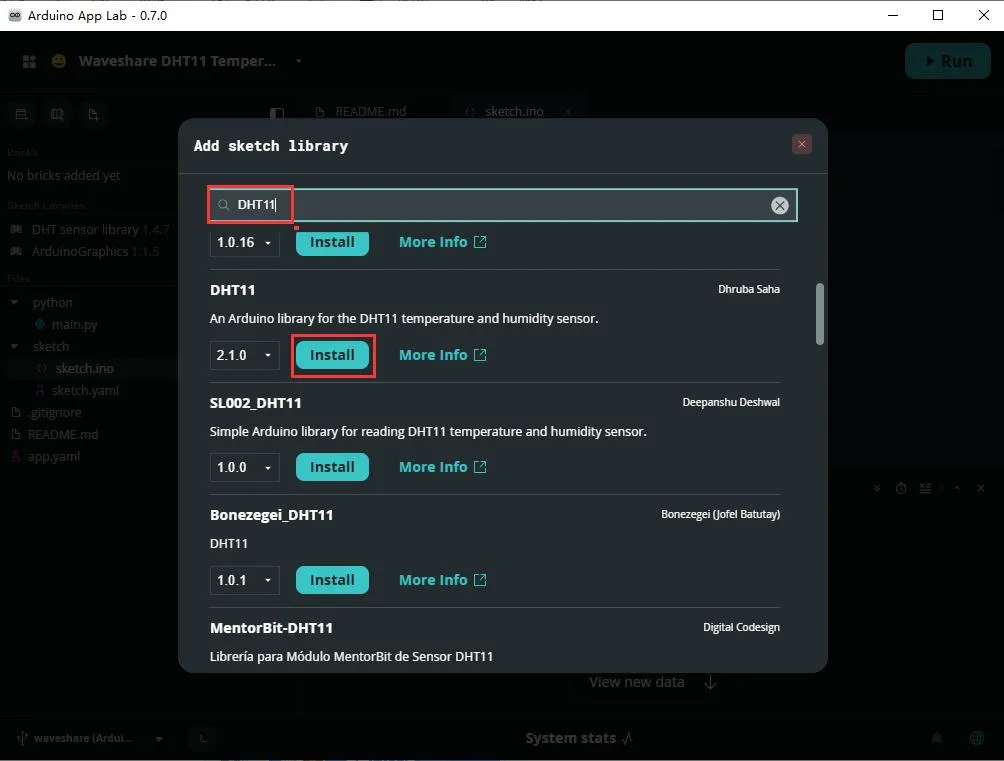
In the App editing interface, click the book icon on the right to enter the library manager.

-
Enter the name of the required library in the search box, then click Install to Install it.
This example requires the following libraries:
DHT11ArduinoGraphicsArduino_LED_Matrix
-
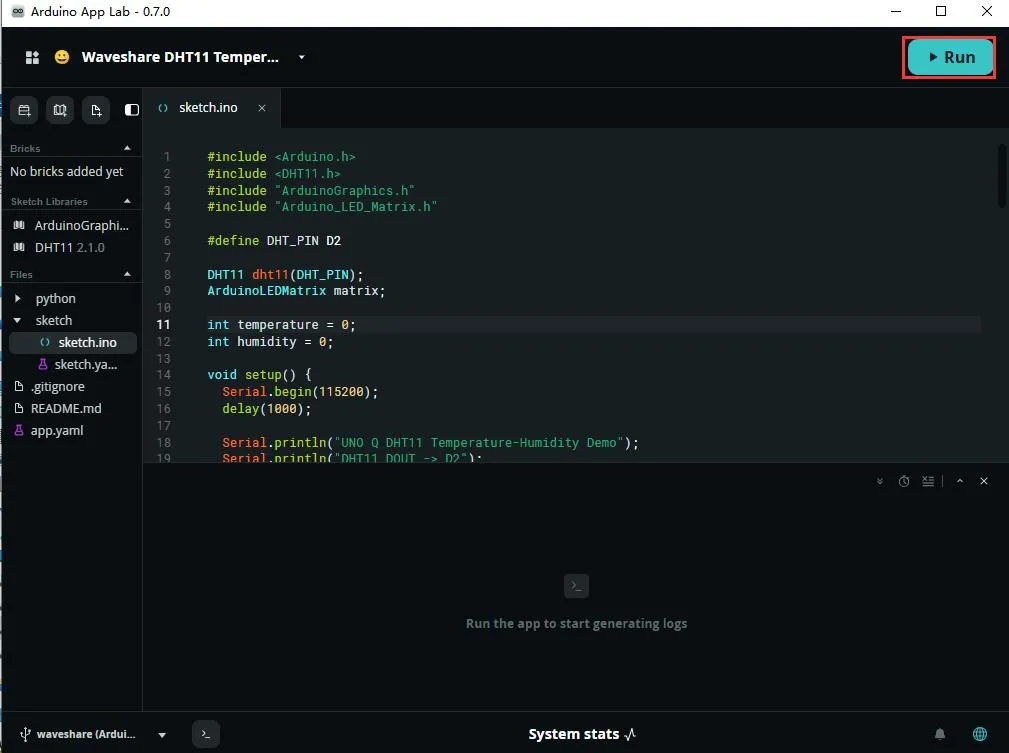
Write the following code in the
sketch.inofile.Complete example code (click to expand)
#include <Arduino.h>#include <DHT11.h>#include "ArduinoGraphics.h"#include "Arduino_LED_Matrix.h"#define DHT_PIN D2DHT11 dht11(DHT_PIN);ArduinoLEDMatrix matrix;int temperature = 0;int humidity = 0;void setup() {Serial.begin(115200);delay(1000);Serial.println("UNO Q DHT11 Temperature-Humidity Demo");Serial.println("DHT11 DOUT -> D2");matrix.begin();matrix.setGrayscaleBits(8);matrix.textFont(Font_5x7);matrix.clear();showText("READY");delay(1000);}void loop() {int result = dht11.readTemperatureHumidity(temperature, humidity);if (result == 0) {Serial.print("Temp: ");Serial.print(temperature);Serial.print(" C, Hum: ");Serial.print(humidity);Serial.println(" %");showText("T" + String(temperature) + "C");delay(1500);showText("H" + String(humidity) + "%");delay(1500);} else {Serial.print("DHT11 read failed: ");Serial.println(DHT11::getErrorString(result));showText("ERR");delay(1500);}delay(2000);}void showText(String text) {matrix.clear();matrix.beginDraw();matrix.stroke(255, 255, 255);matrix.textFont(Font_5x7);matrix.beginText(0, 1, 255, 255, 255);matrix.print(text);matrix.endText();matrix.endDraw();} -
Click Run on the right to start the App; click Stop to stop the program.
-
After the program runs, the Arduino UNO Q will read temperature and humidity data from the DHT11 and alternately display the temperature and humidity on the onboard LED matrix.
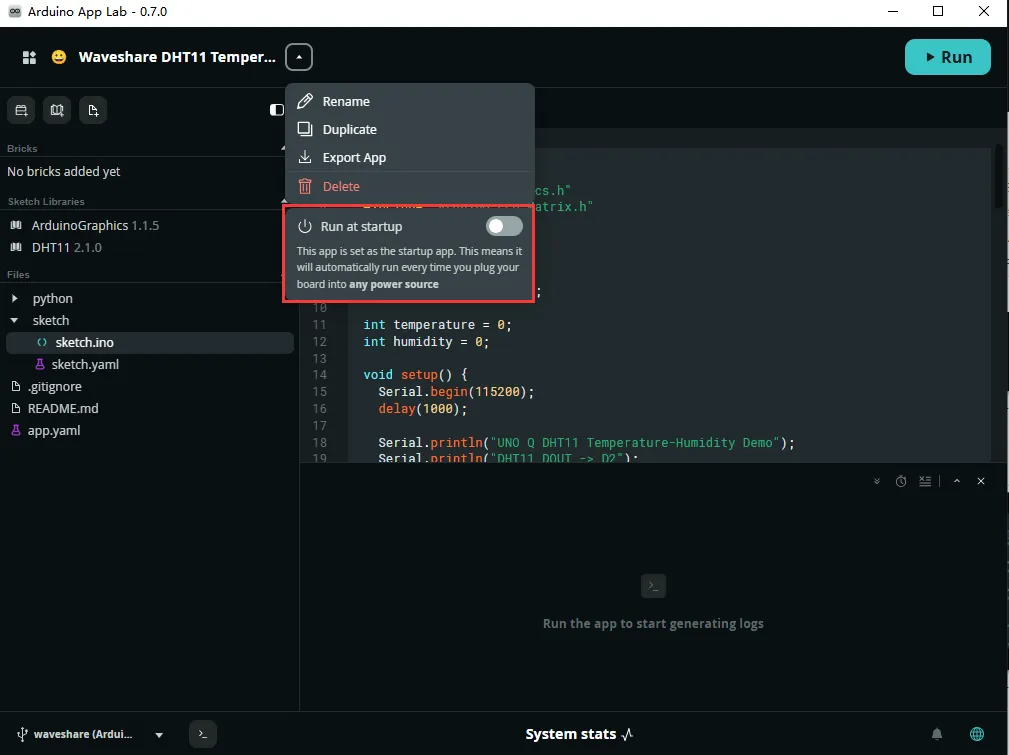
Setting Auto-Start Program
If you want the UNO Q to automatically run the program on boot, you can set Run at startup.
Network Mode
Even if UNO Q is set to SBC mode, you can still remotely access the board from a computer on the same local network using Arduino App Lab's Network Mode. This allows you to develop applications on your computer and test them locally on the board, as both modes can be used simultaneously. To use Network Mode:
-
Ensure that your computer and UNO Q are connected to the same local network.
-
Open Arduino App Lab.
-
If the UNO Q is discoverable, it will appear in the device list under the Network tab.
-
Click on the device and enter the Linux login password for the UNO Q.
-
Once connected, you can develop and run applications just as you would with a direct USB-C connection.
 warning
Network Mode relies on local network discovery (mDNS). If you are using guest Wi-Fi, corporate network, isolated IoT network, VPN, or a network environment with strict firewall restrictions, UNO Q may not be automatically discovered.
If Arduino App Lab cannot discover UNO Q in Network Mode, check the following:
- Windows Firewall prompt: When launching Arduino App Lab for the first time, Windows Defender or other security software may display a network access prompt for
mdns-discovery.exe. Please allow it to access the network. - Firewall settings: Ensure the firewall allows communication over UDP port 5353, which is used for mDNS local network discovery.
- Network environment: Verify that your computer and UNO Q are on the same local network and that client isolation is not enabled.
noteEven if you can access the UNO Q via a browser, SSH, or IP address, it may not necessarily appear in the Network Mode device list of Arduino App Lab. Network Mode depends on the mDNS automatic discovery mechanism. If the network configuration is incompatible, the device may not be displayed.
- Windows Firewall prompt: When launching Arduino App Lab for the first time, Windows Defender or other security software may display a network access prompt for