NVMe Boot
This section introduces how to use NVMe SSD booting on the Raspberry Pi, laying the foundation for subsequent project development.
Note: Do not enable Auto-mount on Boot when booting from an NVMe SSD.
NVMe SSD Boot
Method 1 (Modifying raspi-config)
- First, boot the Raspberry Pi using a TF card, mount and test the NVMe SSD to ensure the hardware functions correctly
- Enter raspi-config
sudo raspi-config
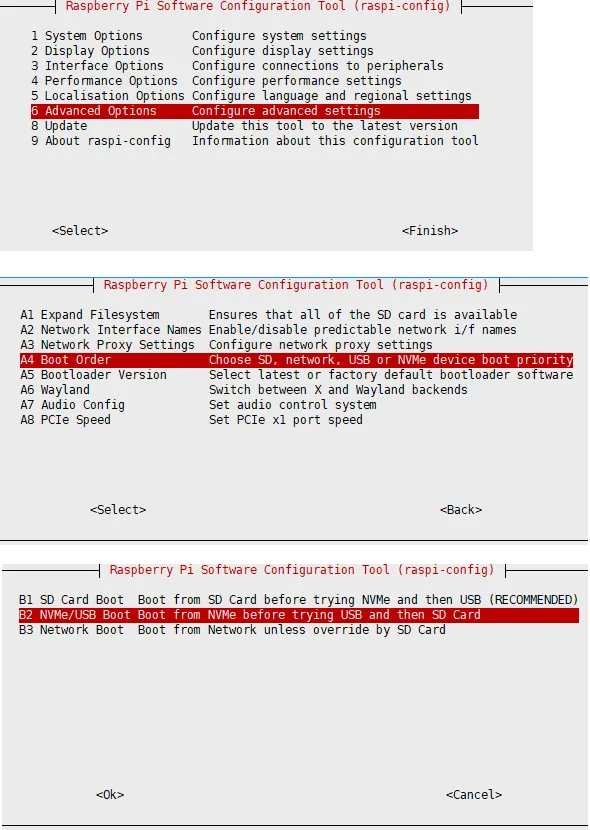
- Reboot the Raspberry Pi (Note: If you find it cannot be modified after multiple attempts, please connect to the network (wait for automatic network time sync) before modifying, or set the correct time before modifying the file)
sudo reboot
- Flash the system image to the NVMe SSD, then connect the NVMe SSD to the onboard hard drive interface (or the hard drive interface on the expansion board), remove the TF card, and power on again
Method 2 (Modifying Bootloader Configuration)
- First, boot the Raspberry Pi using a TF card, mount and test the NVMe SSD to ensure the hardware functions correctly
- Enter the bootloader configuration
sudo rpi-eeprom-config --edit
- Modify the
BOOT_ORDERin the Raspberry Pi's bootloader configuration - Change
BOOT_ORDER=0xf41toBOOT_ORDER=0xf416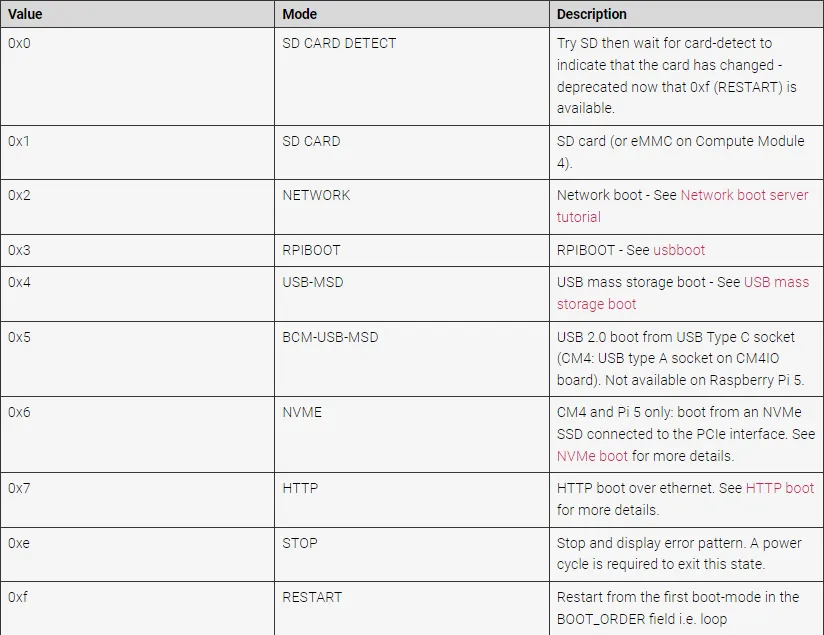
- Reboot the Raspberry Pi (Note: If you find it cannot be modified after multiple attempts, please connect to the network (wait for automatic network time sync) before modifying, or set the correct time before modifying the file)
sudo reboot
- Flash the system image to the NVMe SSD, then connect the NVMe SSD to the onboard hard drive interface (or the hard drive interface on the expansion board), remove the TF card, and power on again