User Guide
To help users quickly understand the various functions of the product, we provide a series of test examples to familiarize customers with the use of each interface. Besides the ESP32-C6-LCD-0.85 host and its accompanying components, the following items are required to run the examples:
Required Components
- ESP32-C6-LCD-0.85 ×1
- TF card ×1 (not required, needed only for TF card examples)
Assembly Guide
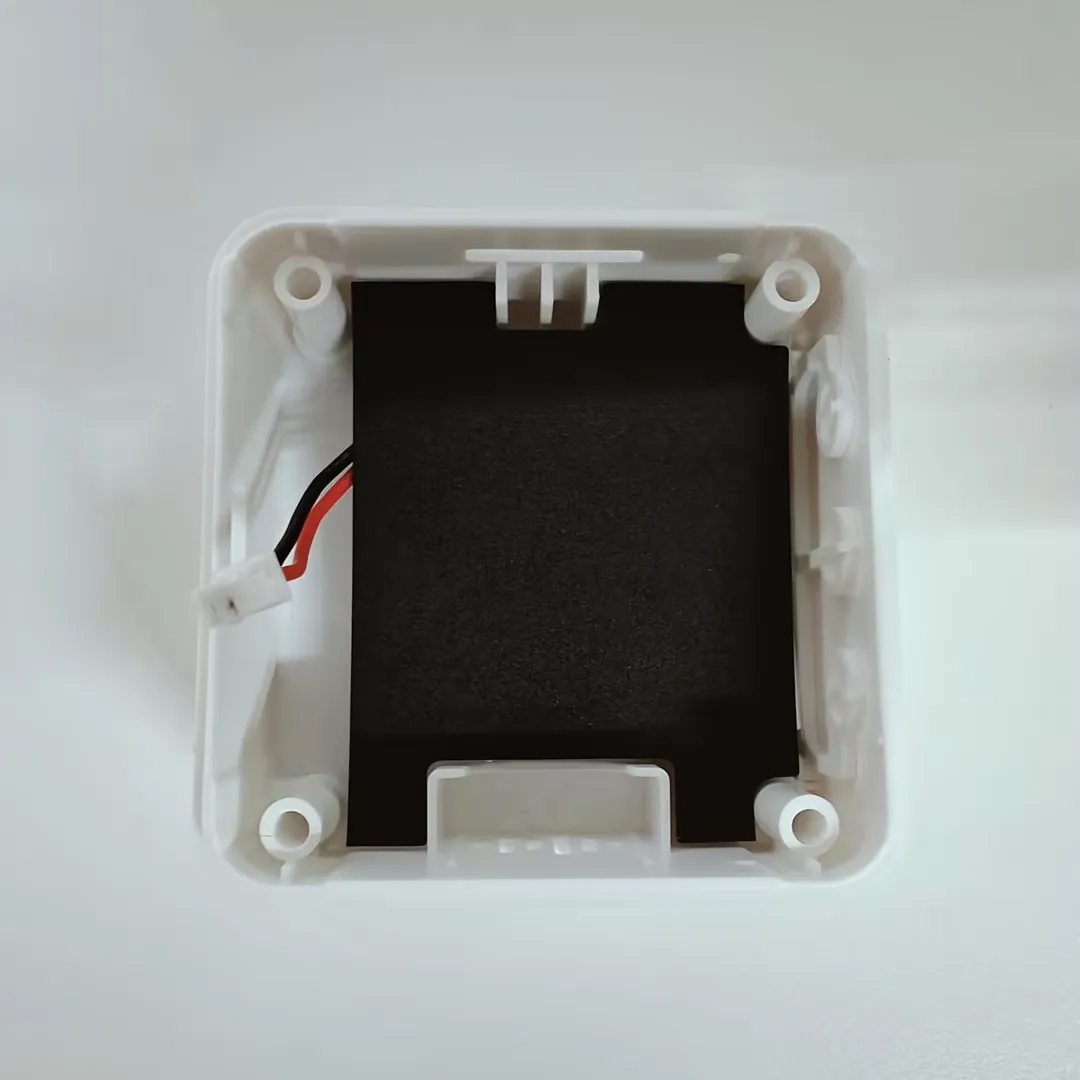
warning
When installing the battery, assemble the PC insulating sheet. It provides insulation and flame retardancy to isolate the battery from the PCB board.
Precautions
⚠️ USB Download Precautions (Important)
The development board uses USB for programming.
If the port is not recognized, please enter Boot mode:
- Press and hold the BOOT button
- Connect the USB cable to the computer
- Release the BOOT button
After the download is complete, power cycle the board to run the program.
Firmware Download
- The example programs are located in the
Firmwaredirectory of the example package
Firmware Flashing
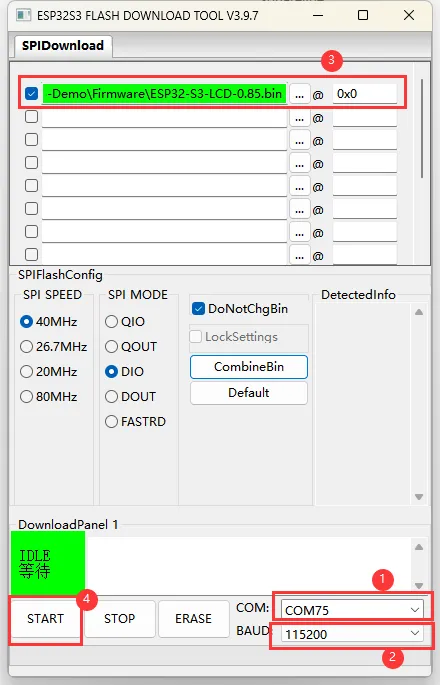
- Unzip the software resource package (Flash_download_tool)
- Open the flash_download_tool_3.9.7.exe software. Select
ESP32-S3andUSBbased on the development board's MCU and interface.ESP32-C6andUSB
- Parameter Settings
- ①. Select the COM port corresponding to the development board
- ②. Select the highest baud rate, 1152000
- ③. Click "..." to select the bin file from the
ESP32-C6-LCD-0.85-Demo\Firmwaredirectory provided in the example package. Manually enter the download address "0x00", and check the box on the far left - ④. Start flashing
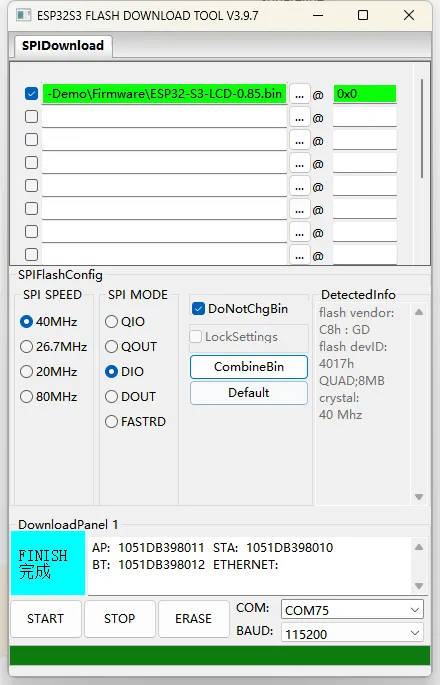
- Flashing complete (the flashing process takes some time, please be patient)
- Press the reset button and observe the result
warning
If it remains in the "Waiting for power-on sync" state, hold the "Boot" button and power cycle the device to enter download mode; this will resolve the issue.