Working with Arduino
Keep the screen brightness at 50% or lower during use, and do not operate the screen at full brightness for extended periods. Excessive brightness increases the screen temperature, and overheating may cause dark shadows on the screen and affect normal display.
If the display is already abnormal, allow the development board to cool down, then flash a program with a lower brightness setting.
This chapter contains the following sections. Please read as needed:
Arduino Getting Started
New to Arduino ESP32 development and looking for a quick start? We have prepared a comprehensive Getting Started Tutorial for you.
- Section 0: Getting to Know ESP32
- Section 1: Installing and Configuring Arduino IDE
- Section 2: Arduino Basics
- Section 3: Digital Output/Input
- Section 4: Analog Input
- Section 5: Pulse Width Modulation (PWM)
- Section 6: Serial Communication (UART)
- Section 7: I2C Communication
- Section 8: SPI Communication
- Section 9: Wi-Fi Basics
- Section 10: Web Server
- Section 11: Bluetooth
- Section 12: LVGL GUI Development
- Section 13: Comprehensive Project
Note: This tutorial uses the ESP32-S3-Zero as a reference example, and all hardware code is based on its pinout. Before you start, we recommend checking the pinout of your development board to ensure the pin configuration is correct.
Setting Up the Development Environment
1. Installing and Configuring the Arduino IDE
Please refer to the tutorial Installing and Configuring Arduino IDE to download and install the Arduino IDE and add ESP32 support.
2. Installing the ESP32 Development Board
- To use ESP32-related boards in the Arduino IDE, you must first install the "esp32 by Espressif Systems" library.
- Install according to the board installation requirements. "Online Installation" is generally recommended. If online installation fails, use "Offline Installation".
- For the installation tutorial, please refer to Arduino Board Management Tutorial
- Offline package for the esp32 by Espressif Systems development board, click here to download: esp32_package_3.0.2_arduino offline package
For the ESP32-C6-LCD-1.47 development board, esp32 by Espressif Systems V3.0.0 or later is required.
3. Installing Libraries
-
When installing Arduino libraries, there are typically two methods: Install Online and Install Offline. If the library installation requires Install Offline, you must use the provided library file.
-
For most libraries, users can easily search for and install them via the Arduino IDE's online Library Manager. However, some open-source or custom libraries are not synchronized to the Arduino Library Manager and therefore cannot be found through online search. In this case, users can only install these libraries manually via offline methods.
-
For library installation tutorial, please refer to Arduino Library Manager Tutorial
Library or File Name Description Version Installation Method LVGL Graphics Library v8.3.10 "Offline Installation" PNGdec Decode PNG image format v1.0.2 "Offline Installation"
There are strong dependencies between versions of LVGL and its driver libraries. For example, a driver written for LVGL v8 may not be compatible with LVGL v9. To ensure that the examples can be reproduced reliably, it is recommended to use the specific versions listed in the table above. Mixing different versions of libraries may lead to compilation failures or runtime errors.
Example
Arduino Project Parameter Settings

LVGL_Arduino
Example Description
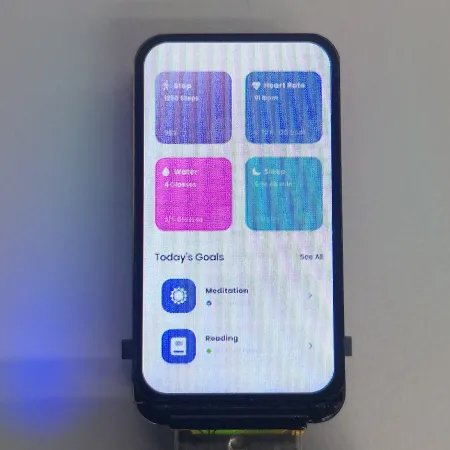
- This example demonstrates the functions of the onboard devices. The LCD screen displays parameters such as SD Card, Flash Size, and Wireless scan.
Hardware Connection
-
Connect the development board to the computer.
-
Insert the TF card into the board
Code Analysis
- setup
Flash_test(): Tests and prints the device's flash size information.LCD_Init(): Initializes the display.Lvgl_Init(): Initializes the LVGL graphics library.SD_Init(): Initializes the TF card.Lvgl_Example1(): Calls a specific LVGL example function.Wireless_Test2(): Calls a function for wireless communication testing.
- loop
Timer_Loop(): Handles timer-related tasks.
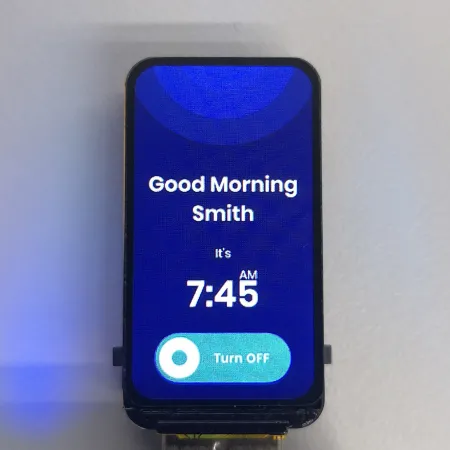
Operation Result

LCD_Image
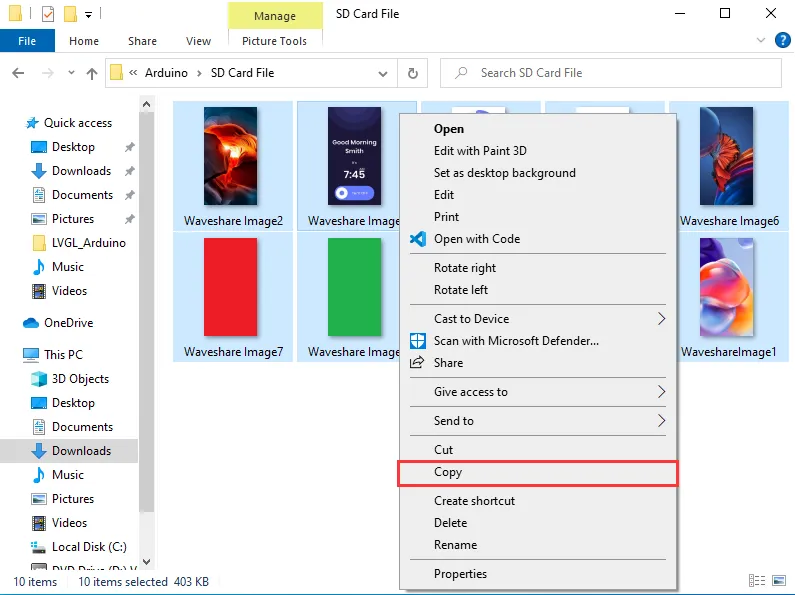
TF Card Preparation
-
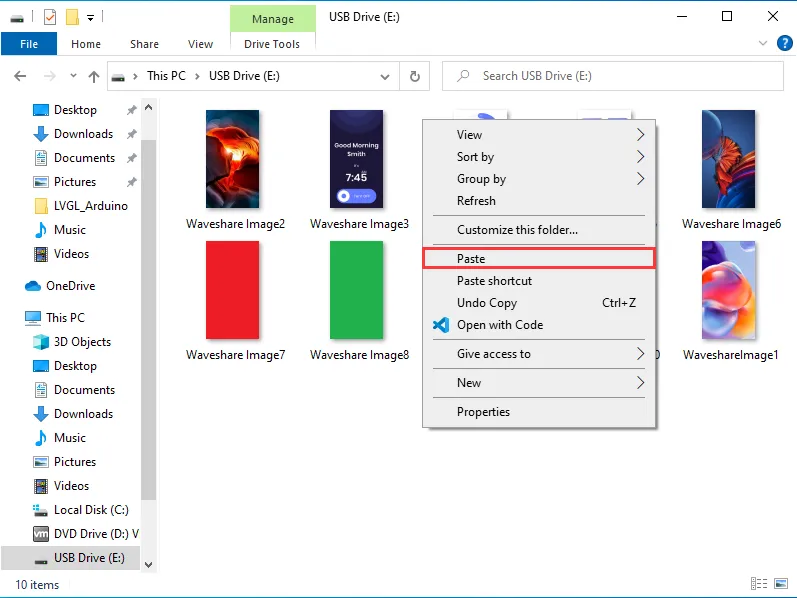
Add the example images provided by Waveshare to the TF card. You can also add your own images (pixel size ≤ 172×320)
Hardware Connection
-
Insert the TF card containing example images into the device.
-
Connect the development board to the computer.
Code Analysis
void Display_Image(const char* directory, const char* fileExtension, uint16_t ID)- First, call
Search_Image(directory, fileExtension)to search the given directory for image files with the specified extension, and store the count of found images in the global variableImage_CNT. - If
Image_CNTis non-zero (i.e., images are found), build the full path of the image file depending on whether the directory is the root directory, convert it to a C-style string and print it for debugging, then call theShow_Imagefunction to display the image. - If no image is found (
Image_CNTis zero), print an error message indicating that no file with the specified extension was found in the given directory.
- First, call
Operation Result