FAQ
Q: How can I modify the 02_lvgl_demo_v9 example to support LVGL8?
-
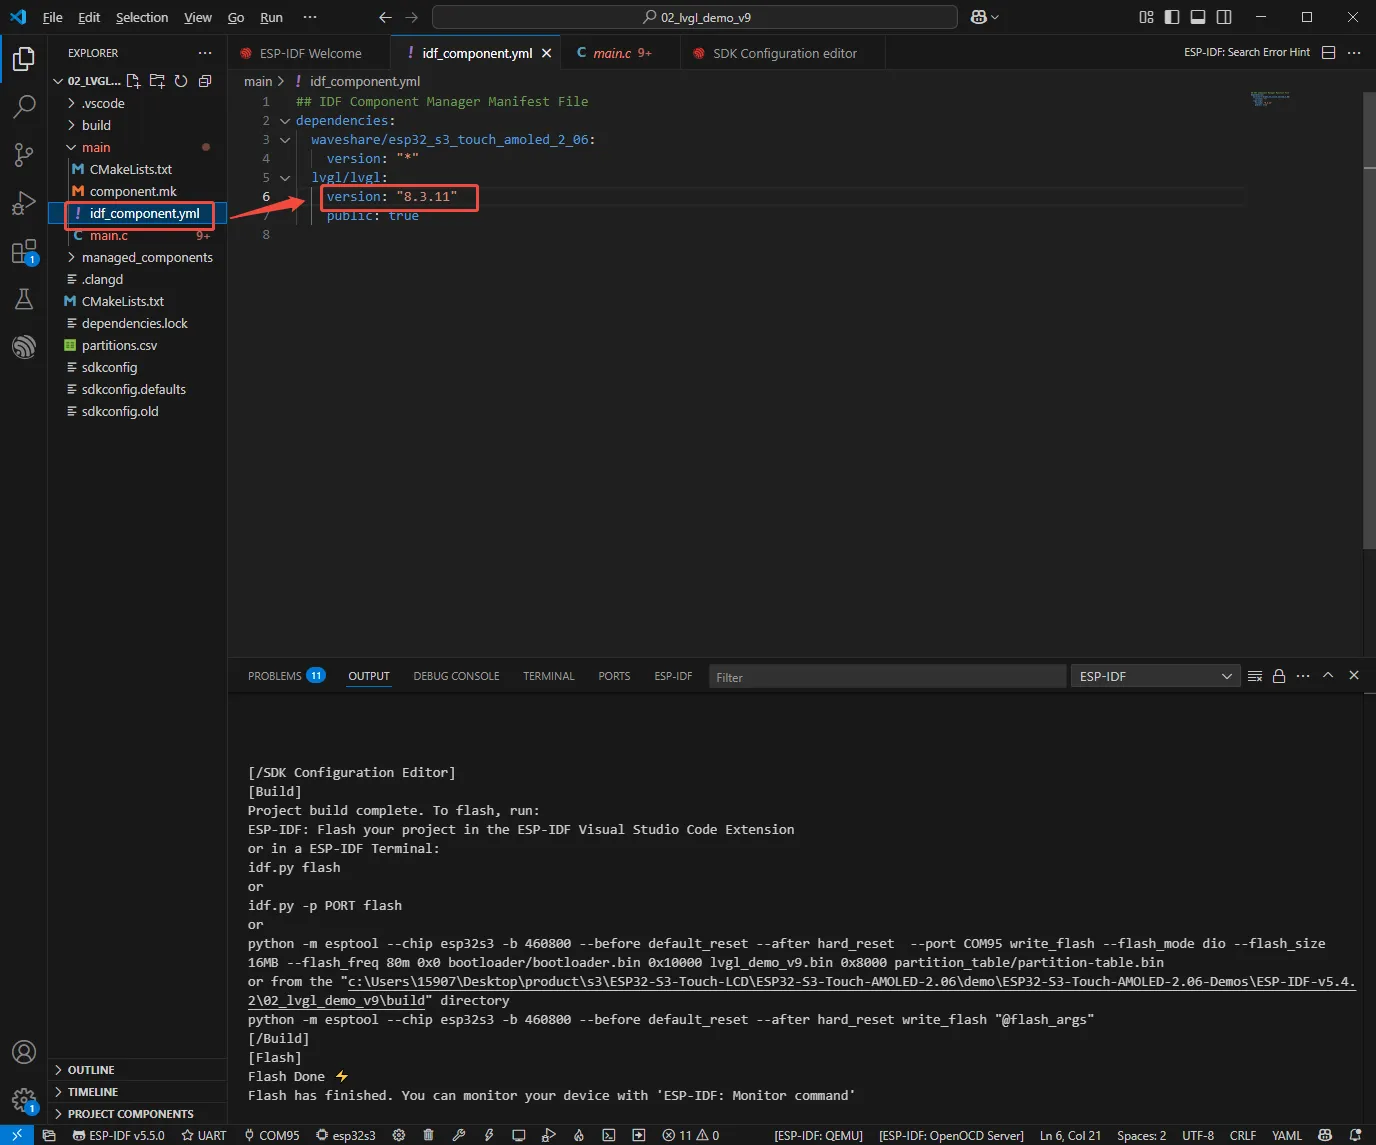
Modify the version of the LVGL component in the yml file, change the version number from 9.2.0 to 8.3.11.
-
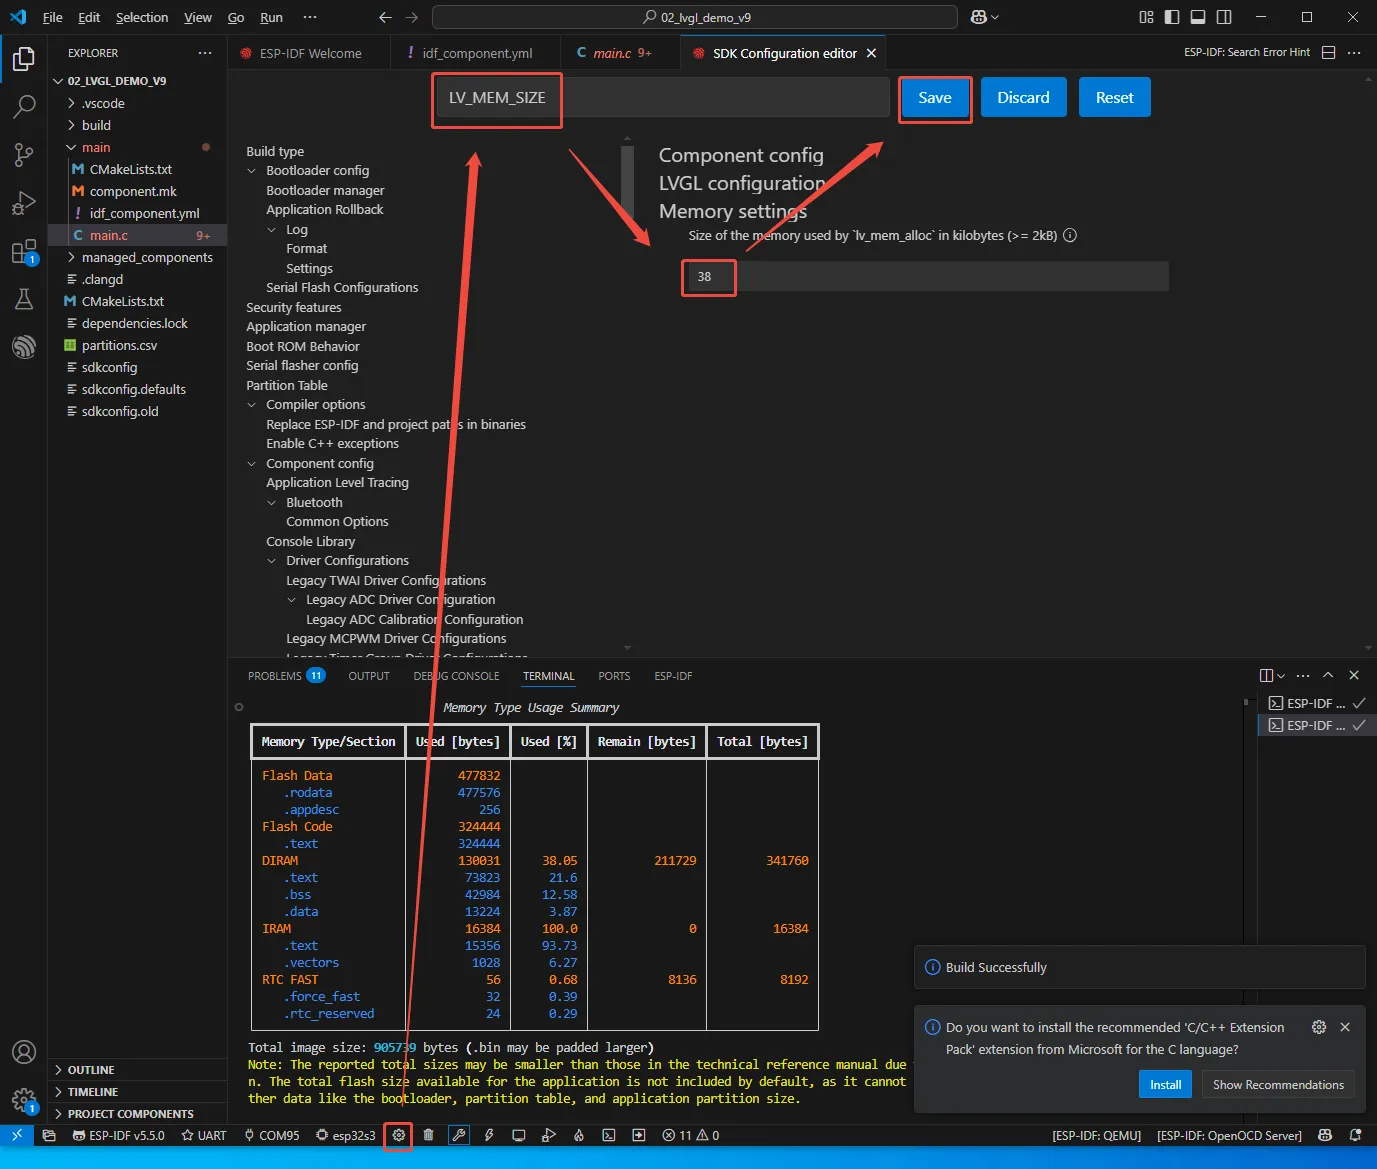
Open the SDK, modify the following two configuration items, then recompile and flash.

Q: How to get more library support for the example?
You can subscribe to this repository and raise an issue to describe your requirements. The engineers will assess your request as soon as possible: ESP32-C6-Touch-AMOLED-2.06-Prj
Q: What platforms are supported by the AI voice conversation example?
- This product features an onboard ES8311 audio codec chip, onboard speaker, and SMD microphone, enabling voice conversation functionality.
- Integration with various platforms has been verified, supporting mainstream platforms such as Doubao, Wenxin Yiyan, ChatGPT, and Tuya Smart. The exampes will be gradually released to ESP32-AIChats
Q: How is the heat dissipation of this product? Will it affect the display?
- In actual measurements at a room temperature of 20°C, with Wi‑Fi STA and AP modes enabled and the battery charging, the temperature reading from the AXP2101 reached a maximum of 46°C after half an hour. During the normal discharge process, the temperature will decrease by 3-4 ℃. If Wi‑Fi/Bluetooth functions are not enabled, the temperature remains stable at around 36°C.
- The AMOLED screen is heat‑resistant; temperatures between 40‑60°C do not affect display or touch functionality. Under high‑temperature, high‑humidity conditions, some polarization may occur, which is within normal limits.
- It is recommended to use the low‑power operating modes of the ESP32-C6 for certain application scenarios.
Q: Why does the flashing fail?
- When the serial port is occupied, the flashing will fail. Close the serial port monitor and try to flash again.
- When the ESP32 program crashes, the flashing will fail. In this case, you need to completely power off the development module, hold down BOOT button and power it on again to enter the forced download mode and then flash it. After flashing, the module will not automatically exit download mode, so you need to power cycle again.
To power on this product after a complete shutdown, press and hold the PWR button for more than 6 seconds, then press the PWR button again.
Q: Why does compilation fail?
When the project fails to be compiled, check the development environment.
- In the Arduino IDE, if the situation shown below occurs during compilation, change the Partition Scheme to 16M Flash (3MB APP/9.9MB FATFS).
- When an ESP‑IDF project fails to compile, delete the
build,managed_components, anddependencies.lockdirectories, then compile again. If it still fails, check the ESP‑IDF version and whether theCMakeList.txtin the project directory is correctly recognized.
Q: The module keeps resetting?
This situation is caused by a program crash that makes USB malfunction. Press and hold the BOOT button while powering on; the module will enter download mode. Flashing the firmware (program) will resolve the issue.
Q: What should I do if the first compilation is extremely slow?
In the Arduino IDE, the first compilation loads and compiles all dependent packages, so it is normal for the first compilation to be slow. Please wait patiently.
Q: After successful flashing in ESP‑IDF, the serial port shows 'waiting for download'. What should I do?
Simply power cycle the board.
Q: How can I measure the battery voltage on this product?
This product features an onboard AXP2101, which can measure various battery data, such as chip temperature, charging status, power connection status, charger state, battery voltage, charging voltage, battery level, etc.
Q: Why does the battery percentage reading fluctuate significantly on this product?
The battery capacity measurement of the AXP2101 is based on battery voltage, but battery capacity does not vary linearly, so large percentage fluctuations may occur during measurement. Especially in the case of plugging and unplugging chargers, load changes, or battery aging, the fluctuations become more noticeable. The measured percentages are for reference only, and the actual voltage is used as a measure of capacity.
Q: Can you provide the 3D CAD file of the enclosure?
No.
Q: Are both buttons on this product programmable?
Yes. The two buttons on this product are BOOT and PWR, with the following functions:
- BOOT: Press and hold BOOT while powering on to enter download mode (commonly used when the program crashes or the USB GPIO is occupied). Under normal operation, the button state can be detected via GPIO0; low level indicates a press. Single‑click, double‑click, multiple‑click, and long‑press actions can be recognized.
- PWR: When powered on, press and hold PWR for 6 seconds to shut down. When powered off (the battery can still be charged), single‑click to power on. Under normal operation, the button state can be detected via the expanded GPIO10; high level indicates a press. Single‑click, double‑click, multiple‑click, and long‑press actions can be recognized (long press must not exceed 6 seconds, otherwise the device will shut down).
Q: Does this product support Bluetooth?
The core chip of this product is the ESP32-C6, which supports 2.4GHz Wi‑Fi 6, Bluetooth 5 low‑energy, and other wireless communication functions. It features an onboard chip antenna with optimized gain, supporting both Bluetooth and Wi‑Fi. For details, please refer to ESP32-C6 datasheet
Q: Does this product support Chinese character display?
This product uses the ESP32-C6 as the core and connects to the screen via QSPI. It fully supports Chinese character display, provided the following conditions are met:
- Character encoding support: strings in UTF‑8 encoding can be rendered to the screen.
- Font support.
- Display library support: both LVGL and Arduino_GFX support Chinese display.
Q: What is the maximum brightness of the screen on this product? How to control the screen brightness?
- 600nit
- Brightness is controlled by writing values from 0x00 (darkest, backlight off) to 0xFF (brightest) to address 0x51 via QSPI.
Q: Which chips are used for the screen on this product?
- Display driver chip: CO5300
- Touch controller chip: FT3168
Q: What development tools can be used with this product?
The ESP32-C6-Touch-AMOLED-2.06 is based on the ESP32-C6 chip and supports ESP‑IDF and its ecosystem. It can be developed using ESP‑IDF or the arduino-esp32 core. ESP‑IDF can be used with VS Code, and arduino-esp32 can be used with Arduino IDE or PlatformIO.
Q: Is this product waterproof?
No, it is not waterproof. Keep it dry during use.
Q: What battery size is recommended for this product?
The recommended battery specification is 62525 mm, 400 mAh. Under normal full‑brightness operation, it can run for approximately 1 hour. With the screen backlight off only, it can run for 3‑4 hours. In a full low‑power scenario, it can run for about 6 hours.
Q: Why is the LVGL example running on Arduino IDE less smooth than the one on ESP-IDF?
The upper driver of the GFX Arduino LVGL is the Arduino TFT library, and the ability to read and write images accelerated by DMA is limited in this scenario. The LVGL examples provided by ESP-IDF enable double buffering and anti-tearing optimization operations, so the results are better.
Q: How can I check which COM port I am using?
Windows System:
- Through Device Manager: Press Windows + R to open the "Run" dialog box. Type
devmgmt.mscand press Enter to open Device Manager. Expand the "Ports (COM & LPT)" section. All COM ports and their current status will be listed here. - Using Command Prompt: Open the Command Prompt (CMD), type the
modecommand, which will display status information for all COM ports. - Check the hardware connection: If an external device is already connected to a COM port, the device typically occupies a port number. You can determine which port is being used by checking the connected hardware.
Linux System:
- Check using the
dmesgcommand: Open the terminal. - Check using the
lscommand: Typels /dev/ttyS*orls /dev/ttyUSB*to list all serial devices. - Use the
setserialcommand: Typesetserial -g /dev/ttyS*to view configuration information for all serial devices.
Q: Why is there no output on the monitor after successful programming and running, even though the code is fine?
The Type‑C programming/debugging port of the ESP32-C6-Touch-AMOLED-2.06 is directly connected to the ESP32-C6 USB. In the Arduino IDE development environment, the printf function works for output. To use Serial for output, you need to enable the USB CDC On Boot option or declare an HWCDC object, as shown in the example code. In ESP‑IDF, ESP_LOGD and ESP_ERROR_CHECK are commonly used for output.
Q: Can you help me review or modify my code? Can you help me modify the code?
This product is positioned as a development board, not a finished product. This product is positioned as a development board, not a finished product. The product ecosystem is based on the ESP32 core, which is very mature and the development environment is very friendly. We do not assist in modifying code. Please let the makers and geeks use their DIY skills. If you have questions, you can ask our engineers for answers.
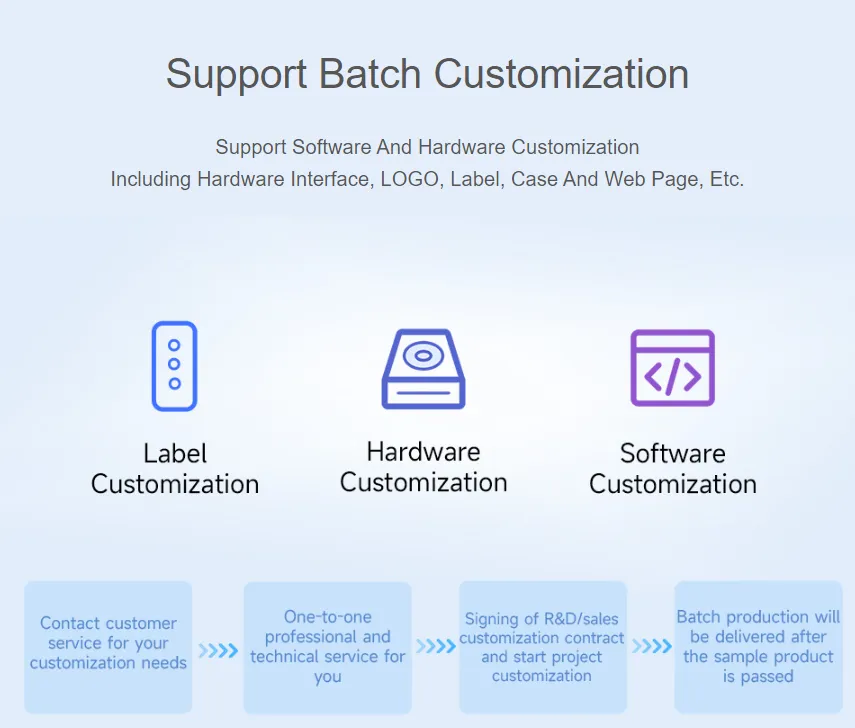
If you find our product satisfactory and are interested in batch hardware customization, custom enclosures, or custom software, please contact our sales department.
Q: How to design a user interface with SquareLine Studio?
Please refer to: SquareLine Studio Tutorial.
Q: How much load current can the 3.3V pad on the board handle?
The entire 3.3V voltage regulation circuit can theoretically supply up to 1.5A, but the main board and screen already consume most of that. Therefore, external high‑power peripherals cannot be connected; only small‑power devices (within 50mA) can be attached.