Working with Arduino
This chapter contains the following sections. Please read as needed:
Arduino Getting Started
New to Arduino ESP32 development and looking for a quick start? We have prepared a comprehensive Getting Started Tutorial for you.
- Section 0: Getting to Know ESP32
- Section 1: Installing and Configuring Arduino IDE
- Section 2: Arduino Basics
- Section 3: Digital Output/Input
- Section 4: Analog Input
- Section 5: Pulse Width Modulation (PWM)
- Section 6: Serial Communication (UART)
- Section 7: I2C Communication
- Section 8: SPI Communication
- Section 9: Wi-Fi Basics
- Section 10: Web Server
- Section 11: Bluetooth
- Section 12: LVGL GUI Development
- Section 13: Comprehensive Project
Note: This tutorial uses the ESP32-S3-Zero as a reference example, and all hardware code is based on its pinout. Before you start, we recommend checking the pinout of your development board to ensure the pin configuration is correct.
Setting Up the Development Environment
1. Installing and Configuring the Arduino IDE
Please refer to the tutorial Installing and Configuring Arduino IDE to download and install the Arduino IDE and add ESP32 support.
2. Installing Libraries
To run the example, you need to install the corresponding library. The example code uses the GFX Library for Arduino library to drive the ST7789 display
and the SensorLib library to drive the CST816 touch controller.
The example package for the ESP32-C6-Touch-LCD-1.54 development board can be downloaded from this link. The Arduino\libraries directory within this package contains all the necessary library files required for this tutorial.
| Library or File Name | Description | Version | Installation Method |
|---|---|---|---|
| lvgl | LVGL graphics library | v8.4.0 or v9.3.0 | Via Library Manager or manual installation |
| GFX_Library_for_Arduino | GFX graphics library | v1.6.0 | Via Library Manager or manual installation |
| U8g2 | Graphics display library | v2.35.30 | Via Library Manager or manual installation |
| SensorLib | Sensor driver library | v0.3.1 | Via Library Manager or manual installation |
| ESP32-audioI2S-master | Audio processing library | v3.4.0 | Via Library Manager or manual installation |
| OneButton | Button library | v2.6.1 | Via Library Manager or manual installation |
There are strong dependencies between versions of LVGL and its driver libraries. For example, a driver written for LVGL v8 may not be compatible with LVGL v9. To ensure that the examples can be reproduced reliably, it is recommended to use the specific versions listed in the table above. Mixing different versions of libraries may lead to compilation failures or runtime errors.
Installation Steps:
- Extract the downloaded example package.
- Copy all folders from its
Arduino\librariesdirectory to your Arduino libraries folder.
The path to the Arduino libraries folder is typically: c:\Users\<username>\Documents\Arduino\libraries.
You can also locate it in the Arduino IDE by going to File > Preferences and checking the "Sketchbook location". The libraries folder is the libraries subfolder within this path.
- For other installation methods, please refer to: Arduino Library Management Tutorial.
ESP32-C6-Touch-LCD-1.54 Board Installation Instructions
| Board Name | Board Installation Requirement | Version Requirement |
|---|---|---|
| ESP32 by Espressif Systems | "Offline Installation" / "Online Installation" | 3.2.0 |
3. Additional Tips
The ESP32-C6-Touch-LCD-1.54 requires selecting and configuring the development board.
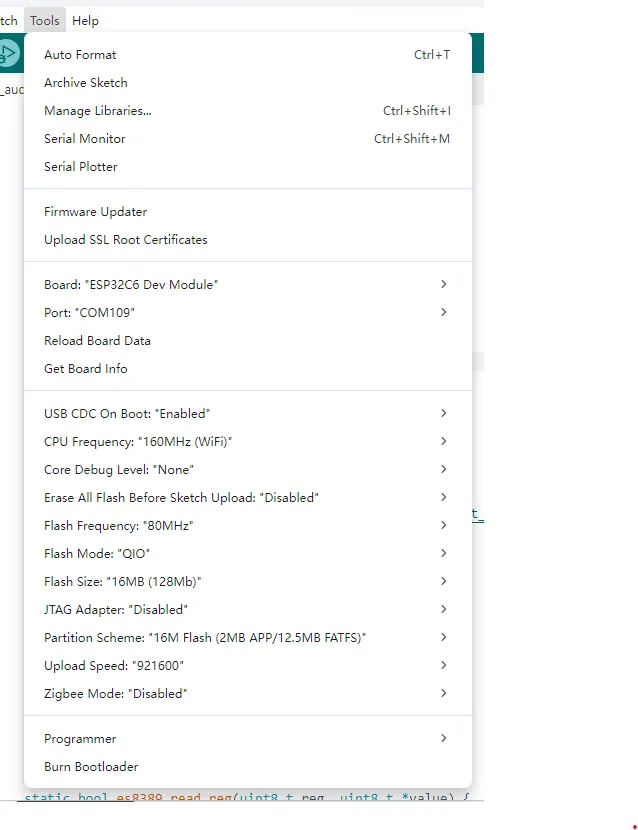
- For ESP32-C6-Touch-LCD-1.54, select ESP32C6 Dev Module.
- Select the corresponding USB port.
- The ESP32-C6-Touch-LCD-1.54 uses the ESP32-C6 native USB interface, not UART-to-USB.
- For serial communication:
- The
printf()function can be used directly; - To use the
Serial.println()function, it is recommended to enable USB CDC On Boot in the IDE Tools menu.
- The
- Select
16MB Flash. - Choose the appropriate partition table size based on example requirements. When running ESP-SR examples, you need to select a large partition table that supports voice models.
Example
The Arduino example programs are located in the Arduino/examples directory of the example package.
| Example | Basic Description | Dependency Library |
|---|---|---|
| 01_audio_out | Read audio files from TF card and play them | ESP32-audioI2S-master |
| 02_button_example | Button test | OneButton |
| 03_qmi8658_example | Prints data obtained from the IMU | SensorLib FastLED |
| 04_gfx_helloworld | Display HelloWorld on the screen | GFX_Library_for_Arduino |
| 05_esp_wifi_analyzer | Display WiFi signal strength on the screen | GFX_Library_for_Arduino |
| 06_gfx_u8g2_font | Display text in multiple languages by loading fonts | GFX_Library_for_Arduino, U8g2 |
| 07_sd_card_test | Test TF card read/write | --- |
| 08_lvgl_example_v8 | lvgl v8.4.0 example | GFX_Library_for_Arduino, lvgl |
| 09_lvgl_example_v9 | lvgl v9.3.0 example | GFX_Library_for_Arduino, lvgl |
01_audio_out
- This example demonstrates the ESP32-C6-Touch-LCD-1.54 reading audio data and playing it back. No activity on the screen.
Code Analysis
-
Set I2S pins:
void setupI2S() {i2s.setPins(I2S_BCK_PIN, I2S_LRCK_PIN, I2S_DOUT_PIN, I2S_DIN_PIN, I2S_MCK_PIN);// Initialize the I2S bus in standard modeif (!i2s.begin(I2S_MODE_STD, EXAMPLE_SAMPLE_RATE, I2S_DATA_BIT_WIDTH_16BIT, I2S_SLOT_MODE_MONO, I2S_STD_SLOT_LEFT)) {Serial.println("Failed to initialize I2S bus!");return;}} -
Set the audio data to be played:
i2s.write((uint8_t *)audio_data, AUDIO_SAMPLES * 2);
Operation Result
- The device will play auido directly without showing content on the screen
02_button_example
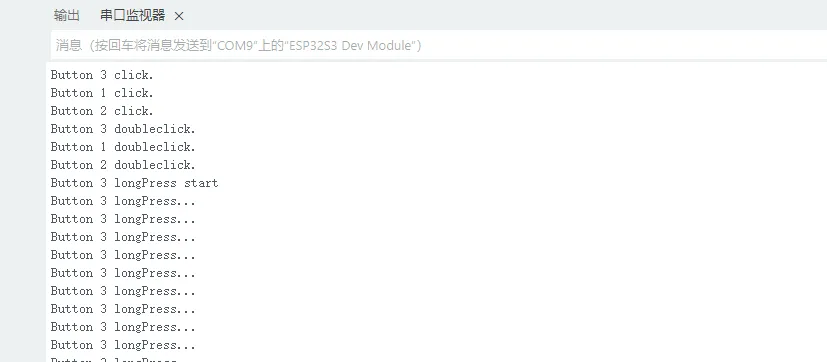
- This example demonstrates how to use the OneButton library to read button states such as single-click, double-click, and long press, and prints them to the serial port.
Code Analysis
-
Bind callback functions:
button1.attachClick(click1);button1.attachDoubleClick(doubleclick1);button1.attachLongPressStart(longPressStart1);button1.attachLongPressStop(longPressStop1);button1.attachDuringLongPress(longPress1);
Operation Result
- The screen shows no output
- Button information is printed to the serial monitor
03_qmi8658_example
- This example uses the ESP32-C6-LCD-1.54 to obtain data from the onboard QMI8658 and prints it to the serial port.
Code Analysis
-
Initialize QMI8658:
if (!qmi.begin(Wire, QMI8658_L_SLAVE_ADDRESS, SENSOR_SDA, SENSOR_SCL)) {Serial.println("Failed to find QMI8658 - check your wiring!");while (1) {delay(1000);}}
Operation Result
- The screen shows no output
- Opening the serial monitor shows printed accelerometer and gyroscope data for the x, y, and z axes.

04_gfx_helloworld
- This example demonstrates the ESP32-C6-Touch-LCD-1.54 using the GFX_Library_for_Arduino library to drive the screen and display "HelloWorld" on it.
Code Analysis
-
Configure the screen interface and screen resolution, etc.
Arduino_DataBus* bus = new Arduino_HWSPI(3 /* DC */, 5 /* CS */, 1 /* SCK */, 2 /* MOSI */, -1 /* MISO */);Arduino_GFX* gfx = new Arduino_ST7789(bus, 4 /* RST */, 0 /* rotation */, true, 240, 240);
Operation Result
- The screen displays as follows:
05_esp_wifi_analyzer
- This example demonstrates the ESP32-C6-Touch-LCD-1.54 using the GFX_Library_for_Arduino library to display Wi-Fi band signal strength.
Operation Result
- The screen displays as follows:

06_gfx_u8g2_font
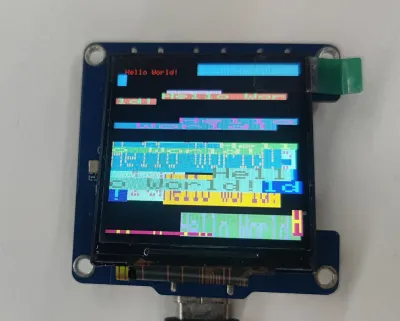
- This example demonstrates the ESP32-C6-Touch-LCD-1.54 using the GFX_Library_for_Arduino library to display text in various languages by loading font libraries.
Operation Result
- The screen displays as follows:

07_sd_card_test
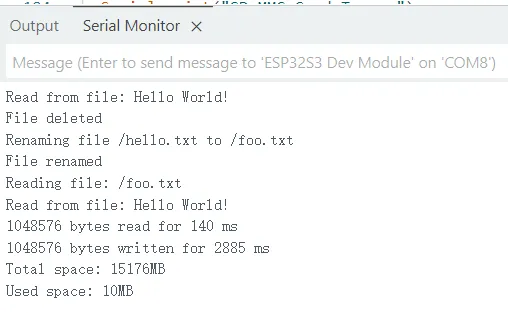
- This example uses the ESP32-C6-Touch-LCD-1.54 to test the TF card read/write functionality.
Code Analysis
-
TF card initialization:
#ifdef REASSIGN_PINSSPI.begin(sck, miso, mosi, cs);if (!SD.begin(cs)) {#elseif (!SD.begin()) {#endifSerial.println("Card Mount Failed");return;}
Operation Result
- The screen shows no output
- Open the serial monitor
08_lvgl_example_v8
-
This example demonstrates running the lvgl (v8.4.0) example program on the ESP32-C6-Touch-LCD-1.54.
It is required to install lvgl v8.4.0 version. If you have installed other version, please reinstall.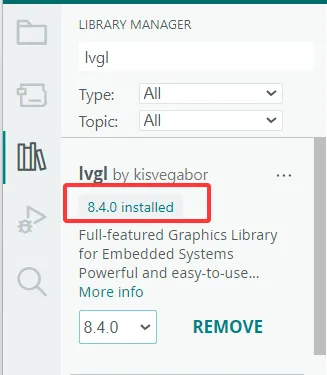
Operation Result
- The screen displays as follows:

09_lvgl_example_v9
-
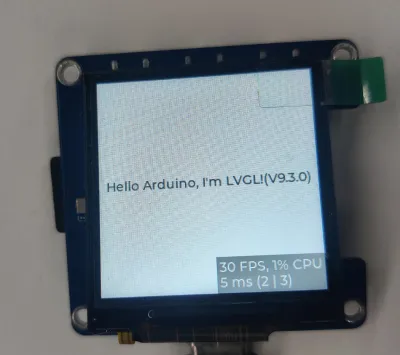
This example demonstrates running the lvgl (v9.3.0) example program on the ESP32-C6-Touch-LCD-1.54.
It is required to install lvgl v9.3.0 version. If you have installed other version, please reinstall.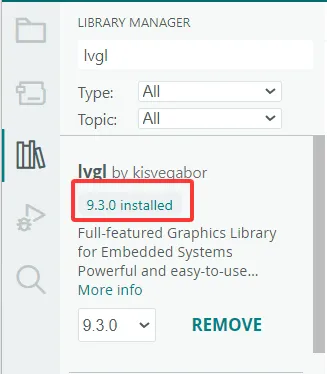
Operation Result
- The screen displays as follows: