Section 4: Extending ESPHome Configurations
Building on Section 3, this section covers how to extend ESPHome configurations for your own hardware: from consulting the official component documentation and adding new components, to configuration file organization and reusing community configurations.
1. Reading the ESPHome Official Documentation
Most ESPHome capabilities are provided by Components. For configuration details on each component, refer to the official documentation at esphome.io.
1.1 Documentation Structure
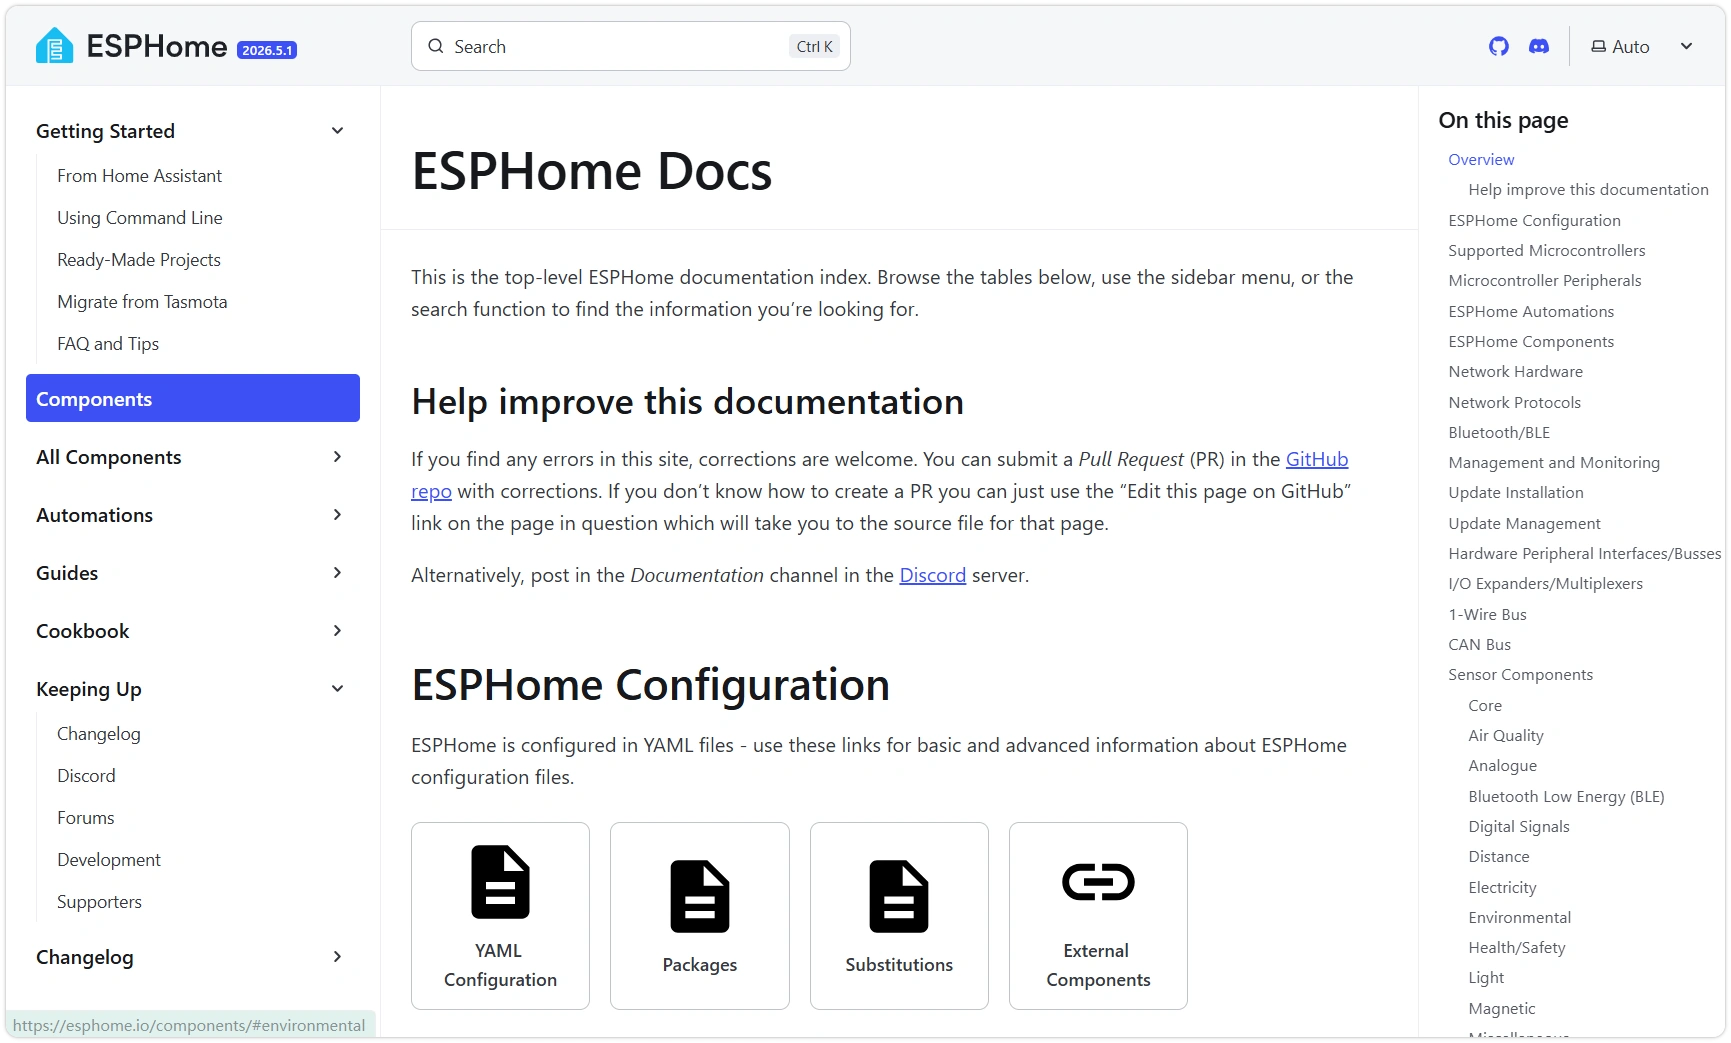
The main entry point is the component index page esphome.io/components (page title: ESPHome Docs), which aggregates configuration guides, chip support information, and all components. The left sidebar is divided into several sections:
- Getting Started — Installation, introduction, FAQ.
- Components / All Components — Component index and full component list — used most frequently.
- Automations — Automations, actions / triggers / conditions, templates,
lambda. - Guides — YAML configuration, configuration types, and other basics.
- Cookbook — Complete examples of combined usage.
On the component index page, components are grouped by functional category. Commonly used categories for beginners include:
| Category | YAML Top-Level Key | Appears in HA as |
|---|---|---|
| Sensor Components | sensor: | Temperature, voltage, and other numeric entities |
| Binary Sensor Components | binary_sensor: | Buttons, touch, and other "on/off" entities |
| Switch Components | switch: | Relays, GPIO outputs |
| Light Components | light: | The RGB LED from Section 3 |
| Display Components | display: | Displays (don't directly generate entities — content drawn via lambda) |
| Climate / Cover / Fan … | climate: / cover: / fan: | Corresponding device cards |
Categories are further subdivided. For example, Binary Sensor Components is split into Core, Capacitive Touch, Mechanical, NFC/RFID, and other subcategories — the GPIO button we'll use in Section 2.1 is under Binary Sensor → Core → GPIO.
1.2 How to Read a Component Page
Open a component page (e.g., esp32_rmt_led_strip used in Section 3). Component pages follow a consistent structure:
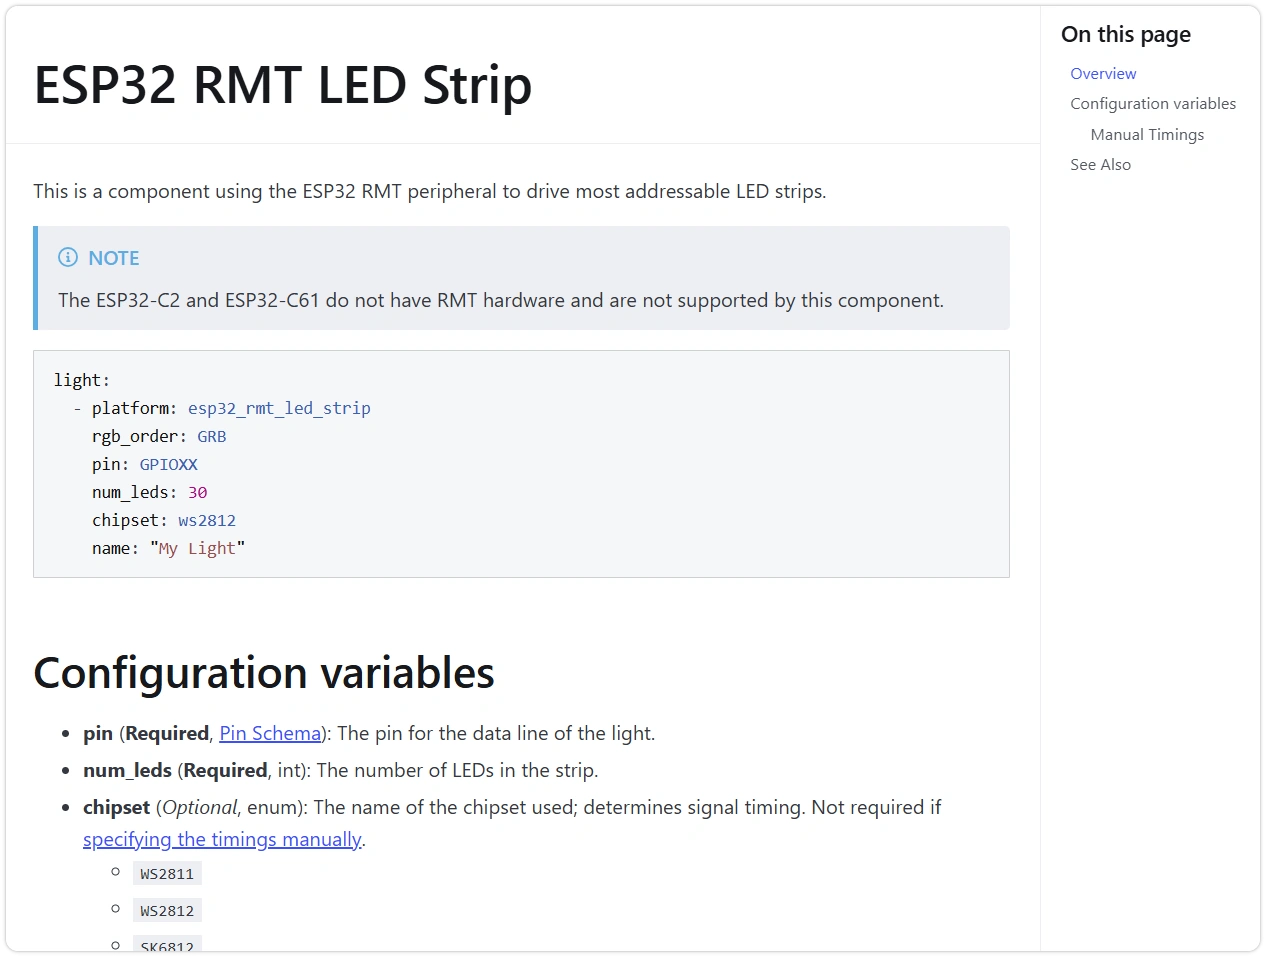
- YAML example at the top — Can be used with minimal modifications; the fastest starting point.
- Configuration variables — Field-by-field descriptions, each noting:
- Required or Optional;
- Field type (e.g.,
Pin,Time— see Configuration Types) and default value.
- See Also — Related components and further reading.
The official documentation is only available in English. Community translations exist but are typically behind on updates. Configuration field names should always follow the English originals. When translations are ambiguous, refer to the YAML examples on the English page.
2. Extending Configuration by Component Type
Below, we use the onboard BOOT button as an example to demonstrate the process from consulting documentation to writing a complete configuration. We then briefly introduce configuration patterns for other common component types.
2.1 BOOT Button
The ESP32-S3-Zero's BOOT button is connected to GPIO0. It is normally used to enter download mode, but can also function as a regular input button after firmware boots.
Here we use the gpio platform under binary_sensor (documentation).
Append the following to the end of the esp32-s3-zero device YAML created in Section 3:
binary_sensor:
  - platform: gpio
    name: "BOOT Button"
    pin:
      number: GPIO0
      mode:
        input: true
        pullup: true
      inverted: true
Field descriptions:
platform: gpio— Reads the high/low level of a GPIO pin.pin.number: GPIO0— The pin where the BOOT button is connected.mode.pullup: true— Enables the internal pull-up; the pin stays high when the button is not pressed.inverted: true— The BOOT button pulls the pin low when pressed; inverting makes "pressed = on," which is more intuitive.
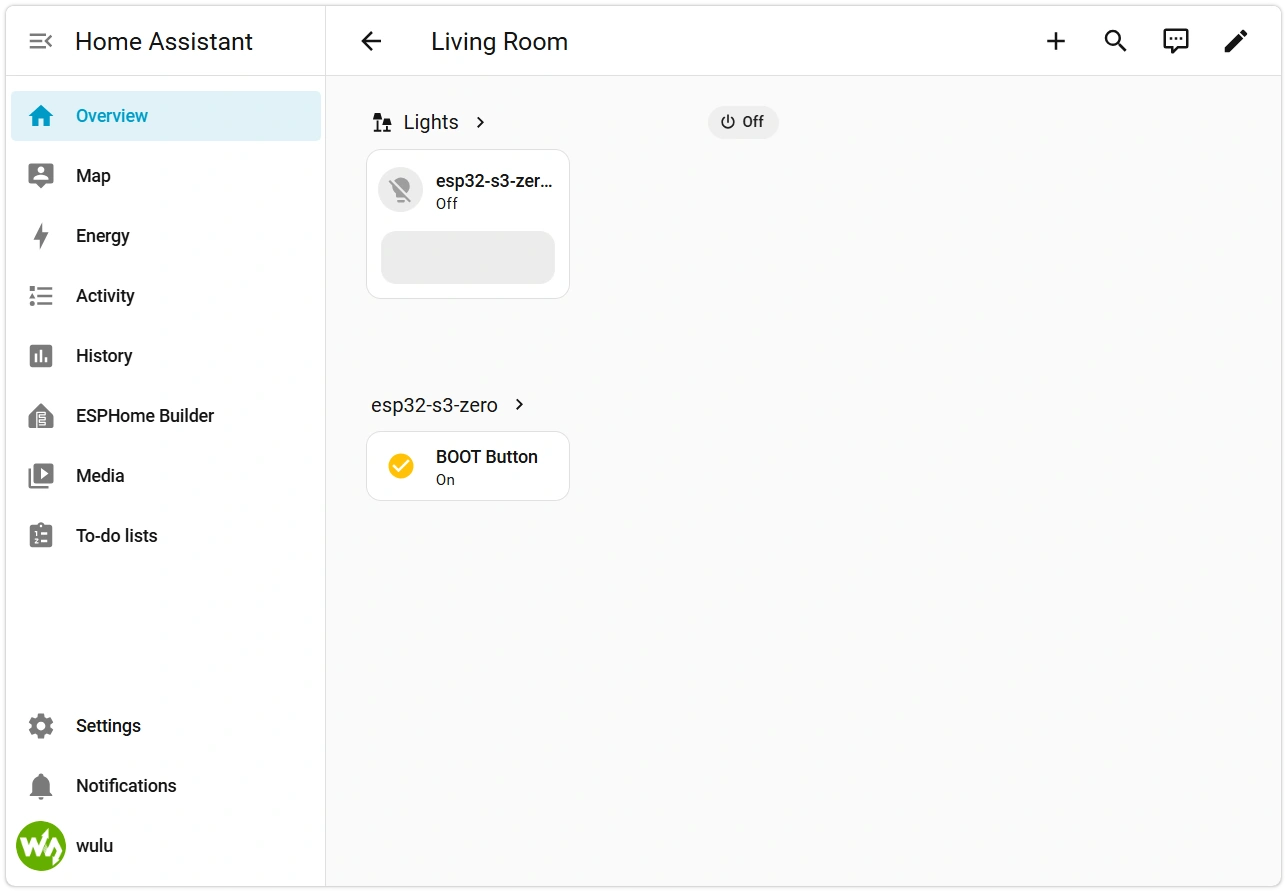
After saving, flash via OTA (INSTALL → Wirelessly). After flashing, a BOOT Button entity will automatically appear on the HA device page, toggling between "off" and "on" when the BOOT button is pressed.
The same approach applies to external buttons: simply change pin.number to the GPIO where the button is connected — all other fields remain the same.
GPIO0 is a strapping pin on the ESP32-S3: the chip samples its level at power-on to decide whether to enter run or download mode. Reading it as a normal input after boot is safe, but do not connect circuitry that pulls it low during reset, as this may cause the device to enter download mode instead of running firmware.
2.2 Common Component Types
Below are configuration snippets for other common peripheral types. The workflow for adding new peripherals follows the same pattern as the BOOT button in Section 2.1: find the corresponding component in the Components Directory → fill in required fields → name the entity with name. Replace pins and specific models according to your actual hardware.
Digital Output — Relay / Level Control (switch: gpio)
switch:
  - platform: gpio
    name: "Relay"
    pin: GPIO2          # Replace with actual pin
Controls a GPIO's high/low level; appears as a switch in HA. See GPIO Switch.
Analog Input — Voltage Sensing (sensor: adc)
sensor:
  - platform: adc
    name: "Battery Voltage"
    pin: GPIO1          # Replace with actual ADC pin
    attenuation: 12db   # Range — affects maximum measurable voltage
    update_interval: 60s
Reads the pin voltage; appears as a numeric sensor in HA. See ADC Sensor.
I²C Sensors (Bus Declaration + Device)
Most temperature/humidity, barometric pressure, and light sensors use the I²C bus. Configuration has two steps: first declare an i2c: bus, then attach sensors under the corresponding platform.
# Step 1: Declare I²C bus (typically one per board)
i2c:
  sda: GPIO8          # Replace with actual SDA pin
  scl: GPIO9          # Replace with actual SCL pin
  scan: true          # Scans bus at boot, prints detected device addresses in LOGS

# Step 2: Attach device under sensor component (replace platform with actual sensor model)
sensor:
  - platform: <sensor_component_name>
    address: 0x40
    update_interval: 60s
    temperature:
      name: "Temperature"
    humidity:
      name: "Humidity"
Which fields a specific sensor supports (address, which measurements to expose) is documented in its entry in the Sensor Components List. If scan: true doesn't detect the device, first check wiring, pull-up resistors, and the I²C address.
Display (display:)
Displays come in many varieties (OLED, LCD, e-Paper, etc.). They generally do not directly generate HA entities — content is drawn via lambda. Configuration is relatively complex. This section won't go into detail — look up your display's driver model in the Display Components documentation; Section 5 provides a complete RLCD display example.
3. Configuration File Organization
As you add more components, YAML files get longer and duplication increases. ESPHome provides several mechanisms for parameterization and splitting configurations.
3.1 substitutions: Parameterization
substitutions defines a set of variables, referenced in the configuration body via ${variable_name}. Change once, apply everywhere — ideal for values like pins and device names that appear repeatedly.
substitutions:
  device_name: esp32-s3-zero
  led_pin: GPIO21

esphome:
  name: ${device_name}

light:
  - platform: esp32_rmt_led_strip
    pin: ${led_pin}
    # …other fields same as Section 3
3.2 YAML Anchors: Snippet Reuse
YAML natively supports defining anchors with &name, referencing with *name, and using the merge key <<: to insert a set of fields into multiple locations — ideal for reusing "a group of identical fields."
sensor:
  - platform: adc
    pin: GPIO1
    <<: &adc_defaults     # Define anchor
      update_interval: 60s
      accuracy_decimals: 2
  - platform: adc
    pin: GPIO2
    <<: *adc_defaults     # Reuse the same set of fields
3.3 packages and !include: Multi-file Organization
!include inserts the contents of another YAML file verbatim at the current position; packages splits configurations into reusable "packages," especially useful when sharing the same base configuration across multiple devices.
# Device main configuration
packages:
  wifi: !include common/wifi.yaml
  base: !include common/base.yaml
Extract Wi-Fi, logging, OTA, and other sections that are identical across devices into a common/ directory. New devices simply reference them, avoiding duplication. See Packages and YAML Configuration.
3.4 external_components: Third-Party Components
When a hardware driver has not yet been merged into the official ESPHome release, you can use external_components to pull in community-written components from GitHub or other sources.
external_components:
  - source: github://username/repo@branch
    components: [ component_name ]
The RLCD-4.2 display used in Section 5, with its ST7305 driver, is introduced this way — a complete example will be provided there.
4. Introduction to Lambda
ESPHome's YAML is declarative — it describes "what exists," not "how to do it." When declarative syntax cannot express certain logic (e.g., custom conversions on readings, conditional triggering of actions), a small lambda snippet fills the gap.
Inside lambda, you write C++ code. The most common introductory use case is value conversion in sensor filters::
sensor:
  - platform: adc
    pin: GPIO1
    name: "Light Level"
    filters:
      - lambda: |-
          // x is the raw reading received at this stage; the return value is the converted result
          return x * 100.0;
lambda is the gateway to advanced ESPHome usage, but it is essentially C++ — in-depth use requires some programming knowledge, which is beyond the scope of this introductory tutorial. Refer to Automations & Templates when needed.
5. devices.esphome.io and Community Configurations
devices.esphome.io is a community-maintained device configuration index with many ready-made ESPHome configurations for development boards and commercial devices — a good starting point when looking for existing configs.
When using community configurations, please note:
- These configurations are community-contributed and not officially maintained by Waveshare. Quality varies and some may be outdated.
- Pin definitions and component versions may not match your actual hardware or current ESPHome version.
Treat community configurations as references rather than drop-in solutions: after copying, review each component's fields against the official docs (Section 1), run Validate to check for errors, then flash and test.
6. Common Issues in This Section
- Changed
substitutionsbut no effect: Confirm the body uses${variable_name}and the variable name spelling matches; thesubstitutionsblock must be at the configuration top level. !includereports file not found: Paths are relative to the main configuration file's directory — note thecommon/wifi.yamlsubdirectory syntax.- I²C sensor not detected in LOGS scan: Check if SDA/SCL are swapped, if pull-up resistors are missing, and if the address matches documentation. Enable
scan: truefirst and check the actual addresses reported in logs. external_componentspull failed: Most likely the network cannot access GitHub, or the repository/branch name insourceis incorrect.- Added component but no new entity appears in HA: Confirm flashing succeeded and the device is online. Only components with a
namefield generate entities — pure bus declarations (likei2c:) do not.