Working with Arduino
This chapter contains the following sections. Please read as needed:
Arduino Getting Started
New to Arduino ESP32 development and looking for a quick start? We have prepared a comprehensive Getting Started Tutorial for you.
- Section 0: Getting to Know ESP32
- Section 1: Installing and Configuring Arduino IDE
- Section 2: Arduino Basics
- Section 3: Digital Output/Input
- Section 4: Analog Input
- Section 5: Pulse Width Modulation (PWM)
- Section 6: Serial Communication (UART)
- Section 7: I2C Communication
- Section 8: SPI Communication
- Section 9: Wi-Fi Basics
- Section 10: Web Server
- Section 11: Bluetooth
- Section 12: LVGL GUI Development
- Section 13: Comprehensive Project
Note: This tutorial uses the ESP32-S3-Zero as a reference example, and all hardware code is based on its pinout. Before you start, we recommend checking the pinout of your development board to ensure the pin configuration is correct.
Setting Up Development Environment
1. Installing and Configuring Arduino IDE
Please refer to the tutorial Installing and Configuring Arduino IDE to download and install the Arduino IDE and add ESP32 support.
| Board Name | Board Installation Requirement | Version Requirement |
|---|---|---|
| esp32 by Espressif Systems | "Offline Installation" / "Online Installation" | 2.0.11 |
2. Running Examples
Creating an Example
- Change the project folder to
c:\Users\Waveshare\AppData\Local\Arduino15\packages(where Waveshare is the computer username)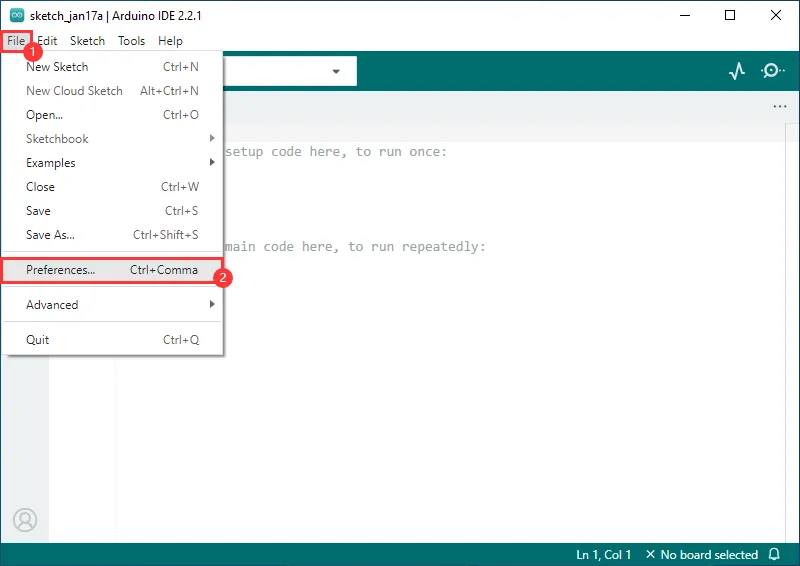
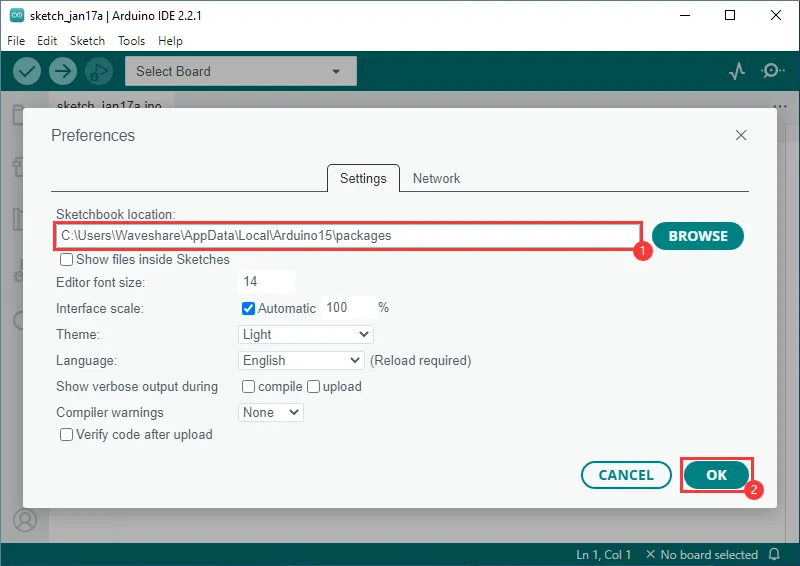
- Restart the Arduino IDE
- You can create examples from the examples in the project folder under File
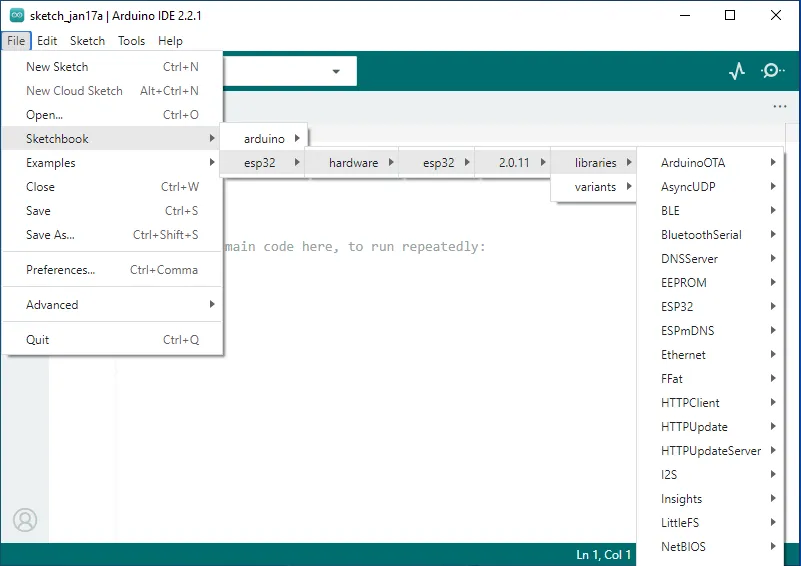
- The following demonstrates creating an RGB blink example (located under File -> Sketchbook -> esp32 -> hardware -> esp32 -> 2.0.11 -> libraries -> ESP32 -> examples -> GPIO -> BlinkRGB)
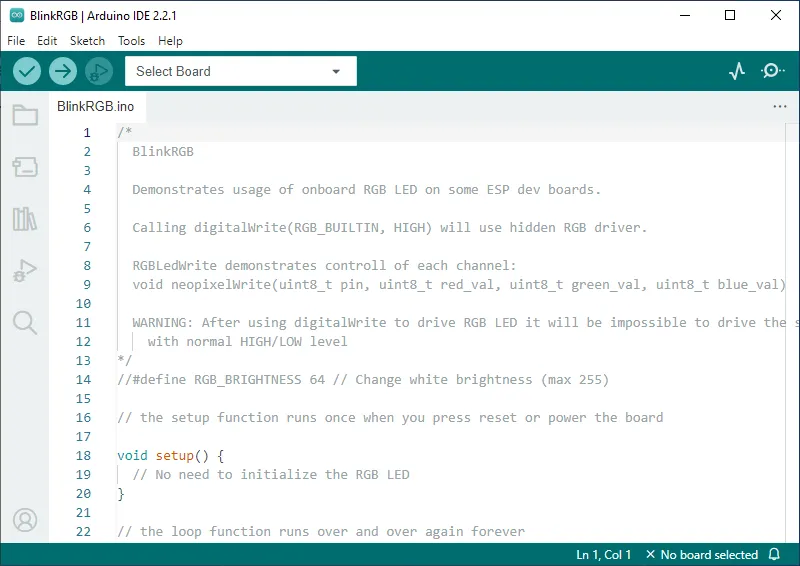
- Replace the program with the following:
#define PIN_NEOPIXEL 14void setup() {// No need to initialize the RGB LED}// the loop function runs over and over again forevervoid loop() {neopixelWrite(PIN_NEOPIXEL, RGB_BRIGHTNESS, 0, 0); // Reddelay(1000);neopixelWrite(PIN_NEOPIXEL, 0, RGB_BRIGHTNESS, 0); // Greendelay(1000);neopixelWrite(PIN_NEOPIXEL, 0, 0, RGB_BRIGHTNESS); // Bluedelay(1000);neopixelWrite(PIN_NEOPIXEL, 0, 0, 0); // Off / blackdelay(1000);}
Example Flashing
- Note that you need to change the pins to the corresponding RGB pins for it to work
- Select the board and port
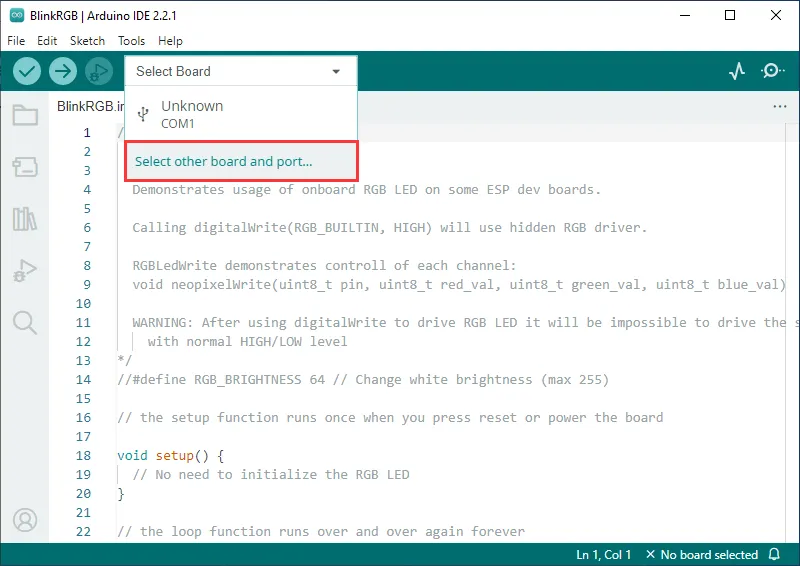
- Search for esp32s3, select ESP32S3 Dev Module and the download port
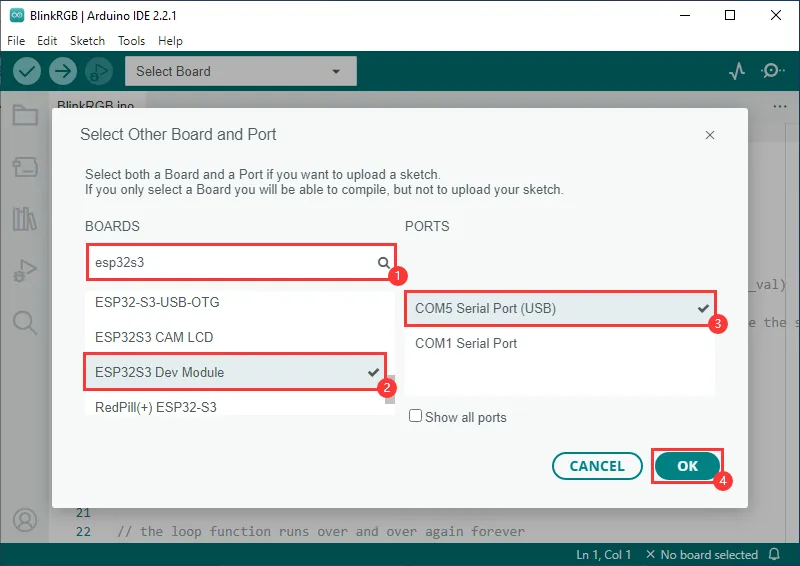
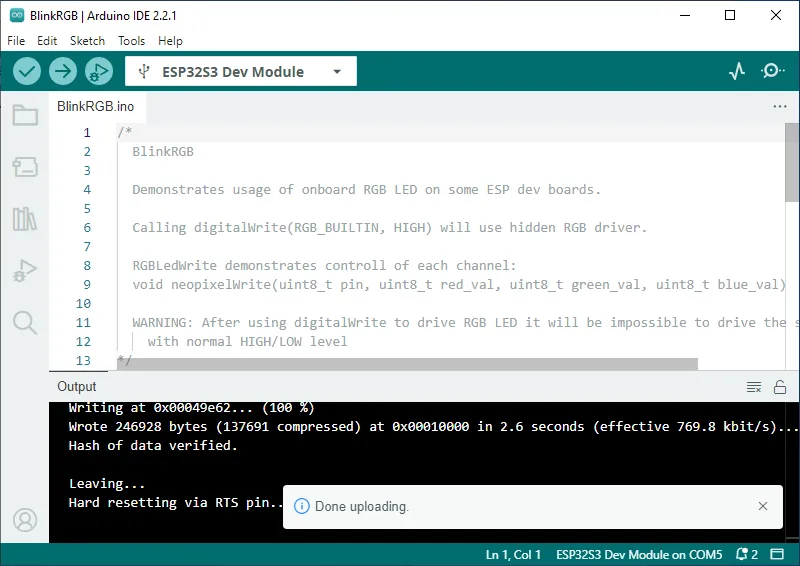
- Select OK, click upload, Arduino IDE will compile and flash the example
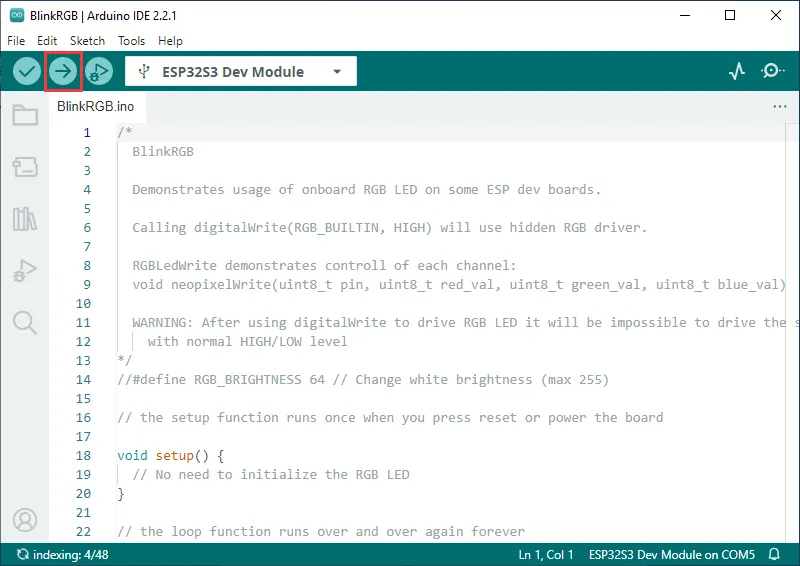
- After uploading, you can see the result on the development board
Example
Note: Do not set the LED brightness too high; excessive brightness will cause the temperature to rise rapidly and may damage the board.
Library Installation
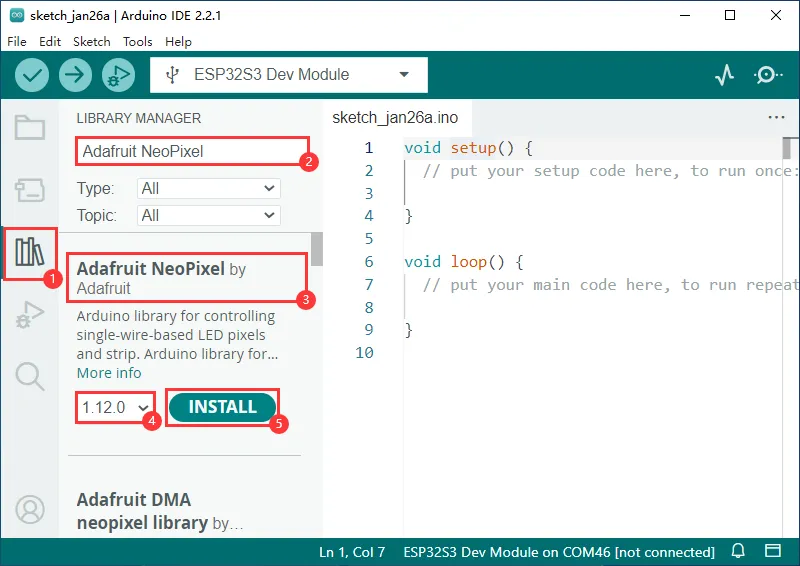
- Install the Adafruit NeoPixel library (select the library version matching the one shown below; otherwise it may be incompatible with the example programs)
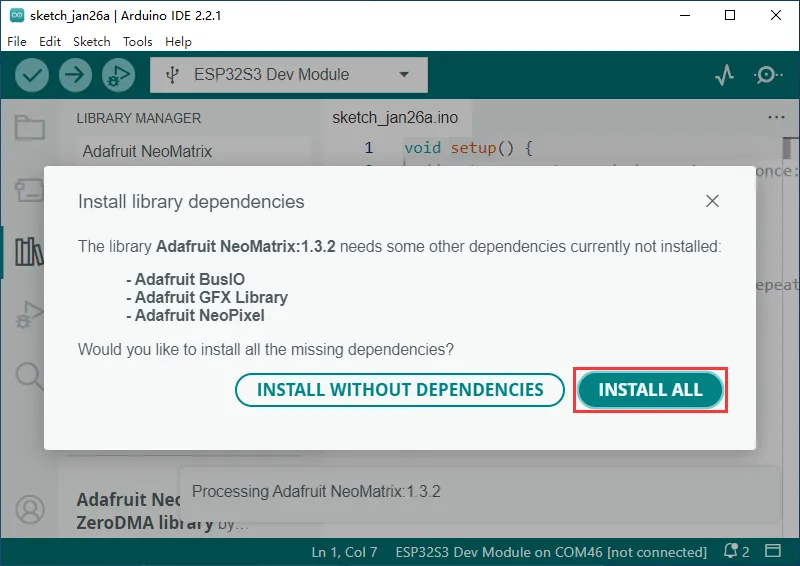
- Install the Adafruit NeoMatrix library (select the library version matching the one shown below; otherwise it may be incompatible with the example programs)

- Select INSTALL ALL
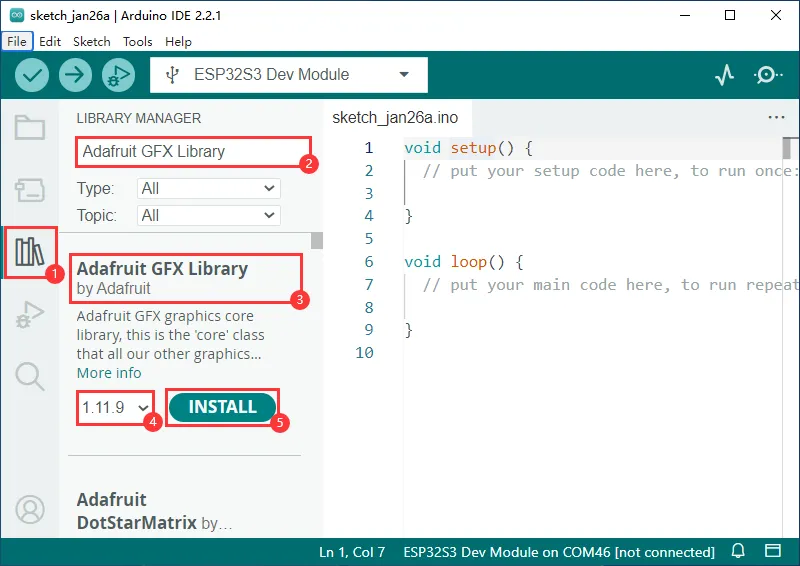
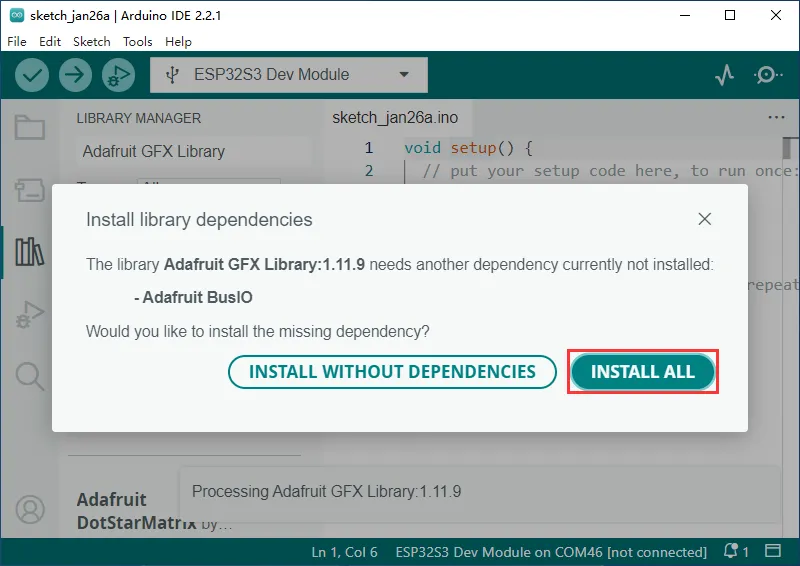
- Install the Adafruit GFX Library library (select the library version matching the one shown below; otherwise it may be incompatible with the example programs)
- Select INSTALL ALL
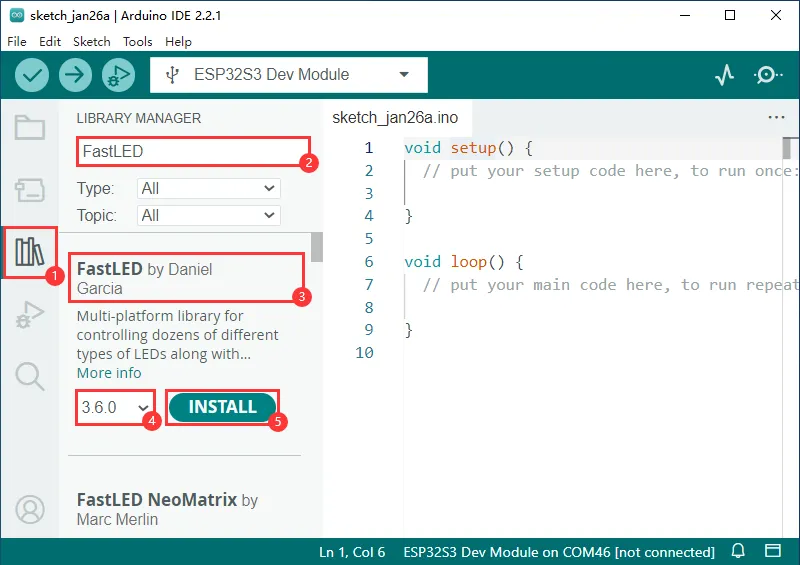
- Install the FastLED library (select the library version matching the one shown below; otherwise it may be incompatible with the example programs)
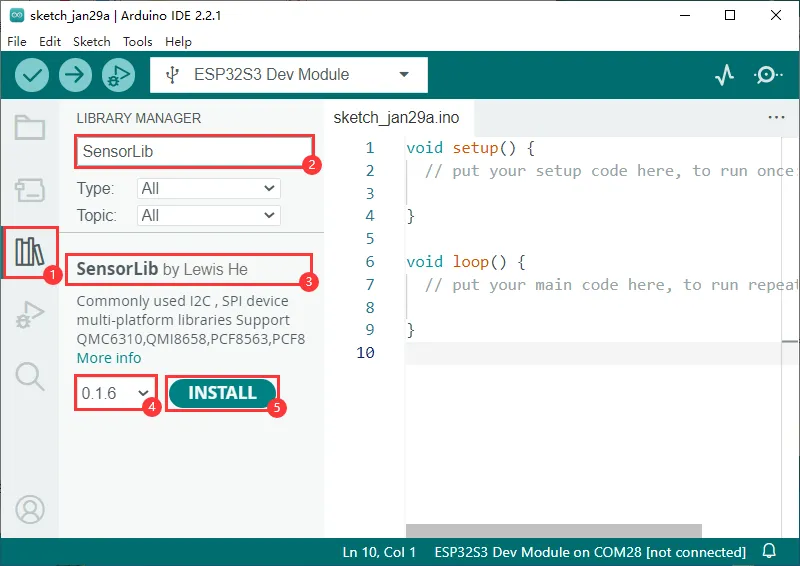
- Install the SensorLib library for QMI8658 (select the library version matching the one shown below; otherwise it may be incompatible with the example programs)
Display Characters
Note: Do not set the LED brightness too high; excessive brightness will cause the temperature to rise rapidly and may damage the board.
- Install the corresponding libraries
- Download the example; the example in the Font folder scrolls characters.
- As shown below, it currently displays 26 lowercase characters
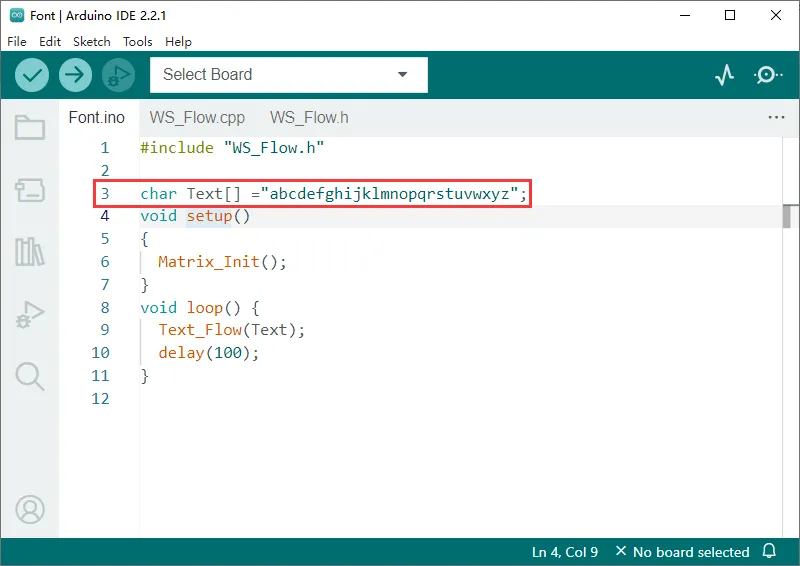
- You can change the characters inside the quotes to display corresponding characters on the
ESP32-S3-Matrix - After modification, flash the example and use it
Motion-Controlled Game
Note: Do not set the LED brightness too high; excessive brightness will cause the temperature to rise rapidly and may damage the board.
- Install the corresponding libraries
- Download the example; the example in the Game folder is a small game where a single LED moves as the ESP32-S3-Matrix is tilted.
- Flash the example and use it
- After successful flashing, an LED will light up near the center.
- The lit LED will move according to the current tilt angle of the device.
- You can modify the example as needed to implement more complex operations.
Cool Color Effects
- Install the corresponding libraries
- Download the example; the example in the Color folder is a relatively cool flowing color effect.
- Flash the example and use it
- After successful flashing, the panel will display colors in a flowing pattern.
- You can modify the example as needed to implement more complex operations.
Web Page Control
Note: Do not set the LED brightness too high; excessive brightness will cause the temperature to rise rapidly and may damage the board.
- Install the corresponding libraries
- Download the example; the example in the HTTP folder allows you to control the ESP32-S3-Matrix via a web page.
- Flash the example and use it. After successful flashing, follow the steps below.
- Connect your control device (phone, computer, etc.) to the Wi-Fi named ESP32-S3-Matrix.

- After successfully connecting to the Wi-Fi, enter 10.10.10.1 in a browser to access the ESP32-S3-Matrix control page.
10.10.10.1
- The web page has two global refresh buttons and one text box with a submit button for controlling the ESP32-S3-Matrix.
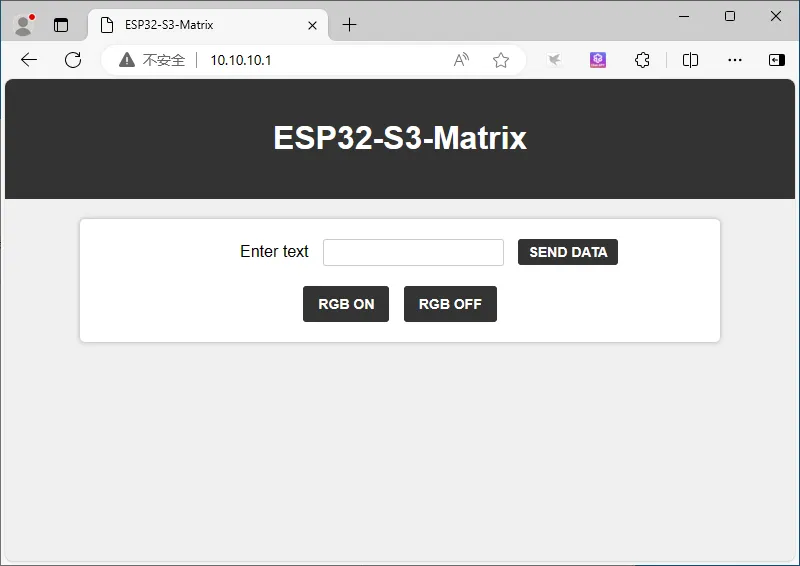
- Enter characters in the text box and click the Submit button; the characters will scroll on the ESP32-S3-Matrix.