Arduino
This chapter includes the following sections. Please read as needed:
Arduino Getting Started
New to Arduino ESP32 development and looking for a quick start? We have prepared a comprehensive Getting Started Tutorial for you.
- Section 0: Getting to Know ESP32
- Section 1: Installing and Configuring Arduino IDE
- Section 2: Arduino Basics
- Section 3: Digital Output/Input
- Section 4: Analog Input
- Section 5: Pulse Width Modulation (PWM)
- Section 6: Serial Communication (UART)
- Section 7: I2C Communication
- Section 8: SPI Communication
- Section 9: Wi-Fi Basics
- Section 10: Web Server
- Section 11: Bluetooth
- Section 12: LVGL GUI Development
- Section 13: Comprehensive Project
Note: This tutorial uses the ESP32-S3-Zero as a reference example, and all hardware code is based on its pinout. Before you start, we recommend checking the pinout of your development board to ensure the pin configuration is correct.
Setting Up the Development Environment
1. Install and Configure Arduino IDE
Please refer to the tutorial Install and Configure Arduino IDE to download and install the Arduino IDE and add ESP32 support.
2. Install the Board Package
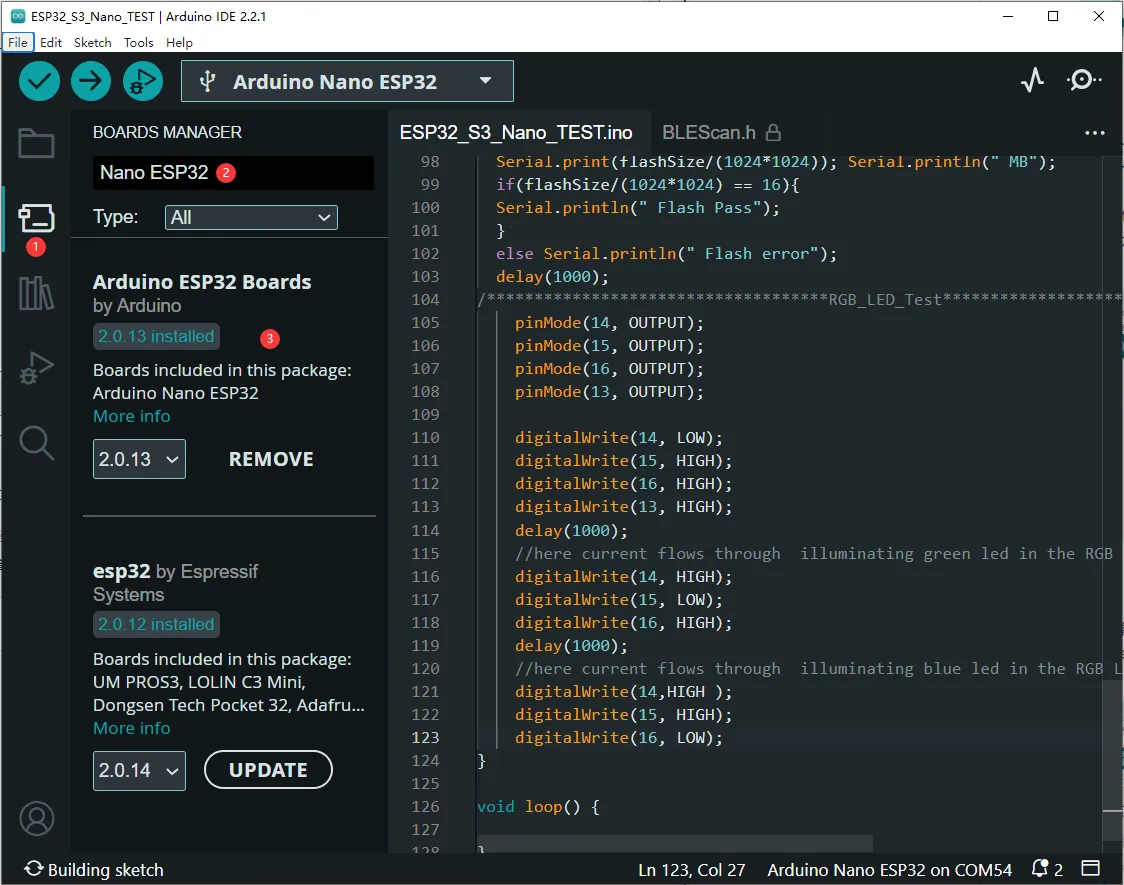
To install the board package, open the "Boards Manager" from the left menu. Search for "Nano ESP32" and install the latest version (or the version you want to use).
3. Create an Example
-
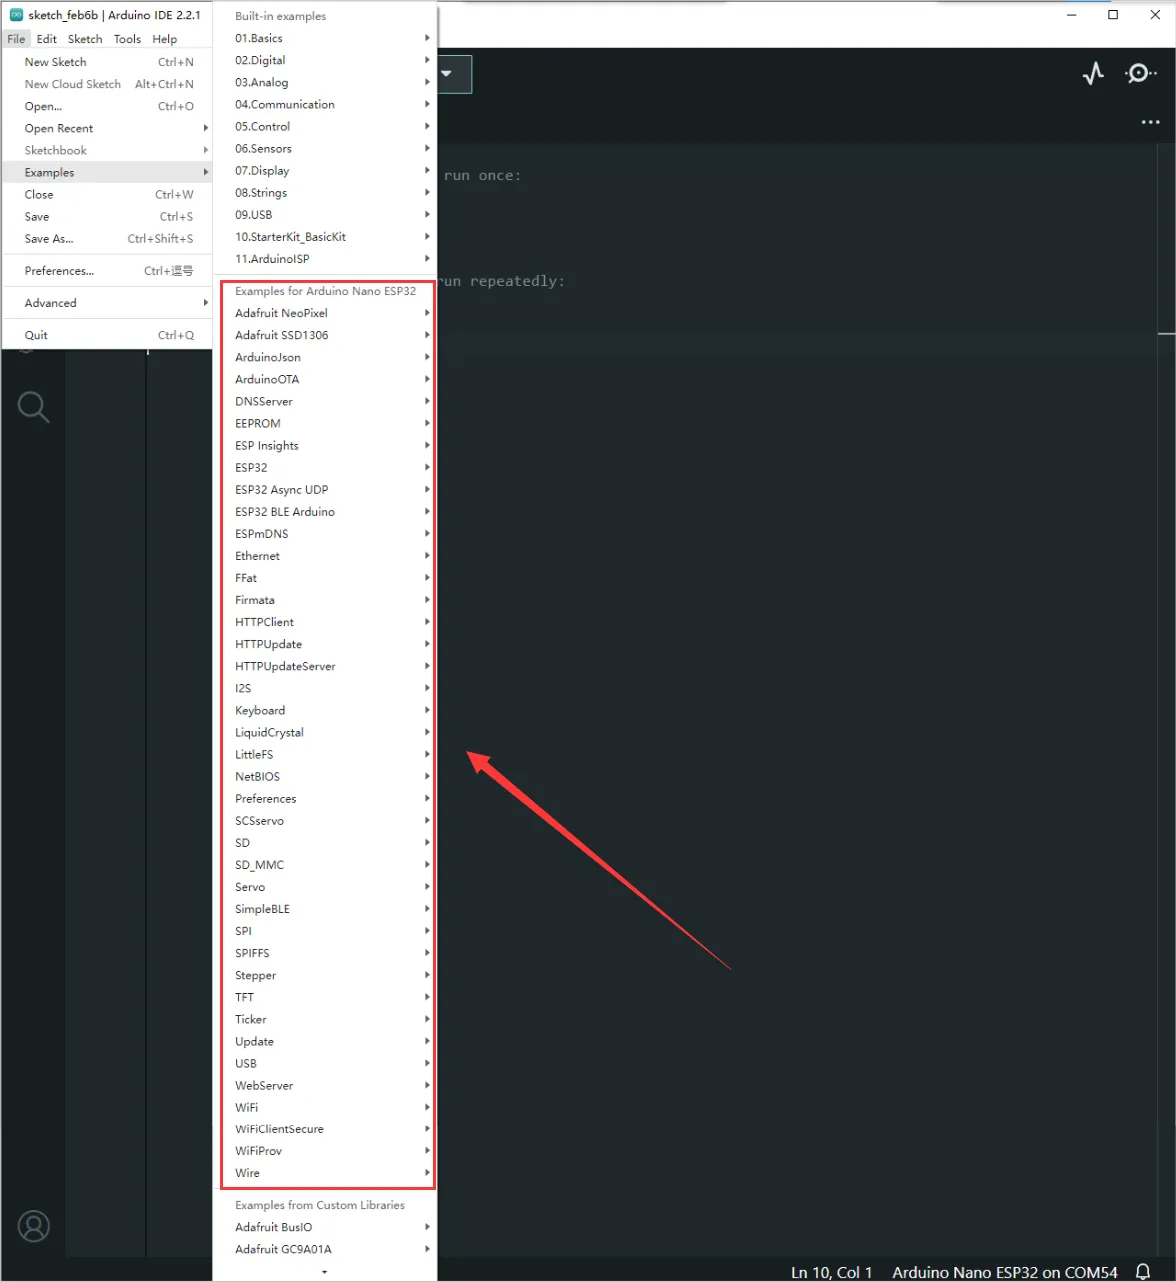
The following demonstrates creating an LED blink example (Blink under File -> examples -> 01.Basics)
-
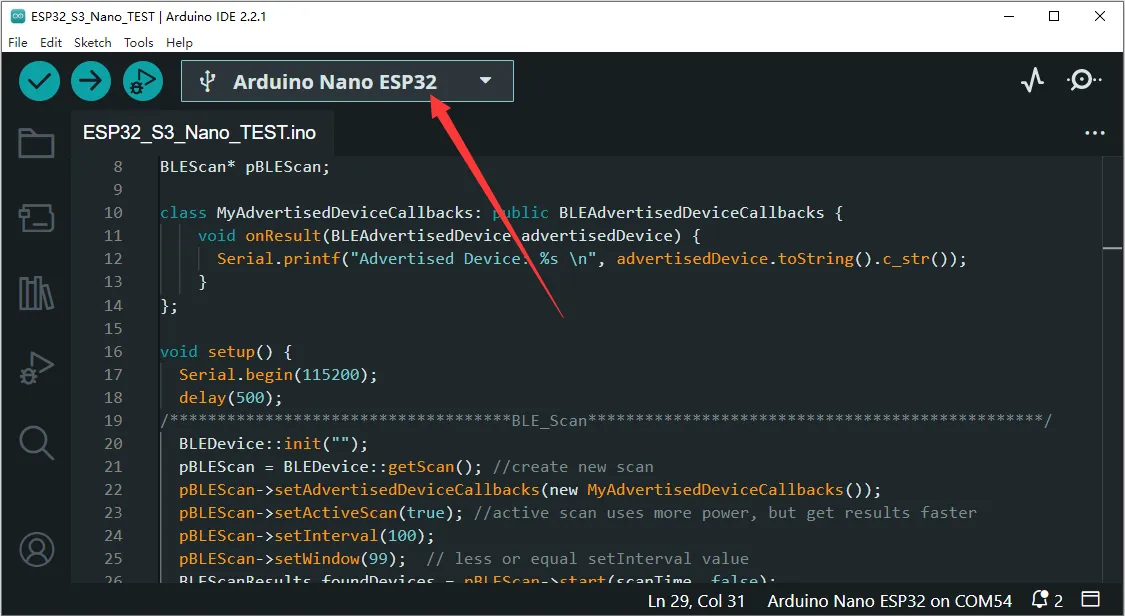
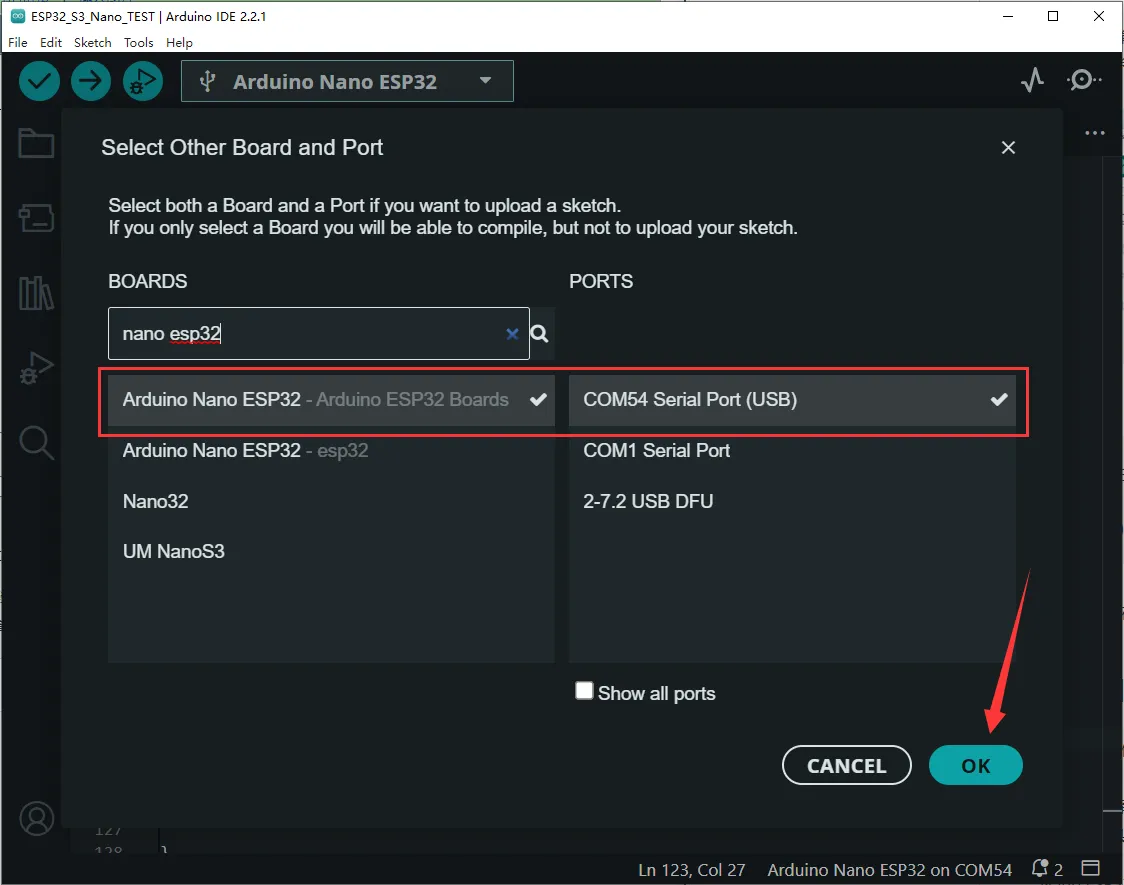
Select the board and port
Search for Nano ESP32, select Arduino Nano ESP32, then select OK (the image below is for reference only; you must select the corresponding board)
-
Click ✓ in the menu bar to compile, and click → to flash the compiled program to the board.
4. Open an Example
-
Opening an existing example is simpler: directly run the corresponding .ino sketch, refer to the above steps, select the corresponding board and port, then compile, download, and flash.
-
The ESP32-S3-Nano can access Arduino examples directly in the IDE via File -> Examples in the upper-left corner. These examples can be used directly without external libraries.