Flash Firmware Flashing and Erasing
Test firmware is provided in the current example program. You can directly flash the test firmware to verify whether the onboard device functions are working properly. The bin file path is:
...\ESP32-S3-Touch-LCD-7-Demo\Firmware
- Flash Firmware Flashing
- Flash Firmware Erasing
The following uses flashing the ESP32-S3-Touch-LCD-2.8 bin file as an example. For flashing other bin files, the operation steps are similar.
-
Unzip the software resource package (Flash_download_tool)
-
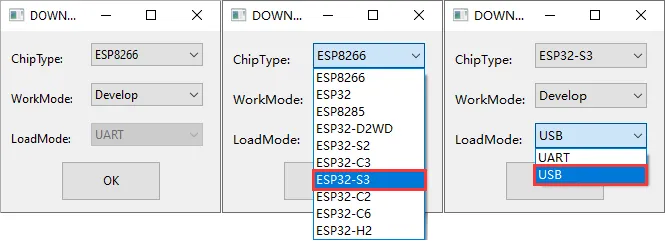
Open the flash_download_tool_3.9.7.exe software. Select based on the development board's MCU and interface, for example: ESP32-S3 and USB (most devices use USB; the specific choice depends on the product hardware design).
-
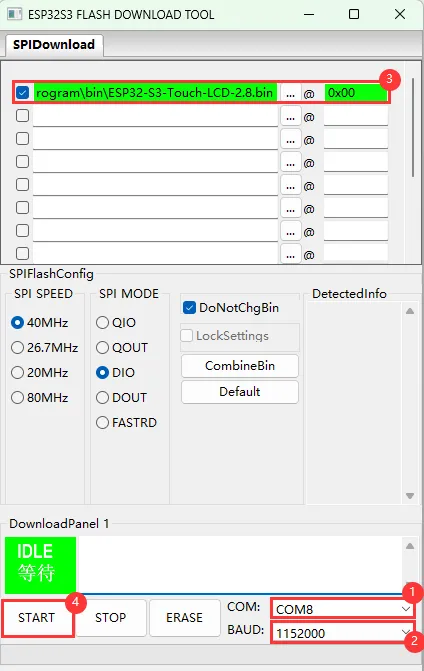
Parameter Settings
- Select the COM port corresponding to the development board
- Set BAUD to the maximum 1152000
- Click "..." to select the bin file provided by Waveshare, manually enter the download address "0x00", and check the leftmost checkbox
- Start flashing
-
Flashing complete (the flashing process takes some time, please be patient)
-
Press the reset button and observe the result
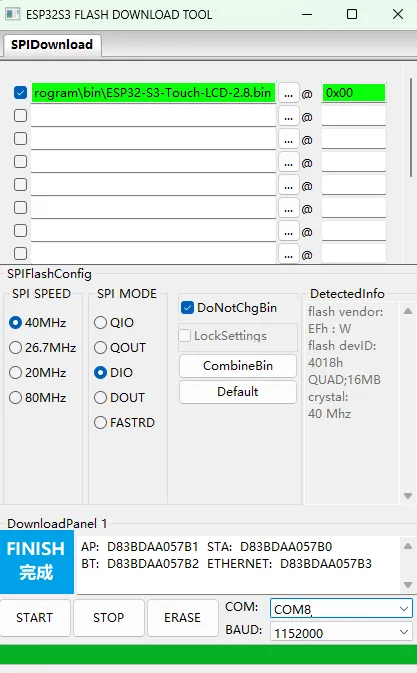
If it remains in the "Waiting for power-on sync" state, hold the "Boot" button and power cycle the device to enter download mode; this will resolve the issue.
Flash erasing is performed independently. Because direct erasing sometimes fails to completely erase the flash, the "flash then erase" approach can help avoid incomplete erasure to some extent.
-
Unzip the software resource package (Flash_download_tool)
-
Open the flash_download_tool_3.9.7.exe software. Select based on the development board's MCU and interface, for example: ESP32-S3 and USB (most devices use USB; the specific choice depends on the product hardware design).
-
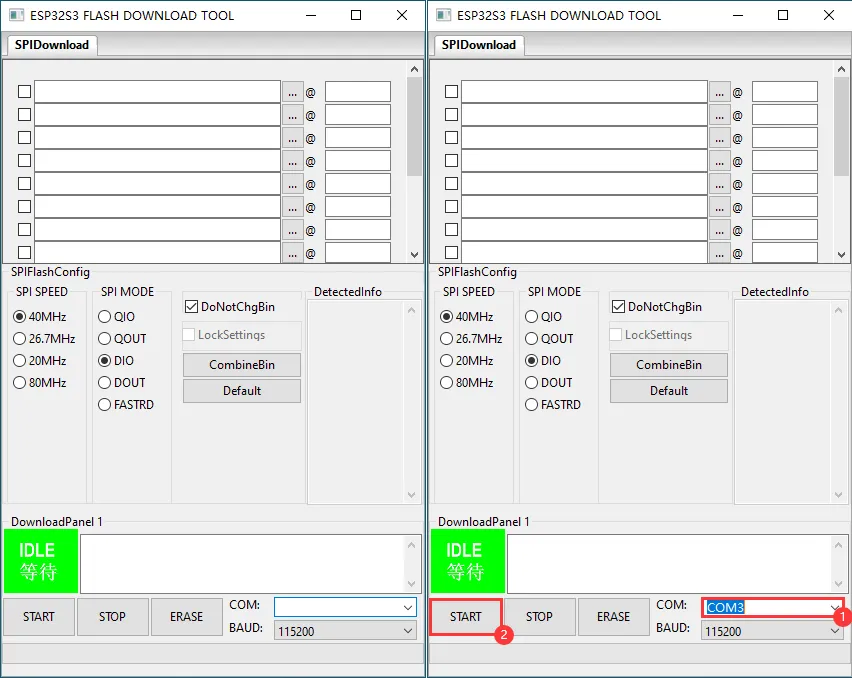
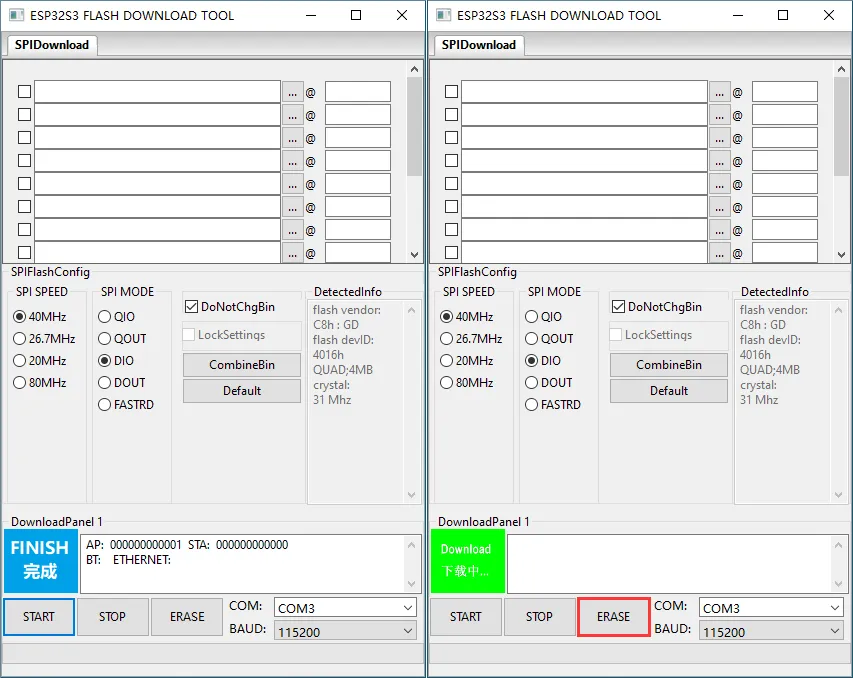
Select the port corresponding to the device, click START (do not select any bin file)
-
Wait for the flashing to complete, then click Erase
-
Wait for the erasing to complete