ESP32-S3-ePaper-1.54G User Guide
To quickly understand the various features of the product, a series of test examples are provided below to help you learn how to use each interface. In addition to the ESP32-S3-ePaper-1.54G host board and its bundled components, the following items are required to run the examples:
Required Components
- ESP32-S3-ePaper-1.54G ×1
- TF card ×1 (not required, needed only for TF card examples)
Precautions
⚠️ USB Download Precautions (Important)
If the port is not recognized, please enter Boot mode:
- Press and hold the BOOT button.
- Connect the USB cable to the computer
- Release the BOOT button.
After the download is complete, power cycle the board to run the program.
Firmware Download
- The firmware is located in the
ESP32-S3-ePaper-1.54G\Firmwaredirectory of the example package. - Flash address:
0x00
Firmware Flashing
Online Flashing
- Open the ESP32 Firmware Online Flashing Web Page
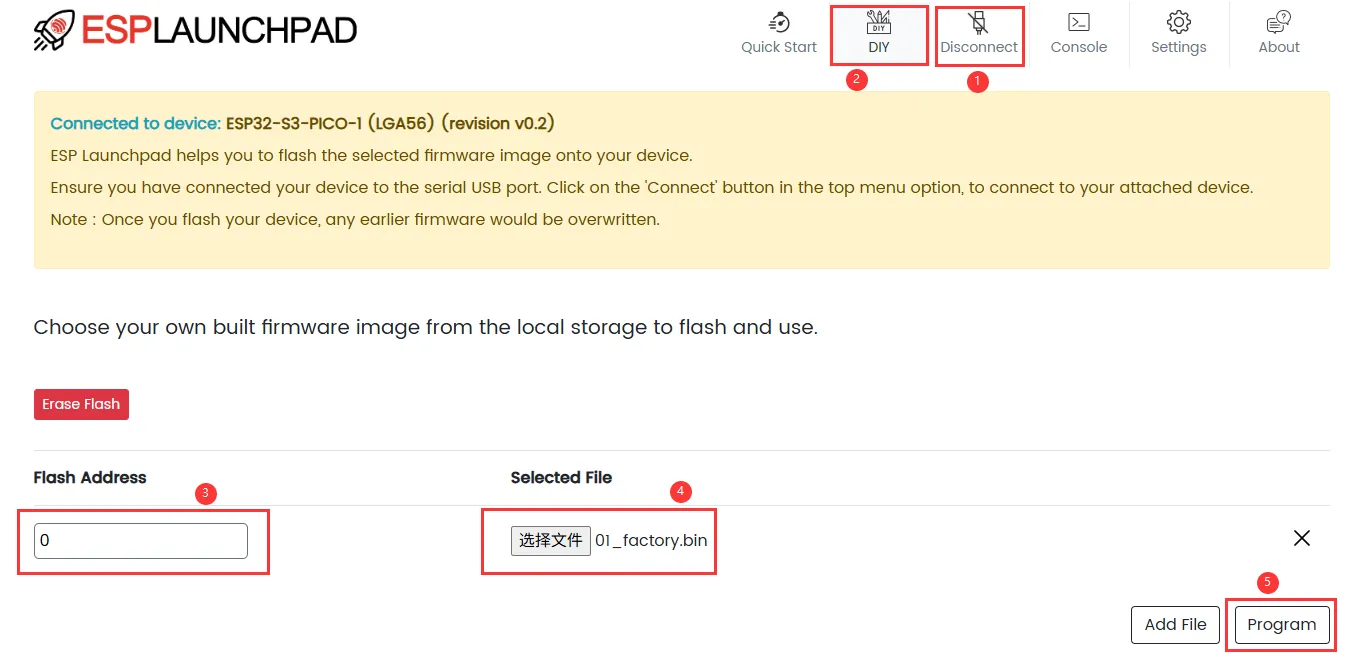
- Parameter Settings
- ①. Select the COM port corresponding to the connected development board
- ②. Go to the firmware flashing page
- ③. Set the flash address to
0 - ④. Click "Select File" and choose the bin file located in the
ESP32-S3-ePaper-1.54G\Firmwaredirectory provided in the example program package - ⑤. Start flashing
Software Flashing
- Firmware Flashing
- Firmware Erasing
The following steps apply to the firmware provided on this page.
-
Download and extract Espressif's official Flash Download Tool (Download)
-
Run Flash Download Tool and select the options that match the development board's MCU and download interface. The screenshot below uses ESP32-S3 and USB as an example; use the options required by the product's hardware design.
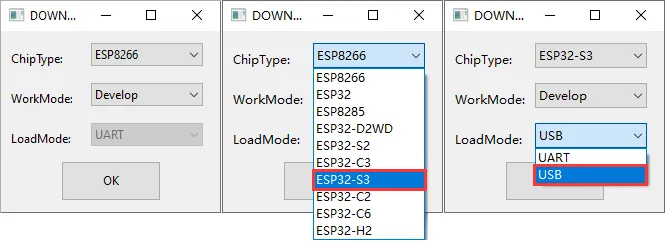
-
Parameter settings
- Select the COM port for the development board
- Set BAUD to the maximum value, 1152000
- Click the "..." button in the row, select the bin file provided by Waveshare, manually enter the flash address given at the top of this page in the field to its right, and select the leftmost checkbox in the row
- Click START to begin flashing
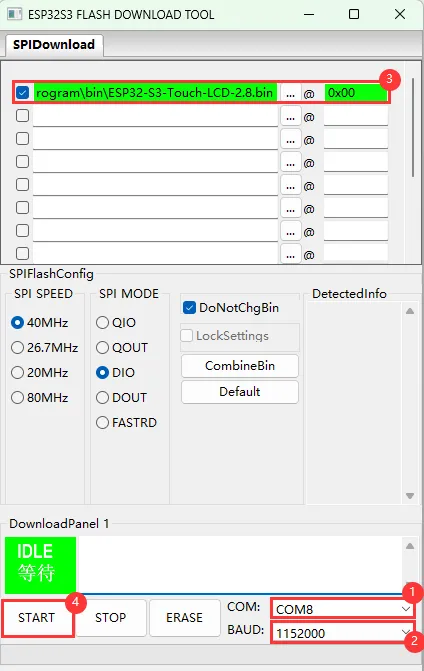
-
Wait for flashing to complete (this may take some time; please be patient)
-
Press the reset button and verify the result
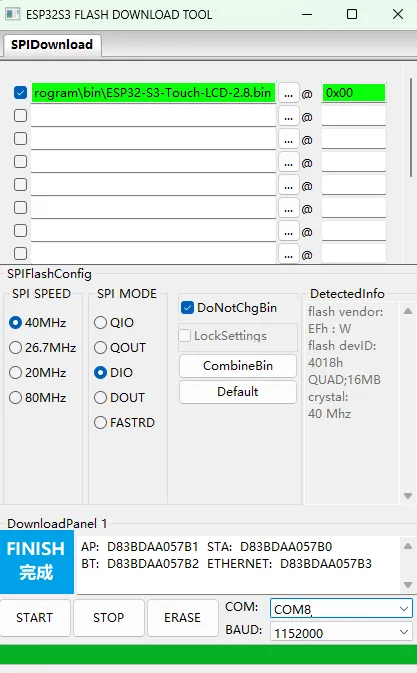
If the tool remains at "Waiting for power-on sync", hold down BOOT and power cycle the device to enter download mode.
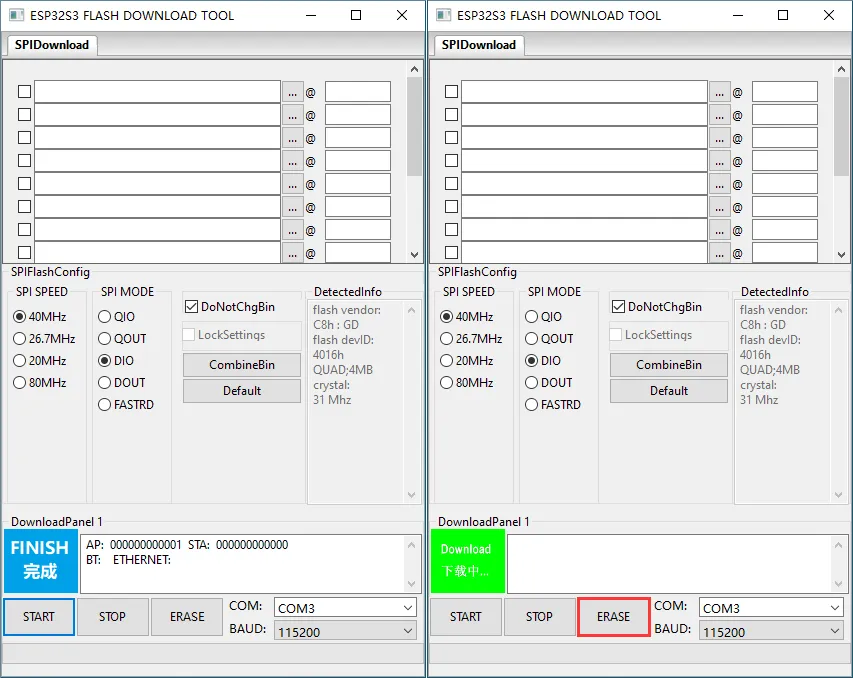
Click ERASE to erase the entire flash. If erasing fails or the device does not respond, hold down BOOT and power cycle the device to enter download mode, then try again.
-
Download and extract Espressif's official Flash Download Tool (Download)
-
Run Flash Download Tool and select the options that match the development board's MCU and download interface. The screenshot below uses ESP32-S3 and USB as an example; use the options required by the product's hardware design.
-
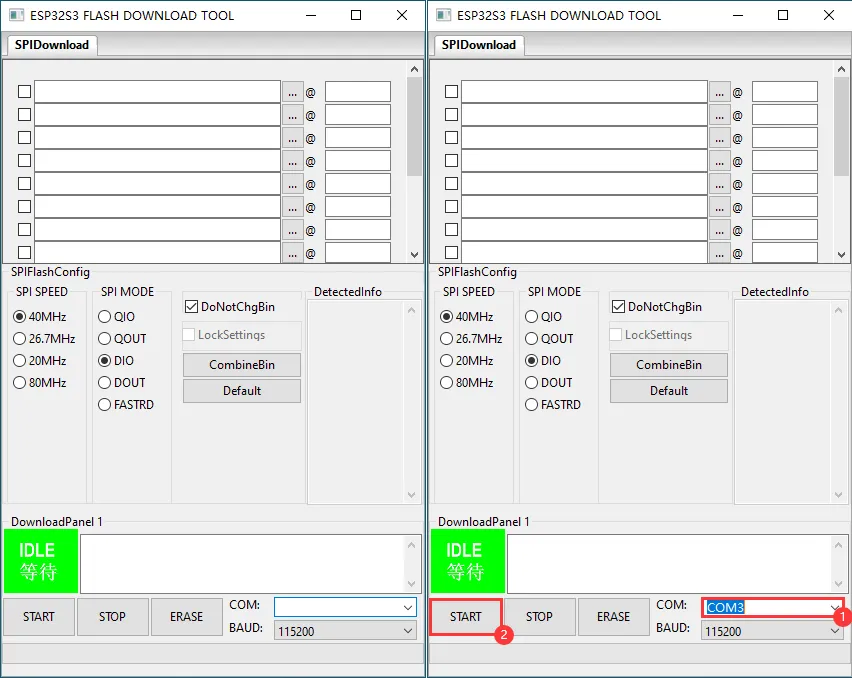
Select the COM port for the device, do not select any bin file, and click START
-
When the operation above is complete, click ERASE to erase the flash
-
Wait for erasing to complete