Working with ESP32S3
This chapter contains the following sections. Please read as needed:
Setting Up Development Environment
1. Installation and Configuration
-
For setting up the ESP32S3 environment and basic usage, please refer to the following links:
-
After setting up the environment, connect the sensor and download the example package.
Example
Hardware Connection
Refer to the following diagrams for connection

Run Arduino ESP32 Demo
-
Navigate to
Environment-X6-Sensor\examples\esp32s3\arduino\environment_x6_sensor_testand double-click theenvironment_x6_sensor_test.inofile. -
Select the development board:
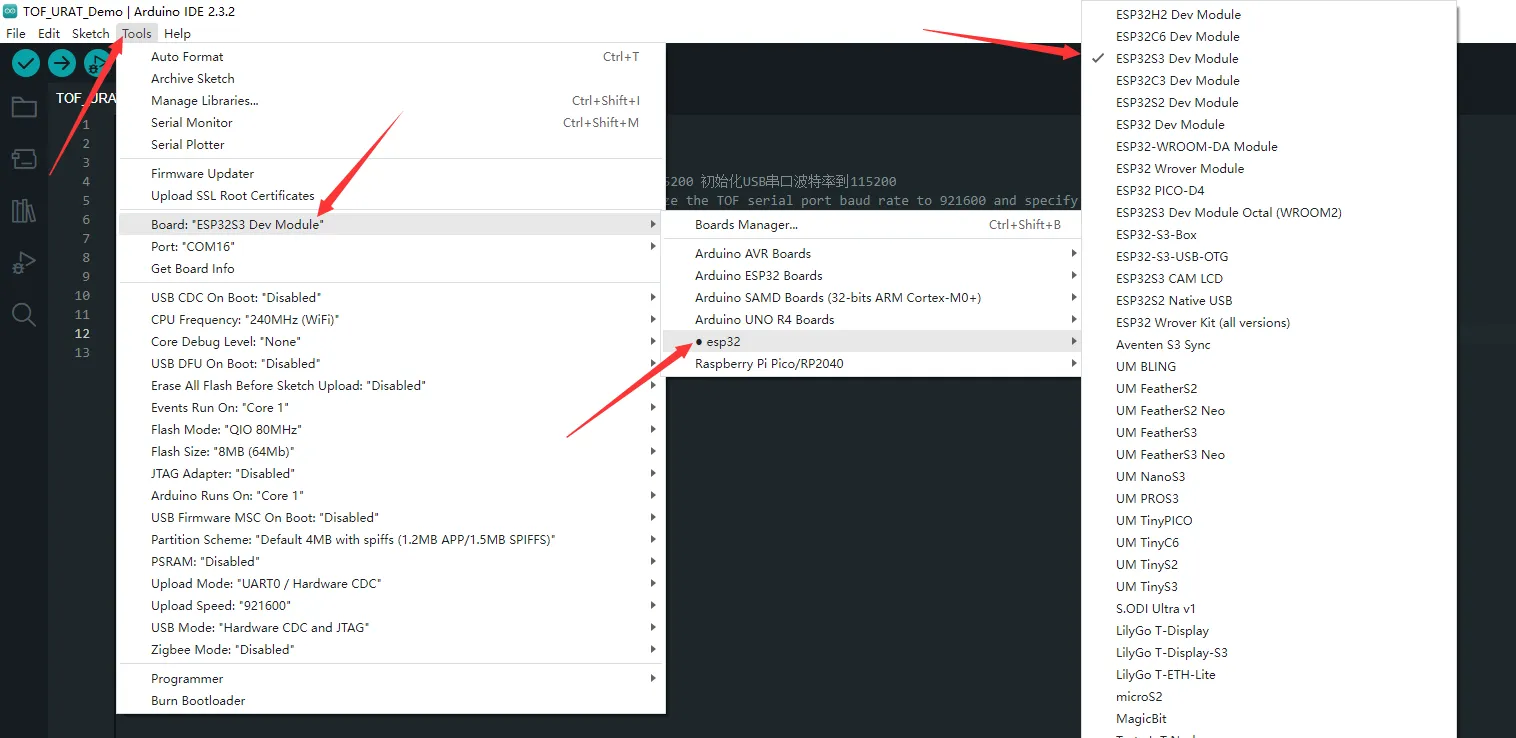
-
Select the port for the ESP32S3, then compile and upload.
-
After the upload is completed, open the serial port monitor, and the relevant information will be output
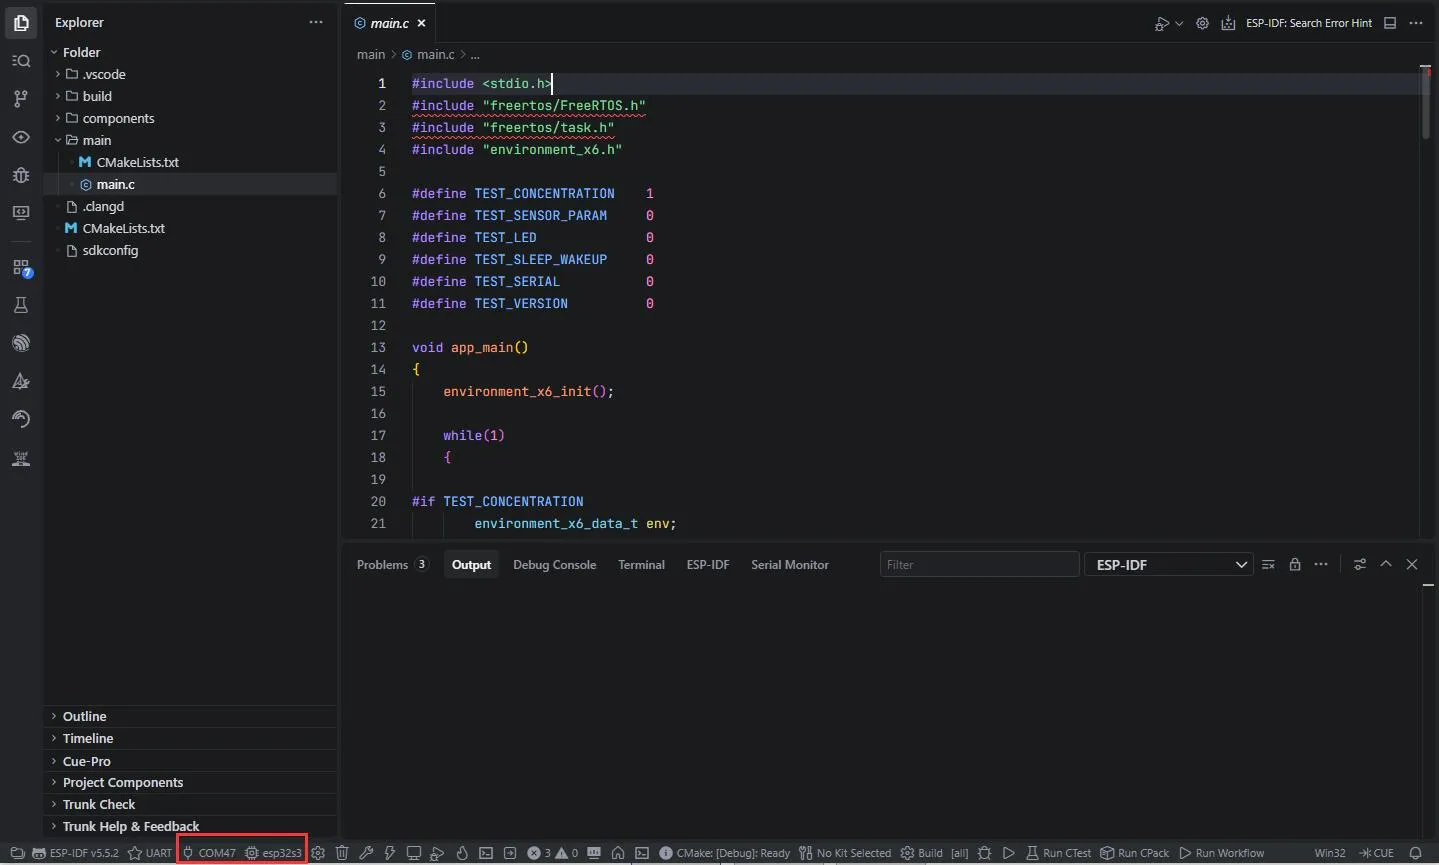
Run ESP-IDF Demo
-
Navigate to
Environment-X6-Sensor\examples\esp32s3\esp-idfand open this path with VS Code. -
Select the development board:
-
Select the port for the ESP32S3, then compile and upload.
-
After the upload is completed, open the serial port monitor, and the relevant information will be output.
Run MicroPython Demo
-
Navigate to
Environment-X6-Sensor\examples\esp32s3\micropythonand double-click theenvironment_x6_sensor_test.pyfile. -
Set the chip model to esp32 and select the appropriate port:

-
Select the port for the ESP32S3, then run the program.
-
The relevant information will be output in the Shell.