HexArth Arduino User Guide
Using the Secondary Development Tools
This tutorial introduces the installation and usage of the secondary development tools, focusing on how to upload modified programs to the HexArth robot, helping users perform secondary development based on the open-source robot program. The development tool used here is Arduino IDE. The following sections detail the installation and use of the robot's dependency libraries and development environment in Arduino IDE.
What is Arduino IDE
Arduino IDE (Integrated Development Environment) is an open-source code-based development platform with its own programming language and development environment. Arduino IDE provides a rich set of libraries, greatly simplifying the use of complex hardware and software platforms such as displays and sensors.
Installing Arduino IDE
1. Download Arduino IDE
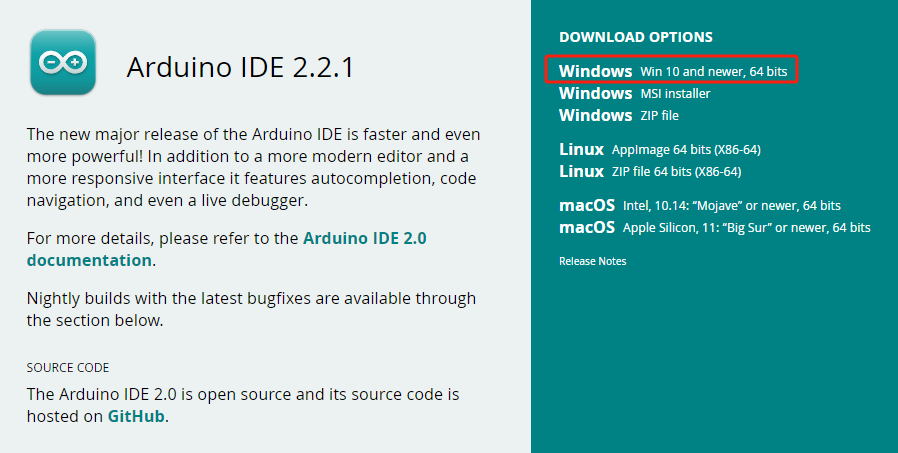
First, go to the Arduino website to download the latest version of the Arduino IDE installer. The official IDE supports downloads for different operating systems; choose according to your operating system. Here we download the Windows version. If already installed, skip to step two. The installation process is very simple; just keep clicking Next.
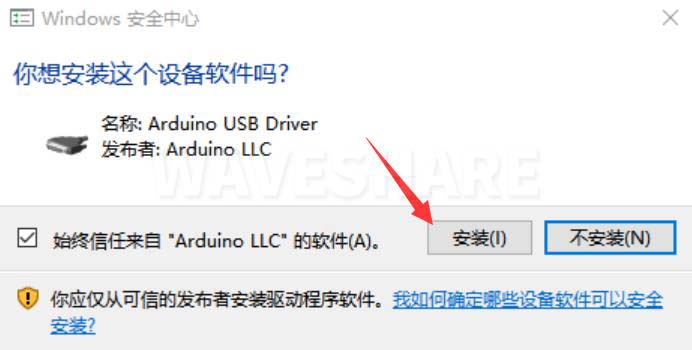
During installation, you will be prompted to install drivers; just click Install.
2. Set Arduino IDE to Chinese Interface
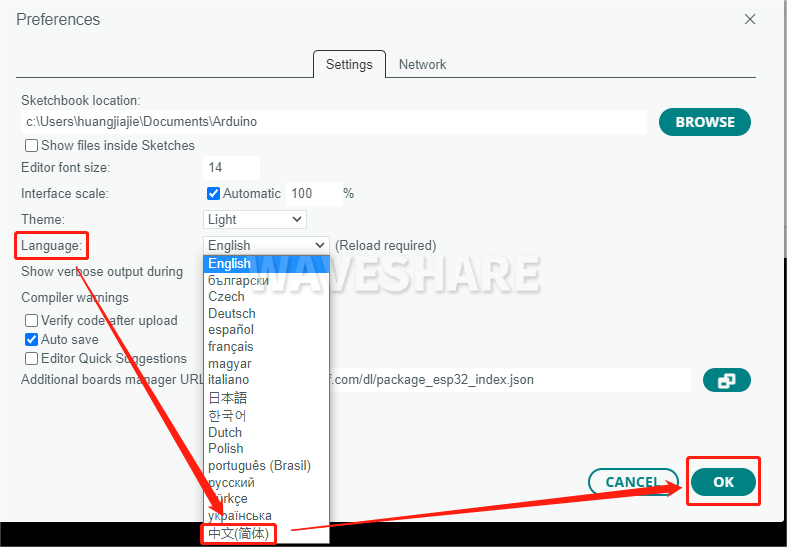
After the first installation, when you open the Arduino IDE, it will be in English. You can switch to other language in File --> Preferences, or continue using the English interface.

Installing the Development Environment
The main control module on the robot's driver board is ESP32, so we need to install the corresponding ESP32 board package in the Arduino IDE development environment. The steps are as follows:
-
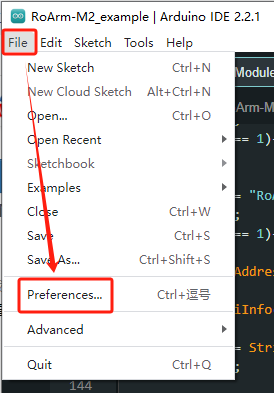
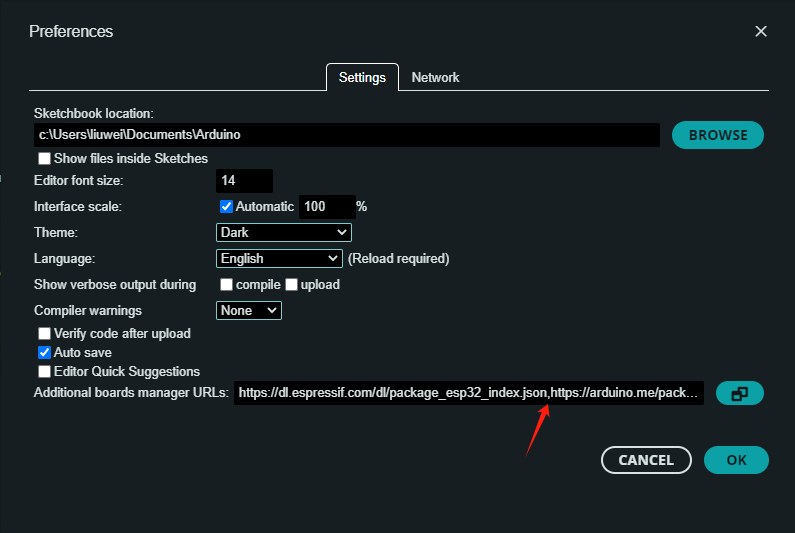
Open Arduino IDE, click "File" → "Preferences".
-
Add the following link in the "Additional Boards Manager URLs" field, then click "OK" to save the settings.
https://dl.espressif.com/dl/package_esp32_index.json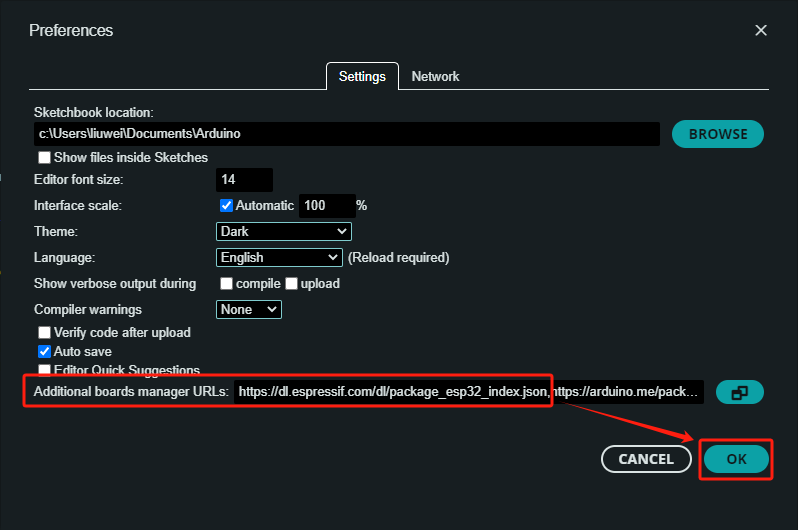 warning
If you need to add multiple board URLs, do not delete the ESP32 board support URL. You can add other URLs on separate lines; by default they are separated by commas.
For example, if you need to add the ESP8266 board URL, add it on another line, which will appear as:
https://dl.espressif.com/dl/package_esp32_index.json,http://arduino.esp8266.com/stable/package_esp8266com_index.json
-
Click the link for the ESP32 development package: ESP32 Development Package, download and unzip it. In "My Computer", enter the following path:
C:\Users\username\AppData\Local\Arduino15Change "username" according to your computer's username. Create a new folder named "packages", and copy the unzipped ESP32 development package into the "packages" folder.
You can see in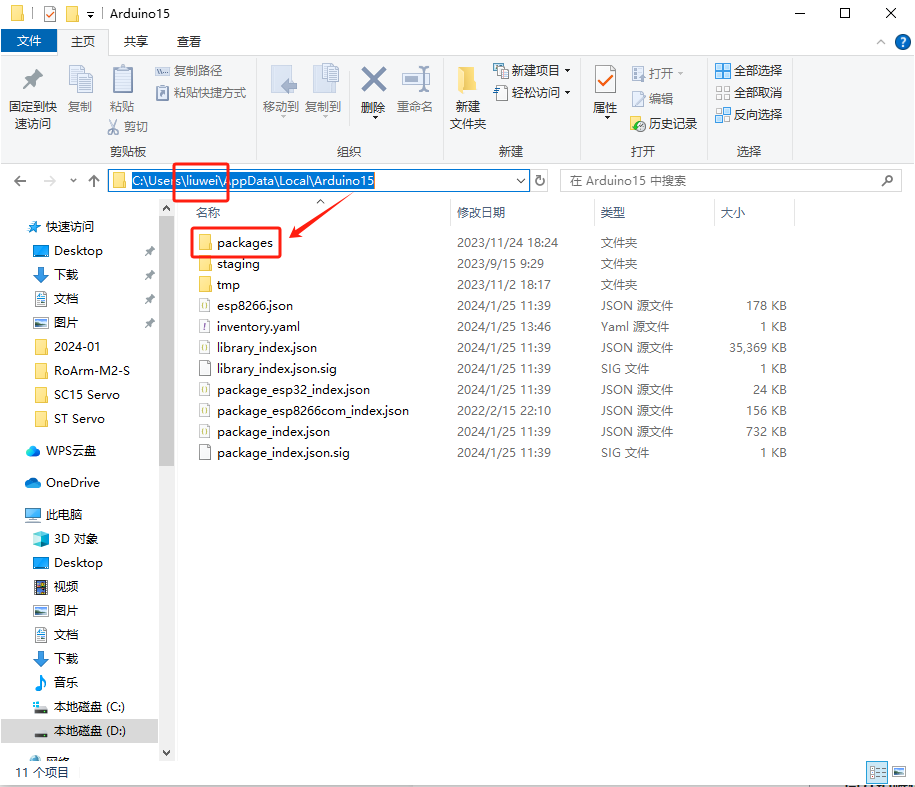
packages-esp32-hardware-esp32that the installed ESP32 board version is 3.0.7. The ESP32 board version for the HexArth open-source program is 3.0.7.
Installing Dependency Libraries
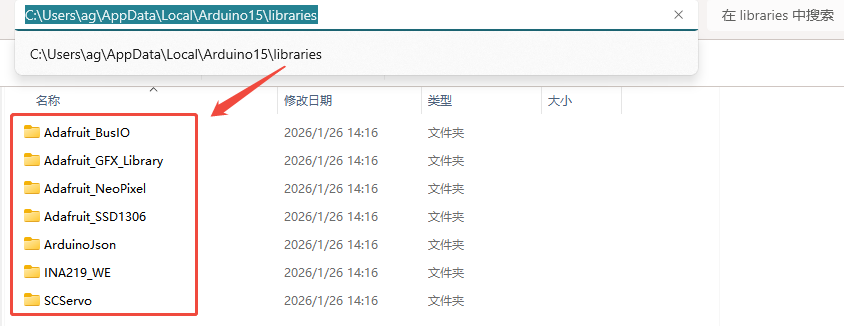
Download the dependency library files, unzip them. Navigate to the default Arduino IDE installation location: C:\Users\username\AppData\Local\Arduino15\libraries (adjust according to your actual location), then copy the folders shown in the figure into the "libraries" folder.
Uploading Programs
-
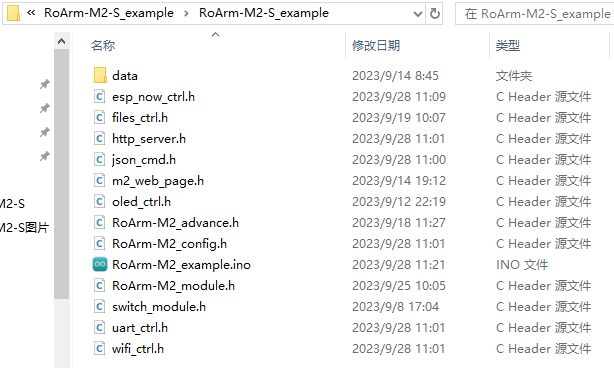
Download the HexArth lower computer open-source program, unzip it, and double-click to open HexArth_example.ino. Note that all files in this directory must be in the same folder.
-
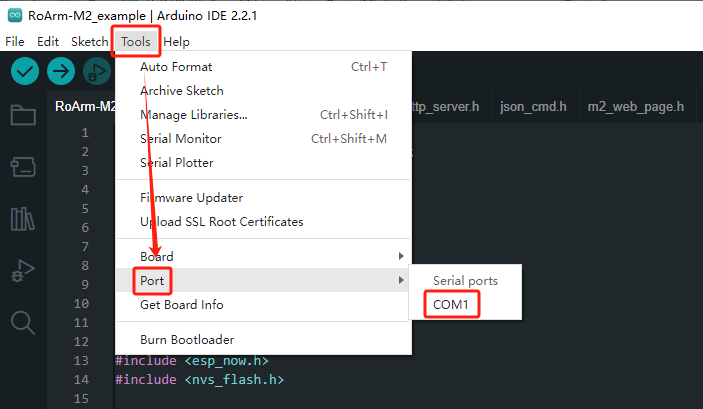
Click "Tools" → "Port". Remember the existing COM port(s) on your computer. Do not select that COM port at this point (here, the COM port shown is COM1; different computers may show different COM ports).
-
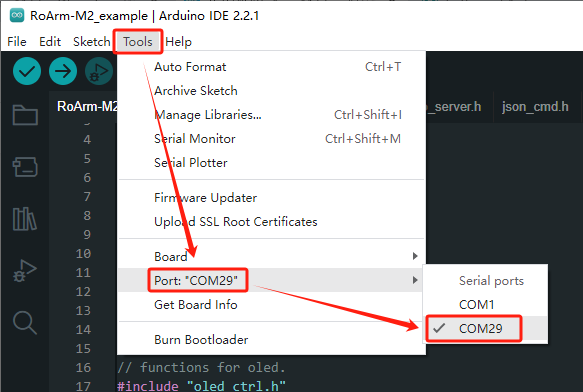
Connect the driver board on the HexArth robot to your computer using a USB cable (note: connect to the left USB interface). Click "Tools" → "Port", then select the newly appeared COM port (here, the newly appeared COM port is COM29).
-
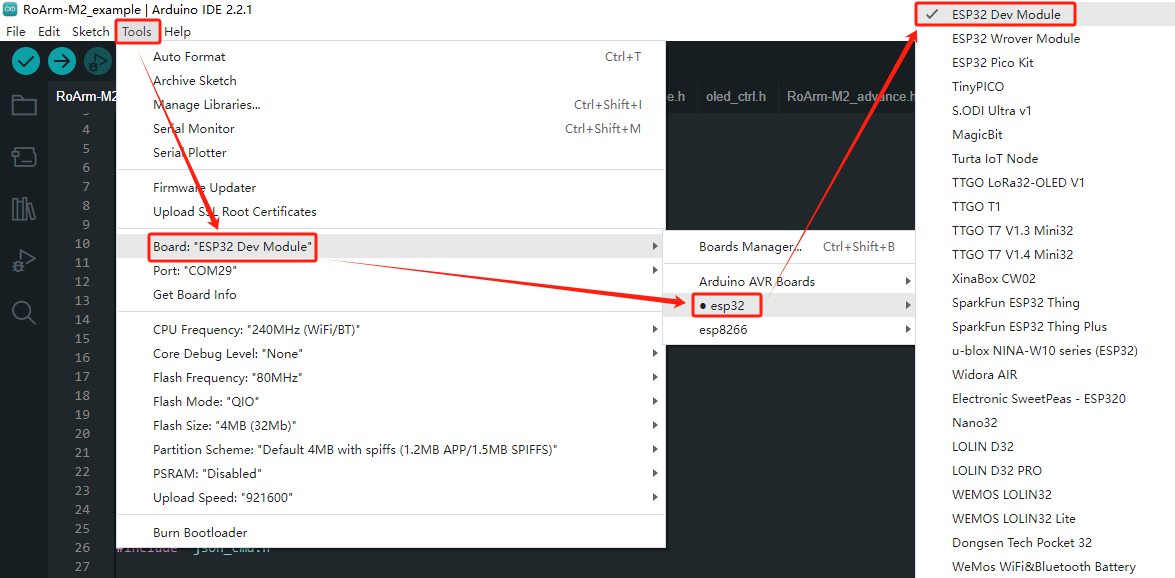
In Arduino IDE, click "Tools" → "Board" → "ESP32" → "ESP32 Dev Module".
-
Click "Tools". Other settings are as follows: (Partition Scheme is best set to Huge APP, PSRAM must be set to Enabled)

-
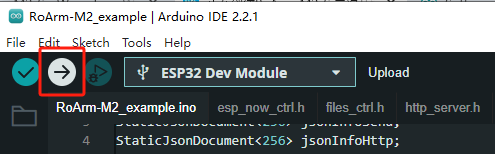
After all settings are complete, click "Upload" to upload the program to the robot's driver board.
 warning
If you encounter issues during upload and need to reinstall or change the Arduino IDE version, you must completely uninstall Arduino IDE. After uninstalling the software, manually delete all contents in the folder
C:\Users\username\AppData\Local\Arduino15(hidden files need to be visible), then download and install again.