Assembly Guide
🎬 Video Assembly Tutorial
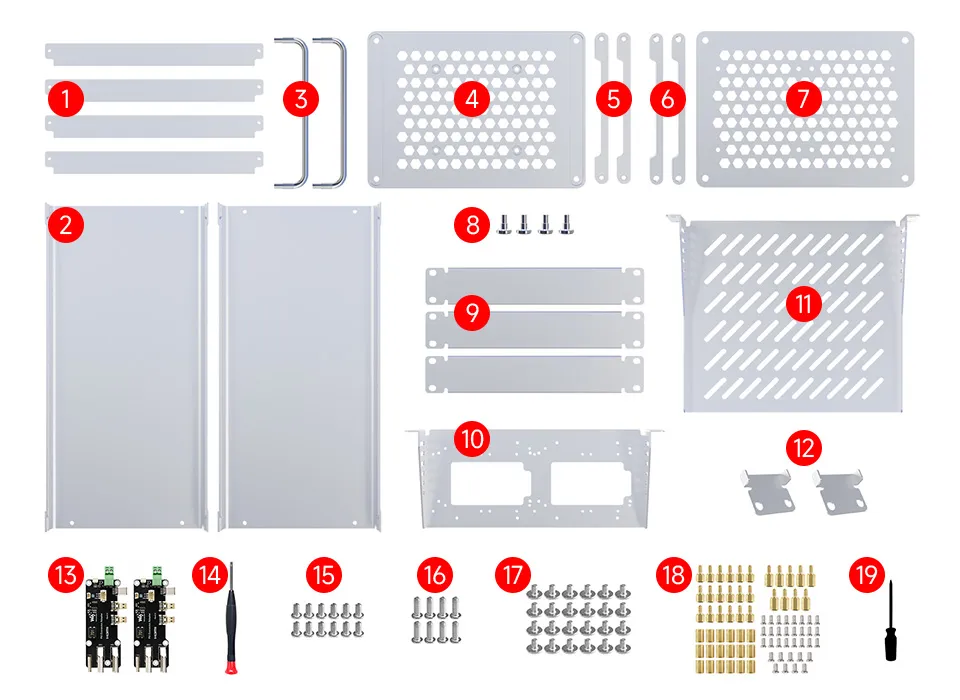
Package Contents
After opening the package, please check that the following accessories are complete.
If any are missing or damaged, please contact the point of purchase for after-sales support.
Rack Assembly Steps
- Do not over-tighten screws to avoid damaging threads or structural parts.
- Perform assembly on a stable desk or floor.
- Before installing devices, ensure the device dimensions are compatible with the rack space.
- If installing a fan, make sure the power connection is correct and that the airflow direction meets cooling requirements.
Step 1: Assemble parts ①, ②
- Screws: M4 × 8mm

Step 2: Assemble parts ③, ④, ⑤
- Screws: M4 × 8mm

Step 3: Assemble the Step 2 assembly with the Step 1 assembly
- Screws: M4 × 12mm
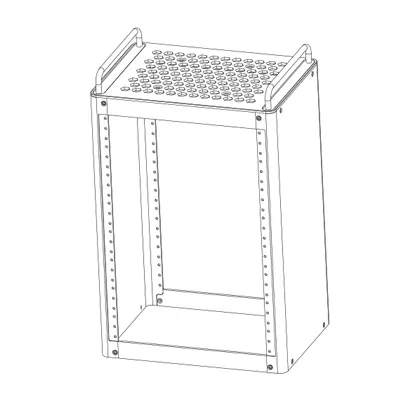
Step 4: Assemble parts ⑥, ⑦, ⑧ (Part ⑧ comes with M8 threads)

Step 5: Assemble the Step 4 assembly with the Step 3 assembly
- Screws: M4 × 12mm
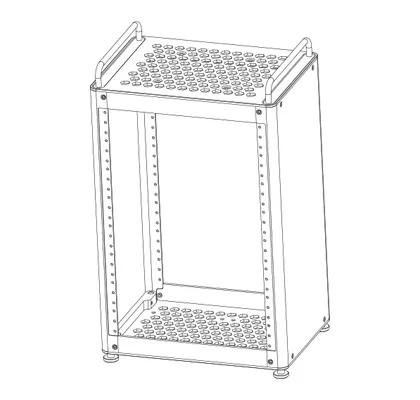
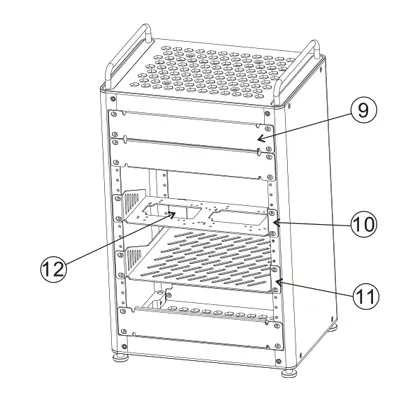
Step 6: Assemble parts ⑨, ⑩, ⑪, ⑫
- Screws: M4 × 6mm, head ∅10
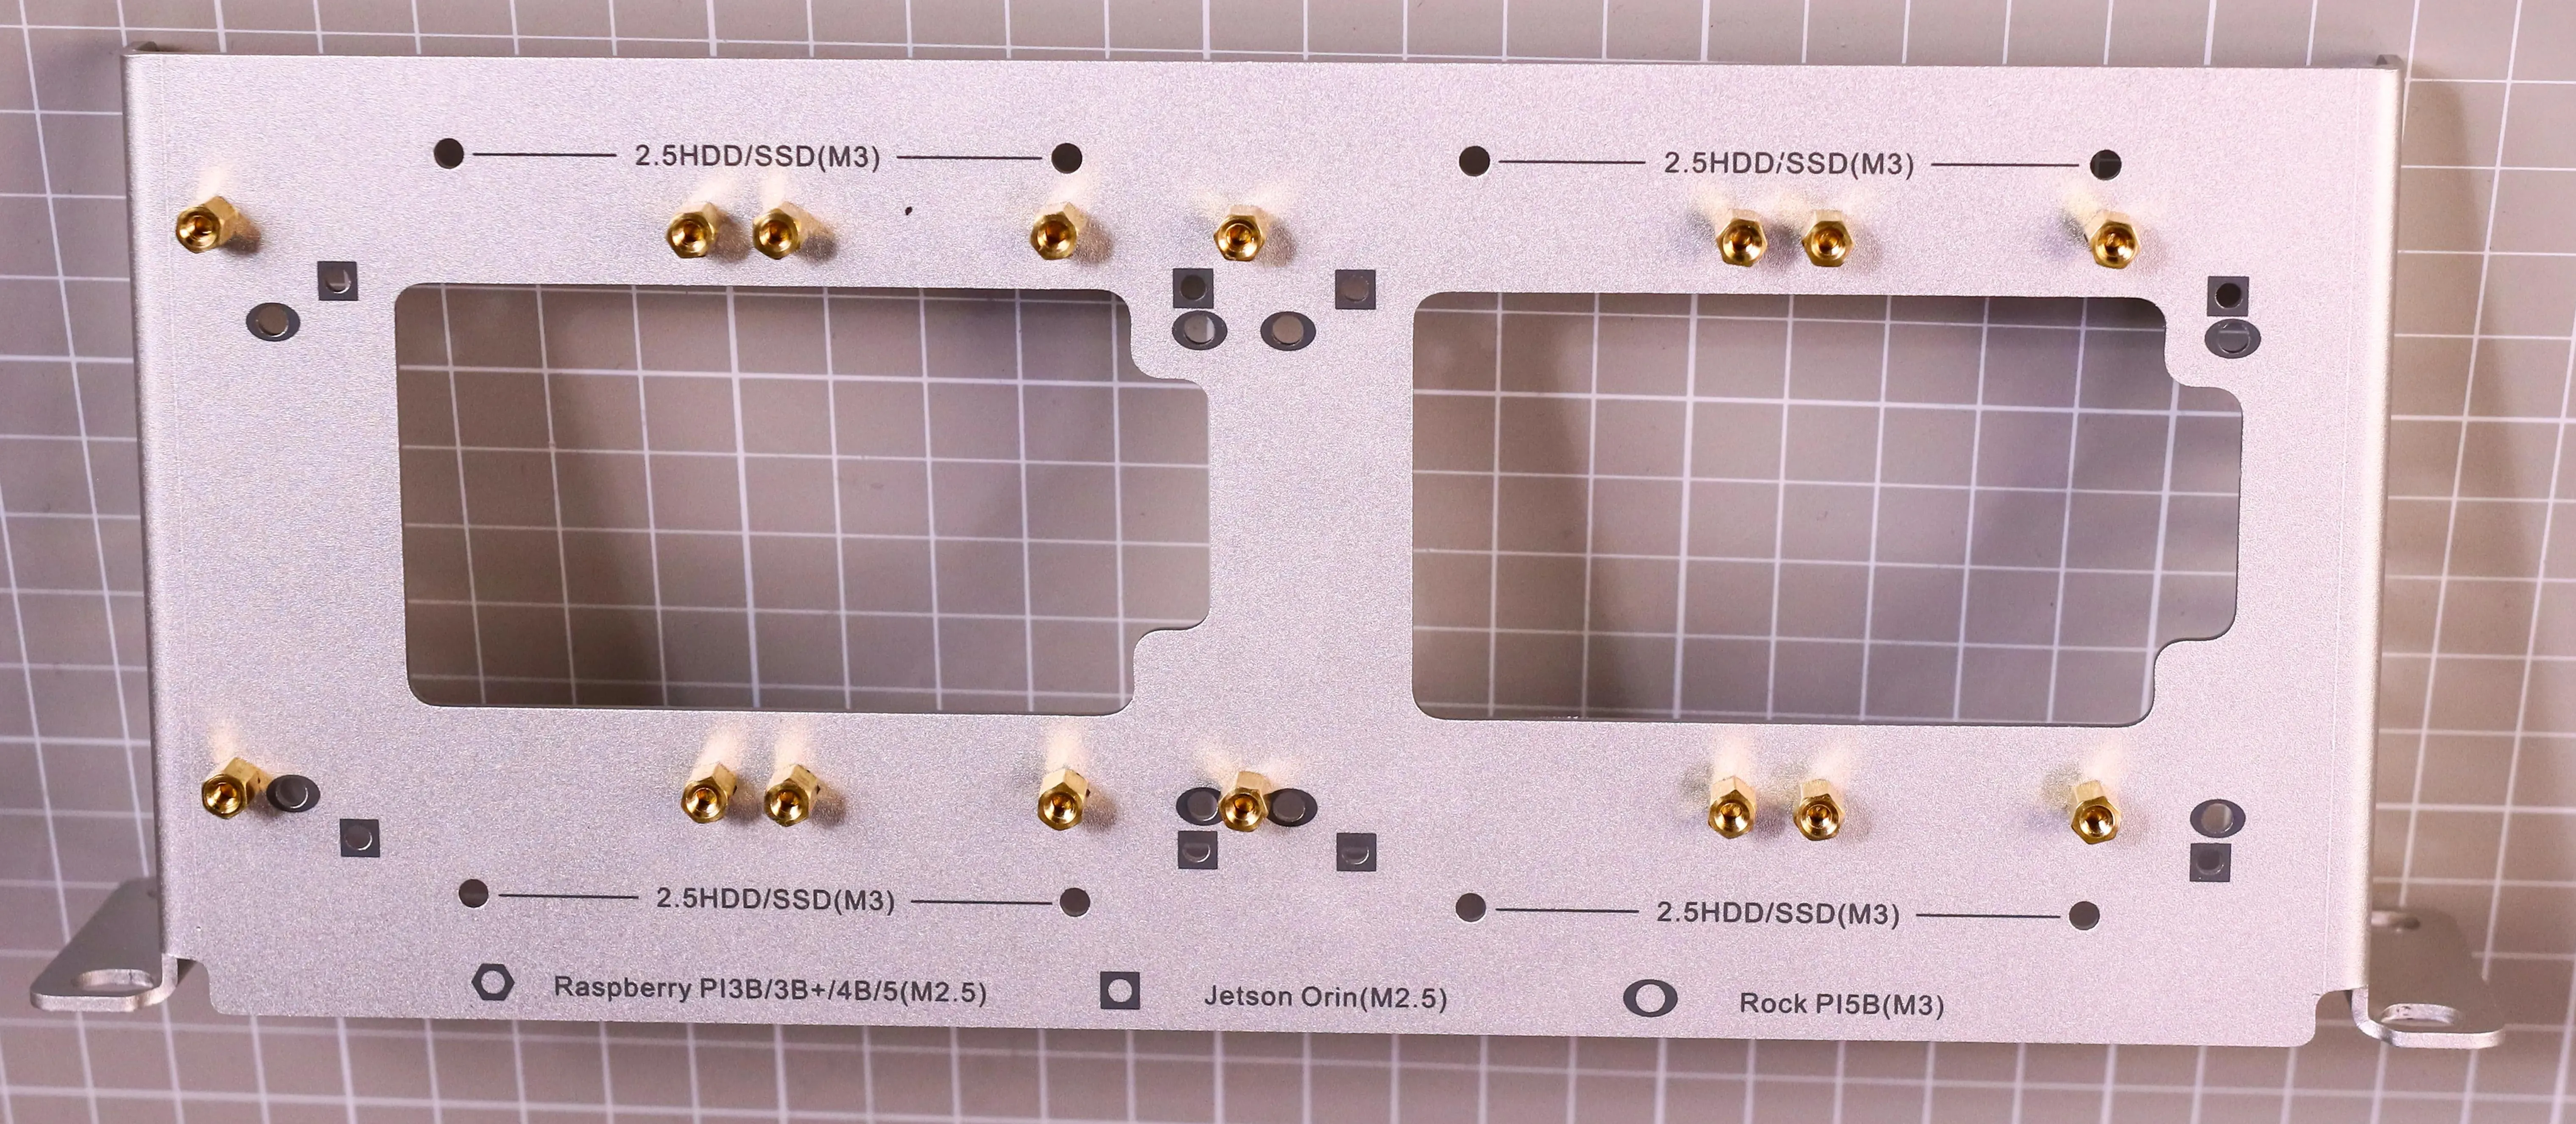
Function Board Tray Hole Positions
The bottom of the tray features three distinct symbols—a hexagon symbol, a square symbol, and an oval symbol.
These symbols correspond to different types of development boards. When installing, simply align the board with the holes matching its specific locating pattern.
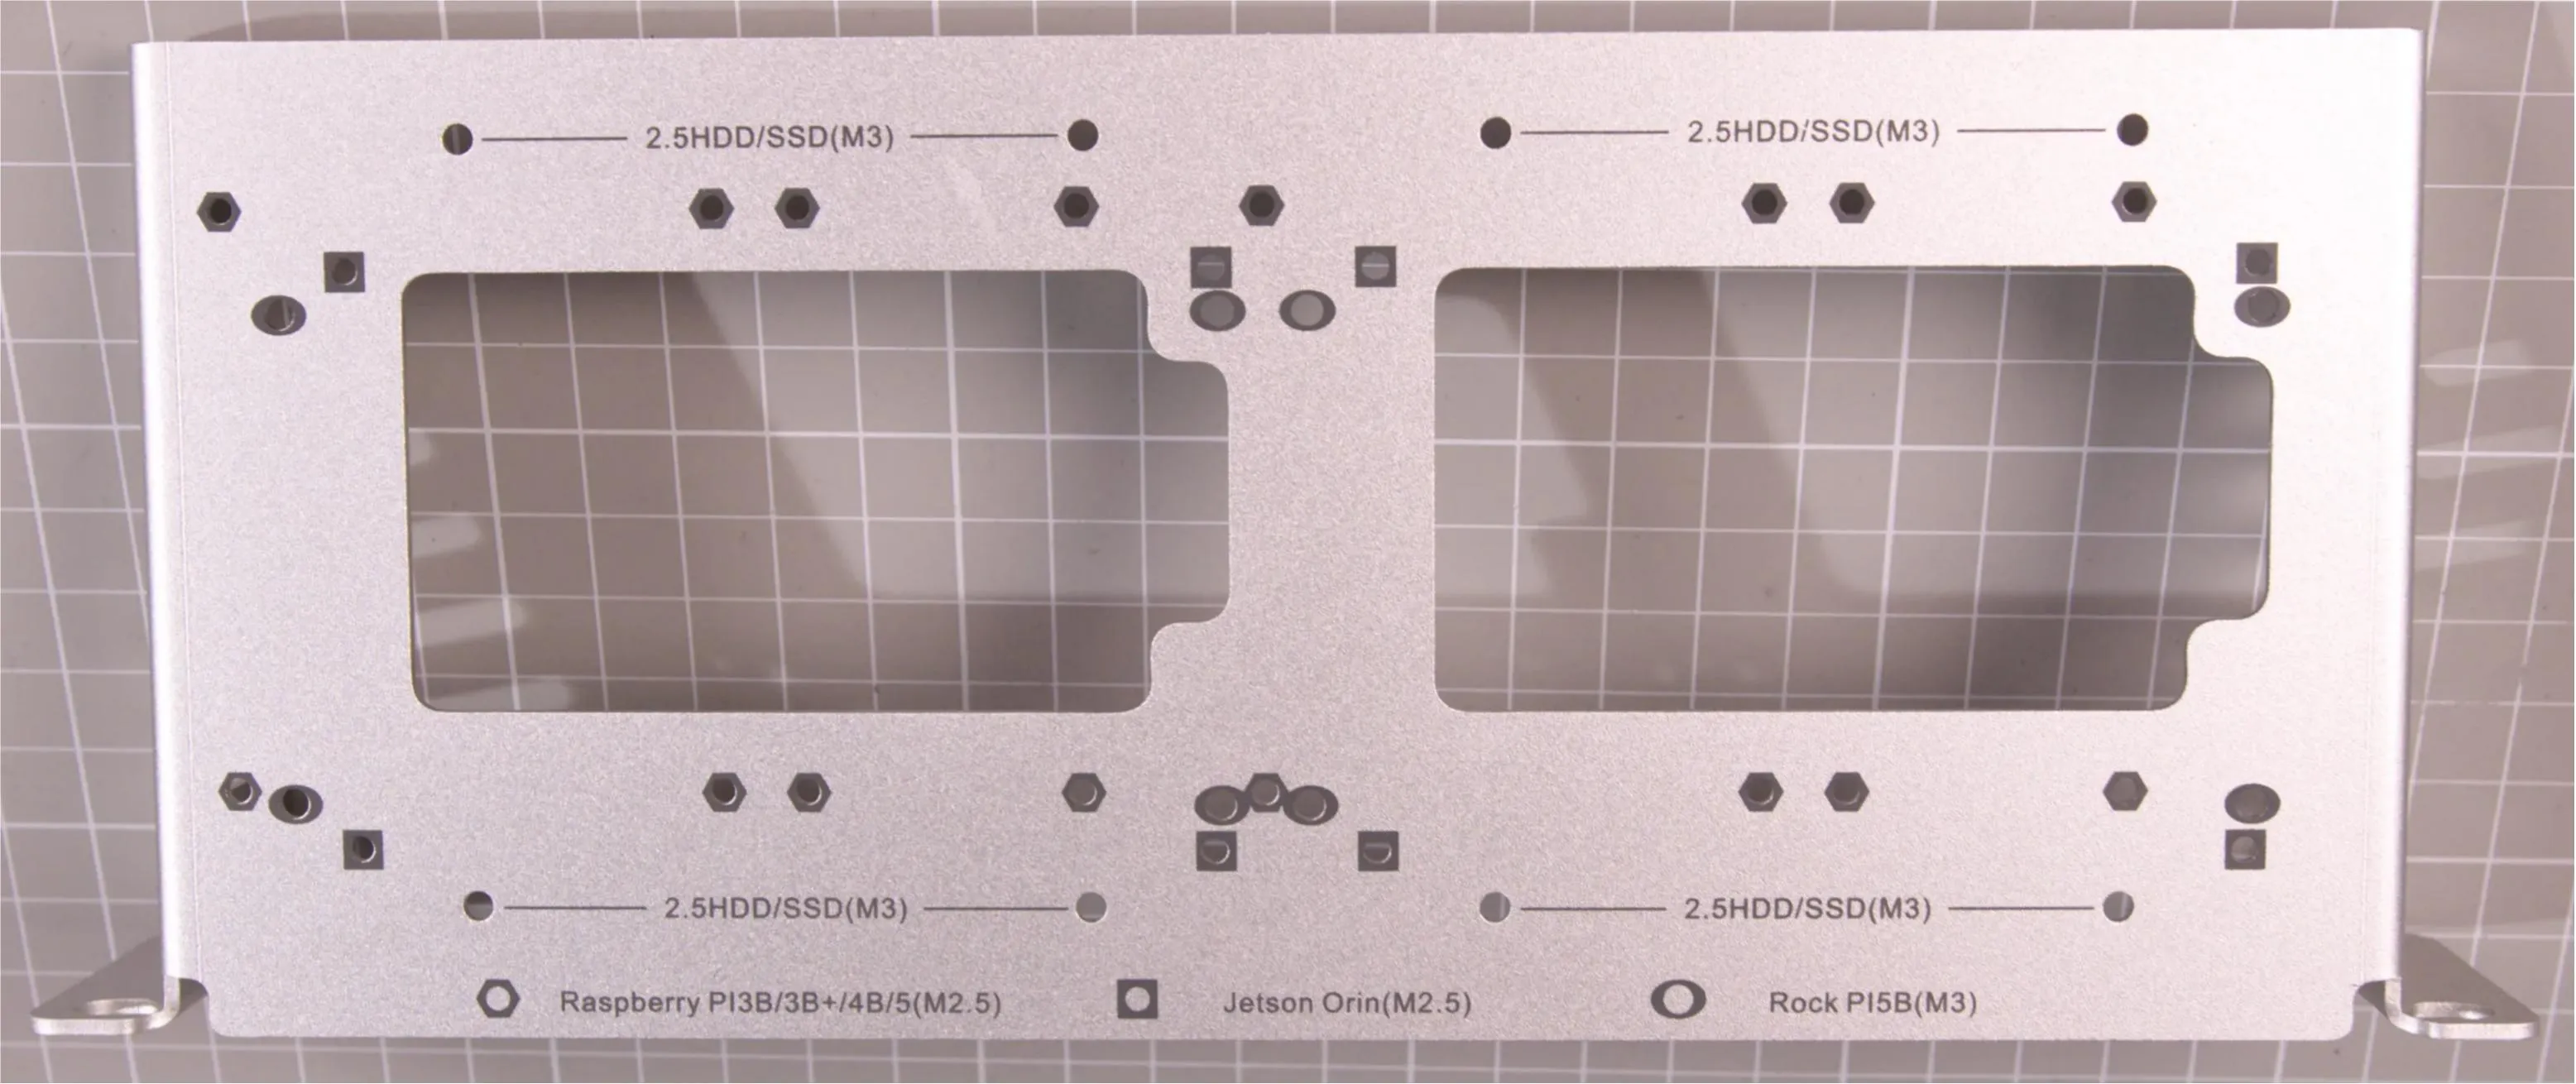
| Icon | Device Model | Hole Description |
|---|---|---|
| Raspberry Pi 3B / 3B+ / 4B / 5 | M2.5 Mounting Holes | |
| Jetson Orin | M2.5 Mounting Holes | |
| Rock Pi 5B | M3 Mounting Holes |
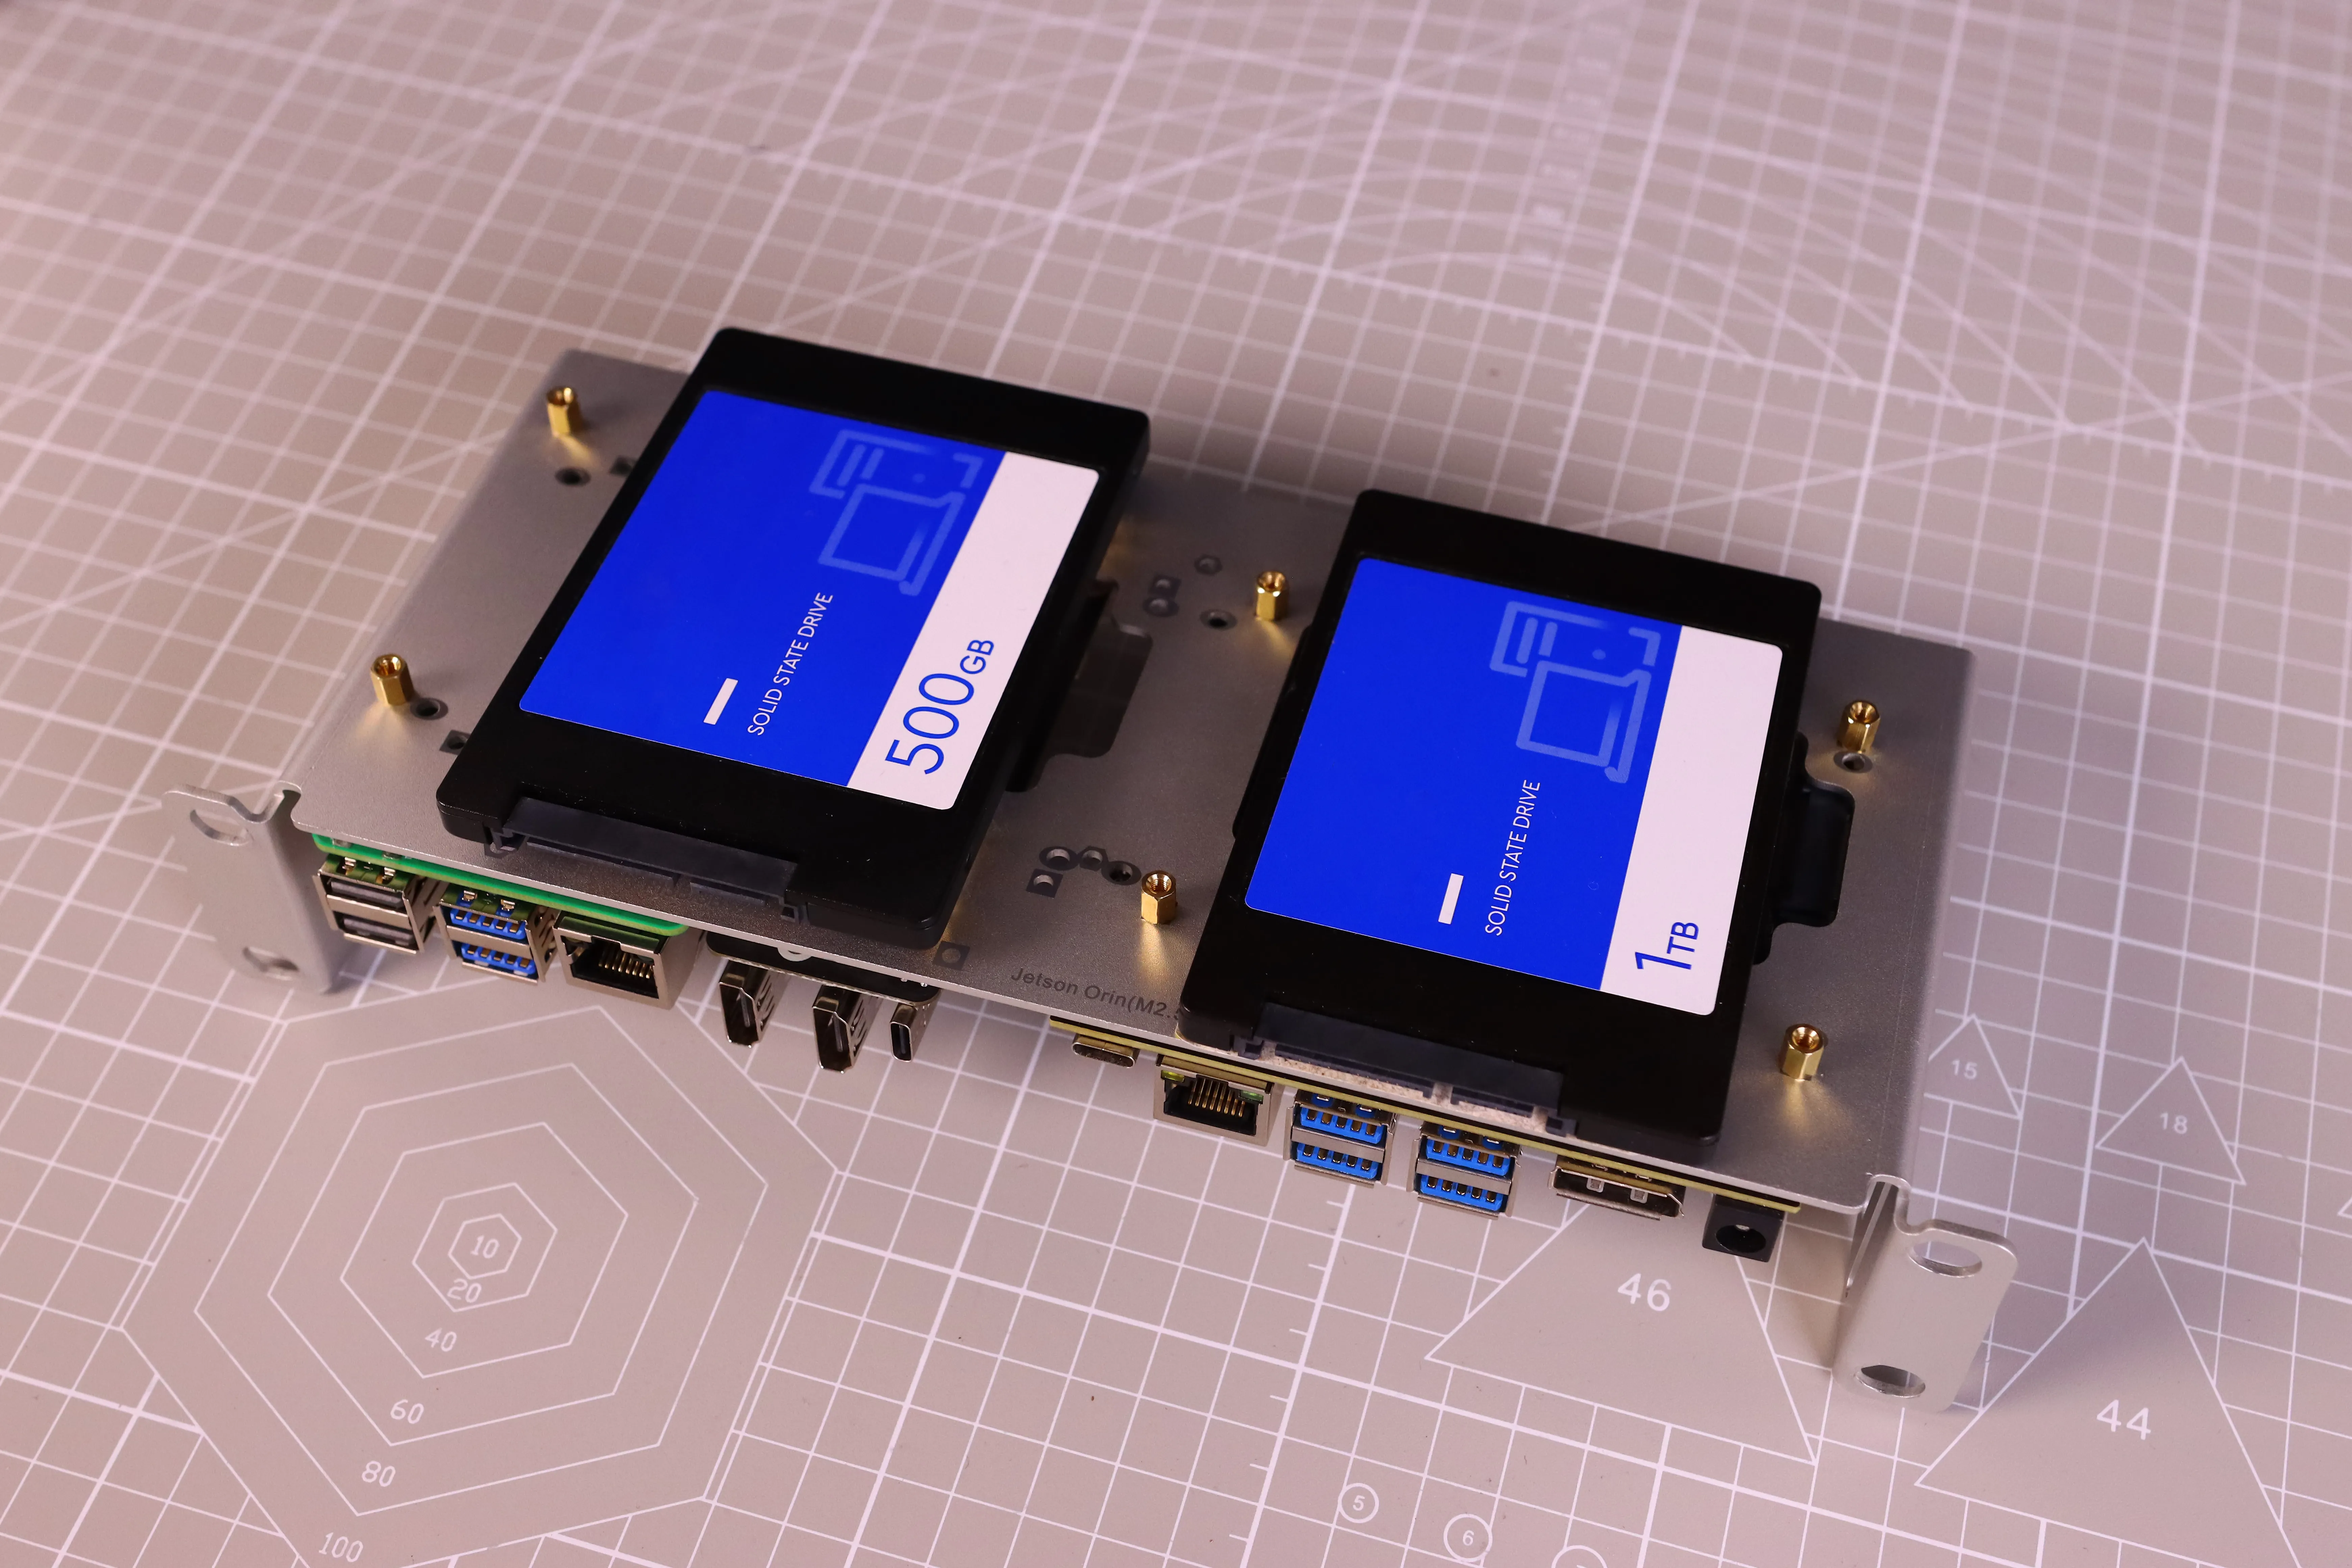
Additionally, this tray can accommodate two 2.5inch hard drives, thereby expanding storage capacity. This feature enhances the product's versatility, allowing users to customize and scale storage according to their needs.
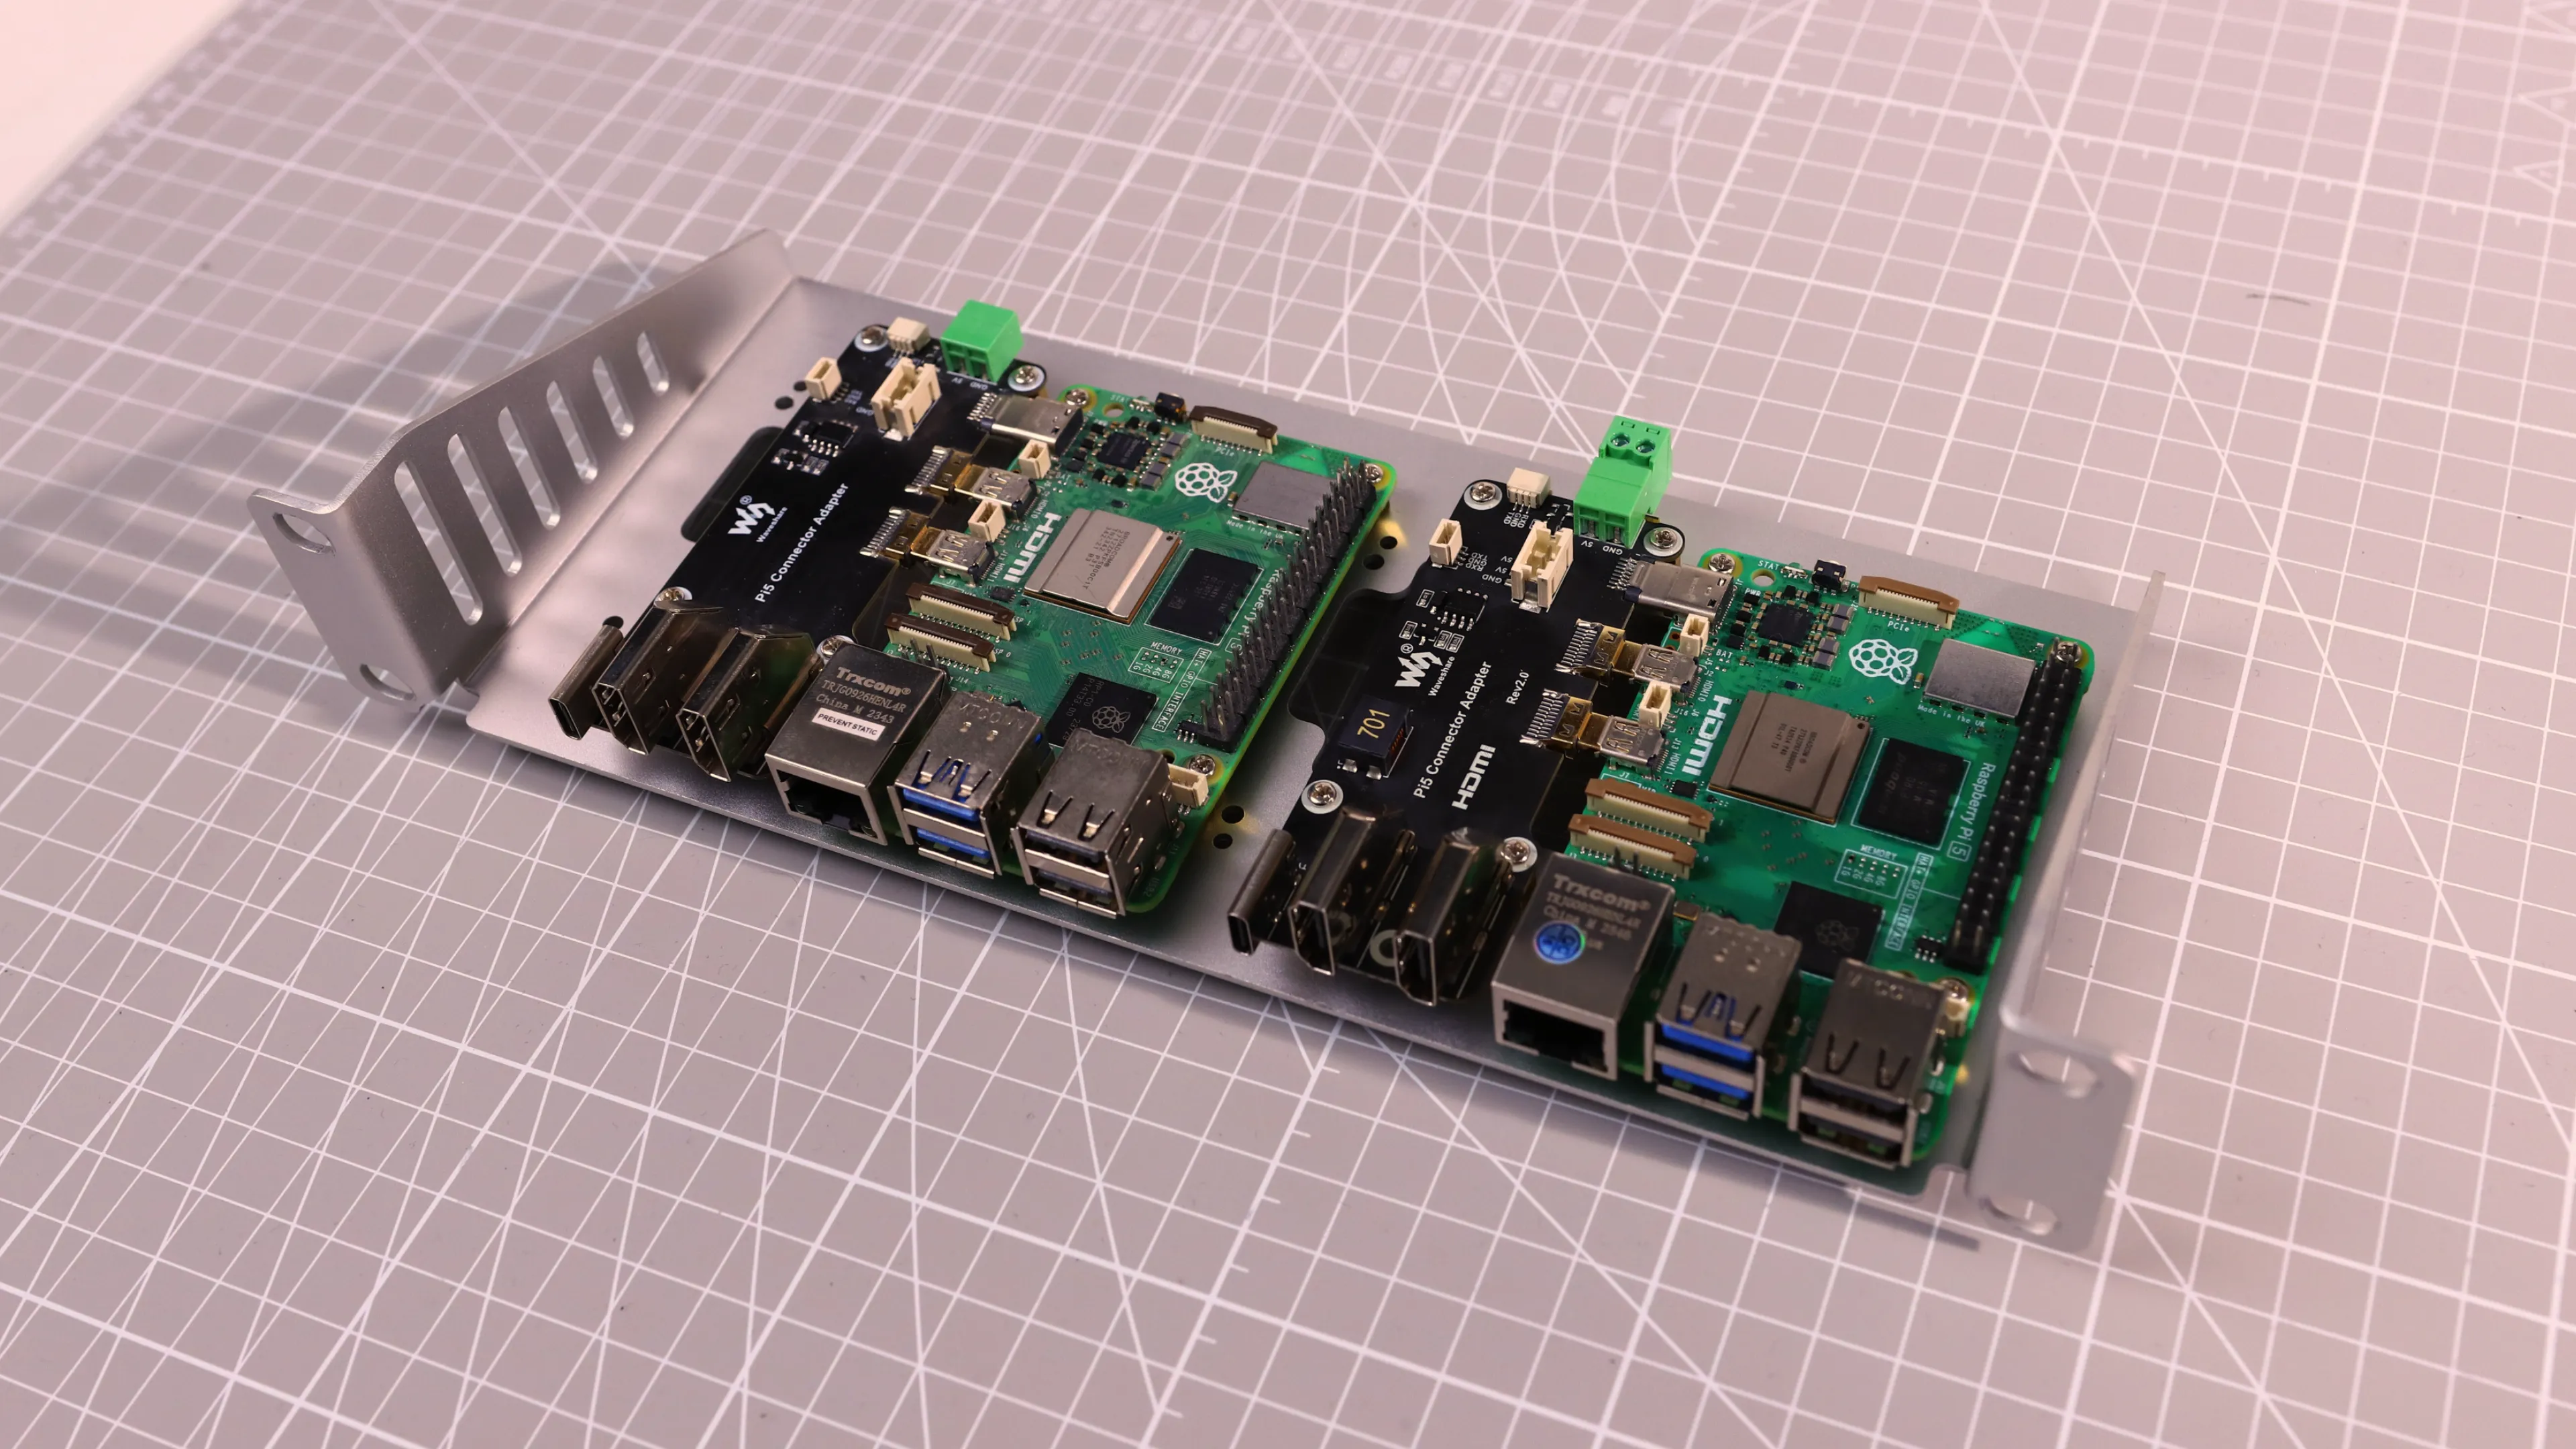
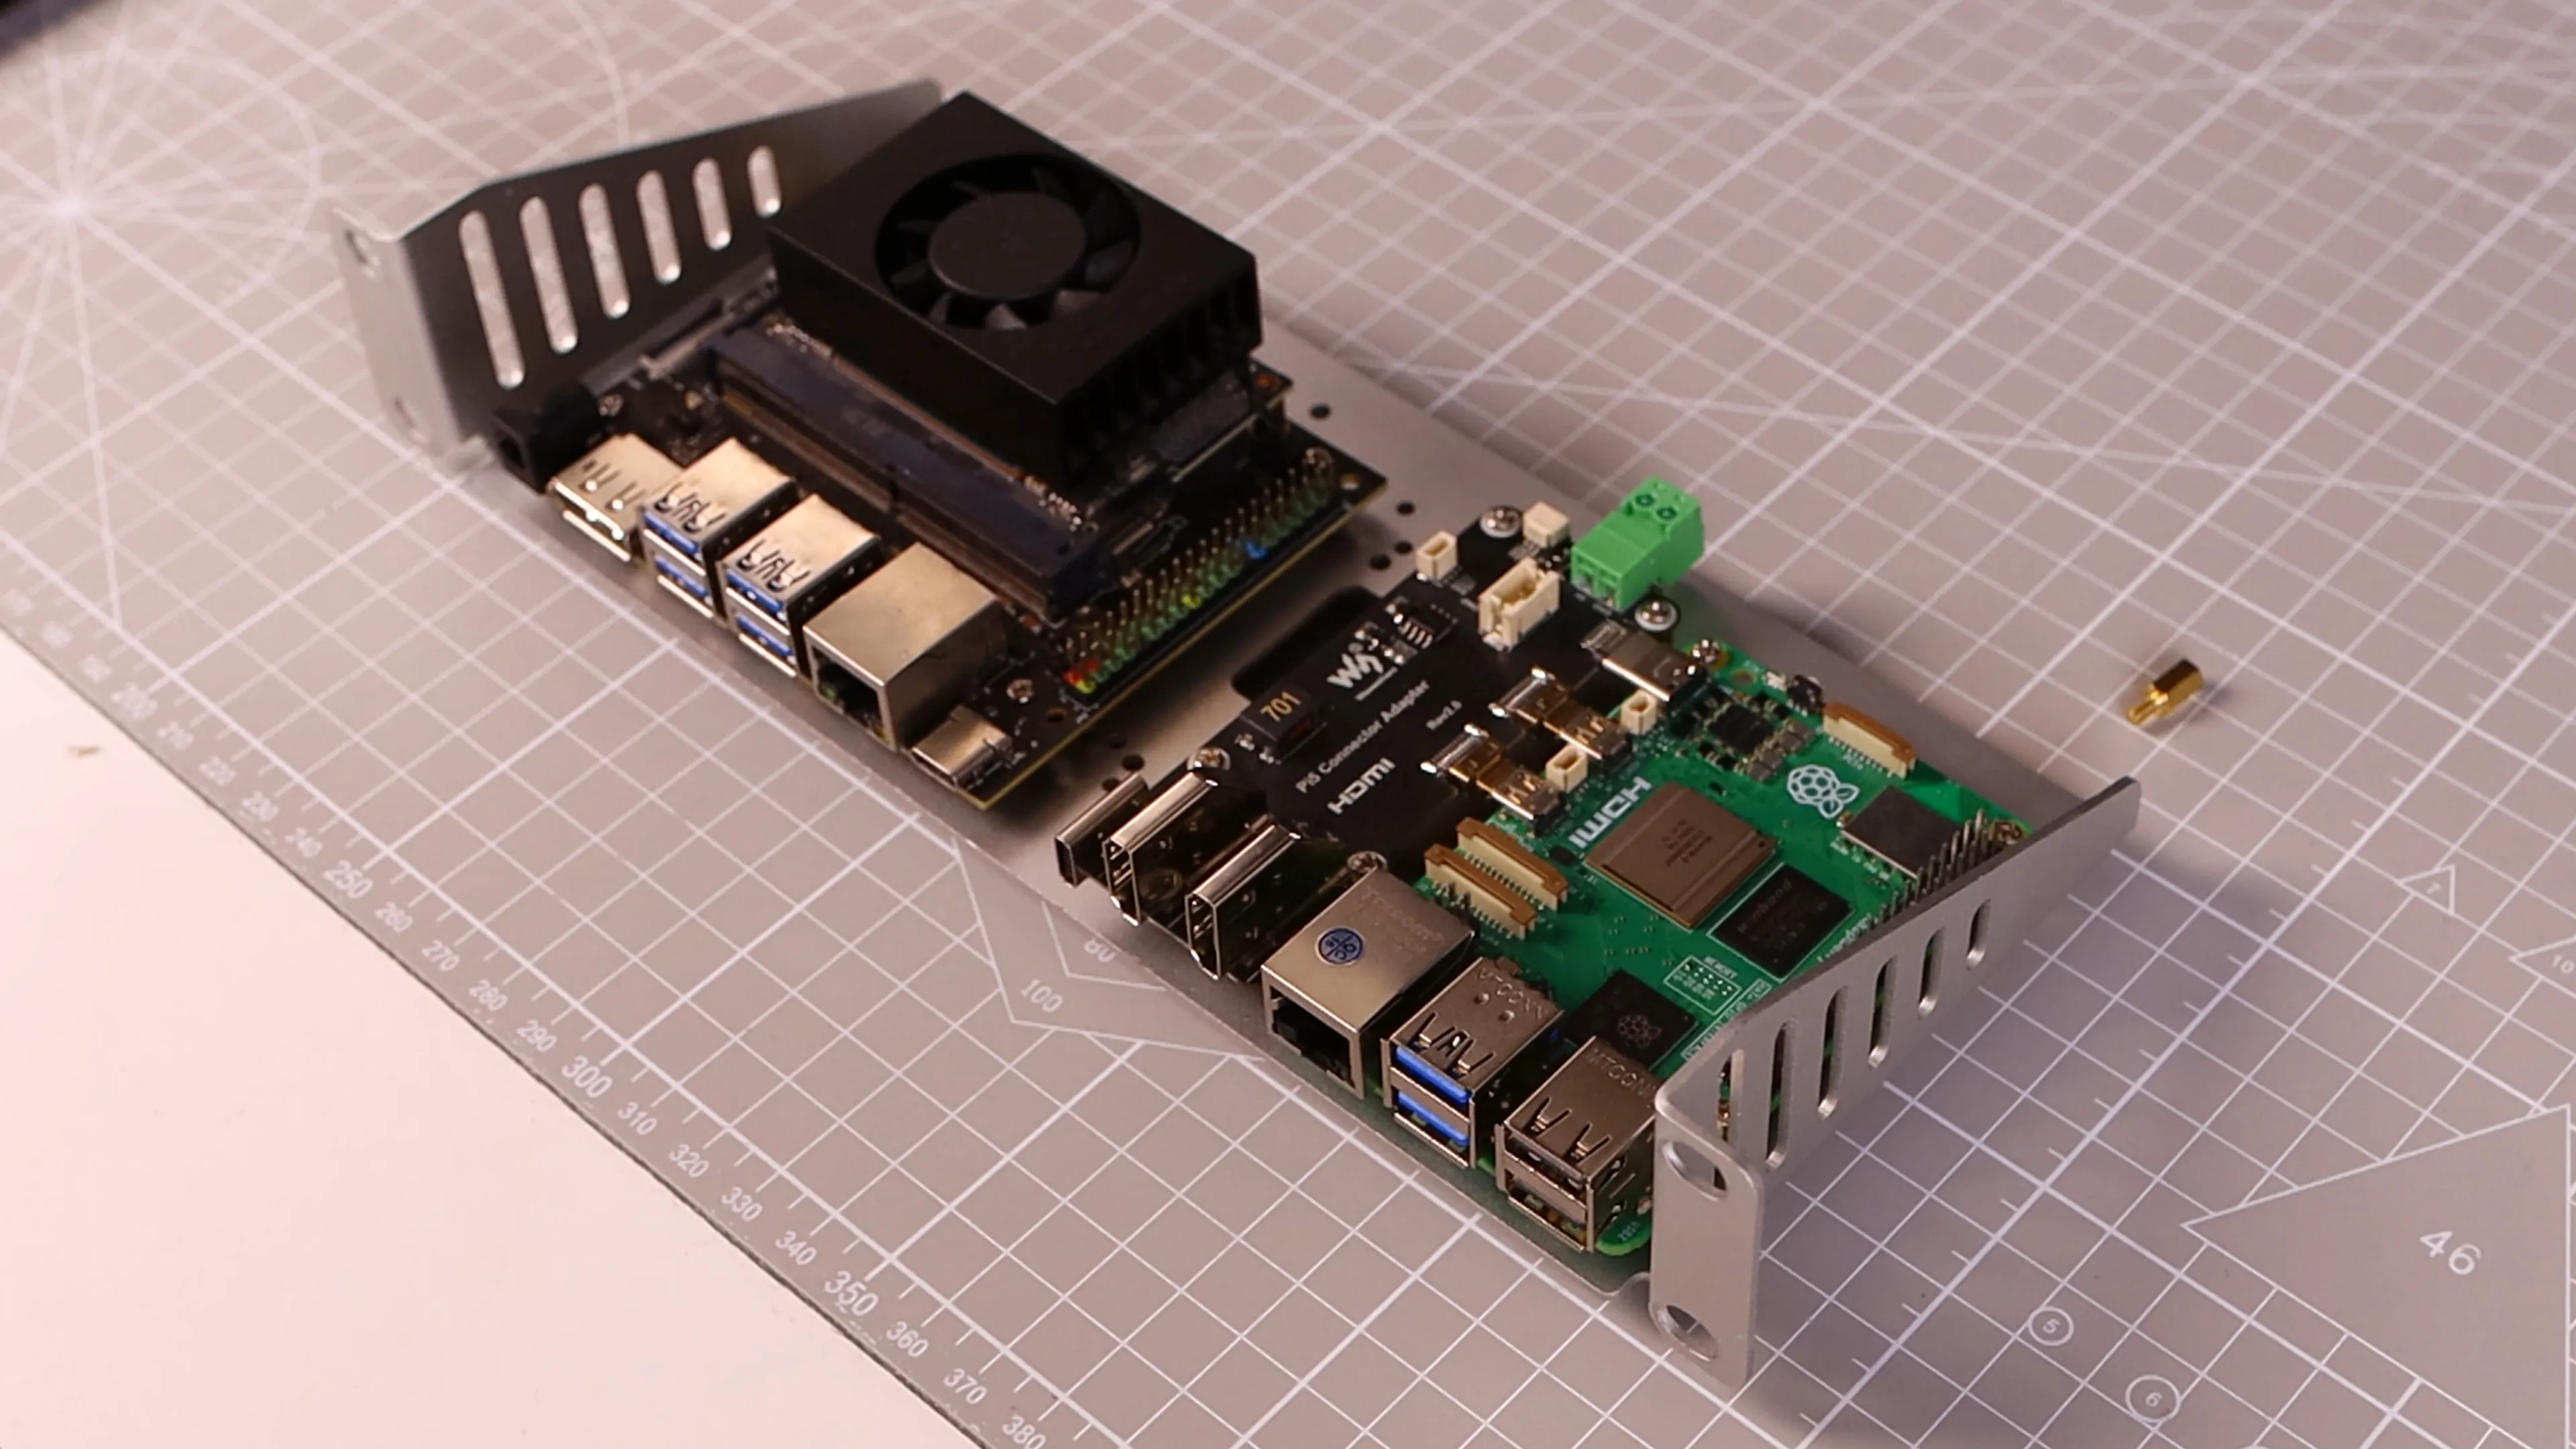
Raspberry Pi Installation Reference (Using Raspberry Pi 5 as an Example)
HomeRack SBC Shelf 1U Screw Pack includes:
| # | Type | Specification | Qty |
|---|---|---|---|
| ① | Hex brass standoff (male-female) | M2.5, stud 5 mm + internal thread 5 mm | 18 |
| ② | Hex brass standoff (male-female) | M2.5, stud 7.5 mm + internal thread 5 mm | 9 |
| ③ | Hex brass standoff (female-female) | M2.5, length 6 mm | 18 |
| ④ | Round head screw | M2.5 × 5 mm | 18 |
| ⑤ | Round head screw | M3 × 5 mm | 9 |
Step 1
Use 4 pcs of ① and ③ to secure onto the function board, extending the four mounting nuts for the Raspberry Pi board position;
Use 4 pcs of ② and ③ to secure onto the function board, extending the four mounting nuts for the adapter board position.
Step 2
Combine the "Raspberry Pi Adapter Board" and the "Raspberry Pi 5 Board", then place them flat onto the mounting nuts from Step 1 and secure them using ④.
Notes
- Can install 2 sets of Raspberry Pi 4/5 boards simultaneously.
- Can install 1 set of Nvidia Jetson series board and 1 set of Raspberry Pi 4/5 board simultaneously (Jetson on the left, Raspberry Pi on the right), as shown below;
- The back side can be used to install a 2.5inch hard drive using ⑤. Before installing the hard drive, ensure there is no interference from existing SBC board standoffs, as shown below.