Working with Raspberry Pi
Hardware Connection
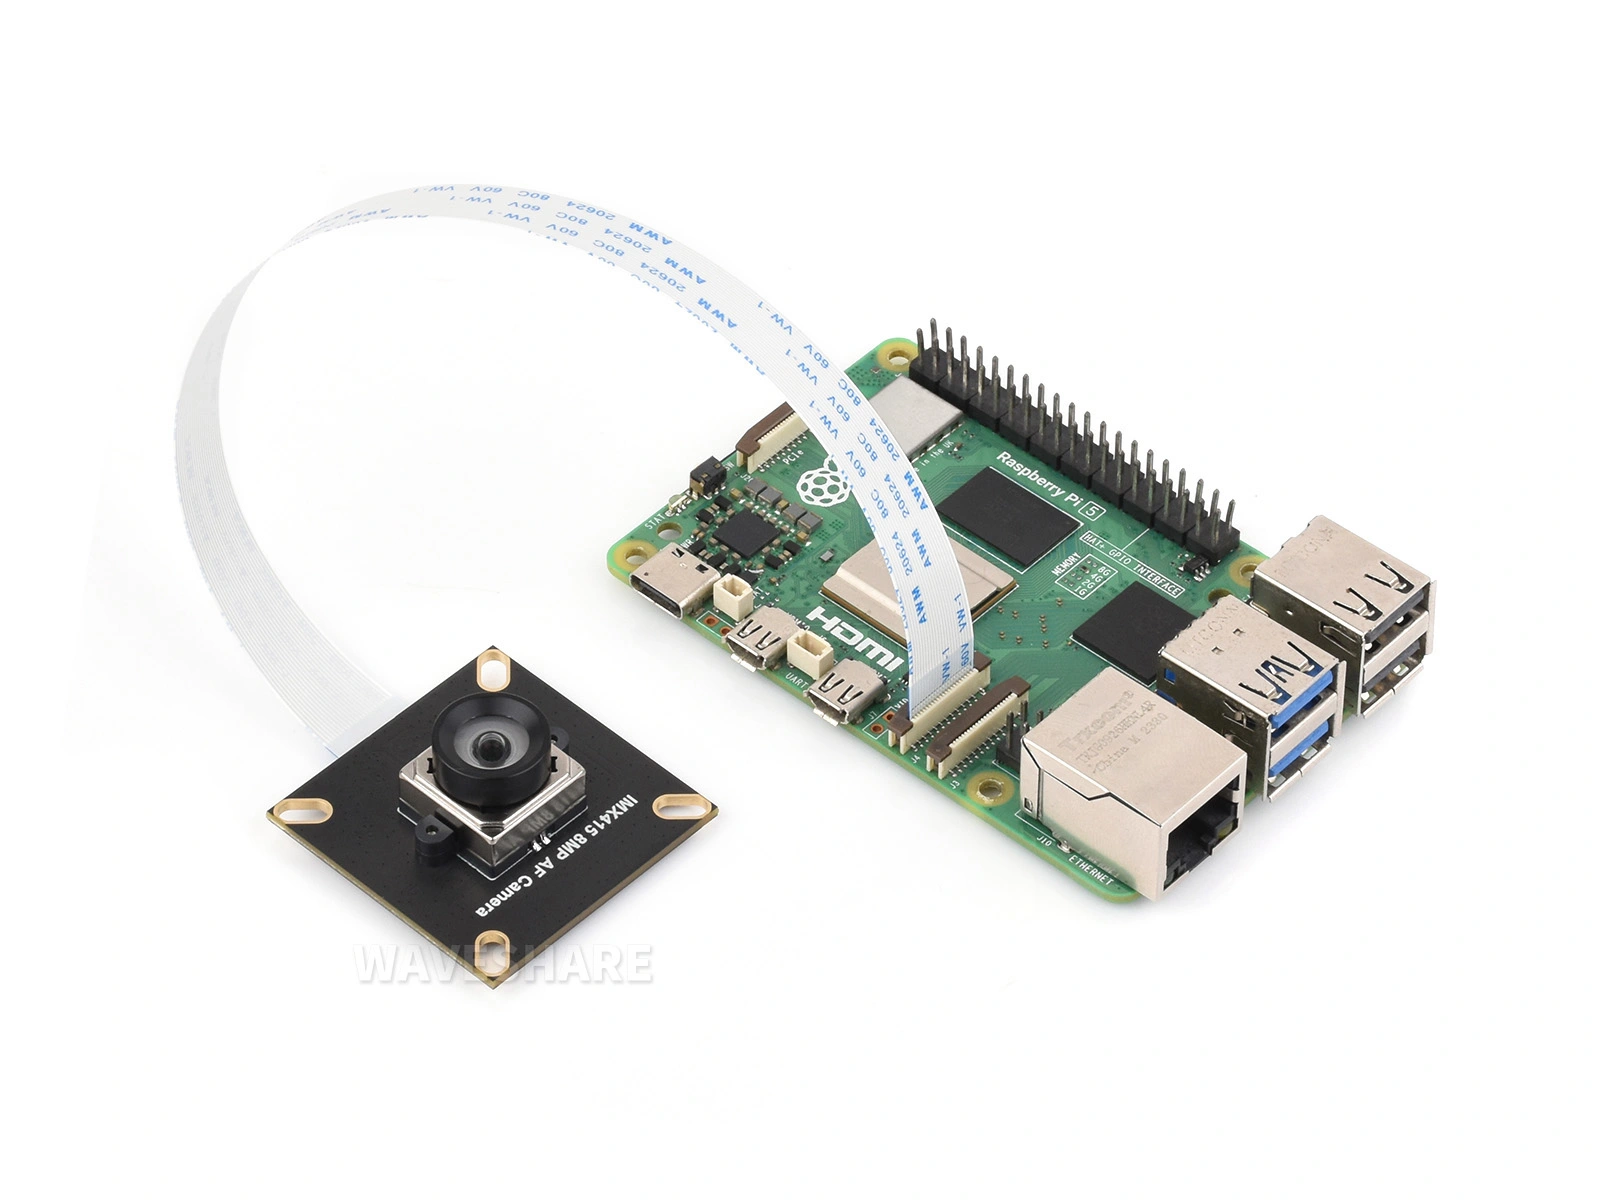
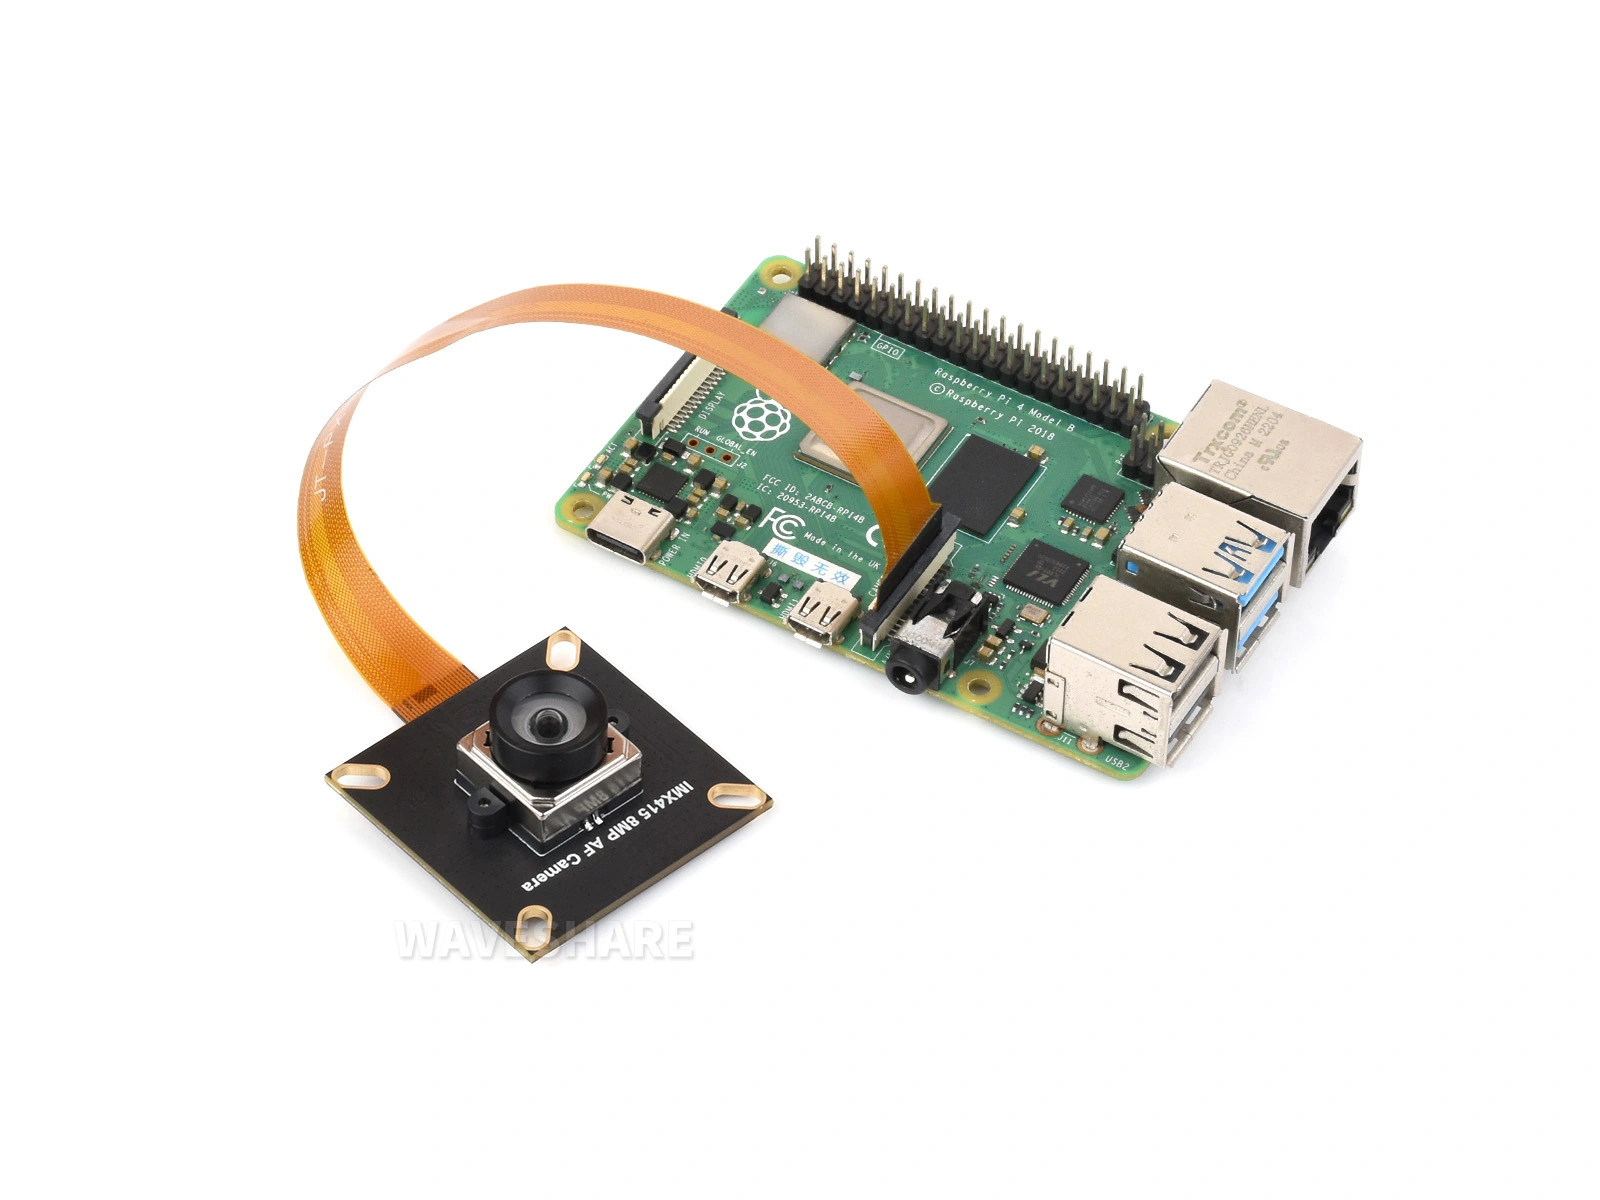
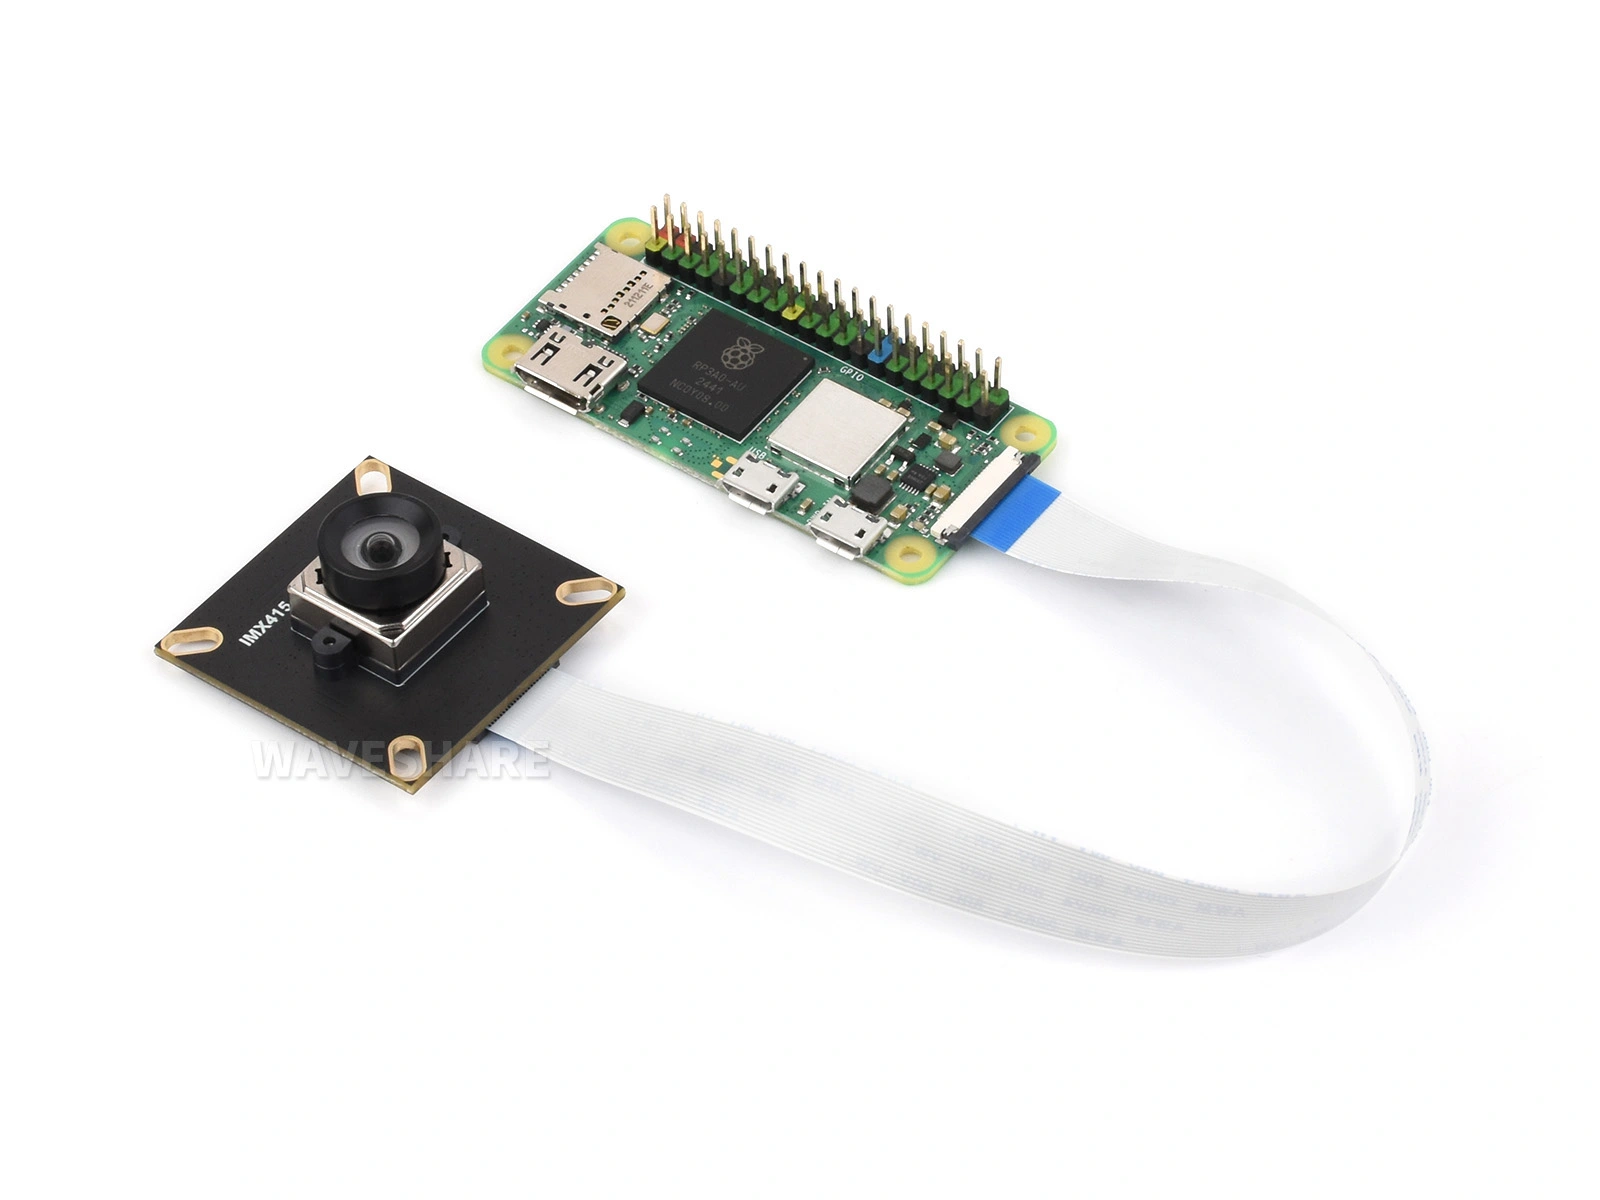
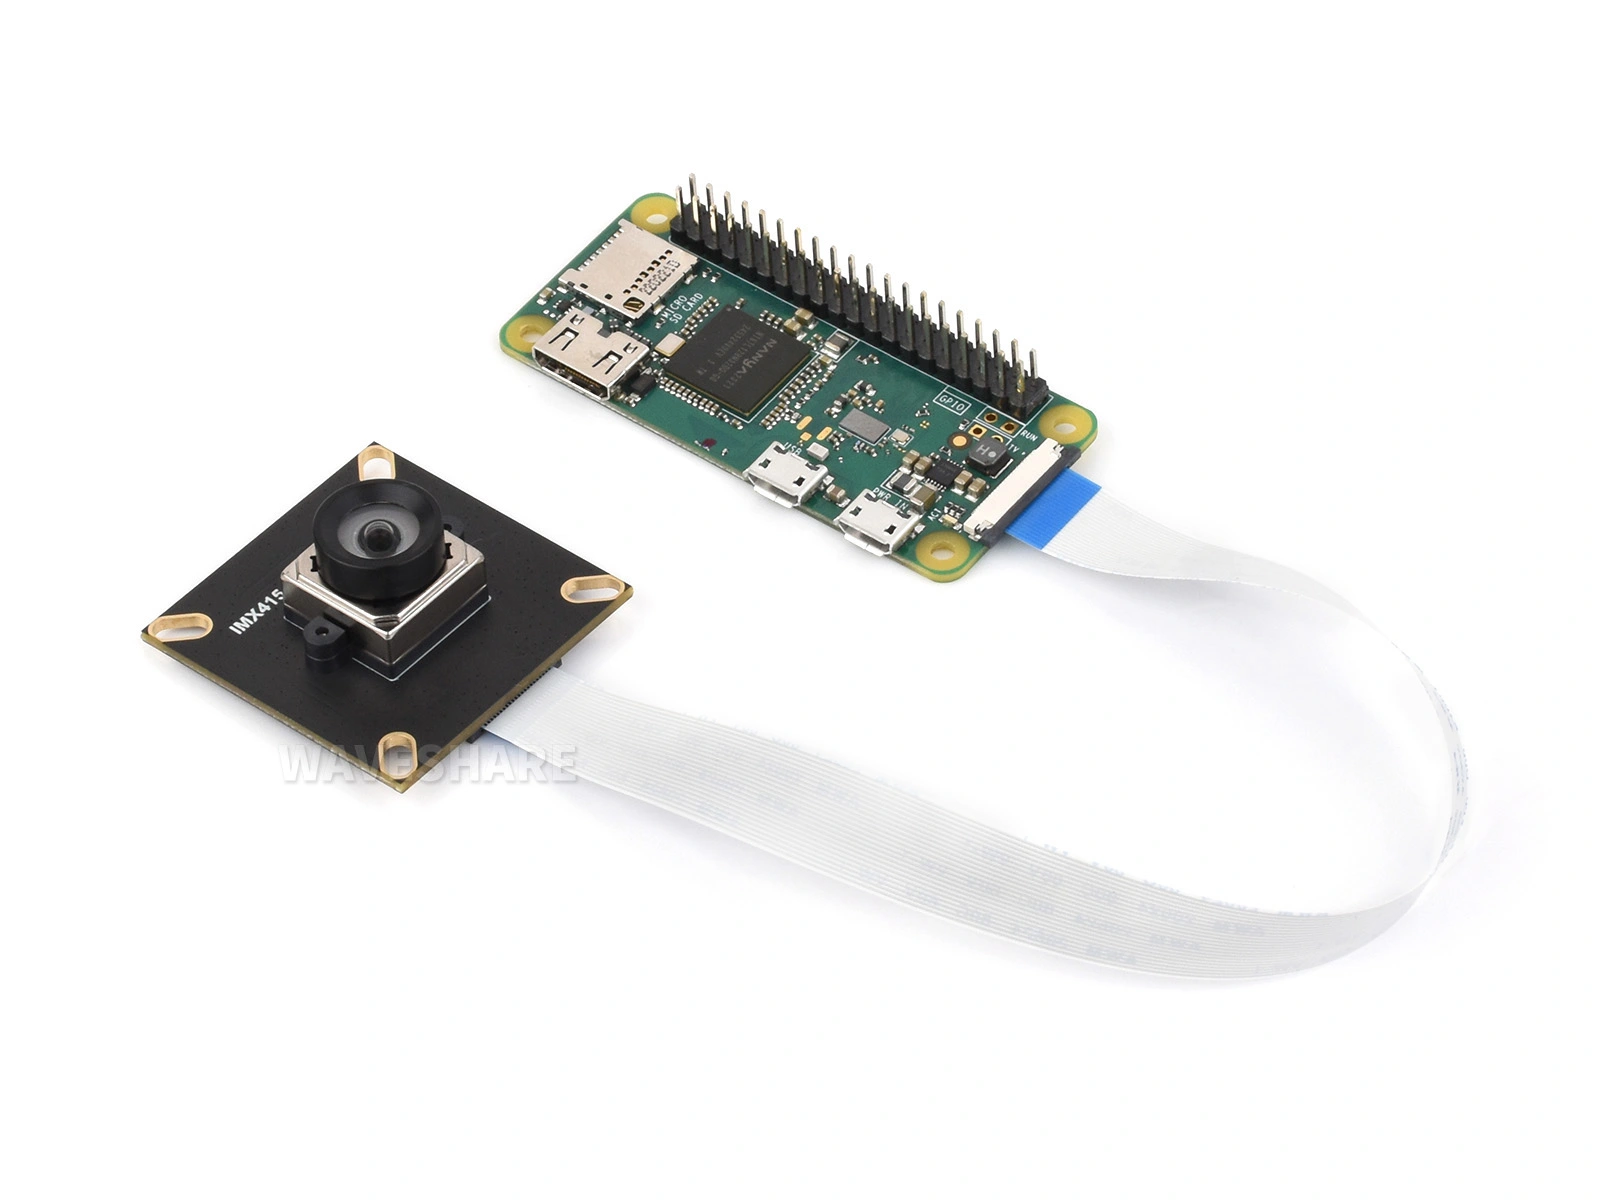
Software Environment Configuration and Testing
Flash the Official Raspberry Pi OS Image
- First, flash the latest official Raspberry Pi OS image to a TF card.
- After flashing, start the Raspberry Pi and complete the basic initial configuration.
Download the Driver and Copy it to the Raspberry Pi
wget https://files.waveshare.com/wiki/IMX415-8MP-AF-Camera/IMX415-8MP-AF-Camera.zip
If using only one camera, connect it to the CAM1 port.
Extract the Package and Enter the Directory
unzip IMX415-8MP-AF-Camera.zip
cd IMX415-8MP-AF-Camera
Add Execute Permissions to the Installation Script and Run It
chmod +x install.sh
./install.sh
Reboot the Raspberry Pi After Installation
sudo reboot
2-lane / 4-lane Mode Description
- By default, 2-lane mode is used, and the IMX415 preview frame rate is 15fps.
- Raspberry Pi 5 supports 4-lane mode, which can increase the preview frame rate to 30fps. To enable it, add the
4laneparameter to the dtoverlay line in/boot/firmware/config.txt:
dtoverlay=imx415,4lane,clk-37125,addr=0x1a,vcm,aw86017
- After saving the change, reboot the Raspberry Pi for it to take effect.
Check if the Camera is Successfully Detected
- After reboot, run:
rpicam-hello --list-cameras
- If the camera is successfully detected, you should see output similar to:
Available cameras
-----------------
0 : imx415 [...]
Preview and Autofocus Test
Raspberry Pi 5
- Run:
rpicam-hello --autofocus-mode continuous --qt-preview -t 0 --info-text "focus:%focus, lp:%lp, afstate:%afstate" --tuning-file ~/imx415_af.json
- Move the object at different distances and check if autofocus works properly.
Raspberry Pi 4 and Other Models
- Run:
rpicam-hello --autofocus-mode continuous --qt-preview -t 0 --info-text "focus:%focus, lp:%lp, afstate:%afstate" --tuning-file ~/imx415_af_vc4.json
-
Move the object at different distances and check if autofocus works properly.
-
For more information about rpicam commands, please refer to Raspberry Pi rpicam Tool Documentation.