AUDIO
This section describes how to use the USB audio function on the Raspberry Pi, laying the foundation for subsequent project development.
AUDIO Operations
Check Audio Devices
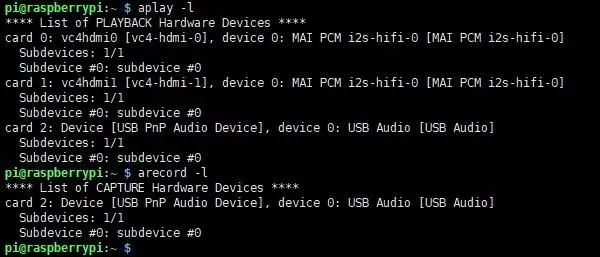
- Check currently recognized audio playback devices
aplay -l
- Check currently recognized audio recording devices
arecord -l
Audio Recording
- Record a 2-second audio clip and save it as
test.wavin the current directory (using the corresponding device; here the recognized audio device is hardware sound card number 2)sudo arecord -D hw:2,0 -f S32_LE -r 16000 -c 2 test.wav - After recording finishes, view the generated file
ls
Audio Playback
- Play the audio file
test.wav(using the corresponding device; here the recognized audio device is hardware sound card number 2). Make sure the file exists in the current directory; if not, generate it by following the Audio Recording step abovesudo aplay -Dhw:2 test.wav - The speaker or headphones will then play the audio
Audio Input/Output Test
- Loopback test (the sound collected by the microphone will be heard through the headphones or speaker)
- Note: Keep the speaker away from the microphone to avoid feedback howling.
sudo arecord -f cd -Dhw:2 | aplay -Dhw:2
arecord -f cd Dhw:2: Use hardware sound card number 2 for recording, with CD standard formataplay -Dhw:2: Output the audio to hardware sound card number 2