RS485/RS232
This section introduces how to use the RS485/RS232 interface functions on the Raspberry Pi, laying the foundation for subsequent project development.
Enable Interface Configuration
-
Enable the RS485/RS232 interface (disabled by default)
-
Edit the config.txt file
sudo nano /boot/firmware/config.txt -
To use RS485/RS232, add the following lines (these correspond to the 4 communication interfaces):
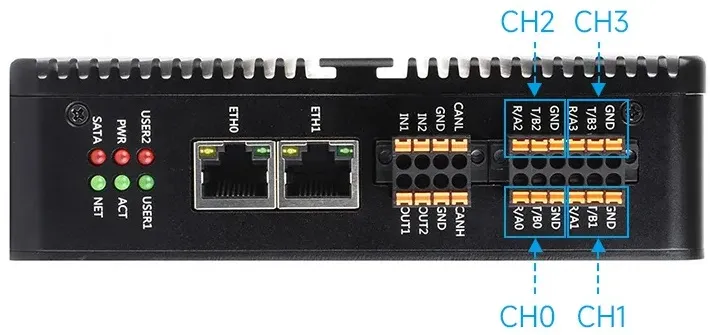 # Corresponding to CH0dtoverlay=uart2-pi5# Corresponding to CH1dtoverlay=uart3-pi5# Corresponding to CH2dtoverlay=uart4-pi5# Corresponding to CH3dtoverlay=uart0-pi5
 -
Enable all 4 RS485/RS232 channels simultaneously
# Enable CH0 ~ CH3 simultaneously, a total of 4 RS485/RS232 channels on the boarddtoverlay=uart2-pi5dtoverlay=uart3-pi5dtoverlay=uart4-pi5dtoverlay=uart0-pi5 -
After modification, reboot the Raspberry Pi to enable normal program-driven operation of RS485/RS232
sudo reboot