NVMe
This section introduces how to use the NVMe hard drive function on the Raspberry Pi, laying the foundation for subsequent project development.
Note: The PCIe interface must be enabled before using this function.
Enable PCIe Interface
- Enabling the PCIe gen3 interface (PCIe gen2 is enabled by default)
-
Open the config.txt file (choose the correct path based on your system version):
sudo nano /boot/config.txt # For some older system versionssudo nano /boot/firmware/config.txt # For most newer system versions -
PCIe defaults to gen2. To enable PCIE gen3, add the following to config.txt
dtparam=pciex1_gen=3 -
After modification, reboot the Raspberry Pi to recognize the device
sudo reboot -
After reboot, check the PCIe device status
lspci
-
NVMe Hard Drive Operations
Formatting SSD
-
If the PCIe interface is not enabled, enable the PCIe interface first
-
Check supported formats. Type
sudo mkfs.and press the tab key to see various suffixes corresponding to different format typessudo mkfs.
-
List all drives
lsblk
-
To format
/dev/nvme0n1p1as ext4, for example, execute:sudo mkfs.ext4 /dev/nvme0n1p1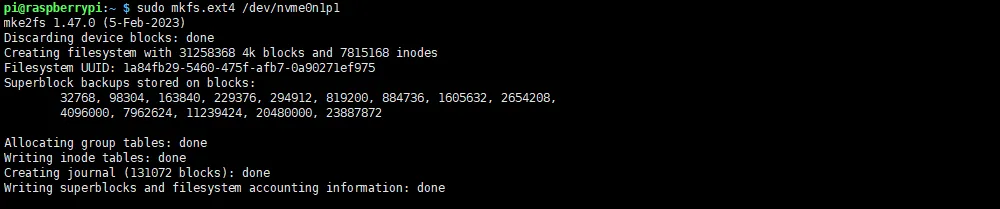
Partitioning SSD
-
If the PCIe interface is not enabled, enable the PCIe interface first
-
List all drives (use
sudo fdisk -lfor detailed information)lsblk -
To repartition
/dev/nvme0n1, execute the following command (Note: Use the main device number, not a partition like p1):sudo fdisk /dev/nvme0n1 -
Press
nto add a new partition, and finallywto save and exit -
fdiskcommand functions:nCreate a new partitionqQuit without savingpPrint the partition tablemPrint the menudDelete a partitionwWrite table to disk and exittChange a partition's system ID
Manual Mounting
-
If the PCIe interface is not enabled, enable the PCIe interface first
-
Confirm the mount directory. Create the directory if it doesn't exist (e.g., to mount to a
toshibafolder in the current directory, create it if missing):sudo mkdir toshiba -
List all drives (use
sudo fdisk -lfor detailed information)lsblk -
To mount
/dev/nvme0n1to thetoshibafolder in the current directory, for example:sudo mount /dev/nvme0n1p1 ./toshiba -
Check the file system disk space usage
df -h
Auto-mount on Boot
-
Note: Auto-mounting is only used when the drive is not the system disk, i.e., when it functions as additional storage. Perform this configuration only in such cases
-
If the PCIe interface is not enabled, enable the PCIe interface first
-
Modify the
fstabfilesudo nano /etc/fstab -
Add the following line at the end of the file (/dev/nvme0n1p1: device name, /home/pi/toshiba: mount directory, ext4: ilesystem type, defaults uses standard mount options)
/dev/nvme0n1p1 /home/pi/toshiba ext4 defaults 0 0 -
Apply the changes (Test the mount first to avoid boot issues if the mount fails)
sudo mount -a -
If no errors occur, reboot the system
sudo reboot -
After reboot, verify the mount status
lsblk
Read/Write Test
-
If the PCIe interface is not enabled, enable the PCIe interface first
-
Check the mount status
lsblk -
If mounted correctly, navigate to the mount directory (here /home/pi/toshiba)
cd /home/pi/toshiba -
Copy data from Raspberry Pi memory to the drive (Write Test)
sudo sh -c "sync && echo 3 > /proc/sys/vm/drop_caches" # Clear memory cachessudo dd if=/dev/zero of=./test_write count=2000 bs=1024k # Write test
-
Copy data from the drive to Raspberry Pi memory (Read Test)
sudo sh -c "sync && echo 3 > /proc/sys/vm/drop_caches" # Clear memory cachessudo dd if=./test_write of=/dev/null count=2000 bs=1024k # Read test
-
Note: Performance varies depending on the drive and the environment on the Raspberry Pi. Some drives may be speed-limited. For accurate performance testing, use a PC