Working with Windows
This section covers quick setup and usage of the Q43 NEO-F9P GNSS Helical RTK Module with software such as u-center on a Windows PC. For detailed u-center usage, refer to the u-center User Guide.
Hardware Connection
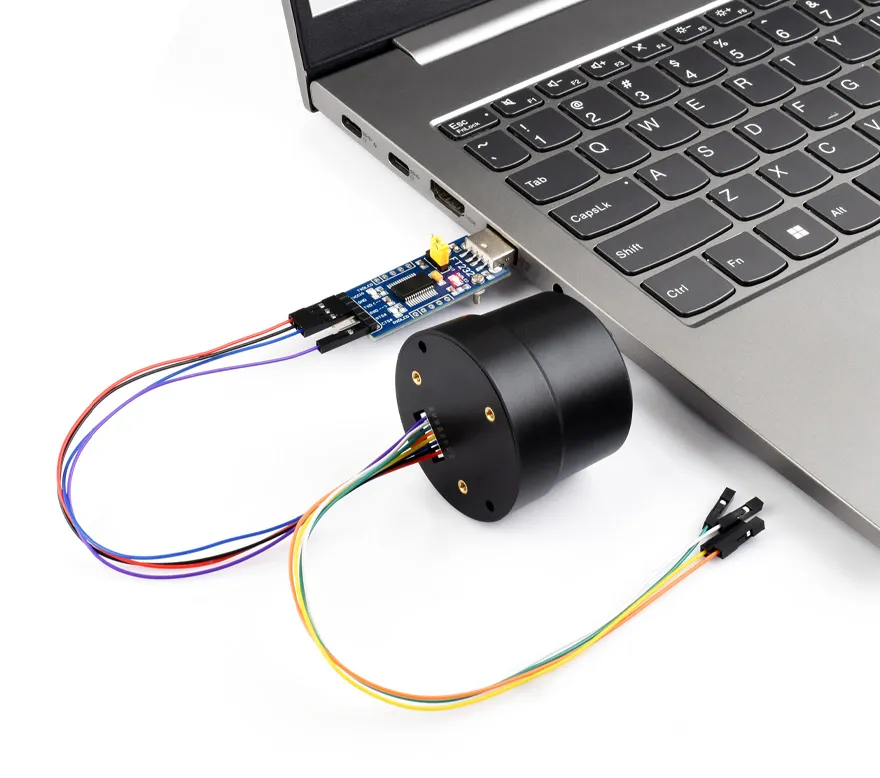
- Connect the Q43 to a PC, Raspberry Pi, or Jetson Orin series board via a USB-to-UART module. This example uses a Windows PC for testing, with the default baud rate set to 38400 bps. The hardware connection is shown below:
- Download and install:
- Download the RTK Debug Tool (no installation required, source code included, supports secondary development)
RTK Rover Positioning
One Q43 NEO-F9P GNSS Helical RTK Module acts as a rover connected to an RTK base station service for testing.
-
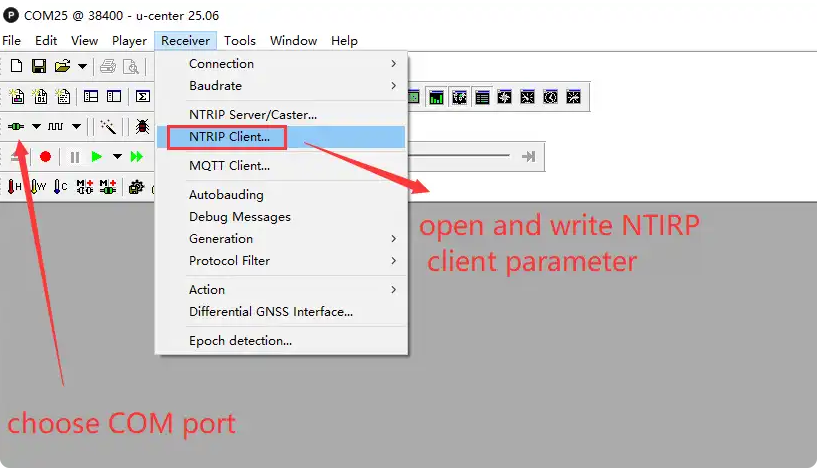
Open u-center and select the COM port corresponding to the serial module:
-
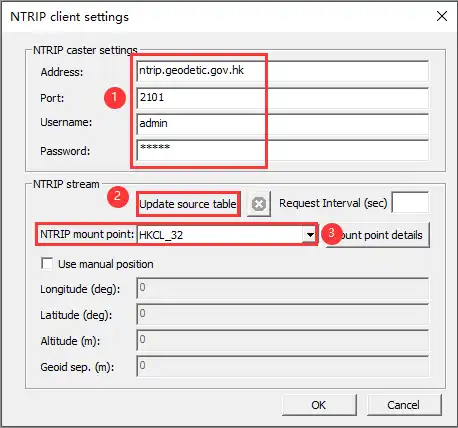
In the u-center menu bar, click Receiver -> NTRIP, and enter the following parameters in the pop-up tab:
Address: ntrip.geodetic.gov.hkPort: 2101Mount Point: HKCL_32Username: adminPassword: adminwarningUsers must first apply for a reference base station service available in their area. For example, users in the United States can apply to services such as UNAVCO. The author is located in Shenzhen and uses the Hong Kong Geodetic Survey Services as an example for testing. Reference station distance, network coverage, differential data quality, and local environmental conditions all affect positioning performance. Therefore, it is recommended to choose a suitable local base station or NTRIP service based on your actual location; commercial services such as Trimble, Hexagon, or Qianxun SI can also be used for a more stable experience.
-
After entering the parameters, click Update source table, select HKCL_32 from the NTRIP mount point dropdown, then click OK to save and start the RTK service:
-
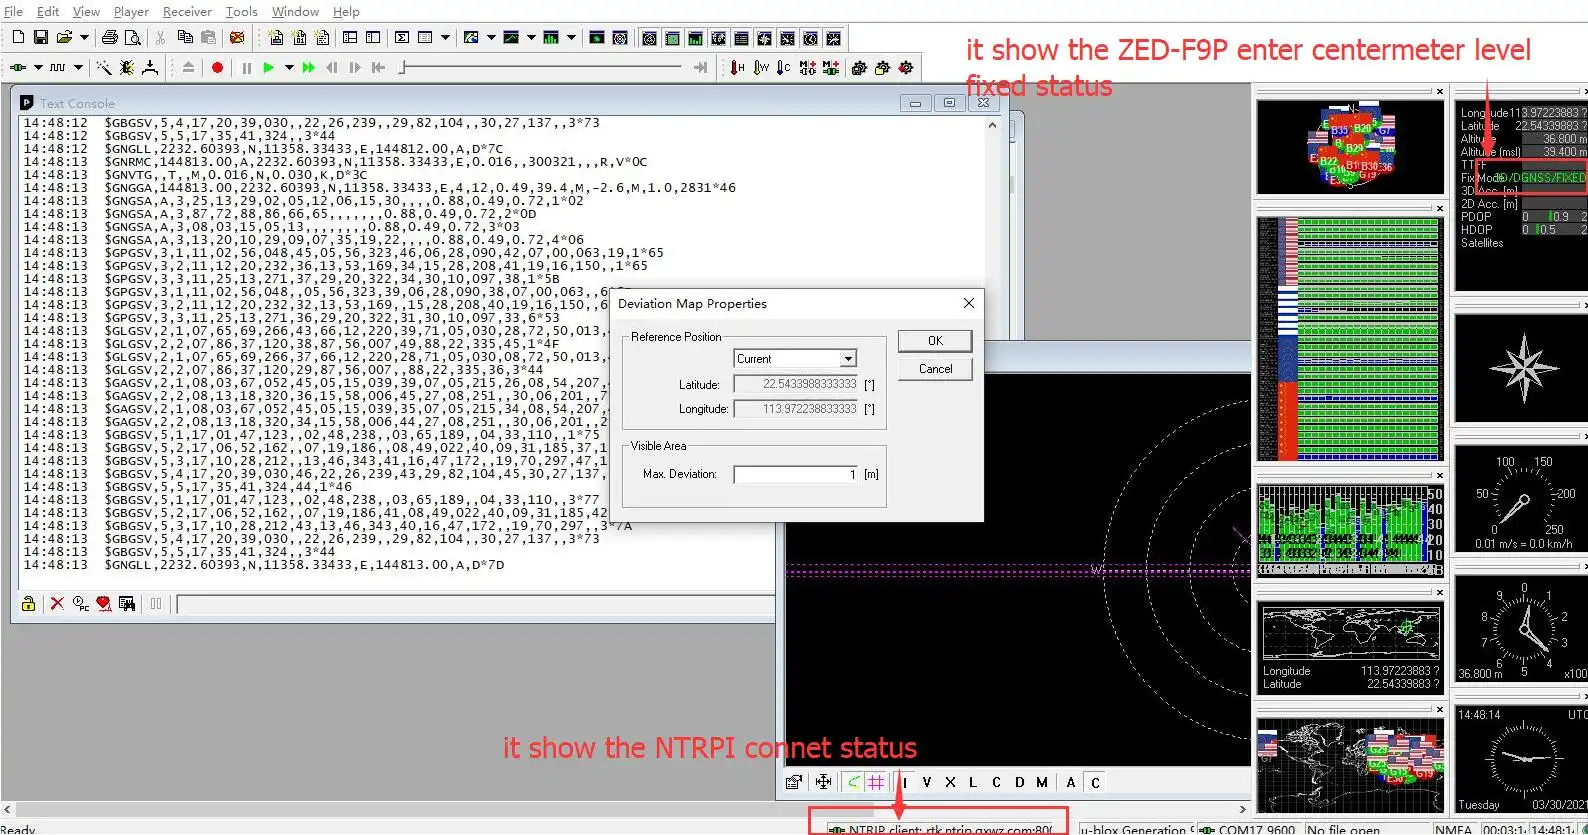
Once the NTRIP connection is successful, the connection status will be displayed at the bottom of u-center:
RTK Base➡️RTK Caster➡️RTK Rover
Two Q43 NEO-F9P GNSS Helical RTK Modules are used as the RTK base station and rover respectively.
-
Before setting up the base station module, first understand NTRIP (Networked Transport of RTCM via Internet) — a protocol that distributes RTK correction data over the Internet or a local network. NTRIP supports multi-base and multi-rover RTK networks. A network with multiple NTRIP devices is called an NTRIP network.
An NTRIP network has three roles: the NTRIP Caster is a server that receives and sends GNSS differential data. It collects RTK correction data (i.e., RTCM data) from one or more base stations and distributes it to RTK rovers. Emlid Caster and rtk2go are cloud-based public Casters that allow you to upload RTCM data to these relay stations, avoiding the need to set up your own Caster.
Configuring Base Station Mode and Outputting RTCM via UART1
-
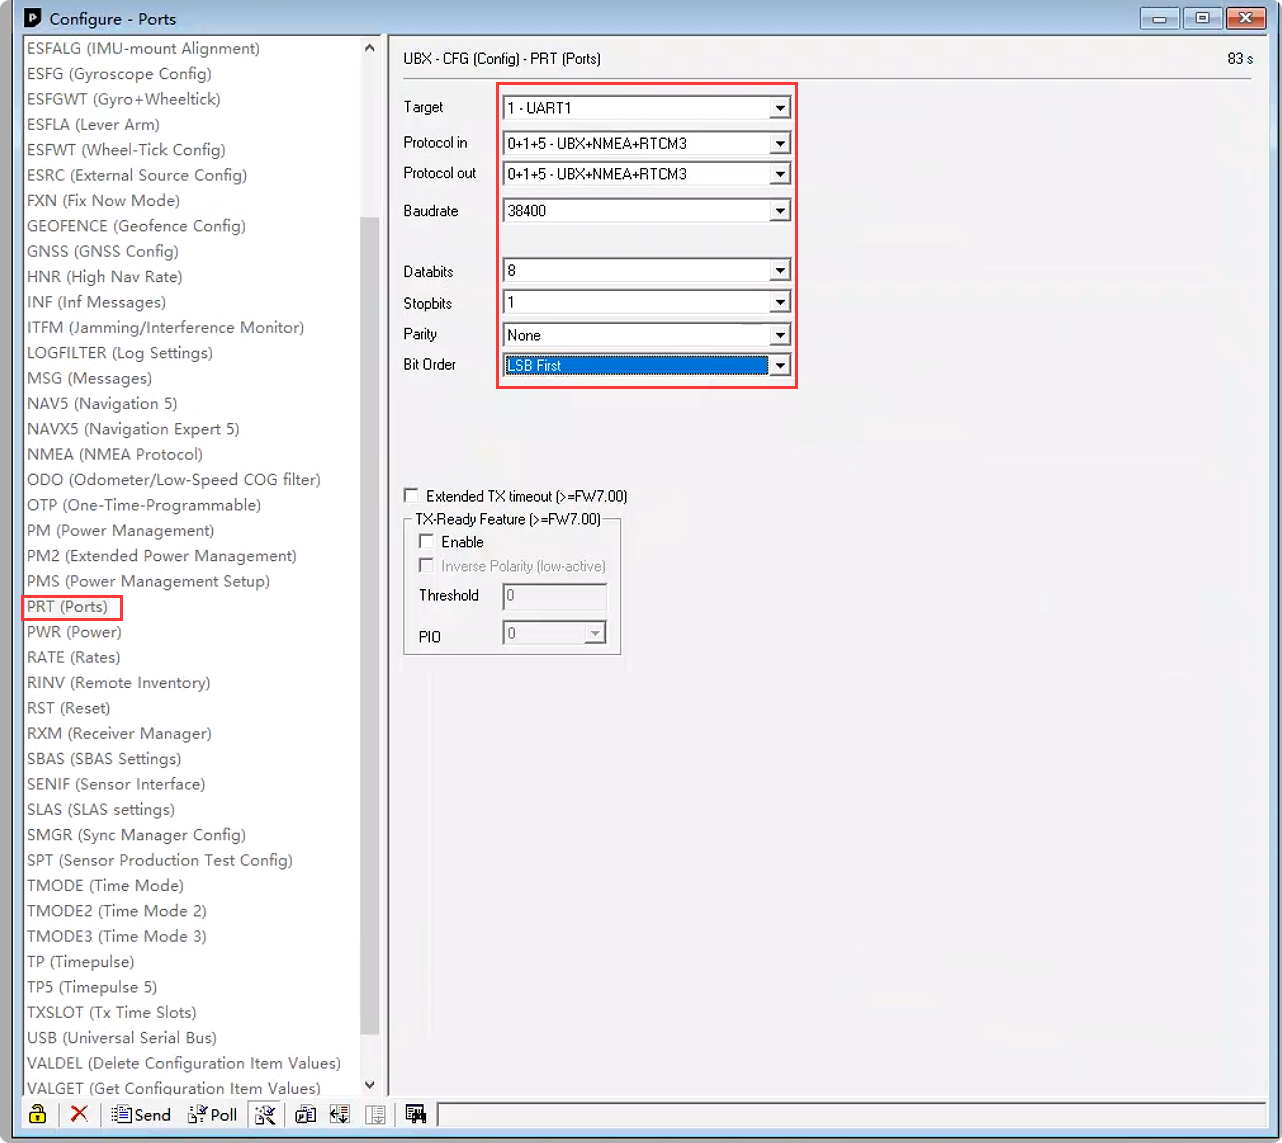
Open View -> Configuration View -> PRT and set the following:
Target: 1 - UART1Protocol in: UBX + NMEA + RTCM3Protocol out: UBX + NMEA + RTCM3Baudrate: 38400Databits: 8Stopbits: 1Parity: None -
Click Send to confirm the configuration.
-
Next, select the MSG (Messages) option, then select and set each of the following to output on UART1:
RTCM3.3 1005RTCM3.3 1074RTCM3.3 1077RTCM3.3 1084RTCM3.3 1087RTCM3.3 1094RTCM3.3 1097RTCM3.3 1124RTCM3.3 1127RTCM3.3 1230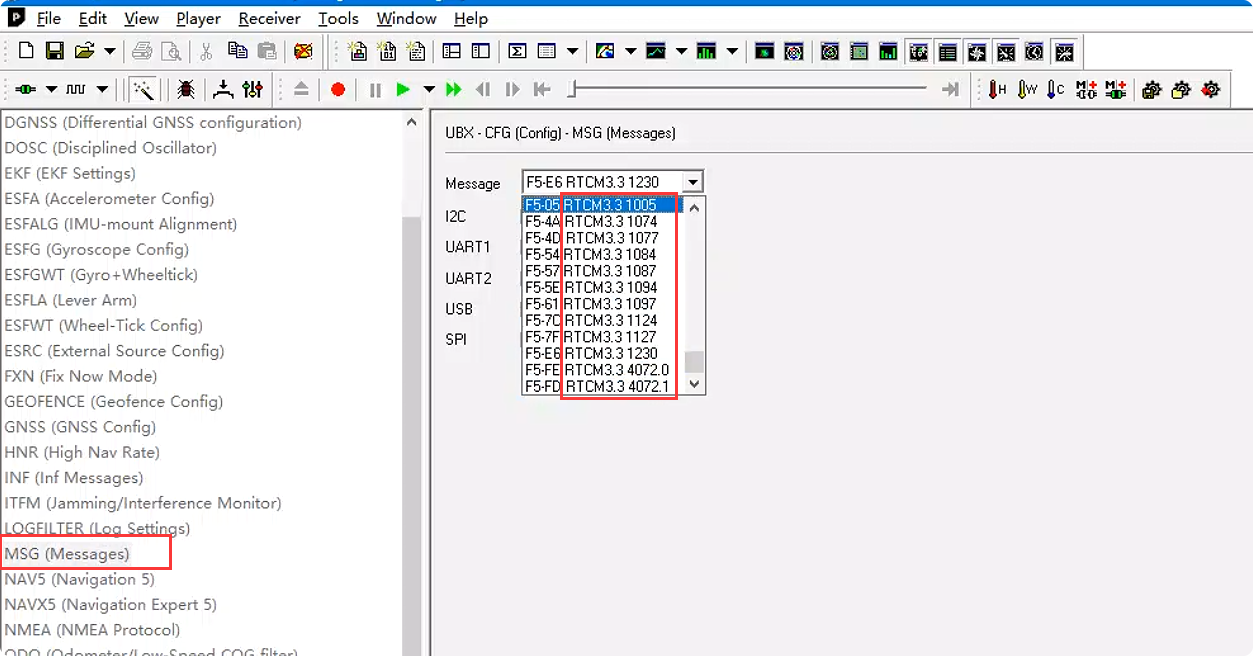
-
Then go to View -> Configuration View -> TMODE3 and select:
Mode: Survey-inMinimum observation time: 120 sRequired position accuracy: 30 m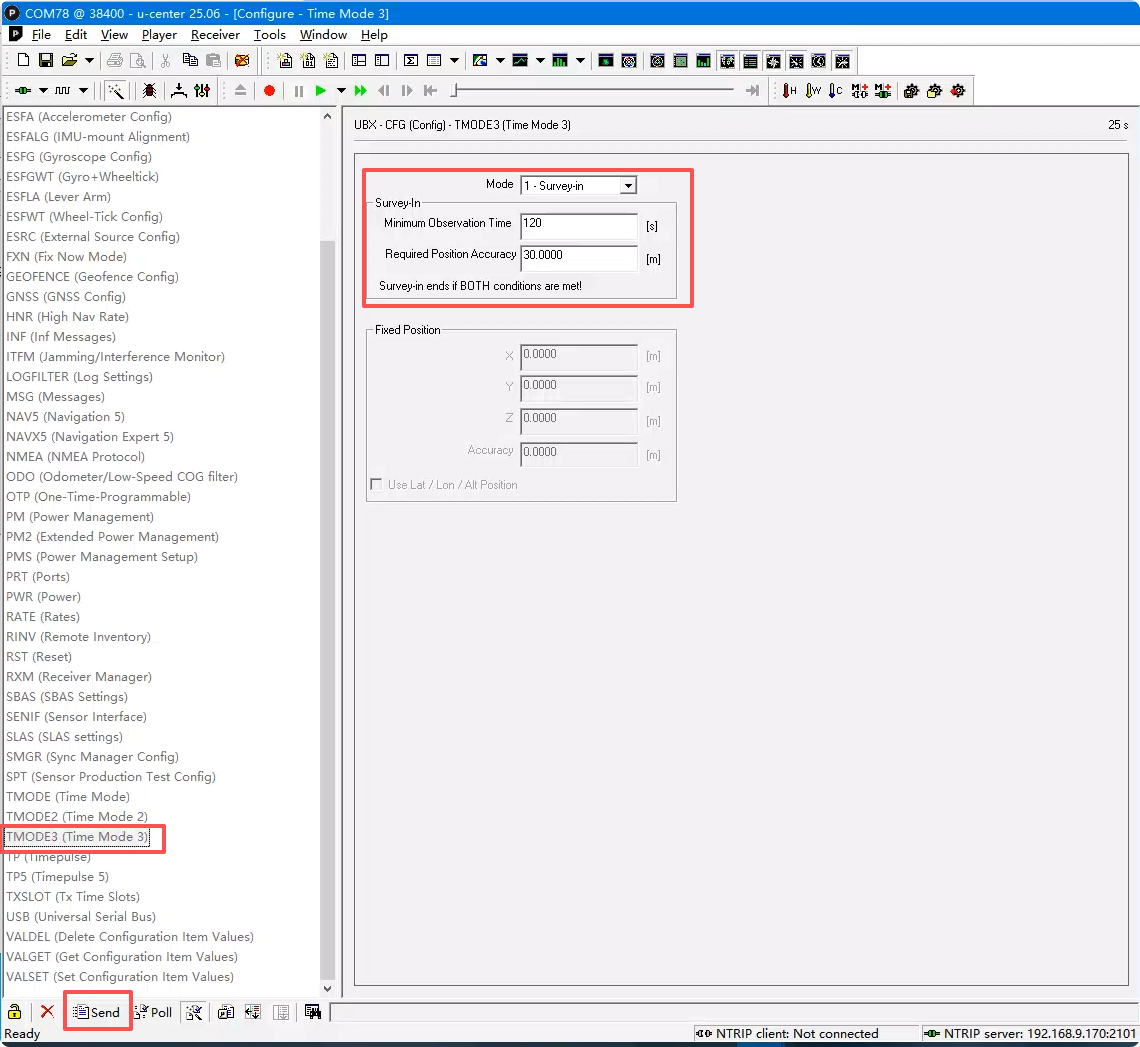 warning
When the Q43 operates as a base station, the convergence time is relatively long. It is recommended to let the base station run for 12 hours and use the converged position as the base station position. The antenna should be installed at a fixed point with a clear, unobstructed view of the sky.
Configure the Caster Service
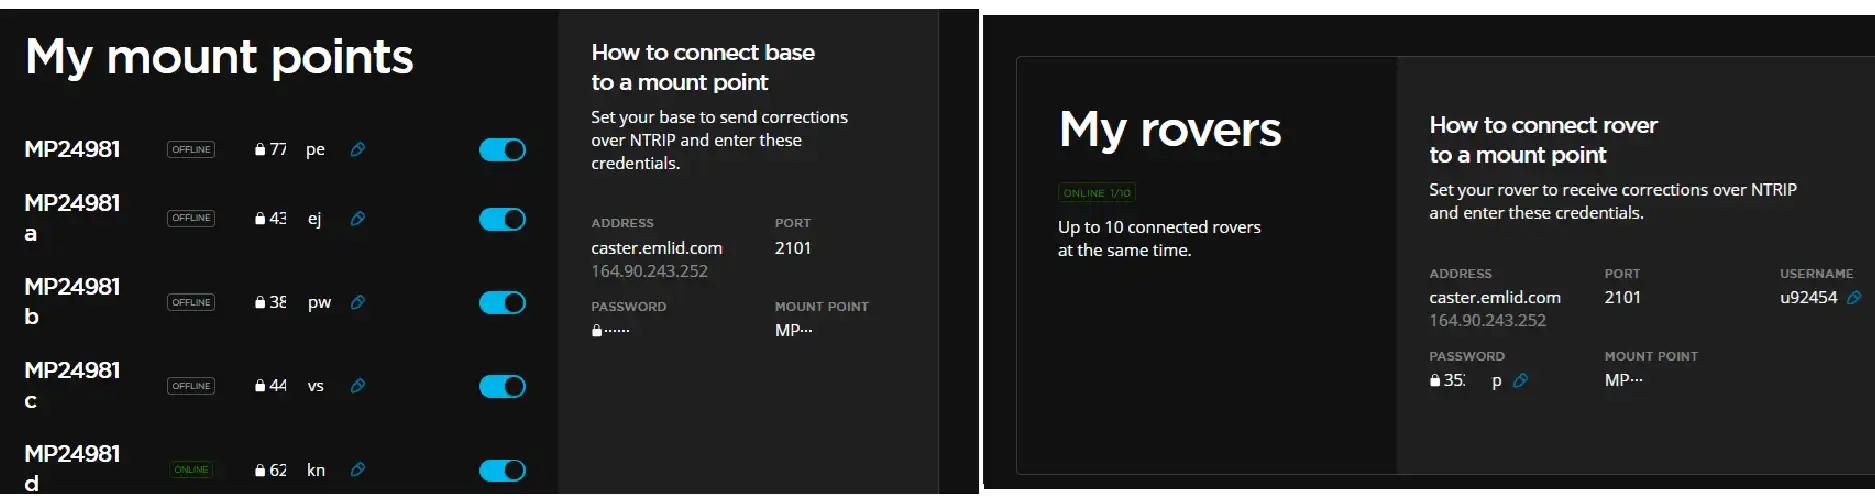
The following example uses the Emlid Caster public Caster for testing:
-
Register and log in to Emlid Caster to obtain an NTRIP mount point.
-
Assign the My mount points configuration shown below to the base station, and the My rovers parameters to the rover, using the same mount point.
 warning
Emlid Caster is for testing hardware functionality only. For production use, we recommend setting up your own server to ensure stability.
Rover RTK Positioning
u-center is not suitable for public-network RTK Caster services. Use the RTK Debug Tool to transmit base station data to the rover. The RTK Debug Tool is developed based on the NEO-F9P command manual and supports fast configuration of base station mode, NTRIP Client, NTRIP Caster, and NTRIP Server. You can also develop your own tools better suited to field applications.
-
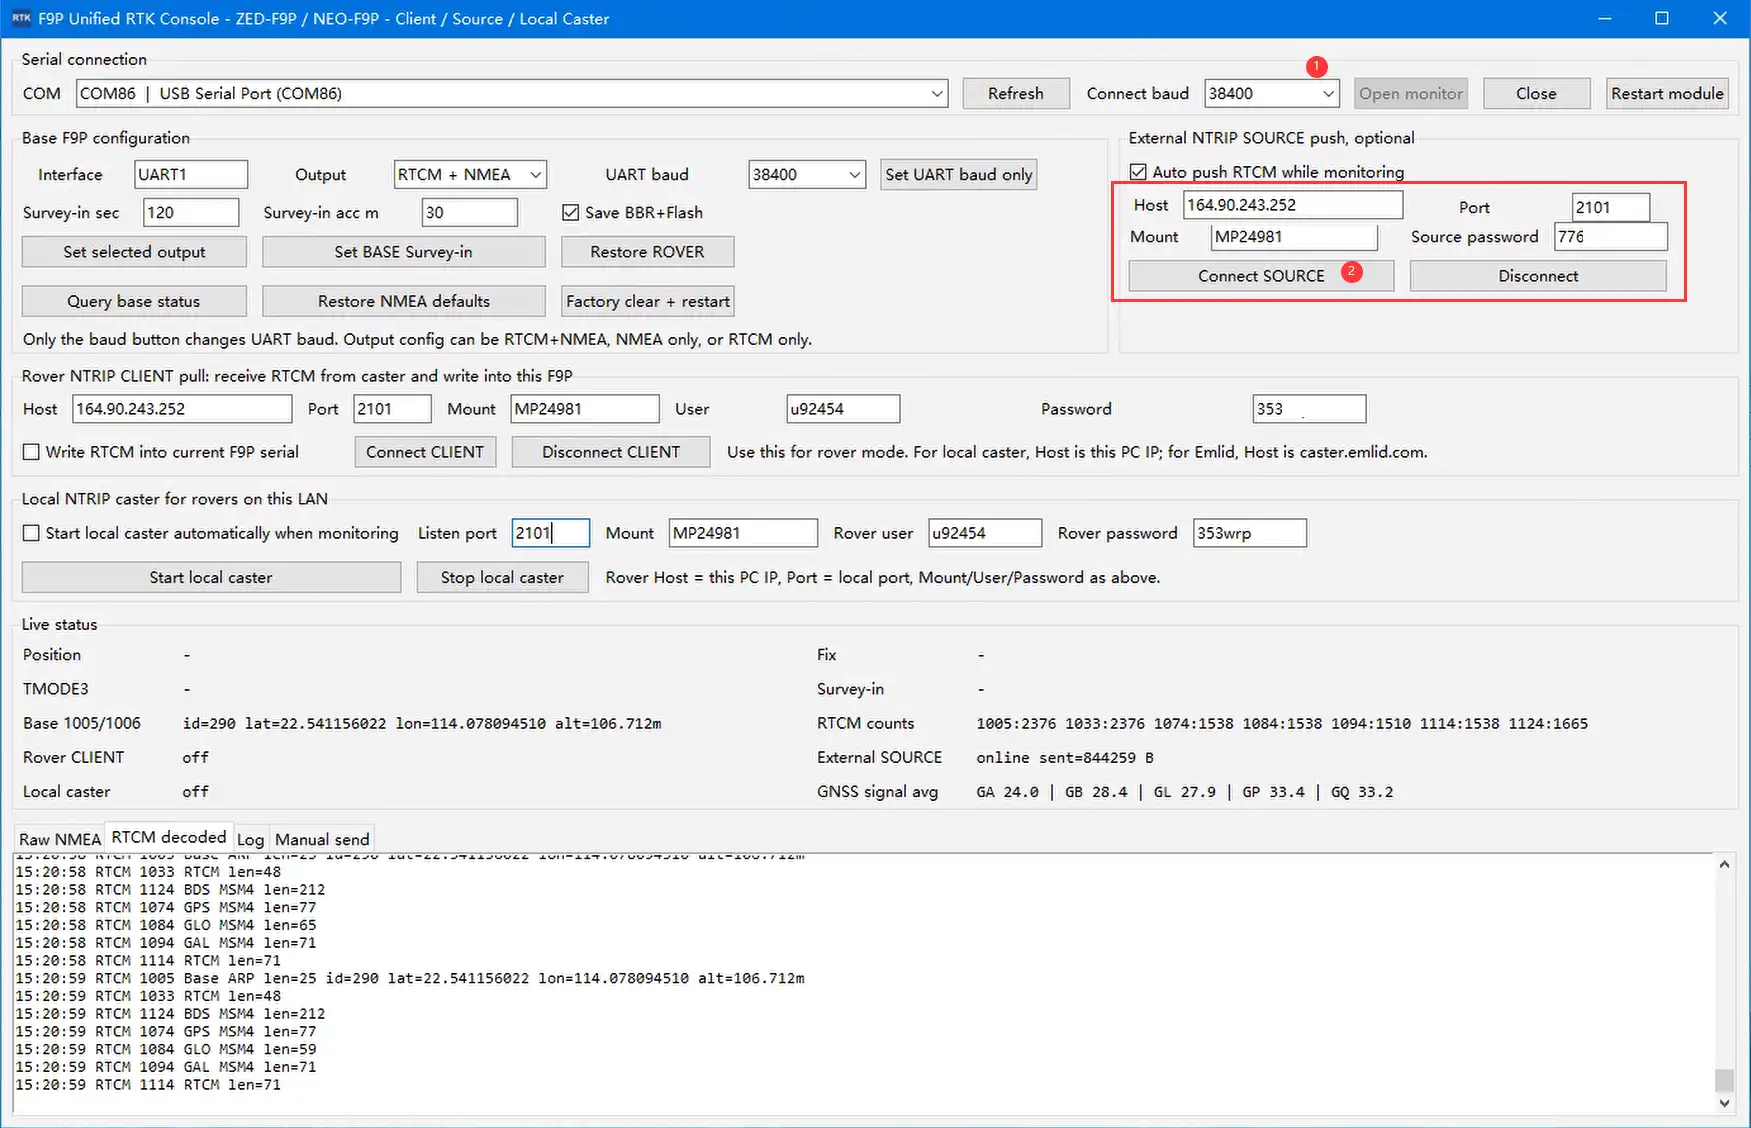
Open RTK Debug Tool window 1, select the COM port corresponding to the base station's serial module, and configure the following parameters:
Connect baud: 38400Host: 164.90.243.252Port: 2101Mount: MP24981Source password: 776XXX -
Click Connect SOURCE to upload base station data to the server.
-
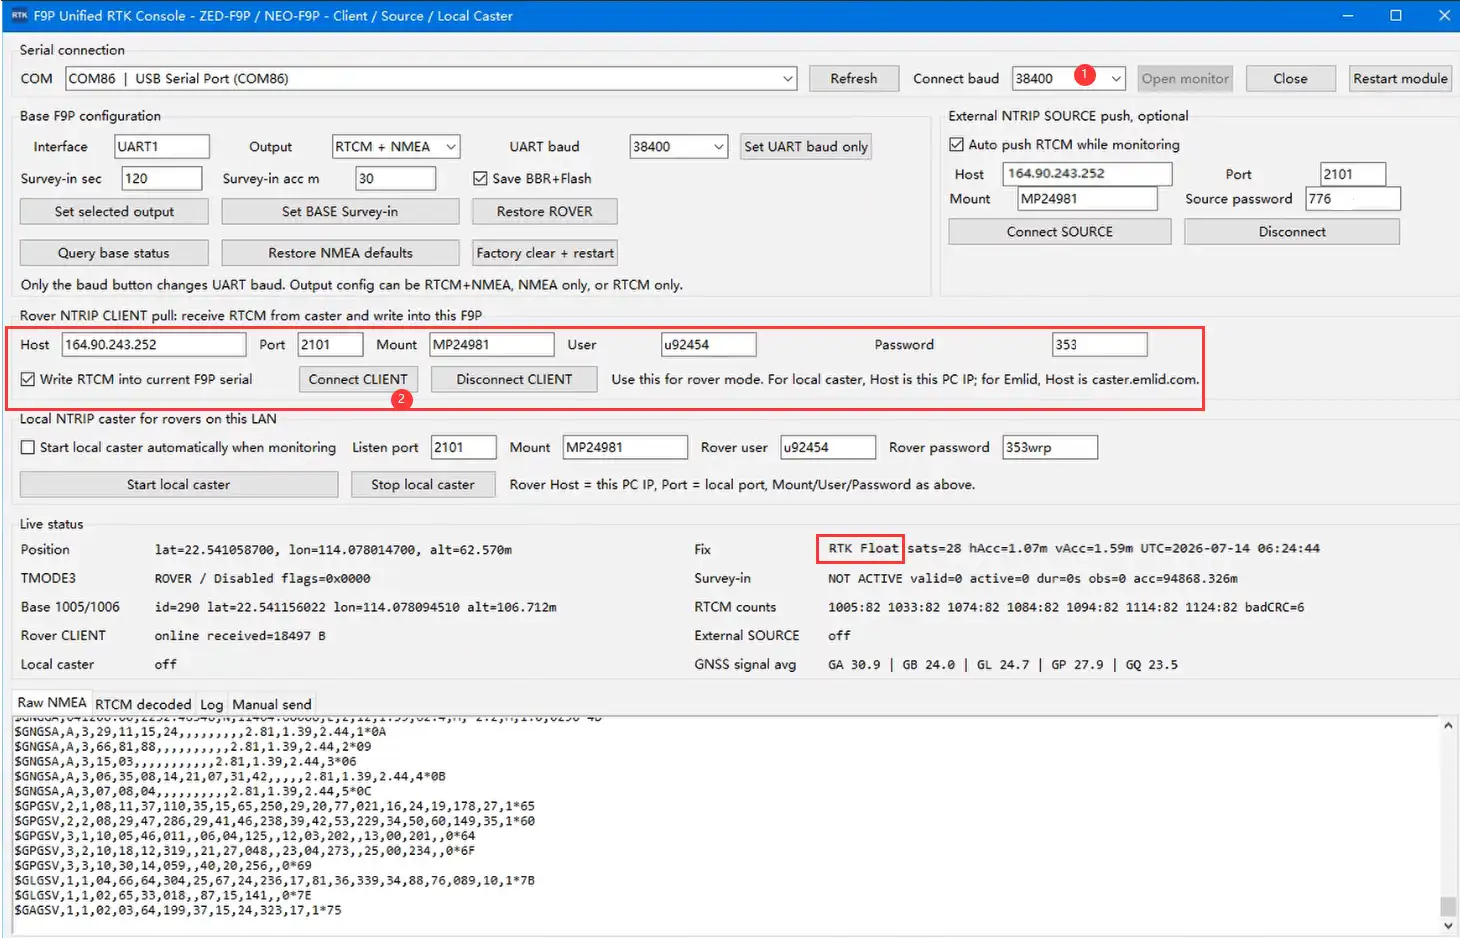
Open another RTK Debug Tool window 2, select the COM port corresponding to the rover's serial module, and configure the following parameters:
Connect baud: 38400Host: 164.90.243.252Port: 2101Mount: MP24981User: u92454Password: 353xxx -
Click Connect CLIENT. Once RTK Float appears, RTK positioning is achieved.
 Tip
TipPerform tests in an open outdoor area. Clear weather and an unobstructed view of the sky help RTK positioning and Fix convergence.