RGB-Matrix-Px-64x32 Working with Raspberry Pi
Working with Raspberry Pi 4B/5
Required Components
- RGB-Matrix-P4-64x32 (included in this product)
- 2 × 8PIN 2.54mm pitch cable (included in this product)
- Raspberry Pi 4B or Raspberry Pi 5 (must be purchased separately)
- 5V external power supply (it is recommended to reserve sufficient current based on the number of panels; must be purchased separately)
Hardware Connection
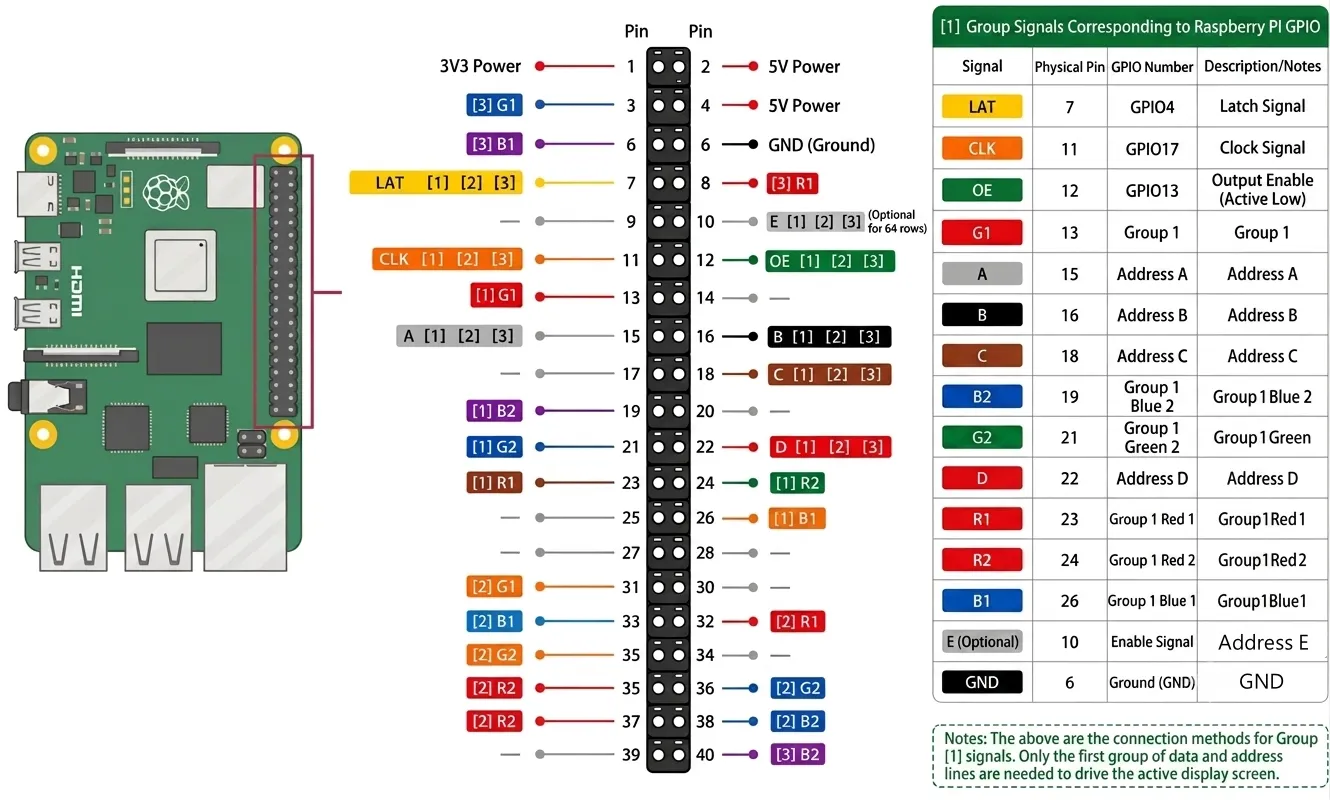
The Raspberry Pi supports up to 3 ways of connecting to LED matrix panels via shared connections. For ease of wiring, this document uses a unified numbering scheme:
[1]: Panel 1 wiring group[2]: Panel 2 wiring group[3]: Panel 3 wiring group
Note: [1], [2], and [3] represent three independent panel wiring groups, not three completely different interface standards; some control pins are common signals.
- Install and run the Raspberry Pi OS (Raspbian bullseye)
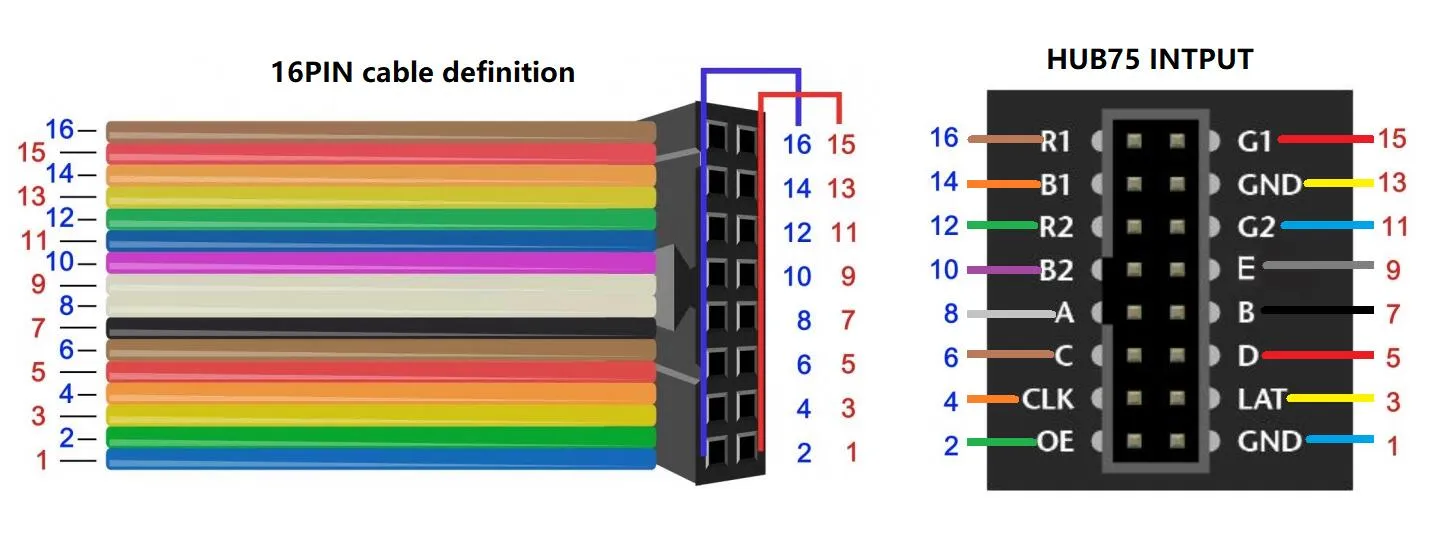
- After completing the 16PIN wiring according to the table above, connect the 5V power supply to the screen
Note: If only one panel is connected, you only need to connect the pins marked [1] and the common pins. The diagram below shows the 16Pin ribbon cable connection:
Project Pull / Environment Setup Workflow
Step 1: Enter working directory
cd ~/Desktop
Step 2: Clone the repository (sparse clone)
git clone --depth 1 --filter=blob:none --sparse https://github.com/waveshareteam/RGB-Matrix-Px-xx.git RGB-Matrix-Px-xx

// If GitHub clone fails, you can try cloning from Gitee

git clone --depth 1 --filter=blob:none --sparse https://gitee.com/waveshare/RGB-Matrix-Px-xx.git RGB-Matrix-Px-xx
Step 3: Enter the repository directory
cd ~/Desktop/RGB-Matrix-Px-xx
Step 4: Pull only the Raspberry Pi example directory
git sparse-checkout set example/Raspberry-Pi
Running C++ Examples
Compile the C++ examples (examples-api-use)
cd ~/Desktop/RGB-Matrix-Px-xx/example/Raspberry-Pi/examples-api-use
make -j4
Run examples (Pi 4B) (It is recommended to set --led-slowdown-gpio to 4 or higher; too fast may cause display corruption)
sudo ./demo -D0 --led-rows=32 --led-cols=64 --led-chain=1 --led-slowdown-gpio=4 --led-no-hardware-pulse
Run examples (Pi 5)
sudo ./demo -D0 --led-rows=32 --led-cols=64 --led-chain=1 --led-slowdown-gpio=2 --led-no-hardware-pulse
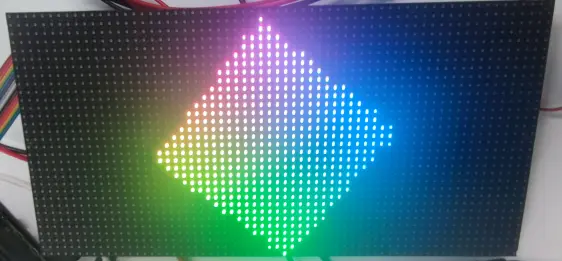
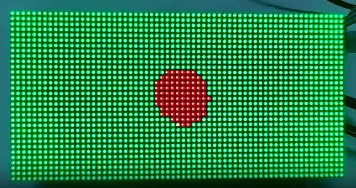
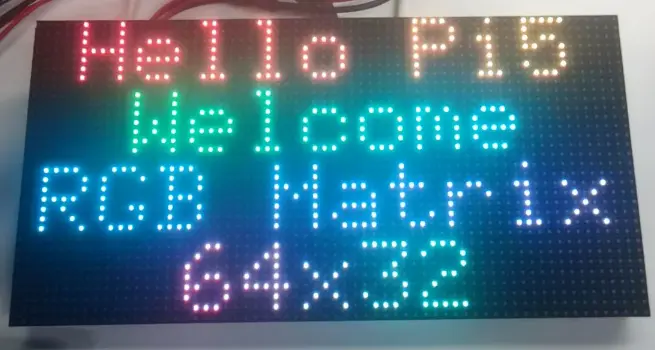
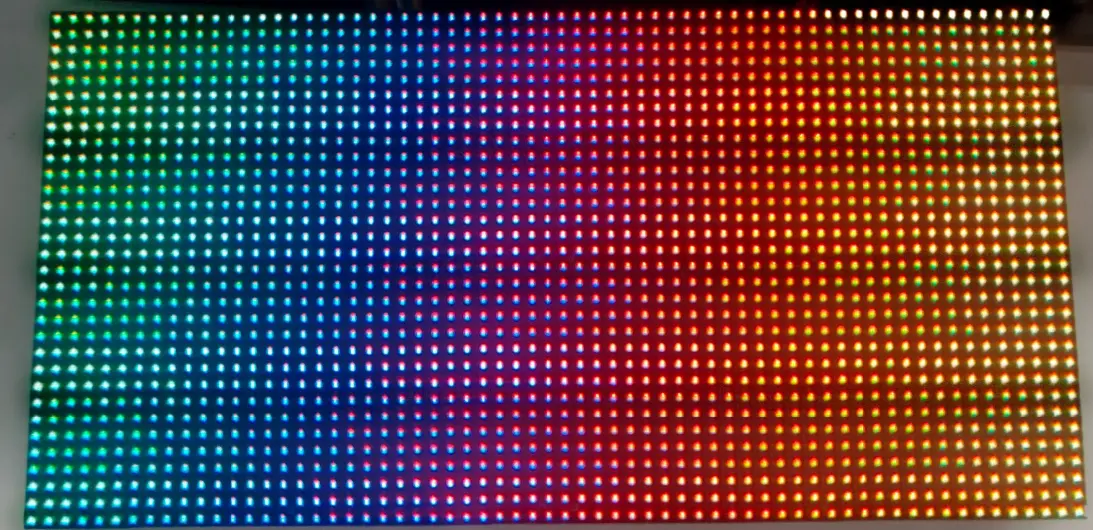
Operation Result
 |  |
Running Python Examples
Step 1: Enter the example directory
cd ~/Desktop/RGB-Matrix-Px-xx/example/Raspberry-Pi
Step 2: Install dependencies
sudo apt update

sudo apt install -y git build-essential cmake \
  pkg-config \
  python3-full python3-dev python3-venv \
  python3-pip \
  cython3 libjpeg-dev zlib1g-dev
Step 3: Set project directory permissions
sudo chown -R pi:pi ~/Desktop/RGB-Matrix-Px-xx
Step 4: Create and activate a virtual environment
python3 -m venv ~/.venvs/rgbmatrix
source ~/.venvs/rgbmatrix/bin/activate
python -m pip install --upgrade pip setuptools wheel
Step 5: Install Python dependencies and the current project
cd ~/Desktop/RGB-Matrix-Px-xx/example/Raspberry-Pi
python -m pip install numpy pillow scikit-build-core cython
python -m pip install -v .
Step 6: Enter the example directory
cd ~/Desktop/RGB-Matrix-Px-xx/example/Raspberry-Pi/bindings/python/samples
Step 7: Verify the environment
python -c "import sys, rgbmatrix, numpy, PIL, Cython; from rgbmatrix import RGBMatrix, RGBMatrixOptions, graphics; print('ALL_OK', sys.version)"
Example output (dates, times, versions may differ):
ALL_OK 3.13.5 (main, Jun 25 2025, 18:55:22) [GCC 14.2.0]
Parameter Description / Run Commands
Parameter Quick Reference (click to expand)
| Parameter | Function | Common / Recommended Values |
|---|---|---|
--led-rows / --led-cols | Rows / columns of a single panel | rows: 16/32/64; cols: 32/64 |
--led-chain / --led-parallel | Number of panels chained horizontally / number of parallel chains | Single panel commonly: chain=1, parallel=1; two panels side-by-side: cols=64 + chain=2 |
--led-gpio-mapping | GPIO mapping / hat board definition | Common: regular / adafruit-hat / adafruit-hat-pwm; use regular for standard wiring |
--led-rp1-rio | RP1 backend selection | 0=PIO; 1=RIO |
--led-no-drop-privs | Do not drop privileges after initialization | Enable when high privileges / device access is required continuously |
--led-slowdown-gpio | Relax GPIO timing | Common: 1/2/3; 2 is a common safe compromise |
--led-show-refresh | Print actual refresh rate | Recommended to enable when tuning parameters |
--led-pwm-bits | PWM bit depth (grayscale) | 11 is heavy; dynamic often uses 7; try 6 for higher refresh |
--led-pwm-lsb-nanoseconds | LSB base lighting time | 50 is fast; 80/100/130 are more conservative |
--led-pwm-dither-bits | Low-bit dithering to improve visual quality | Try 1 first; if abnormal flickering occurs, try 0 |
-i | Input image or GIF | still-viewer.py / image-scroller.py / gif-viewer.py |
-f / -t | Font / text | runtext.py |
--framerate-fraction | Playback speed control | Larger values are usually slower and more stable (try 8/10/12) |
--led-row-addr-type / --led-multiplexing | Row addressing / special multiplexing | Usually leave unchanged if the image looks normal; try only if mapping issues occur |
--led-rgb-sequence / --led-brightness | Color order / brightness | If red/blue are swapped, try RBG/BRG/GRB; for long-term use, start brightness at 30–60 |
--led-limit-refresh / --led-no-hardware-pulse | Limit refresh upper bound / disable hardware pulse | Generally used for troubleshooting; consider only if compatibility issues arise |
Run example (generic command template: Pi 5)
sudo /home/pi/.venvs/rgbmatrix/bin/python script_name.py \
  --led-rows=32 \
  --led-cols=64 \
  --led-chain=1 \
  --led-parallel=1 \
  --led-gpio-mapping=regular \
  --led-slowdown-gpio=2 \
  --led-rp1-rio=0 \
  --led-no-drop-privs
Brightness test (Pi 5)
sudo /home/pi/.venvs/rgbmatrix/bin/python pulsing-brightness.py \
  --led-rows=32 \
  --led-cols=64 \
  --led-chain=1 \
  --led-parallel=1 \
  --led-gpio-mapping=regular \
  --led-slowdown-gpio=2 \
  --led-rp1-rio=0 \
  --led-no-drop-privs
Display text (Pi 5)
sudo /home/pi/.venvs/rgbmatrix/bin/python hello-layout.py \
  --led-rows=32 \
  --led-cols=64 \
  --led-chain=1 \
  --led-parallel=1 \
  --led-gpio-mapping=regular \
  --led-slowdown-gpio=2 \
  --led-rp1-rio=0 \
  --led-no-drop-privs \
  --led-show-refresh
Run example (generic command template: Pi 4)
sudo /home/pi/.venvs/rgbmatrix/bin/python script_name.py \
  --led-rows=32 \
  --led-cols=64 \
  --led-chain=1 \
  --led-parallel=1 \
  --led-gpio-mapping=regular \
  --led-slowdown-gpio=4 \
  --led-no-drop-privs \
  --led-no-hardware-pulse=1
Display text (Pi 4)
sudo /home/pi/.venvs/rgbmatrix/bin/python hello-layout.py \
  --led-rows=32 \
  --led-cols=64 \
  --led-chain=1 \
  --led-parallel=1 \
  --led-gpio-mapping=regular \
  --led-slowdown-gpio=4 \
  --led-no-drop-privs \
  --led-no-hardware-pulse=1 \
  --led-show-refresh
Display text (Pi 4)
sudo /home/pi/.venvs/rgbmatrix/bin/python still-viewer.py \
  --led-rows=32 \
  --led-cols=64 \
  --led-chain=1 \
  --led-parallel=1 \
  --led-gpio-mapping=regular \
  --led-slowdown-gpio=4 \
  --led-no-drop-privs \
  --led-no-hardware-pulse=1 \
  -i ~/Desktop/test_image.png
Operation Result
 |  |