Working with Arduino
This chapter contains the following sections. Please read as needed:
Arduino Getting Started
New to Arduino ESP32 development and looking for a quick start? We have prepared a comprehensive Getting Started Tutorial for you.
- Section 0: Getting to Know ESP32
- Section 1: Installing and Configuring Arduino IDE
- Section 2: Arduino Basics
- Section 3: Digital Output/Input
- Section 4: Analog Input
- Section 5: Pulse Width Modulation (PWM)
- Section 6: Serial Communication (UART)
- Section 7: I2C Communication
- Section 8: SPI Communication
- Section 9: Wi-Fi Basics
- Section 10: Web Server
- Section 11: Bluetooth
- Section 12: LVGL GUI Development
- Section 13: Comprehensive Project
Note: This tutorial uses the ESP32-S3-Zero as a reference example, and all hardware code is based on its pinout. Before you start, we recommend checking the pinout of your development board to ensure the pin configuration is correct.
Setting Up Development Environment
1. Installing and Configuring Arduino IDE
Please refer to the tutorial Installing and Configuring Arduino IDE to download and install the Arduino IDE and add ESP32 support.
2. Installing Libraries
To run the example, you need to install the corresponding library.
You can click this link to download the example package.
| Library/File Name | Description | Version | Installation Method |
|---|---|---|---|
| Adafruit GFX Library | GFX Library graphics library | v1.12.5 | Install via Library Manager or manually |
Board Installation Instructions for ESP32-S3-LCD-4.3C
| Board Name | Installation Requirement | Version Requirement |
|---|---|---|
| ESP32 by Espressif Systems | "Install Offline" / "Install Online" | 3.3.7 |
Installation Steps:
- For installation methods, refer to: Arduino Library Management Tutorial.
Example
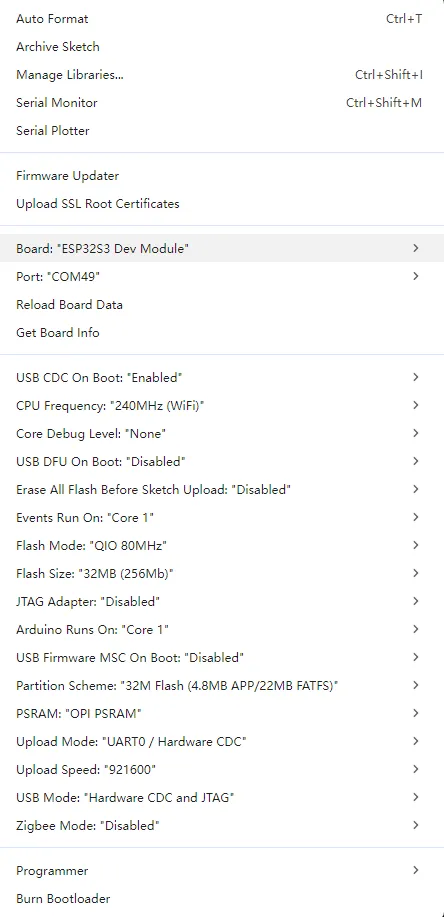
3. Arduino Project Parameter Settings
Code Description
void loop() {
  // animate by going through the colour wheel for the first two lines
  drawText(wheelval);
  wheelval +=1;
  delay(2000);
  dma_display->clearScreen();
  dma_display->fillScreen(myBLACK);
  delay(2000);
  dma_display->fillScreen( myRED);
  delay(2000);
  dma_display->fillScreen(myGREEN);
  delay(2000);
  dma_display->fillScreen(myBLUE);
  delay(2000);
  dma_display->fillScreen(myWHITE);
  dma_display->clearScreen();
}
Code Analysis
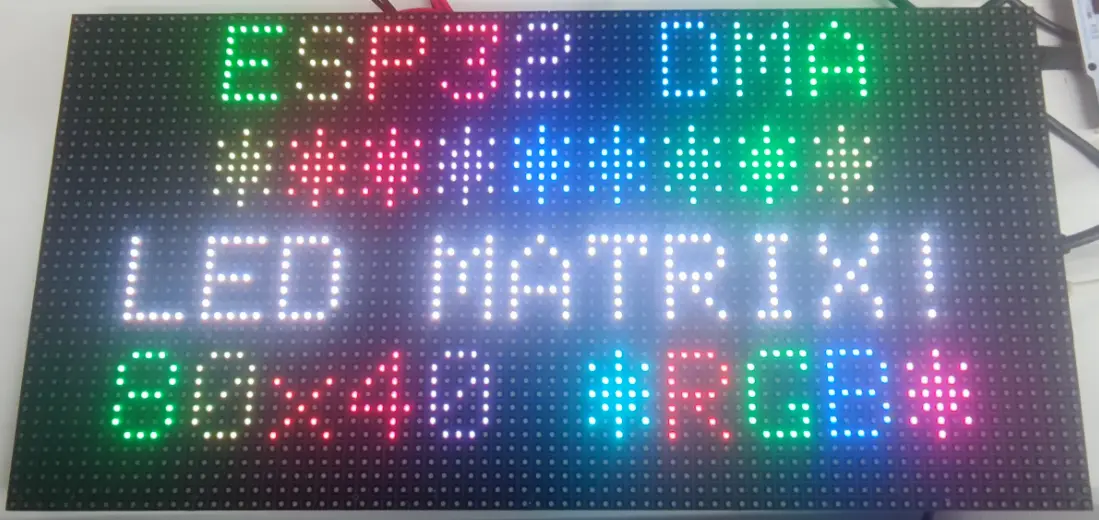
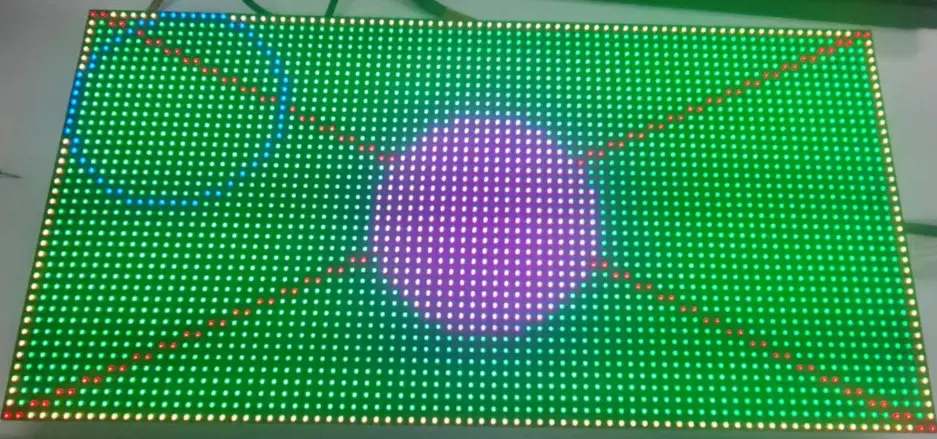
loop(): Sequentially performs text drawing, solid color filling, and screen clearing operations to quickly verify the basic display functionality of the panel.drawText(wheelval): Draws text and changes color effects based onwheelvalto check whether character rendering and color changes are normal.dma_display->fillScreen(): Fills the screen with solid colors such as black, red, green, blue, and white in sequence to observe the full-screen refresh and color display effect.delay(2000): Pauses for 2 seconds after each display step for easy visual confirmation.dma_display->clearScreen(): Clears the screen after the test to avoid residual content from the previous frame.
Operation Result (Arduino IDE)