Working with MicroPython
This chapter contains the following sections. Please read as needed:
MicroPython Getting Started Tutorial
New to Pico MicroPython development and want to get started quickly? We have prepared a general introductory tutorial for you. These tutorial is designed to help developers quickly become familiar with Thonny IDE and start developing. It covers environment setup, project creation, component usage, and peripheral programming, helping you take the first step in MicroPython programming.
- Section 1 Basic Introduction
- Section 2 GPIO
- Section 3 PWM
- Section 4 ADC
- Section 5 UART
- Section 6 I2C
- Section 7 SPI
- Section 8 PIO
Setting Up Development Environment
Please refer to the Install and Configure Thonny IDE Tutorial to download and install the Thonny IDE.
Demo
The MicroPython demos are located in the examples\MicroPython directory of the demo package.
| Demo | Basic Program Description | Dependency Library |
|---|---|---|
| 01_GUI | LCD GUI display program | - |
| 02_SD | Mount TF card | - |
| 03_IMU | Get six-axis IMU data | - |
| 04_LVGL | LCD LVGL display program | LVGL V9.3 |
01_GUI
Demo Description
- Use SPI to communicate with the LCD and implement touch tracking on the LCD via GUI.
Hardware Connection
- Connect the board to the computer using a USB cable
Code Analysis
lcd = LCD_1inch54(): Create an LCD object.touch = Touch_CST816T(): Initialize the touch object.touch_gesture(): Gesture test.touch_hand_writing(): Draw points and display them on the LCD.
Operation Result
-
Upload all .py files from the
01_GUIfolder to the development board using Thonny, and run the RP2350-Touch-LCD-1.54.py program.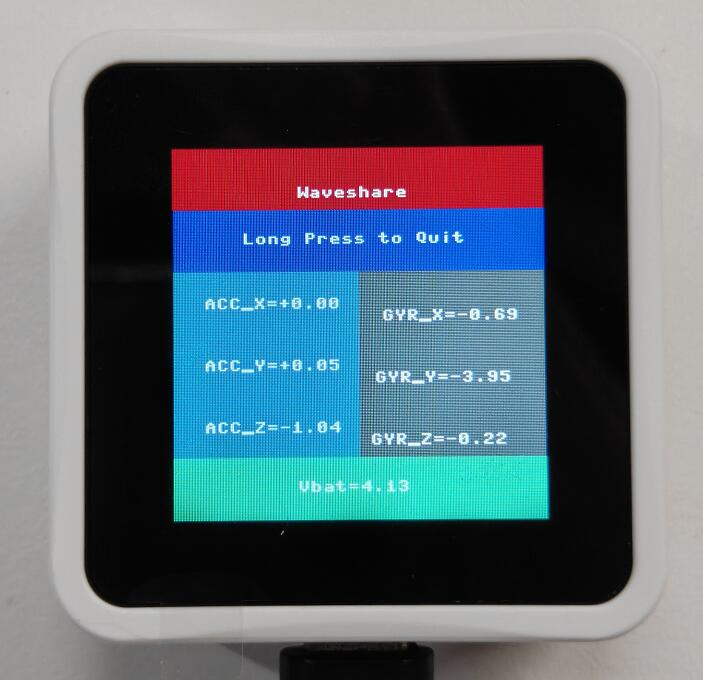
02_SD
Demo Description
- Uses SPI to communicate with the TF card and mounts the TF card to the development board. After successful mounting, you can view and modify the contents of the TF card via Thonny.
Hardware Connection
- Insert a TF card
- Connect the board to the computer using a USB cable
Code Analysis
sdcard.SDCard(spi, cs, baudrate): Creates a TF card object and binds the initialized SPI interface and CS pin to the TF card driver.uos.mount(sd, '/sd'): Mounts the TF card file system to the/sddirectory. After successful mounting, users can perform file read/write operations on the TF card via the/sdpath, such as creating, reading, or deleting files.
Operation Result
-
Upload all py files from the
02_SDfolder to the development board via Thonny and reset the board. After resetting, the development board will automatically mount the TF card to thesddirectory according to the boot.py program.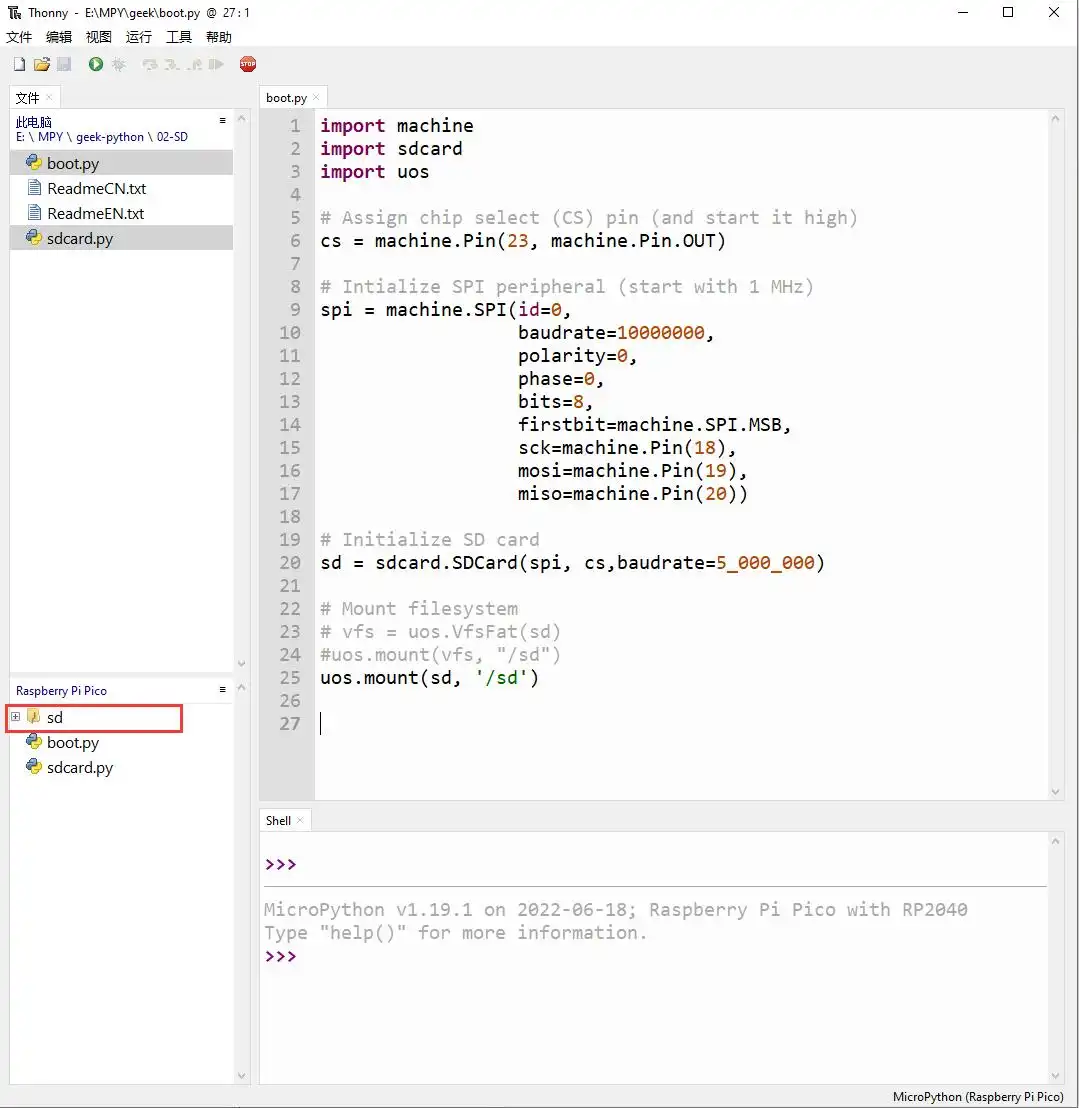
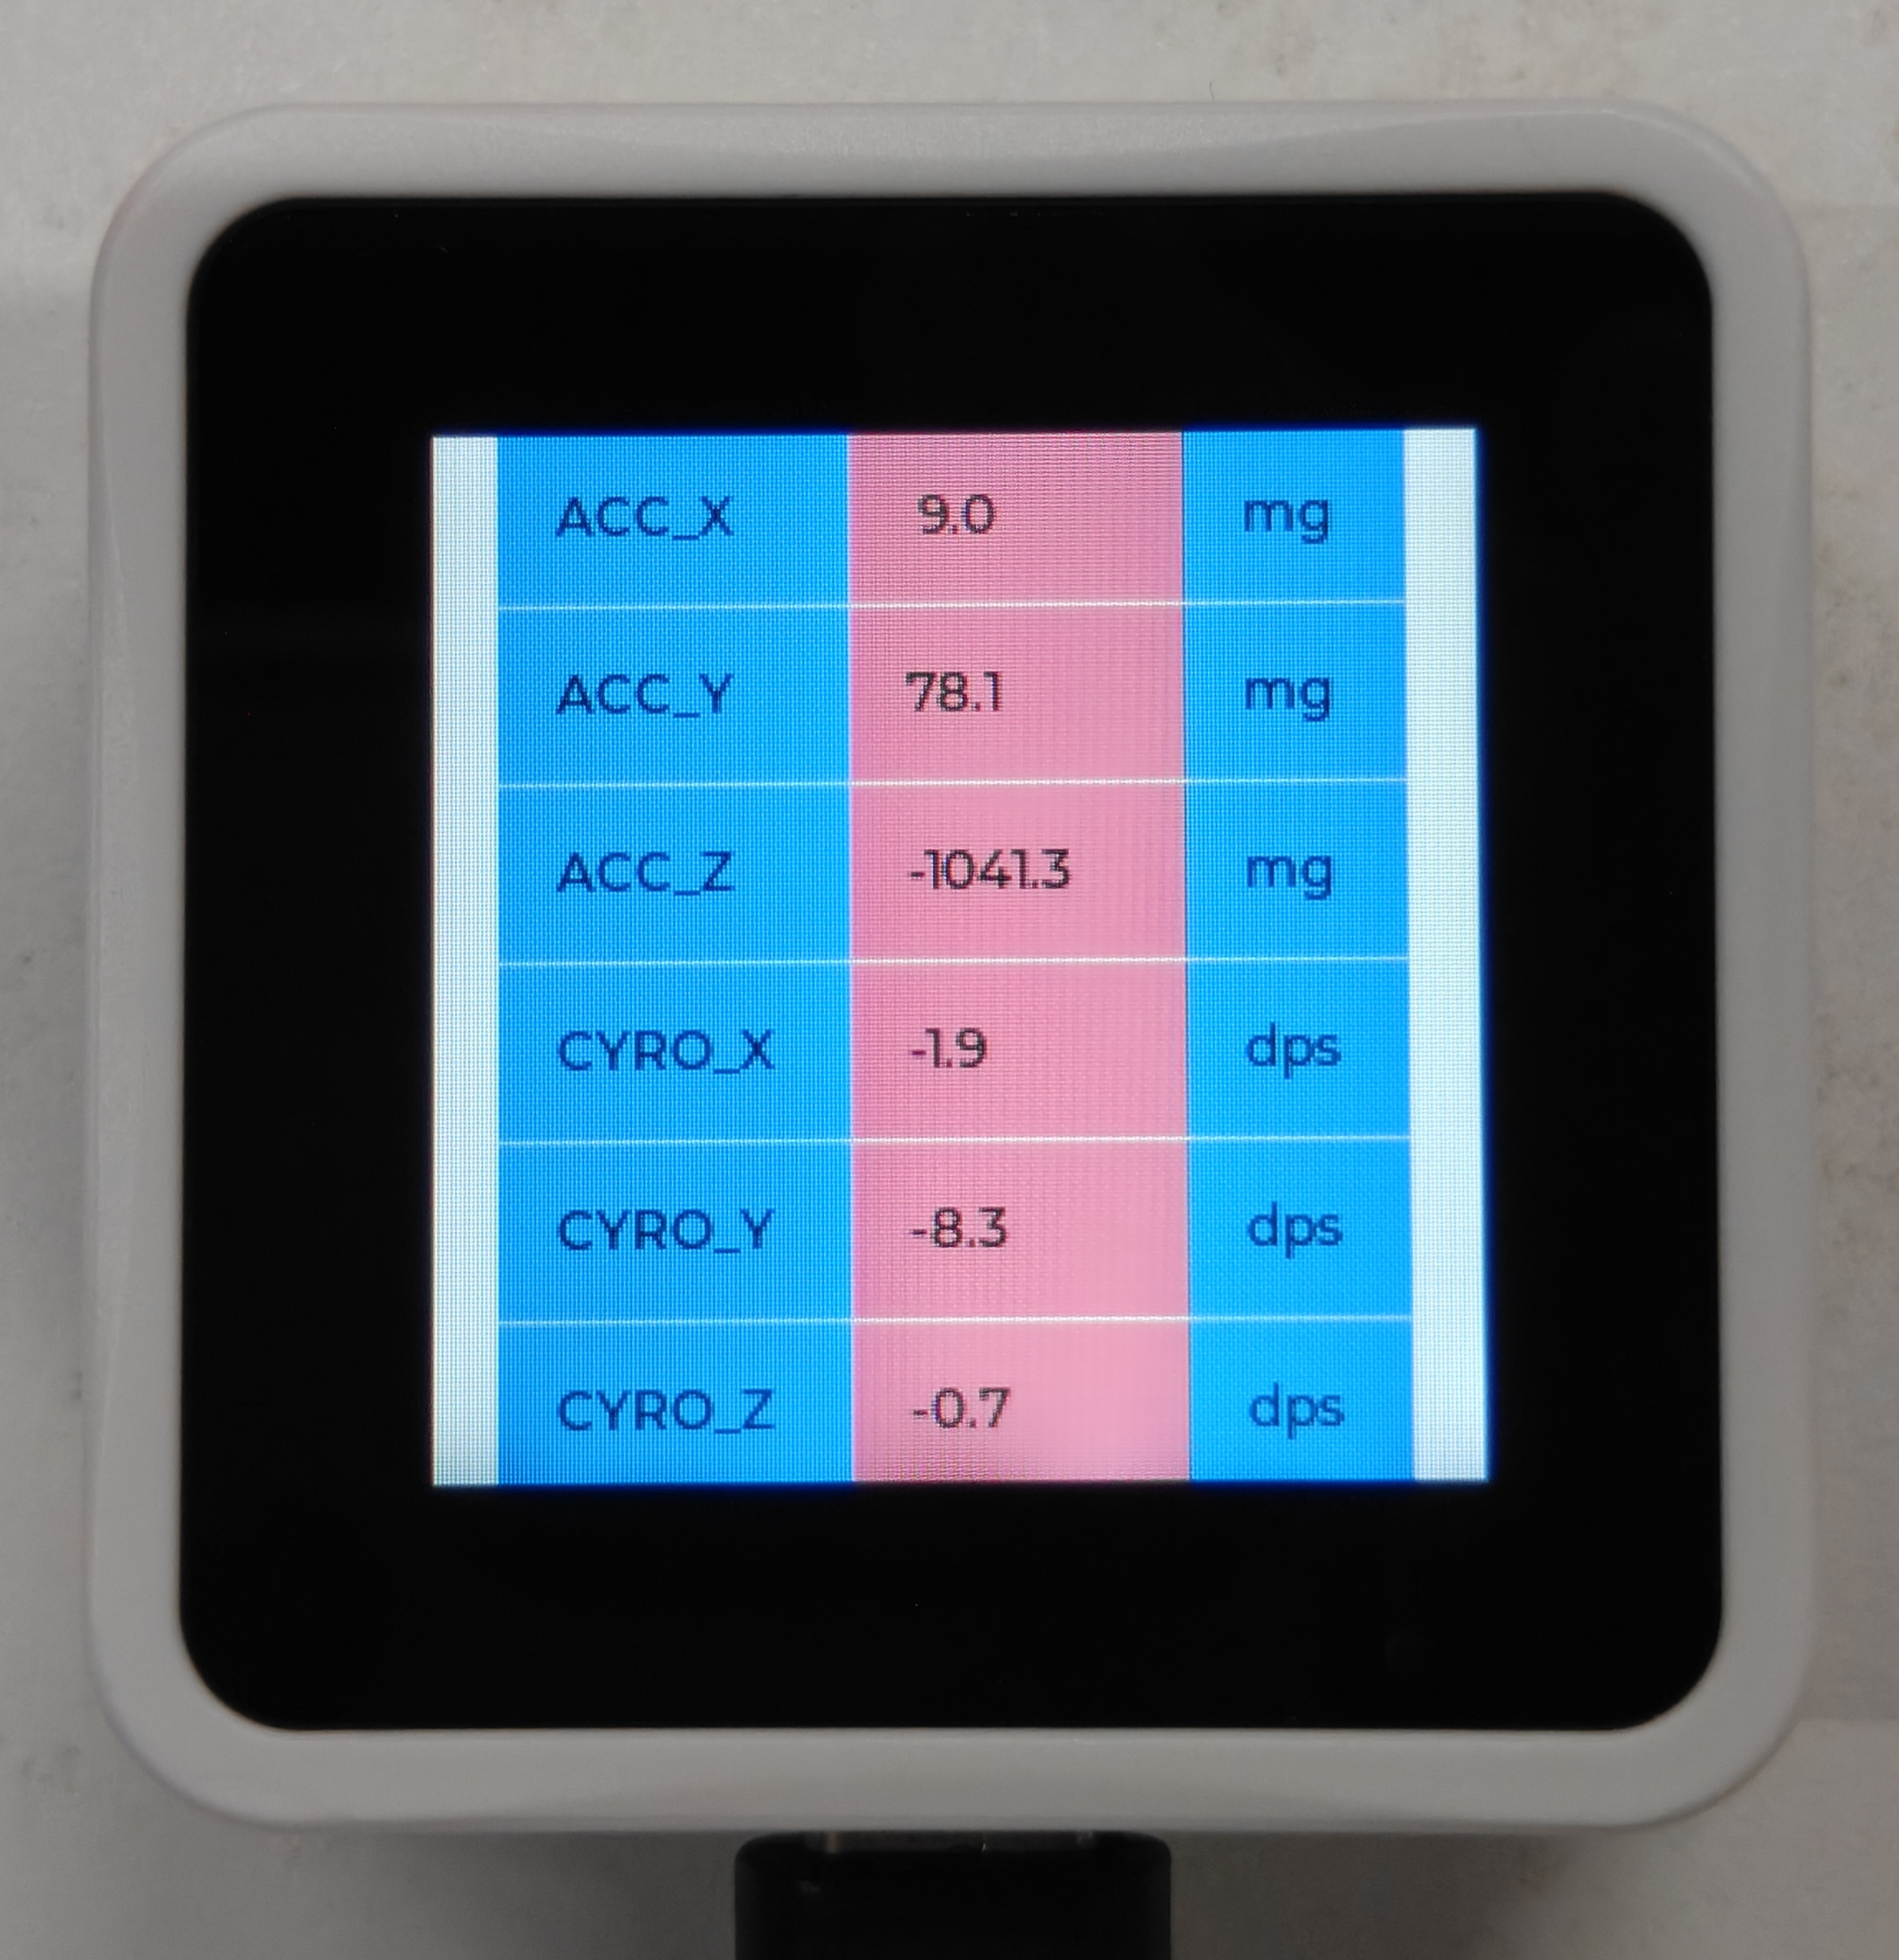
03_IMU
Demo Description
- Uses I2C to communicate with the onboard six-axis sensor and reads the sensor data.
Hardware Connection
- Connect the board to the computer using a USB cable
Code Analysis
IMU = QMI8658(): Creates an IMU object.IMU.Read_XYZ(): Reads the six-axis sensor data.
Operation Result
-
Run the py files in the
03_IMUfolder using Thonny.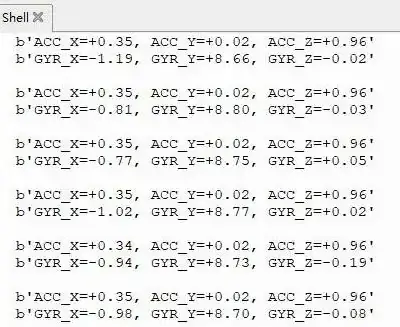
04_LVGL
Demo Description
- Uses SPI to communicate with the LCD and implements functions like displaying text and images via LVGL. The version used is 9.3. The LVGL V9 documentation does not provide Python examples. For detailed development, refer to the LVGL documentation.
Hardware Connection
- Connect the board to the computer using a USB cable
Compile and Run
-
Operation steps
-
Press and hold the BOOT button on the board, connect the board to your computer via USB, then release the button. The computer will recognize the board as a removable drive. Copy the
XXX-LVGL.uf2file from thefirmware\MicroPythondirectory of the example package to the board. -
Open Thonny, upload the
examplesandlibdirectories from the example package to the board.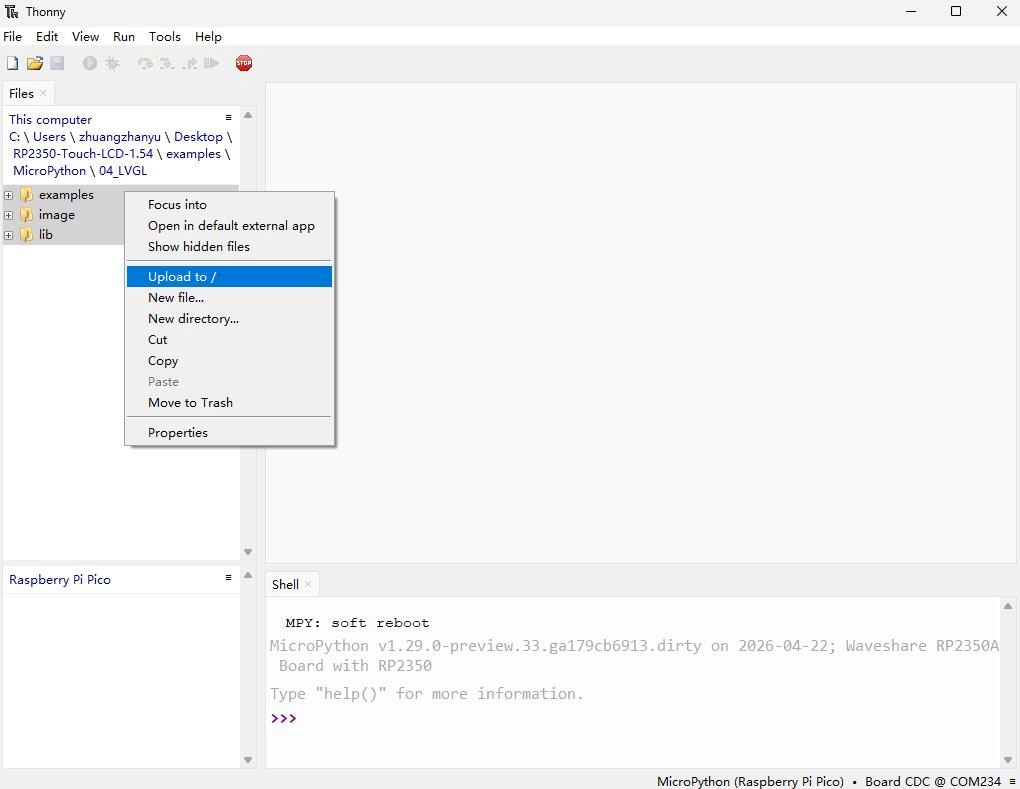
-
Open the file
XXX_LVGL_test.pyin theexamplesdirectory and run the program by following the steps shown below.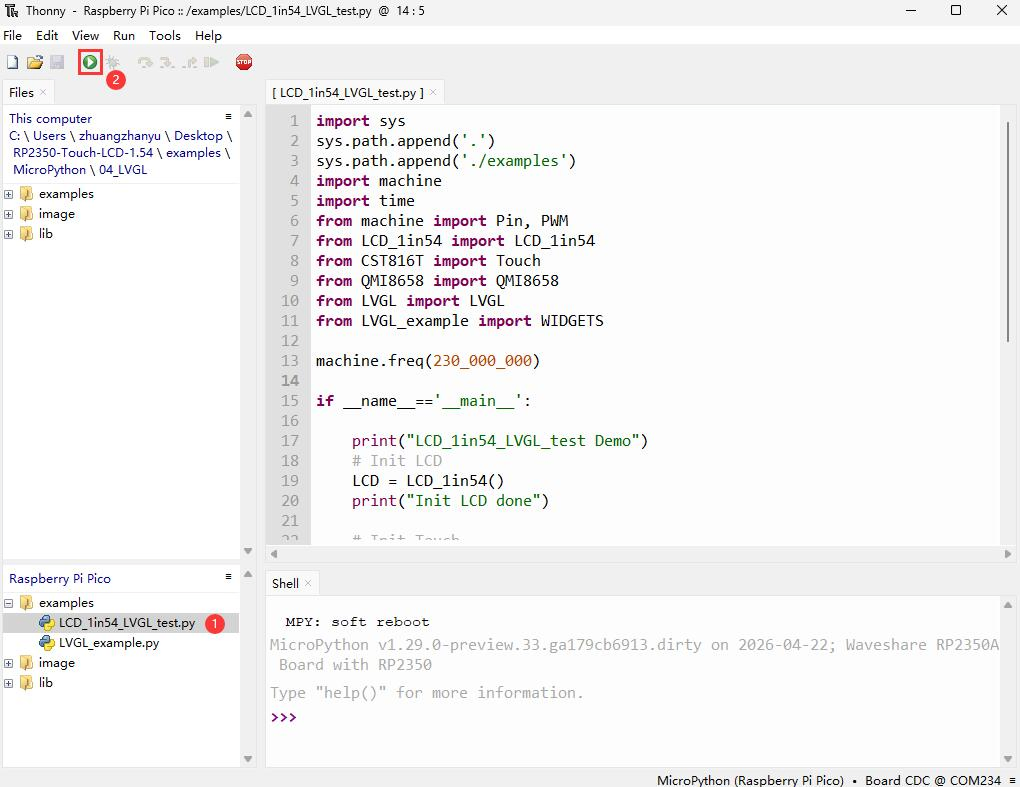
-
-
Building firmware
-
Build environment: Ubuntu 22.04
-
GitHub: lv_micropython
-
Compile firmware: refer to the Raspberry Pi Pico port section
-
Firmware path:
lv_micropython\ports\rp2\build-XXX\firmware.uf2
-
Code Analysis
Source Code Structure
-
For the LVGL library source code, refer to lv_micropython
-
LVGL library settings are in the
lv_micropython\lib\lv_bindings\lv_conf.hfile, where you can set display refresh frequency, system memory usage, etc. -
Application code for LVGL is located in
examples\LVGL_example.pyandlib\LVGL.pyin the project folder.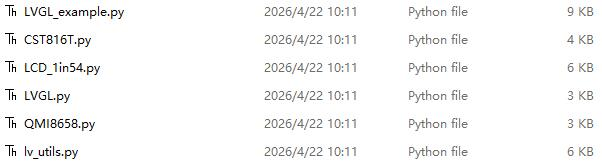
LVGL Initialization
Before using the LVGL graphics library, you need to import the LVGL library.
-
Import LVGL library
Code location:
lib\LVGL.pyFunction: imports the LVGL library and uses the alias
lvfor convenience.import lvgl as lv -
LVGL initialization
Code location:
lib\LVGL.pyDescription: LVGL core initialization is located in the initialization function of the LVGL class and is automatically called when an LVGL object is created.
if not lv.is_initialized(): lv.init() -
Create LVGL object
Code location:
examples\XXX_LVGL_test.pyFunction: creates an LVGL object and passes LCD and TSC objects as parameters
# Init LVGLLVGL(LCD=LCD,TSC=TSC)
LVGL Run
The LVGL library periodically calls the heartbeat interface function lv.tick_inc to inform LVGL of elapsed time, so that LVGL can update its internal time state and handle time-related tasks such as animations and timers. In addition, the lv.task_handler function must be called so that LVGL can promptly process events and tasks, ensuring UI responsiveness and refresh.
-
LVGL run interface
Code location:
lib\LVGL.pyImplementation: creates an
event_loopobject. In the initialization function of this class, a timer is created. This timer automatically calls the heartbeat interface function and event handler at set intervals. The call interval can be adjusted via thefreqparameter, e.g.,lv_utils.event_loop(freq=200), default is 40 ms.# Create event loop if not yet presentif not lv_utils.event_loop.is_running(): self.event_loop=lv_utils.event_loop() -
LVGL heartbeat interface
- Code location:
lib\lv_utils.py
Implementation: ensure that the priority of
lv.task_handleris lower than that oflv.tick_inc. Therefore, in this example,lv.tick_incis called in the timer callback function.# Call timer callback function every 5msself.timer.init(mode=Timer.PERIODIC, period=self.delay, callback=self.timer_cb) # in this example, self.delay = 5def timer_cb(self, t):lv.tick_inc(self.delay)if self.scheduled < self.max_scheduled:try:micropython.schedule(self.task_handler_ref, 0)self.scheduled += 1 # The number of tasks being processed has increasedexcept:pass - Code location:
-
LVGL task handler
- Code location:
lib\lv_utils.py
Implementation: to handle LVGL tasks,
lv.task_handlermust be called regularly. In this example, it is called afterlv.tick_incin the timer callback function.def task_handler(self, _):try:if lv._nesting.value == 0:lv.task_handler()if self.refresh_cb: self.refresh_cb()self.scheduled -= 1 # The number of tasks being processed has decreasedexcept Exception as e:if self.exception_sink:self.exception_sink(e) - Code location:
LVGL Display
To enable LVGL display, a display driver must be initialized and its various properties configured, such as color format, draw buffer, rendering mode, and display callback function. At each LV_DEF_REFR_PERIOD (configured in lv_conf.h), LVGL checks if anything requiring a redraw has occurred on the UI. For example, a button is pressed, a chart is changed, an animation occurs, etc. When redrawing is needed, LVGL calls the display callback function to complete the drawing of the image in the refresh area.
-
LVGL display refresh rate setting
Code location:
lv_micropython\lib\lv_bindings\lv_conf.hSetting method: modify
LV_DEF_REFR_PERIODinlv_conf.hto change the screen refresh time.#define LV_DEF_REFR_PERIOD 10 // Unit: ms, here is 10ms -
LVGL display related variable definitions
Code location:
lib\LVGL.pyFunction:
buf0andbuf1are sized to 50% of the screen display area to implement LVGL double buffering, which helps reduce tearing during full-screen refreshes while effectively improving the screen refresh rate.# Init LVGL displaybuf1 = lv.draw_buf_create(self.LCD.width, self.LCD.height // 2 , color_format, 0)buf2 = lv.draw_buf_create(self.LCD.width, self.LCD.height // 2 , color_format, 0) -
LVGL display device registration
Code location:
lib\LVGL.pyFunction: according to design requirements, complete the core structure variables of the LVGL library, initialize the display driver
disp_drv, and set the draw buffers. The draw buffers are simple arrays used by LVGL to render screen content. Once rendering is ready, the content of the draw buffer is sent to the display using thedisp_drv_flush_cbfunction set in the display driver.self.disp_drv = lv.display_create(self.LCD.width, self.LCD.height) # Create a display driver object and set the width and heightself.disp_drv.set_color_format(color_format) # Set color format to RGB565self.disp_drv.set_draw_buffers(buf1, buf2) # Set the drawing bufferself.disp_drv.set_render_mode(lv.DISPLAY_RENDER_MODE.PARTIAL) # Set the rendering mode to partial refresh modeself.disp_drv.set_flush_cb(self.disp_drv_flush_cb) # Set display callback function -
LVGL display callback function
Code location:
lib\LVGL.pyFunction: mainly completes the drawing of the image in the refresh area.
def disp_drv_flush_cb(self,disp_drv,area,color_p)Parameters:disp_drv : Displays driver structure pointers, which contain information about the display and function pointers. This parameter is often used to notify you that the refresh is completearea : Region structure pointer, containing the position information of the area to be refreshed. In this demo, you can use it for creating TFT display window.color_p : Color structure pointer, indicating the color data to be displayed in the refresh area. In this demo, it reads the address as DMA input to transmit data to the SPI bus and completes the image drawing -
LVGL display callback function implementation
Code location:
lib\LVGL.pyImplementation: to minimize processor utilization, DMA is used for color data transfer.
color_pis set as the read address, and the SPI bus output data register is the write address. The code is long, only a partial example is shown. For the complete code, download the example.def disp_drv_flush_cb(self,disp_drv,area,color_p):self.rp2_wait_dma() # Wait for DMA to be idle......self.rgb565_swap_func(data_view, size) # Convert color formatself.LCD.setWindows(area.x1, area.y1, area.x2+1, area.y2+1) # Set LVGL interface display position...... # DMA configurationself.rp2_dma.enable() # Enable DMAself.rp2_wait_dma() # Wait for DMA to be idleself.disp_drv.flush_ready() # Notify LVGL that data transfer is complete
LVGL Input
In LVGL, users can register input devices such as touchpads, mice, keyboards, or encoders, etc. Users can control the user interface through these input devices to achieve better interaction.
-
Frequency of calling the input device callback in LVGL
Code location:
lv_micropython\lib\lv_bindings\lv_conf.hSetting method: uses the same macro as the screen refresh time. The input device callback is called every 10ms to update events triggered by the input device. Can be set by modifying the
LV_DEF_REFR_PERIODmacro.#define LV_DEF_REFR_PERIOD 10 // unit: ms, here 10ms -
LVGL input device registration
Code location:
examples\LVGL_example.pySetting method: register the touch screen device
indev_drvand initialize it.# Init touch screen as input deviceself.indev_drv = lv.indev_create() # Create an objectself.indev_drv.set_type(lv.INDEV_TYPE.POINTER) # Register a touchscreen deviceself.indev_drv.set_read_cb(self.indev_drv_read_cb) # Set callback function -
LVGL input device callback function
Code location:
lib\LVGL.pyFunction: mainly used to update input events.
def indev_drv_read_cb(indev_drv, data)Parameters:indev_drv : Pointer to the input device driver structure in LVGL. In this case, the structure is a touch screen input device driverdata : Pointer to the input device driver structure in LVGL. In this case, the structure is used to store the status and data of the input device, including the current touch state (pressed or released) and the coordinates of the touch points -
Touch screen input device callback implementation
Code location:
lib\CST816T.py,lib\LVGL.pyImplementation: mainly updates the touch state and touch point coordinates via touch interrupt.
def Int_Callback(self,pin):if self.Mode == 0 :self.Gestures = self._read_byte(0x01)elif self.Mode == 1 :self.Flag = 1self.get_point()elif self.Mode == 2 :self.Flag = 1self.get_point()self.Gestures = self._read_byte(0x01)def indev_drv_read_cb( self, indev_drv, data):self.rp2_wait_dma()data.point.x = self.TSC.X_pointdata.point.y = self.TSC.Y_pointdata.state = 1 if self.TSC.Flag == 1 else 0self.TSC.Flag = 0
LVGL Widget Layout
In LVGL, we can create various user interfaces. The basic components of the interface are objects, also called widgets, such as buttons, labels, images, lists, charts, or text areas. In a interface, we can create multiple widgets simultaneously and set their positions, sizes, parent objects, styles, and event handlers and other basic properties.
-
Create LVGL screen object
Code location:
examples\LVGL_example.pyFunction: creates an LVGL screen object and passes LCD, TSC, and IMU objects as parameters.
# Init WIDGETSWIDGETS(LCD=LCD,TSC=TSC,IMU=IMU) -
Create LVGL tile
Code location:
examples\LVGL_example.pyFunction: A Tile view is a container object whose elements (called tiles) can be arranged in a grid. Users can navigate between tiles by swiping. Use the tile view object to call
add_tile(tileview, row_id, col_id, dir)to create a new tile at rowrow_idandcolumn col_id.dircan be set to parameters such aslv.DIR.LEFT/RIGHT/TOP/BOTTOM/HOR/VER/ALLto allow moving to adjacent tiles in the given direction by swiping.# Create a tile at (0,0) that supports swiping down to (0,1)self.tv = lv.tileview(self.scr)self.tile1 = self.tv.add_tile(0, 0, lv.DIR.BOTTOM) -
Create LVGL widget
Code location:
examples\LVGL_example.pyFunction: create a widget. Different widgets require different function interfaces. You can choose a parent object when creating.
# Create a table widget, where tile2 is its parent object. Can be replaced with list, title, or any object that can have children.self.table_imu_data = lv.table(self.tile2) -
Alignment and positioning of LVGL widgets
Code location:
examples\LVGL_example.pyFunction: allows a widget to be offset-positioned relative to a reference point. The reference point for alignment offset is the center of the widget.
Alignment standard: LVGL supports both internal and external alignment. By default, the upper-left corner is the origin, the leftward as the positive horizontal direction, and the downward as the positive vertical direction.
// Position the widget 15 pixels to the right from the center pointself.table_imu_data.align(lv.ALIGN.CENTER, 15 ,0)
-
Changing font size in LVGL widgets
Code location:
lv_micropython\lib\lv_bindings\lv_conf.h,examples\LVGL_example.pyFunction: in practice, a screen may need multiple font sizes. You can enable multiple font sizes in
lv_conf.hand set the default font size. To set the font size, you need to style the widget so that it renders according to the set style. Useadd_styleto define how each part of the widget is rendered under different states.// lv_micropython\lib\lv_bindings\lv_conf.h#define LV_FONT_MONTSERRAT_16 1 // Enable font 16#define LV_FONT_MONTSERRAT_18 1 // Enable font 18#define LV_FONT_DEFAULT &lv_font_montserrat_18 // Set the default font size as 18# examples\LVGL_example.pytable_imu_data= lv.style_t() # create style objecttable_imu_data.init() # initializetable_imu_data.set_text_font(lv.font_montserrat_16) # set font size to 16self.table_imu_data.add_style(style_imu_table, 0) # set the style -
LVGL widget event handling
Code location:
examples\LVGL_example.pyFunction: in LVGL, you can add event callback functions to widgets so that when events such as clicking, scrolling, or redrawing occur, the event triggers and the callback function is executed. Call
obj.add_event_cb(event_cb, filter, None)to add the event handlerevent_cbfor the eventfilterto the widgetobj. When the widgetobjtriggers thefilterevent, the system automatically callsevent_cb. The last parameter is a pointer to any custom data available in the event.# Add event handler LV_EVENT_VALUE_CHANGED to widget sw, using function sw_event_cbself.sw.add_event_cb(self.sw_event_cb, lv.EVENT.VALUE_CHANGED, None)
Operation Result
-
Run the
LCD_1in54_LVGL_test.pyfile in the04_LVGL\examplesdirectory using Thonny.