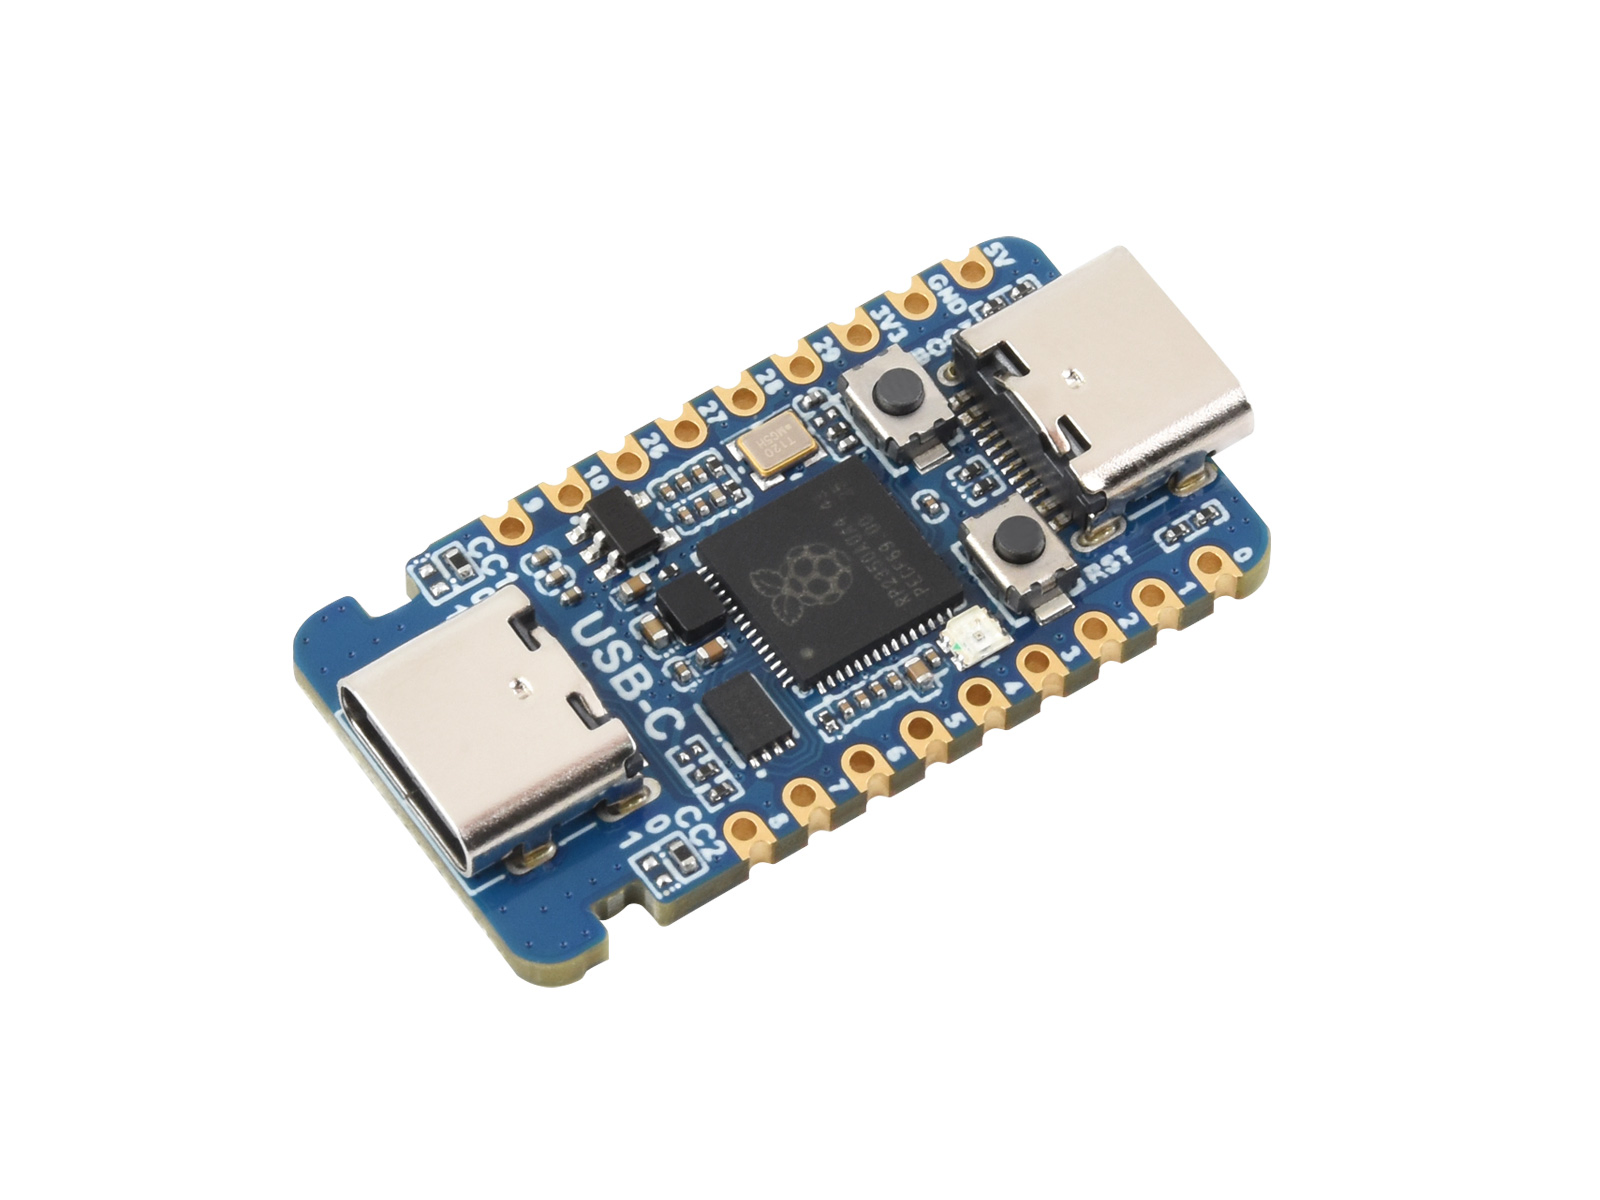
RP2350-USB-C
- RP2350-USB-C (PIO-USB female port)
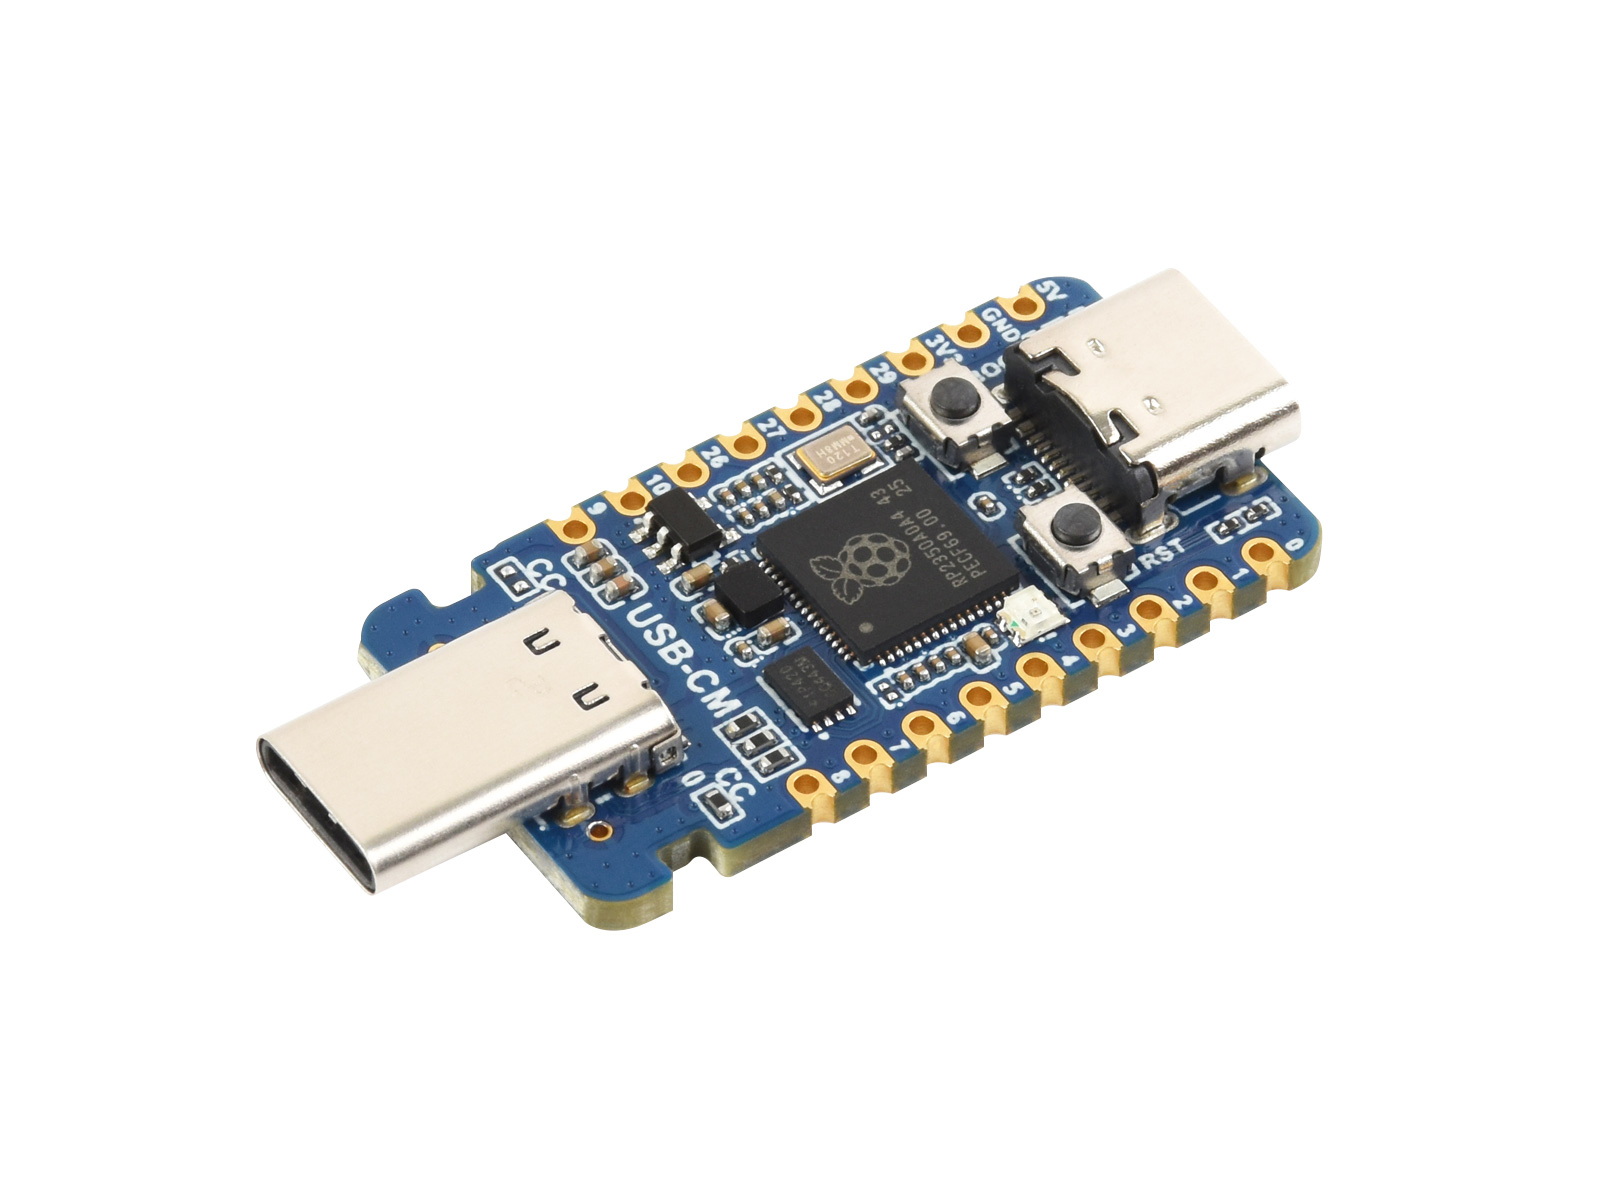
- RP2350-USB-CM (PIO-USB male port)
This product is a high-performance, highly integrated microcontroller development board independently designed by Waveshare. It integrates a large capacity of Flash, onboard PIO-USB, RGB, and other peripherals. In a very compact form factor, it brings out 15 multifunctional GPIO pins, and the PCB edges feature a half-hole (castellated) process, facilitating easy development and integration into end products.
| SKU | Product |
|---|---|
| 34641 | RP2350-USB-C |
| 34953 | RP2350-USB-CM |
Features
- Utilizes the RP2350A microcontroller chip designed by Raspberry Pi
- Unique dual-core, dual-architecture, featuring dual-core ARM Cortex-M33 processors and dual-core Hazard3 RISC-V processors, both operating at up to 150MHz, allowing users to flexibly switch between the two architectures
- Built-in 520KB of SRAM and 2MB of on-chip Flash
- Utilizes a Type-C port, eliminating the hassle of plug orientation
- Supports Type-C power supply (compatible with PD protocol)
- Castellated module design allows direct soldering and integration onto custom base boards
- USB1.1 host and slave device support
- Supports low-power sleep and dormant modes
- Drag-and-drop programming using mass storage over USB
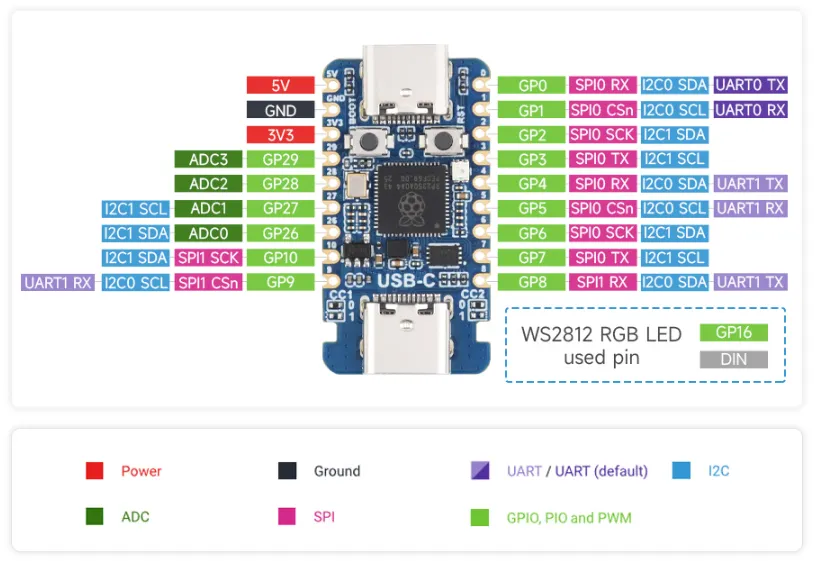
- 15 × multi-function GPIO pins of the RP2350A are brought out
- 2 × SPI, 2 × I2C, 2 × UART, 4 × 12-bit ADC and 14 × controllable PWM channels
- Accurate on-chip clock and timer
- Built-in temperature sensor for real-time chip temperature monitoring
- 12 × programmable I/O (PIO) state machines for custom peripheral support
Onboard Resources
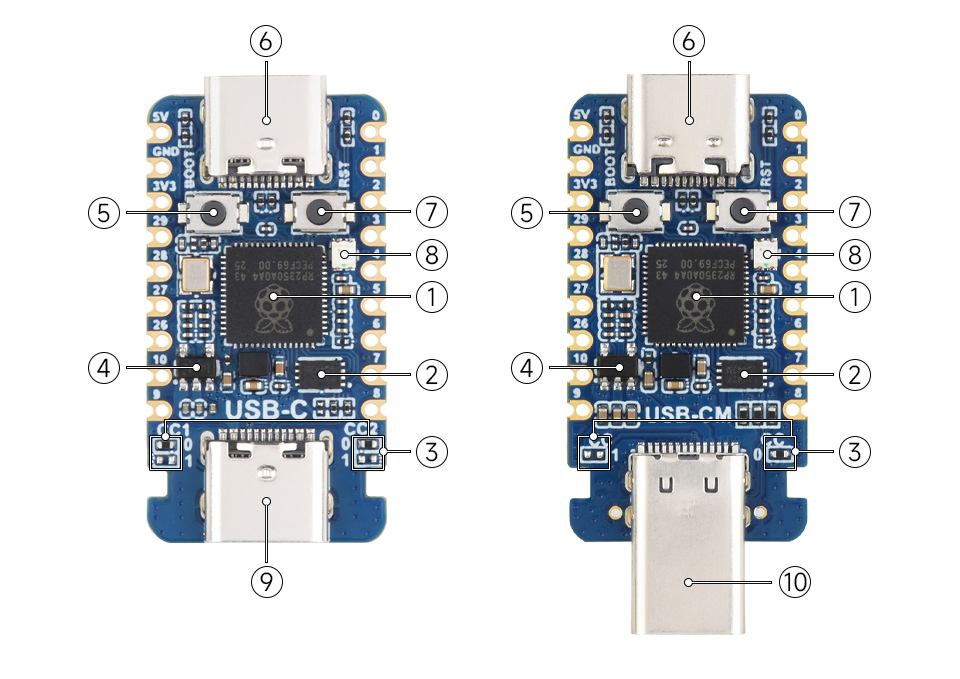
- RP2350A Dual-core, dual-architecture processor, up to 150MHz operating frequency
- W25Q16JVUXIQ 2MB NOR Flash
- PIO-USB CCX pull-up/pull-down resistors Supports Sink / Source switching via resistor configuration
- RT9013-33GB 500mA low dropout, low noise, ultra-fast LDO
- BOOT button Press while resetting to enter download mode
- USB Type-C Port For programming, supports USB1.1 host and device
- RUN Reset Button For resetting the board
- WS2812 Colorful RGB LED
- PIO-USB (Type-C female port) For using as a USB host or device via PIO
- PIO-USB (Type-C male port) For using as a USB host or device via PIO
Interface Introduction
Dimensions
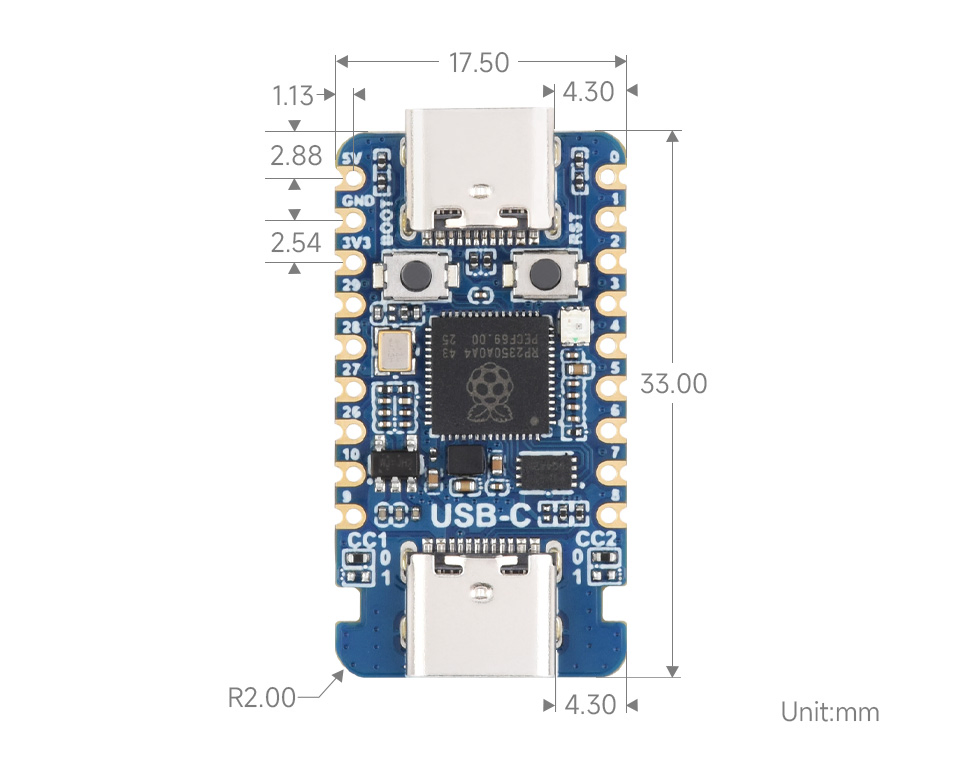
RP2350-USB-C
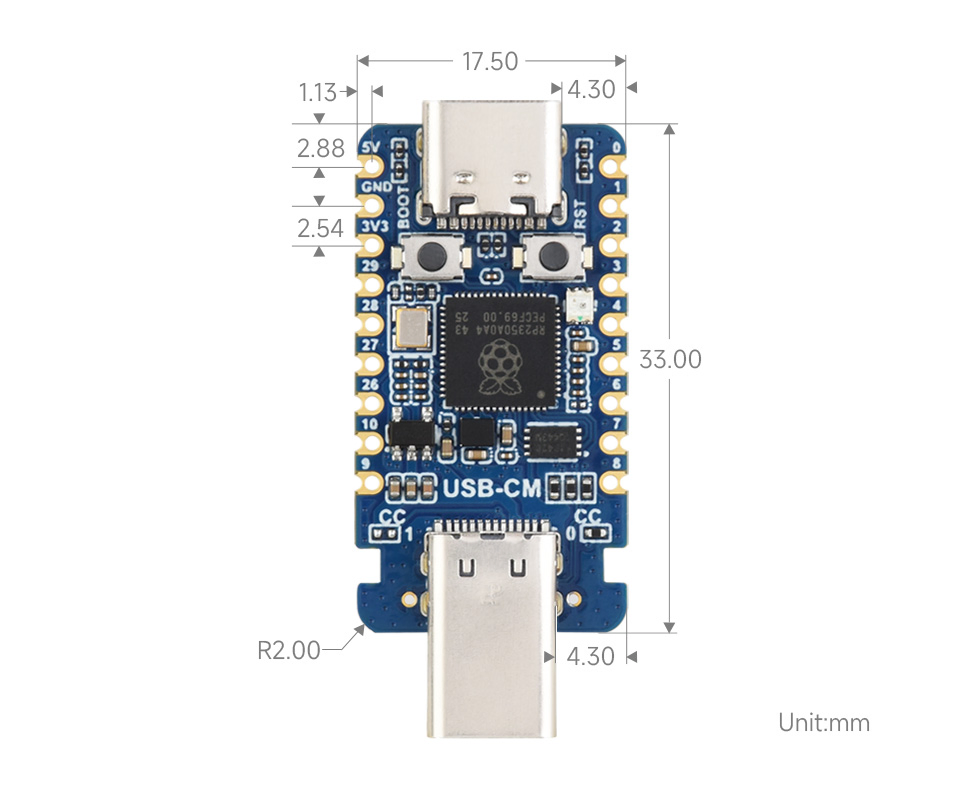
RP2350-USB-CM
Development Methods
RP2350-USB-C and RP2350-USB-CM support three programming languages: MicroPython, C/C++, and Arduino, offering flexible choices to developers. You can select the appropriate development tools and programming methods based on project requirements and personal preference:
-
Thonny IDE (Working with MicroPython): Thonny is a lightweight Python Integrated Development Environment designed for beginners and educational scenarios, now widely used for MicroPython / CircuitPython development. Its interface is simple and intuitive, featuring a built-in Python interpreter, support for serial REPL, code flashing, and debugging, with a straightforward setup process. MicroPython is easy to learn and runs without compilation, making it ideal for beginners to quickly start embedded development. You can refer to the Working with MicroPython for initial setup, which provides detailed environment configuration steps and example programs.
-
VS Code + Pico SDK (Working with C/C++): VS Code is a powerful cross-platform code editor. By installing the Pico VS Code extension, a complete C/C++ development environment can be quickly set up. This extension integrates the Pico SDK toolchain, CMake build system, flashing and debugging tools, supports graphical operations, and offers high development efficiency. C/C++ development fully utilizes hardware performance, making it suitable for projects with higher performance requirements and professional developers, and is more applicable for complex embedded applications. You can refer to the Working with C/C++ for initial setup, which provides detailed environment configuration steps and example programs.
-
Arduino IDE (Working with Arduino): The Arduino IDE is a convenient, flexible, and easy-to-use open-source electronics prototyping platform. Arduino boasts a vast global user community, offering a massive library of open-source code, project examples, tutorials, and rich library resources. These libraries encapsulate complex functionalities, allowing developers to implement various features quickly without delving into low-level details. It is very suitable for rapid prototyping and verification, significantly shortening development cycles. Please refer to the Working with Arduino for initial setup; the tutorial provides detailed environment configuration steps.