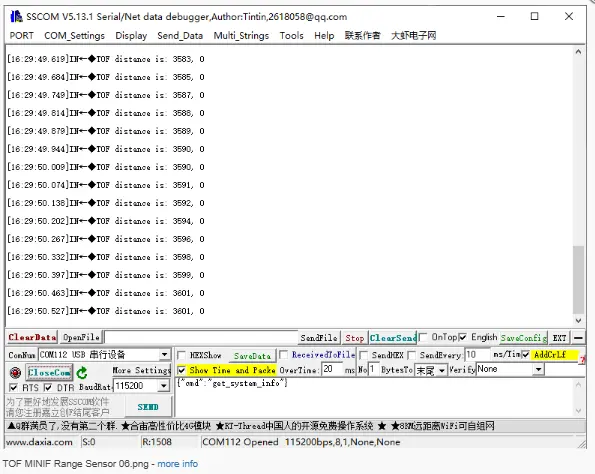
Working with Raspberry Pi Pico
This chapter includes the following sections:
Setting Up the Development Environment
1. Installation and Configuration
- For Raspberry Pi Pico environment setup and basic usage, please refer to the following links:
- After setting up the environment, connect the sensor and download the example package.
Example
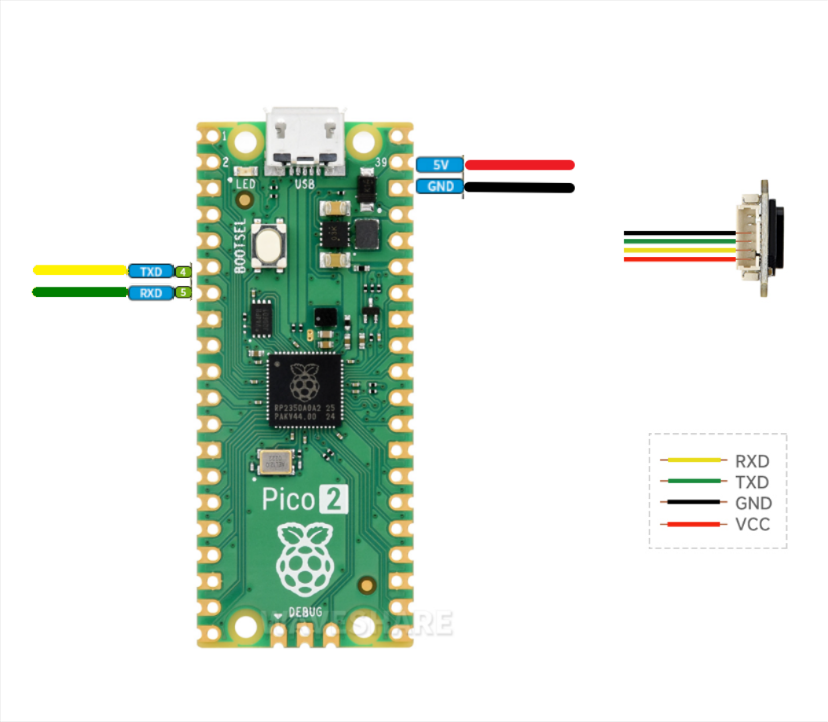
Hardware Connection
Connect as shown in the figure below.
Running the Arduino Pico Example
-
Navigate to
TOF_MINIF_Range_Sensor_Demo/TOF_MINIF_Range_Sensor_Demo/pico/Arduino/TOF_UART_Demoand double-clickTOF_UART_Demo.inoto open the project. -
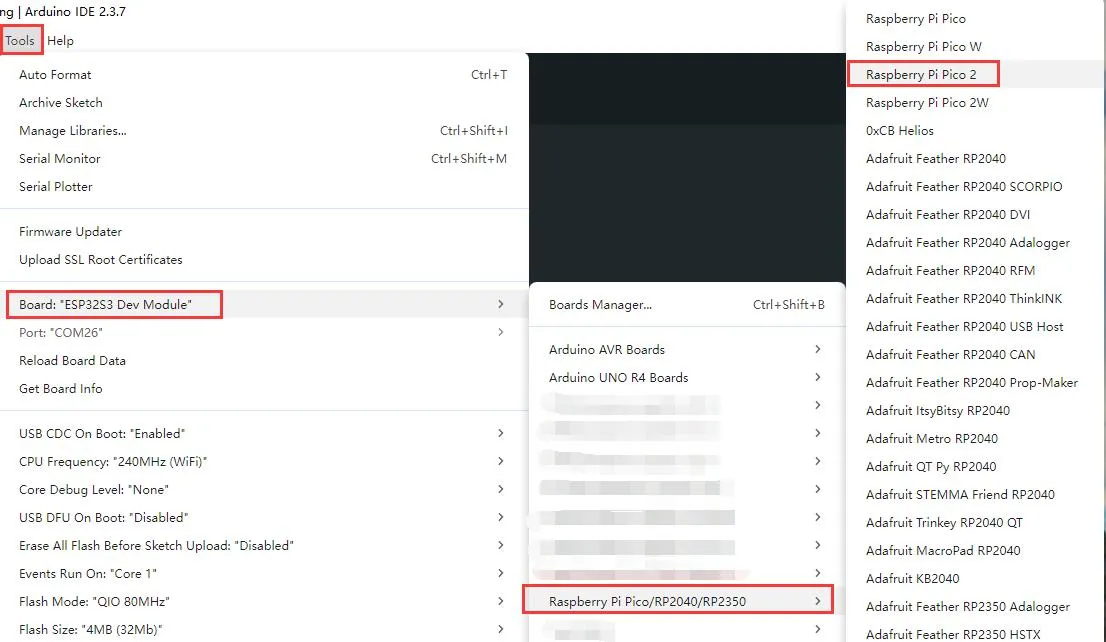
Select the chip model and port.
-
After upload is complete, open the Serial Monitor to view the output.
Running the MicroPython Example
-
First flash the MicroPython firmware to the Raspberry Pi Pico.
-
Navigate to
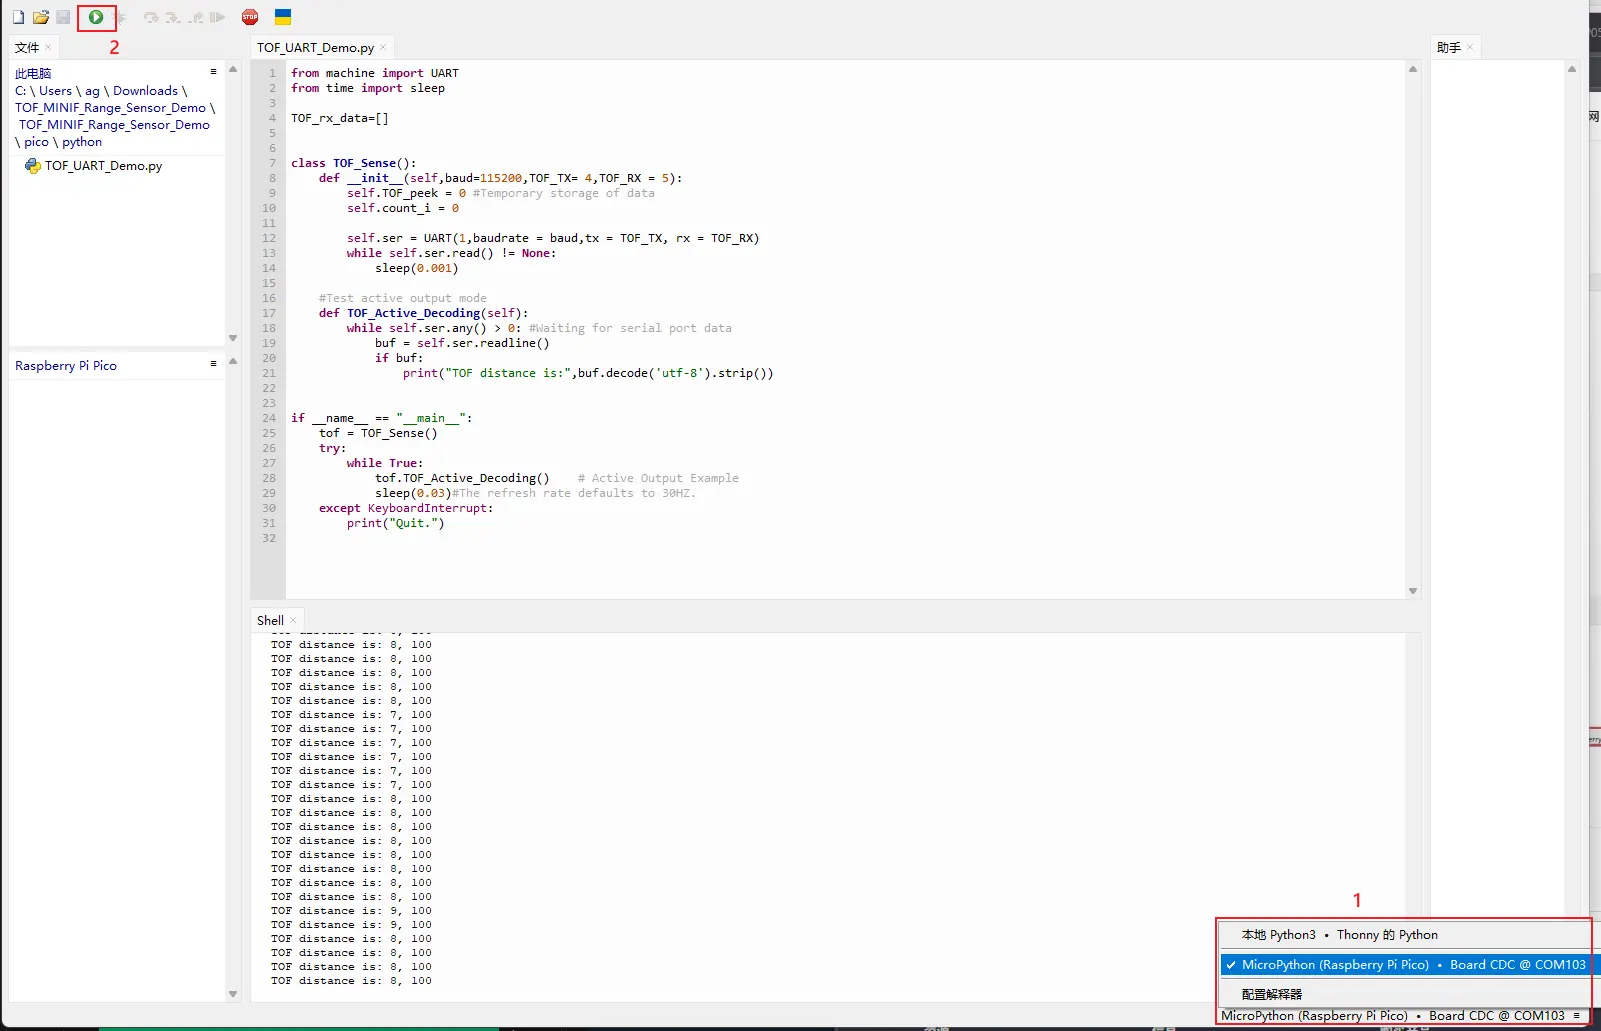
TOF_MINIF_Range_Sensor_Demo/TOF_MINIF_Range_Sensor_Demo/pico/pythonand double-clickTOF_UART_Demo.pyto open the project in Thonny. -
Select the development board.
-
Select the Raspberry Pi Pico port, then run the example.
-
The shell will display the relevant output.
Running the C Example
-
Navigate to
TOF_MINIF_Range_Sensor_Demo/Pico/cand open this folder in VS Code. -
Import this project in the Pico tools.
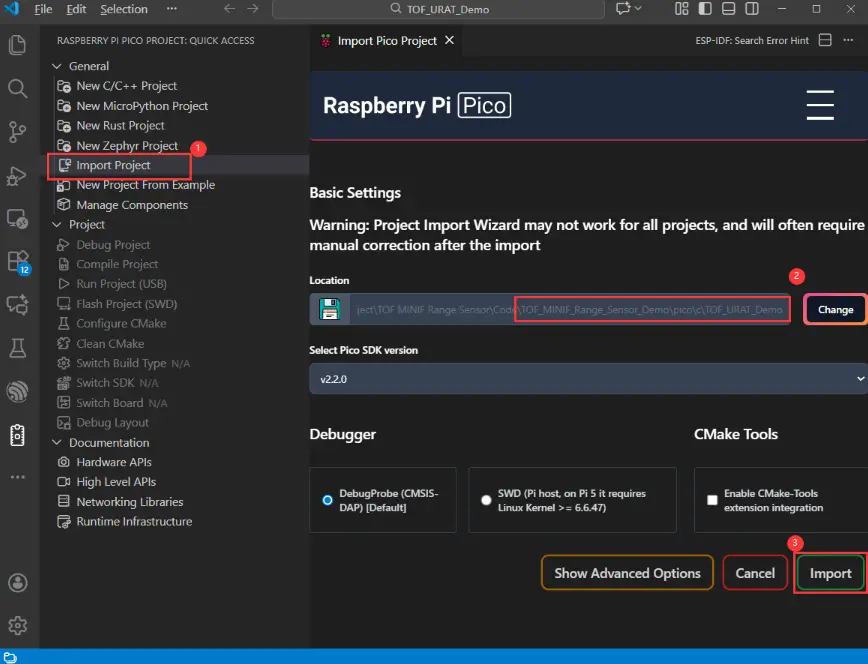
-
After import succeeds, click "Compile" to build. After compilation, put the Pico into BOOT mode and copy the UF2 firmware to the RP2040 disk.
-
Open a serial debug tool to view the output.