Working with Arduino
This chapter includes the following sections:
Setting Up the Development Environment
1. Installation and Configuration
- For setting up the Arduino environment and basic usage, please refer to this R4 link; R3 comes pre-installed by default.
- After setting up the environment, connect the sensor and download the example package.
2. Hardware Configuration
- The IO level of the Arduino board must be 3.3 V. If using 5 V IO levels, a level shifter is required; otherwise, the sensor may be damaged.
- When using Waveshare R3/R4, set the following jumpers to 3.3 V.
| Image | Description |
|---|---|
 | Arduino UNO R3 |
 | Arduino UNO R4 |
 | Arduino UNO R4 WIFI |
Example
Hardware Connection
Connect as shown in the figure below.
| Image | Description |
|---|---|
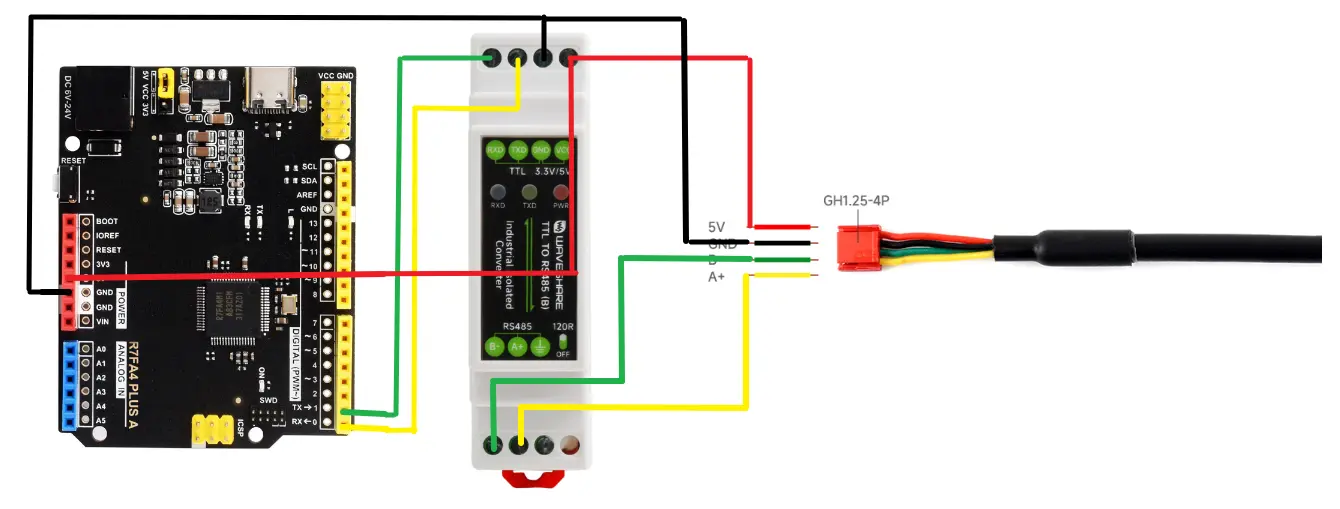 | Arduino UNO R3 |
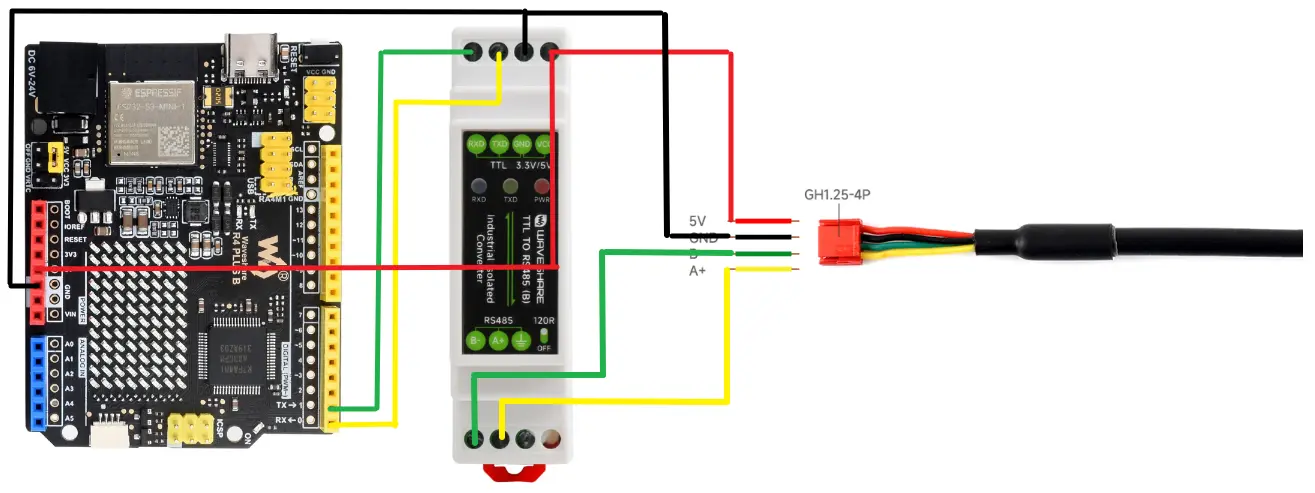 | Arduino UNO R4 |
Running the Example
-
Navigate to
TOF-MINIS-Range-Sensor/example/Arduino/uno_r3_arduino_exampleand double-click theuno_r3_arduino_example.inofile. -
Select the development board:
Image Description 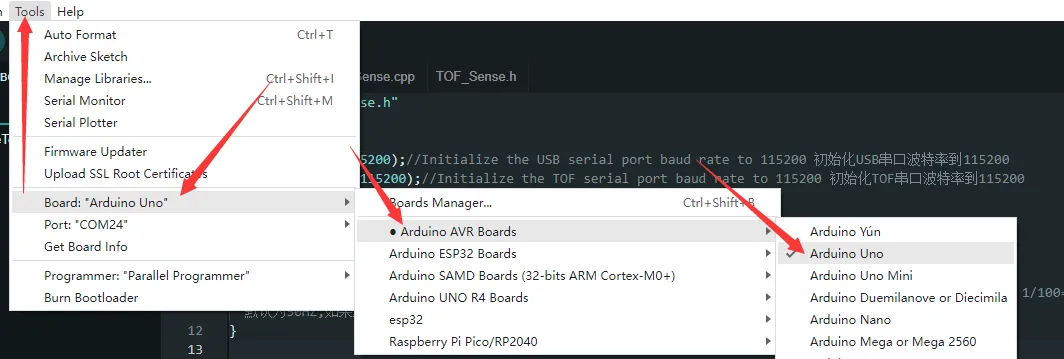
Arduino UNO R3 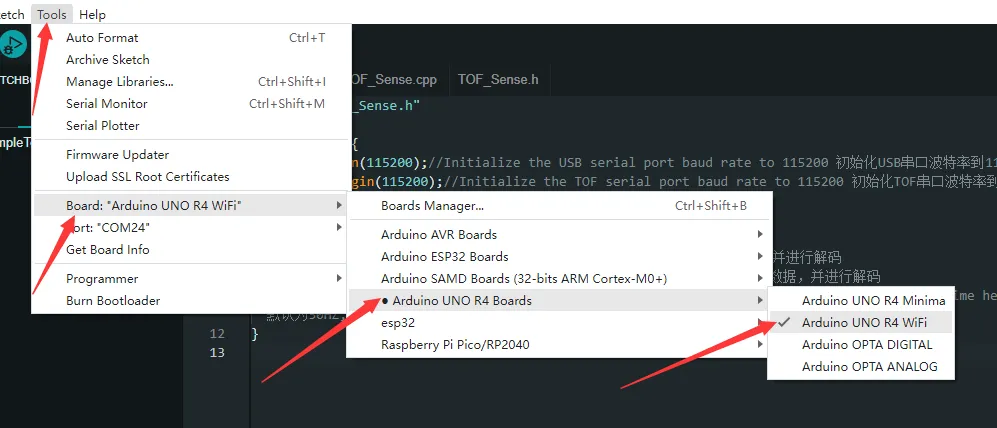
Arduino UNO R4 -
Select the board port, then compile and upload.
-
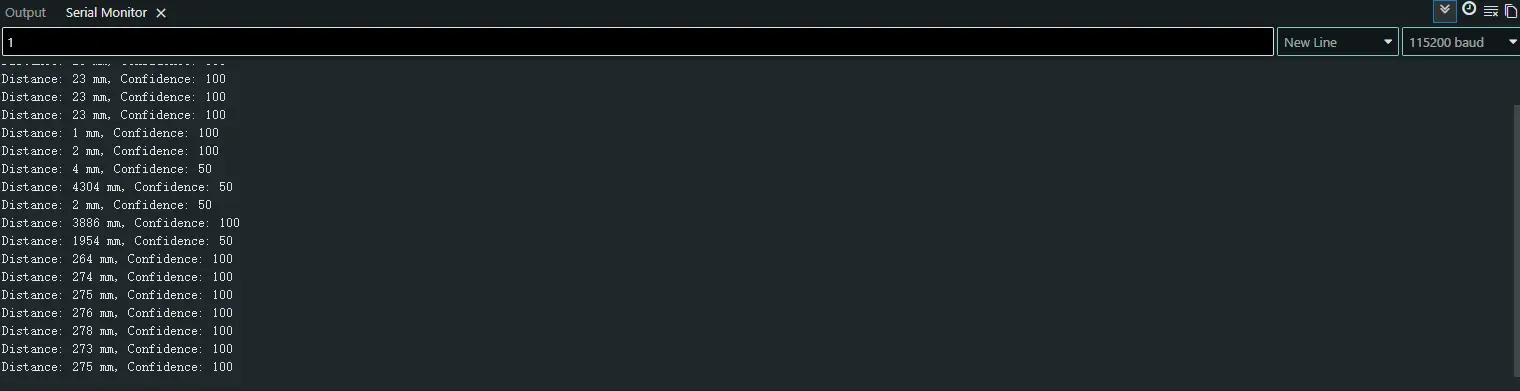
After upload is complete, open the Serial Monitor to view the output.