Working with Raspberry Pi
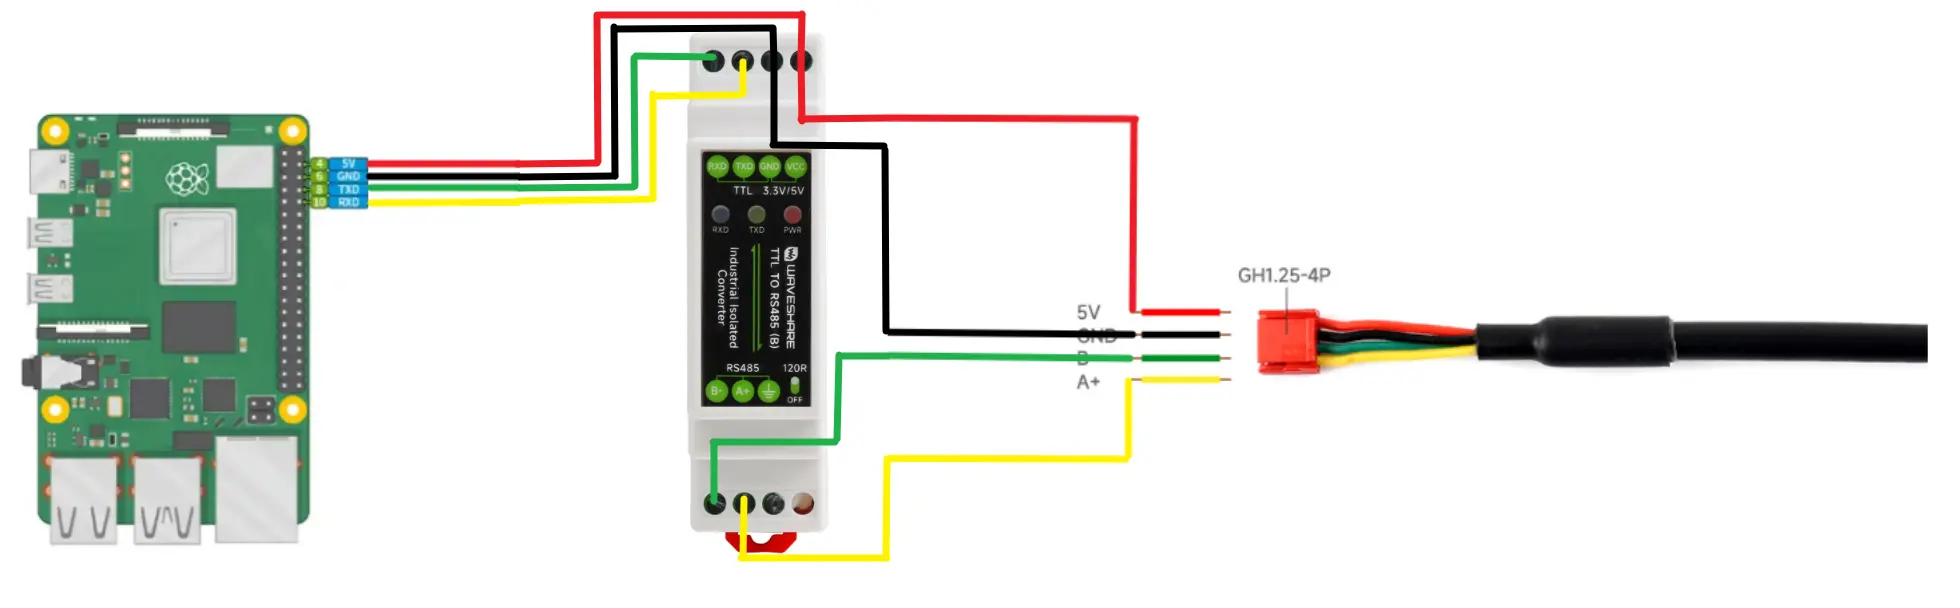
Hardware Wiring
Raspberry Pi Header (UART)
- Physical pin
8: TX (Raspberry Pi transmit) - Physical pin
10: RX (Raspberry Pi receive) GND: → TTL-to-RS485 moduleGND(ground must be common)
RS485 Bus Side
- TTL-to-RS485 module
A→ DeviceA+ - TTL-to-RS485 module
B→ DeviceB-
If no data is read, try swapping A/B first (A/B labeling may differ between modules/devices).
1. Enable Serial Hardware (do once)
sudo raspi-config
Navigate to:
Interface Options→Serial Port- For "Login shell over serial?" select
No - For "Enable serial hardware?" select
Yes


Then reboot:
sudo reboot
2. Install Dependencies (do once)
sudo apt update
sudo apt install -y python3-pip
pip3 install pyserial
3. Copy This Folder to the New Raspberry Pi
Copy the entire pi5_minis2_rs485_example/ folder to any directory on the new Raspberry Pi (e.g., Desktop or home directory).
4. Find the Correct Serial Port Name (Critical)
The header UART device name may vary across different Raspberry Pi models or system configurations. List them:
ls -l /dev/ttyAMA* /dev/ttyS* /dev/serial*
Common order (from most common to alternatives):
/dev/ttyAMA0/dev/serial0- Other
/dev/ttyAMA*entries
5. Run the Example (recommended to specify the port manually)
For example, if the port is /dev/ttyAMA0:
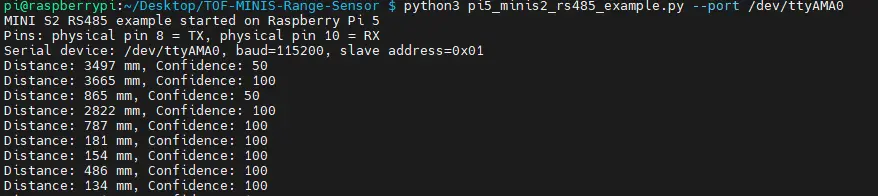
python3 pi5_minis2_rs485_example.py --port /dev/ttyAMA0
Normal output looks like:
Distance: 100 mm, Confidence: 100
Shortest Troubleshooting Order When No Data Is Read
- Try a different port:
--port /dev/ttyAMA0↔--port /dev/serial0↔ otherttyAMA* - Swap RS485
A/B - Verify TX/RX are not reversed:
8 -> DI,10 -> RO - Verify power and common ground are correct (power the device according to its manual)