Section 03 Debugging TF card Interface
The ESP32-S3 has a built-in SD/MMC host controller (SDHOST) that supports TF Memory, SDIO, MMC/eMMC, and CE-ATA devices, and can operate in 1-bit, 4-bit, or 8-bit bus modes.
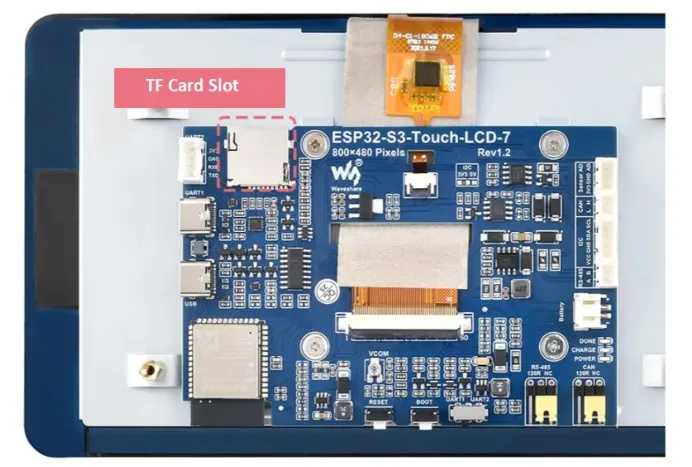
On this product, the ESP32-S3-Touch-LCD-7, we have integrated a TF card slot that uses the SPI communication interface, which consumes fewer GPIO pins. In the following tutorial, we will learn how to connect and call the TF card, allowing users to quickly verify the TF card functionality.
Hardware Design
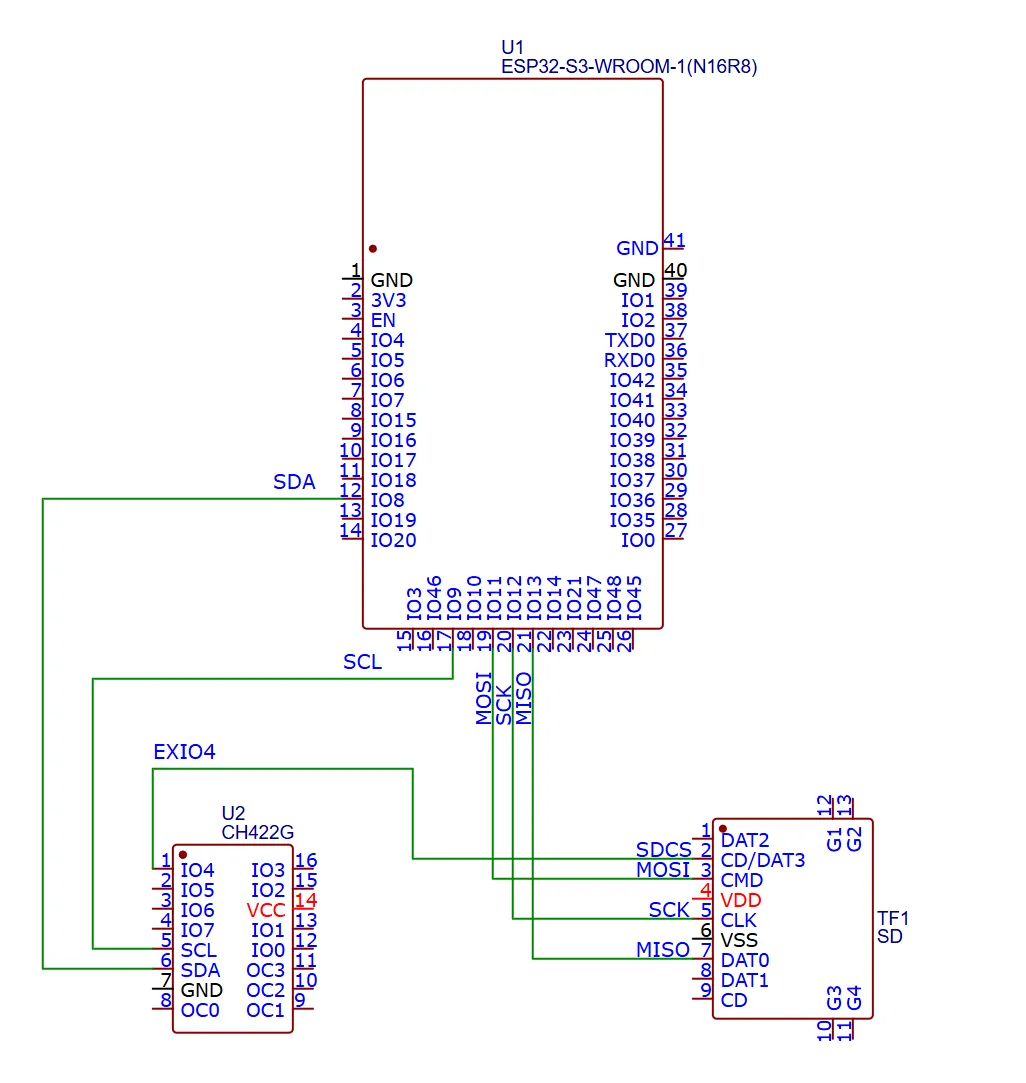
In this product, we use the ESP32-S3 chip to control the TF card via the SPI interface. Pins IO11, IO12, and IO13 are defined as MOSI, SCK, and MISO respectively for connecting to the TF card. Additionally, pins IO8 and IO9 are defined as I2C SDA and SCL to communicate with the CH422G expansion chip, and the expanded EXIO4 pin serves as the TF card chip select (SDCS).
The following is a simplified circuit diagram of the above design. For a more detailed schematic, please refer to the schematic.
Required Components
- ESP32-S3-Touch-LCD-7 x1
- USB cable Type-A male to Type-C male x1
- TF card x1
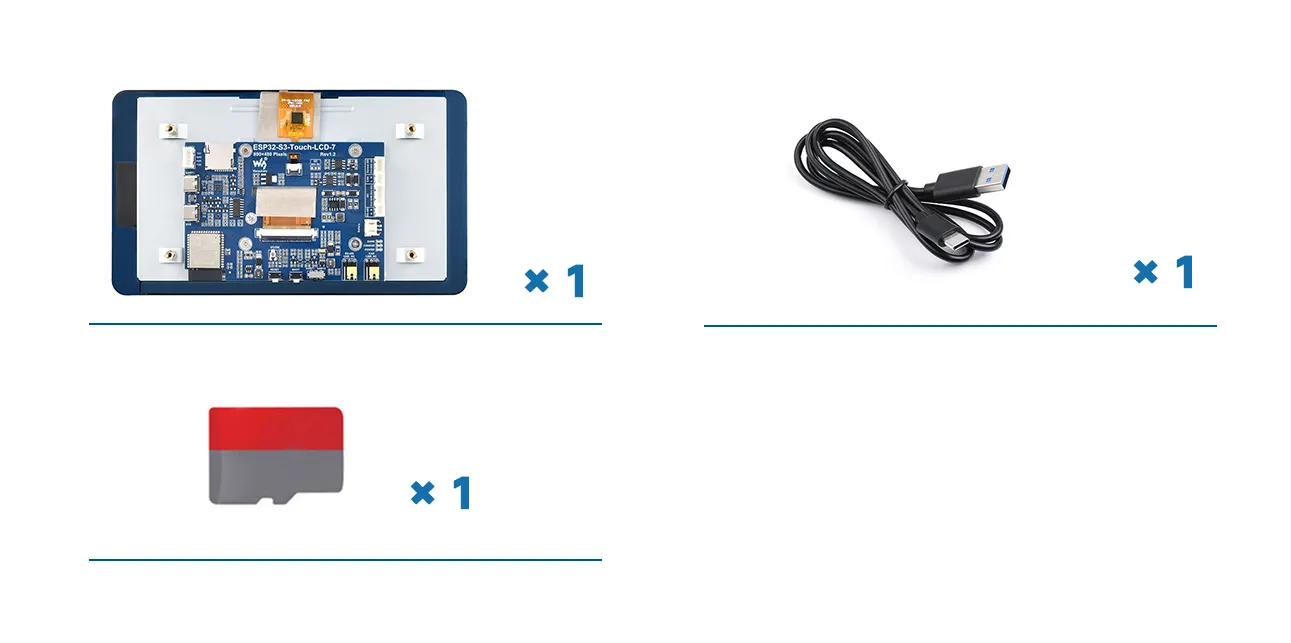
This experiment requires a TF card (not included in the kit, please purchase separately). Before use, insert the TF card into a card reader, connect it to a computer, and format the TF card to FAT32.
Hardware Connection
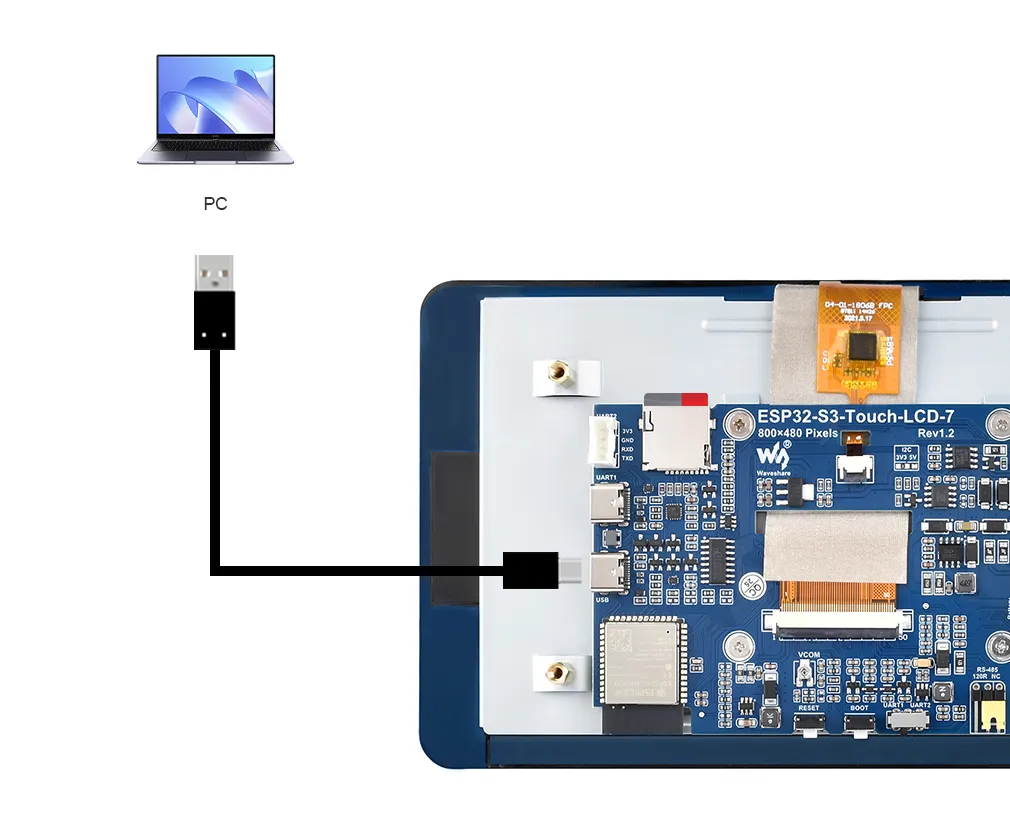
To upload the code to the ESP32-S3, connect the USB port of the ESP32-S3-Touch-LCD-7 to the computer using a Type-C to Type-A cable, and insert the formatted TF card into the TF card slot:
Example
Please download the example package from the following address: ESP32-S3-Touch-LCD-7 Example (if already downloaded, simply open the corresponding folder).
After extracting the example package, open the corresponding 03_SD_Test folder.
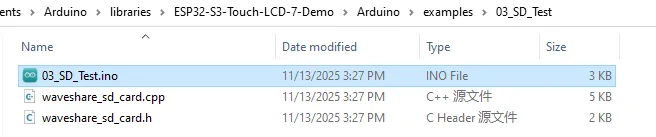
Double-click to open 03_SD_Test.ino:
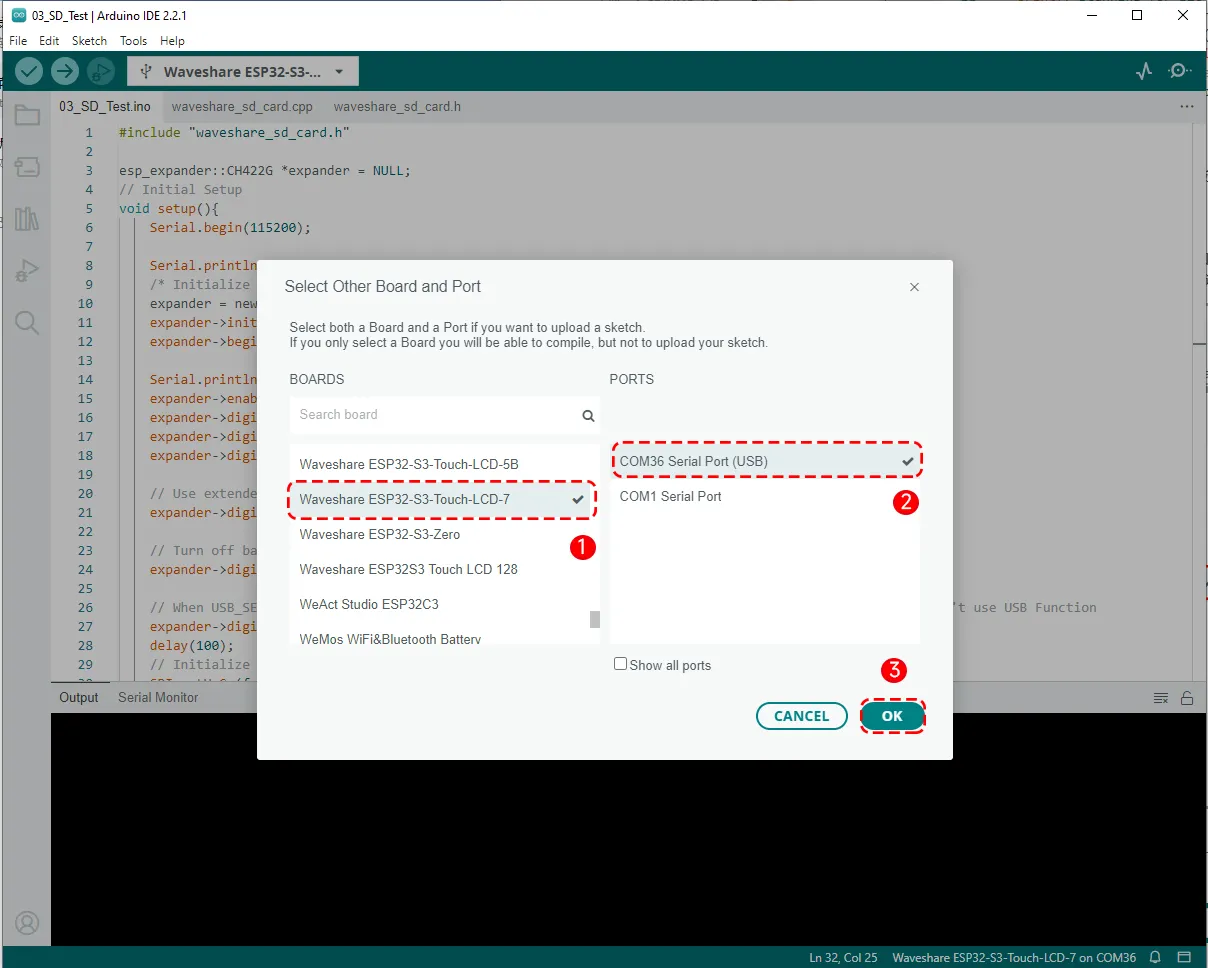
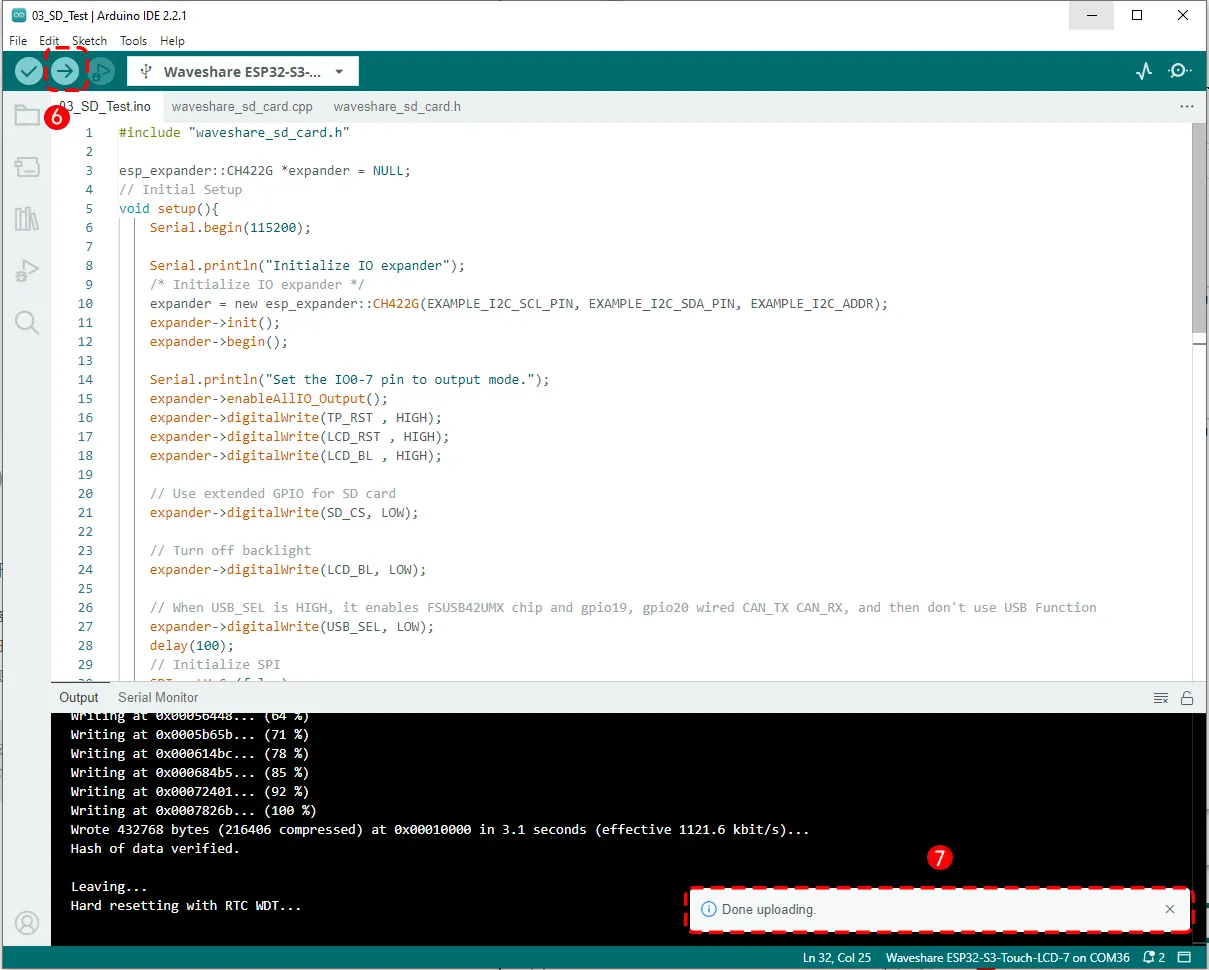
Before uploading the program, select the board model "Waveshare ESP32-S3-Touch-LCD-7" and the corresponding port:
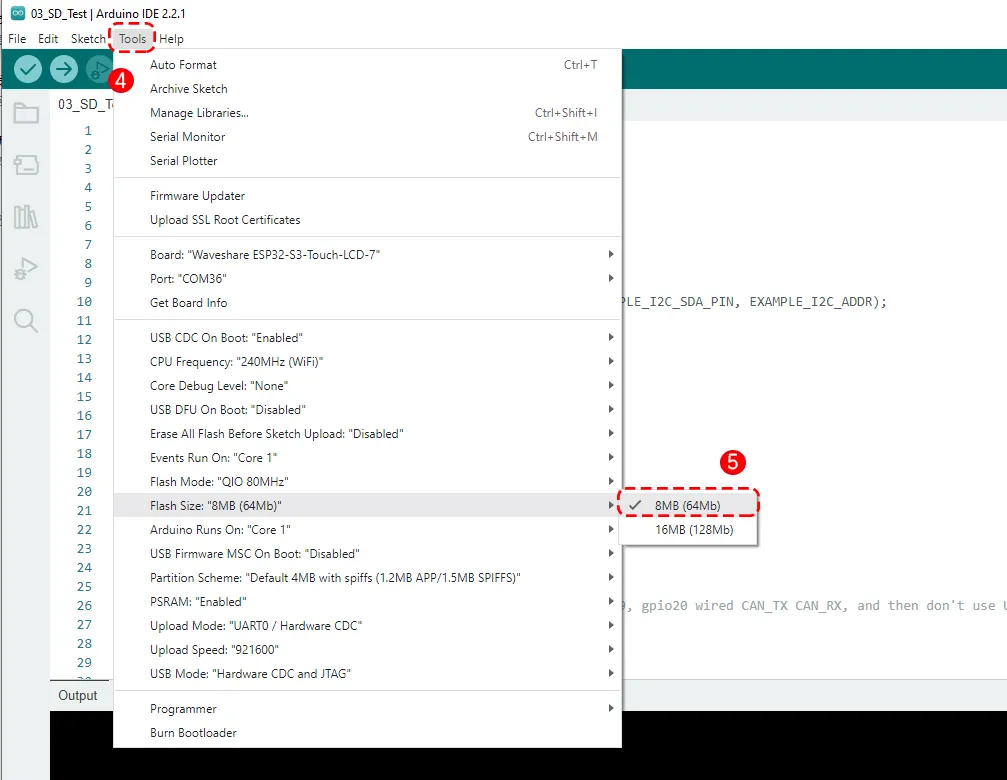
Set the board parameters; under Flash Size, select 8MB (64Mb).
Then click the Upload button in the upper left corner and wait for the upload to complete.
Running Results
After the code is uploaded, open the Serial Monitor from the Tools menu. Restart the program and you will see the printed output. The code will sequentially create a file, read a file, edit a file, rename a file, and perform other operations. It will also output file transfer speed results and TF card capacity information.
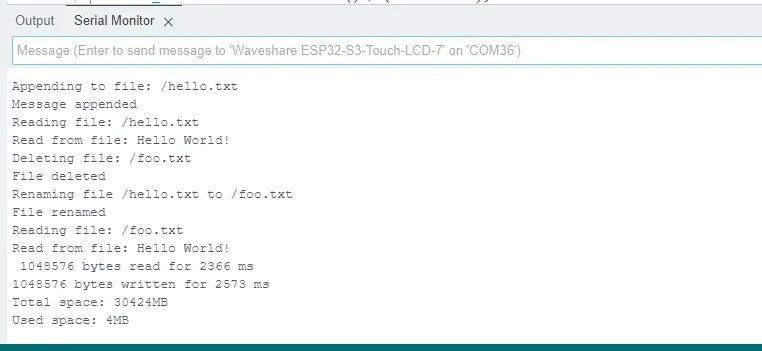
If you reconnect the TF card to the computer using a card reader, you will see two files: foo.txt and test.txt. Opening foo.txt reveals the text "Hello World", indicating that the above operations have been executed successfully.

-
If you encounter library-related errors when downloading the program, check that the Arduino IDE sketchbook location correctly points to the
ESP32-S3-Touch-LCD-7-Demo\Arduinodirectory. -
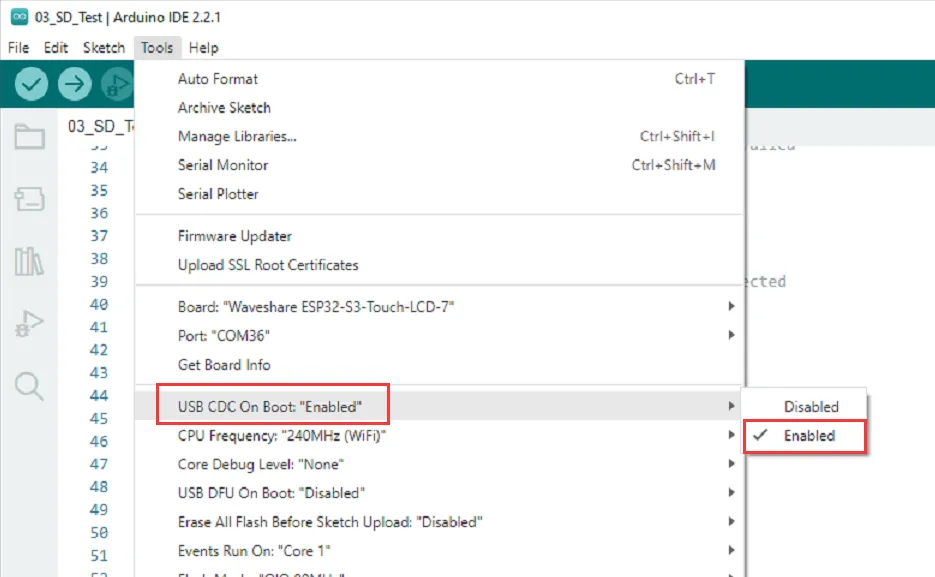
After downloading the program using the USB port, if you see no output in the Serial Monitor, enable "USB CDC On Boot" in the Tools menu, then re-download the program. You should then see output on the USB port.
Code Review
This example consists of the main test file SD_Test.ino and the library files waveshare_sd_card.cpp and waveshare_sd_card.h. Below we explain the key parts of each.
1. Pin Definitions and Function Declarations in waveshare_sd_card.h
    #include "FS.h"
    #include "SD.h"
    #include "SPI.h"
    #include <esp_io_expander.hpp>
Includes the headers for the FS filesystem library, the TF library, the SPI library (all built into ESP32 Arduino), and the esp_io_expander library needed for the CH422G chip.
    #define TP_RST 1      // Touch screen reset pin
    #define LCD_BL 2      // LCD backlight pinout
    #define LCD_RST 3     // LCD reset pin
    #define SD_CS 4       // TF card select pin
    #define USB_SEL 5     // USB select pin
Defines the hardware functions corresponding to CH422G expansion pins 1-5. These five expansion pins control various peripherals such as the LCD, TF card, and USB.
- When your main controller (e.g., ESP32, STM32) runs out of IOs, you can use an expander chip like the CH422G to obtain more input/output pins without using many pins. For example, if you need multiple chip-select (CS) pins for several TF card modules, sensors, or a display, you can use the CH422G's IOs for "chip-select control".
- CH422G is an I2C-interface 8-channel GPIO expander plus 4 open-drain outputs (OC) from Nanjing Qinheng (WCH). It allows you to control extra digital I/O pins using just the I2C bus (SCL/SDA). In this product, we use six expansion pins (IO1~IO6).
    #define EXAMPLE_I2C_ADDR (ESP_IO_EXPANDER_I2C_CH422G_ADDRESS)
    #define EXAMPLE_I2C_SDA_PIN 8         // I2C data line pins
    #define EXAMPLE_I2C_SCL_PIN 9         // I2C clock line pin
These lines define the I2C communication pins of the ESP32: GPIO8 as SDA and GPIO9 as SCL. Also, the preprocessor directive #define renames ESP_IO_EXPANDER_I2C_CH422G_ADDRESS to EXAMPLE_I2C_ADDR for readability and ease of maintenance.
ESP_IO_EXPANDER_I2C_CH422G_ADDRESS is a pre-defined constant in the library for the CH422G chip's I2C address. It can be found in esp_io_expander_ch422g.h file inside the ESP32-S3-Touch-LCD-7-Demo\Arduino\libraries\ESP32_IO_Expander\src\port folder.
    #define SD_MOSI 11    // TF card master output slave input pin
    #define SD_CLK  12    // TF card clock pin
    #define SD_MISO 13    // TF card master input slave output pin
    #define SD_SS -1      // TF card select pin (not used)
These lines define the SPI pins used for communication between the ESP32-S3 and the TF card. GPIO11 is MOSI, GPIO12 is CLK, and GPIO13 is MISO. Because the TF card's CS pin is controlled by the expansion chip (not directly by the ESP32), SD_SS is set to -1, indicating it is not used.
    void listDir(fs::FS &fs, const char * dirname, uint8_t levels);
    void createDir(fs::FS &fs, const char * path);
    void removeDir(fs::FS &fs, const char * path);
    void writeFile(fs::FS &fs, const char * path, const char * message);
    void appendFile(fs::FS &fs, const char * path, const char * message);
    void readFile(fs::FS &fs, const char * path);
    void deleteFile(fs::FS &fs, const char * path);
    void renameFile(fs::FS &fs, const char * path1, const char * path2);
    void testFileIO(fs::FS &fs, const char * path);
These are the common basic function declarations for ESP32 file system (FS) operations. These functions allow you to perform file operations (create, read, delete, rename, etc.) on files in a TF card or SPIFFS filesystem, just like on a computer. The actual function implementations are provided in waveshare_sd_card.cpp. These functions are also examples from the ESP32 TF library – think of them as "file manager" commands on a PC:
| Function | Analogy | Purpose |
|---|---|---|
| listDir() | List folder contents | Lists all files and subdirectories under a given directory |
| createDir() | Create new folder | Creates a new directory |
| removeDir() | Delete folder | Deletes a directory |
| writeFile() | Create & write file | Writes content to a file (overwrites existing) |
| appendFile() | Append content | Appends data to the end of an existing file |
| readFile() | Open file & view | Reads and prints the content of a file |
| deleteFile() | Delete file | Deletes a specified file |
| renameFile() | Rename file | Changes a file's name |
| testFileIO() | Performance test | Tests read/write speed or stability |
2. Main function in SD_Test.ino
First, include the header and define global variables:
    #include "waveshare_sd_card.h"
    esp_expander::CH422G *expander = NULL;
Include the encapsulated driver library waveshare_sd_card.h. Use esp_expander::CH422G *expander = NULL to define a pointer to a CH422G object, which will be dynamically created later with new.
Then enters the setup() initialization, which executes only once on power-up or reset.
    Serial.begin(115200);
    Serial.println("Initialize IO expander");
Open the serial debug output to facilitate viewing the operation logs.
    expander = new esp_expander::CH422G(EXAMPLE_I2C_SCL_PIN, EXAMPLE_I2C_SDA_PIN, EXAMPLE_I2C_ADDR);
    expander->init();
    expander->begin();
Creates a new CH422G object, specifying the I2C clock line (SCL), data line (SDA), and I2C address. Calls init() and begin() to complete initialization.
    Serial.println("Set the IO0-7 pin to output mode.");
    expander->enableAllIO_Output();
Prints a debug message and configures all expansion pins as outputs.
    expander->digitalWrite(TP_RST , HIGH);
    expander->digitalWrite(LCD_RST , HIGH);
    expander->digitalWrite(LCD_BL , HIGH);

    expander->digitalWrite(SD_CS, LOW);
    // TF card chip-select pin: when LOW, the TF card is selected and accessible via the SPI bus.

    expander->digitalWrite(LCD_BL , LOW);
    // Temporarily turn off the backlight to save power or for debugging

    expander->digitalWrite(USB_SEL, LOW);
    // When USB_SEL = HIGH, the FSUSB42UMX chip is enabled, and GPIO19/20 are used as CAN_TX/CAN_RX. // When USB_SEL = LOW, FSUSB42UMX is disabled, and USB can be used normally.
Initializes the output levels of expansion pins IO1-IO6.
    SPI.setHwCs(false);
    SPI.begin(SD_CLK, SD_MISO, SD_MOSI, SD_SS);
SPI.setHwCs(false) disables hardware automatic chip-select. SPI.begin()* sets up the four SPI lines; the pins are defined in waveshare_sd_card.h (Here, SD_SS is actually controlled by the CH422G, but a placeholder parameter still needs to be specified for the SPI).
    if (!SD.begin(SD_SS)) {
    Serial.println("Card Mount Failed"); // TF card mounting failed
    return;
    }
SD.begin() mounts the TF card filesystem. It:
- Initializes the SPI interface
- Sends initialization commands to the TF card
- Detects the presence of the card
- Mounts the FAT filesystem
    uint8_t cardType = SD.cardType();

    if (cardType == CARD_NONE) {
        Serial.println("No TF card attached"); // No TF card connected
        return;
    }

    Serial.print("TF Card Type: "); // TF card type
    if (cardType == CARD_MMC) {
        Serial.println("MMC");
    } else if (cardType == CARD_SD) {
        Serial.println("SDSC");
    } else if (cardType == CARD_SDHC) {
        Serial.println("SDHC");
    }else{
        Serial.println("UNKNOWN"); // Unknown Type
    }
SD.cardType() detects the TF card type and stores it in cardType. The if statement checks whether the TF card was successfully connected; if not, it prints a debug message and exits. Otherwise, it prints the card type.
Common types:
- CARD_MMC: old MMC cards
- CARD_SD: standard capacity SD
- CARD_SDHC: high-capacity SDHC
- CARD_NONE: no card detected
    uint64_t cardSize = SD.cardSize() / (1024 * 1024);
    Serial.printf("TF Card Size: %lluMB\n", cardSize); // TF card size
Gets the TF card capacity and prints it.
After the above steps, we can test the TF card filesystem functionality:
    listDir(SD, "/", 0);
    createDir(SD, "/mydir");
    listDir(SD, "/", 0);
    removeDir(SD, "/mydir");
    listDir(SD, "/", 2);
    writeFile(SD, "/hello.txt", "Hello ");
    appendFile(SD, "/hello.txt", "World!\n");
    readFile(SD, "/hello.txt");
    deleteFile(SD, "/foo.txt");
    renameFile(SD, "/hello.txt", "/foo.txt");
    readFile(SD, "/foo.txt");
    testFileIO(SD, "/test.txt");
These lines will sequentially:
- List the root directory
- Create a folder
/mydir - Delete the newly created
/mydir - Write "Hello World" to
/hello.txt - Read the file
/hello.txt - Rename
hello.txttofoo.txt - Test large file read/write speed
All these functions are implemented in
waveshare_sd_card.h / .cppand are wrappers around FS class functions.
    Serial.printf("Total space: %lluMB\n", SD.totalBytes() / (1024 * 1024)); // Total space
    Serial.printf("Used space: %lluMB\n", SD.usedBytes() / (1024 * 1024)); // Used space
Then output the total capacity and used space of the TF card.
    // Main Loop
    void loop() {

    }
This example does not require repeated operations, so void loop() is left empty.