Section 05 Testing UART Type-C Interface
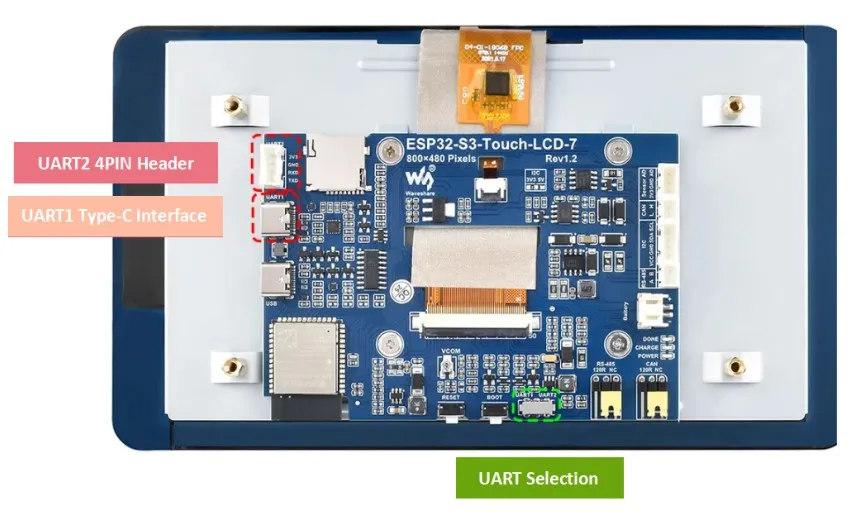
UART is a universal asynchronous receiver/transmitter that supports full-duplex serial transmission. The ESP32-S3 chip has three UART controllers, compatible with different UART devices. On the ESP32-S3-Touch-LCD-7 board, there are two UART interfaces: UART1 and UART2. Both use the UART0 controller (IO43, IO44) of the ESP32-S3, but they differ as follows (refer to the schematic for understanding):
- UART2 is directly connected to ESP32-S3 UART0 and is brought out via a header, making it easy to connect other modules using wires.
- UART1 is routed through a CH343 to provide a USB-to-TTL function and is brought out via a Type-C connector.
- A DIP switch (highlighted in the green box in the figure) can be used to switch between these two interfaces.
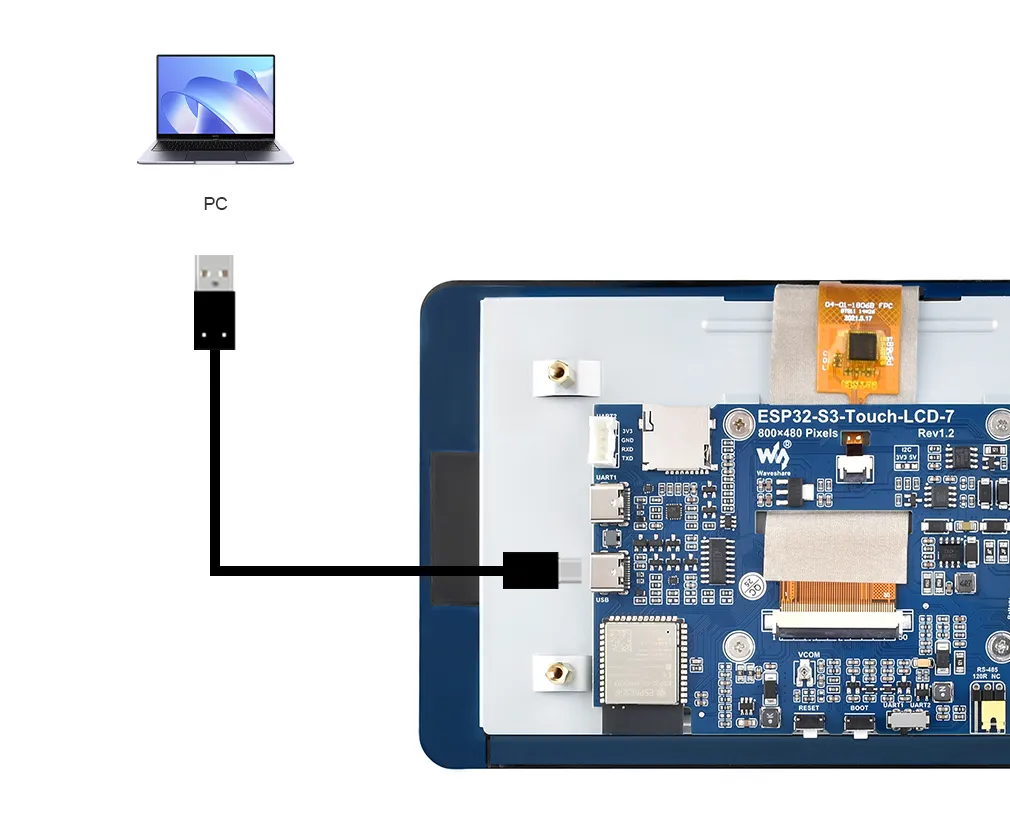
Hardware Connection
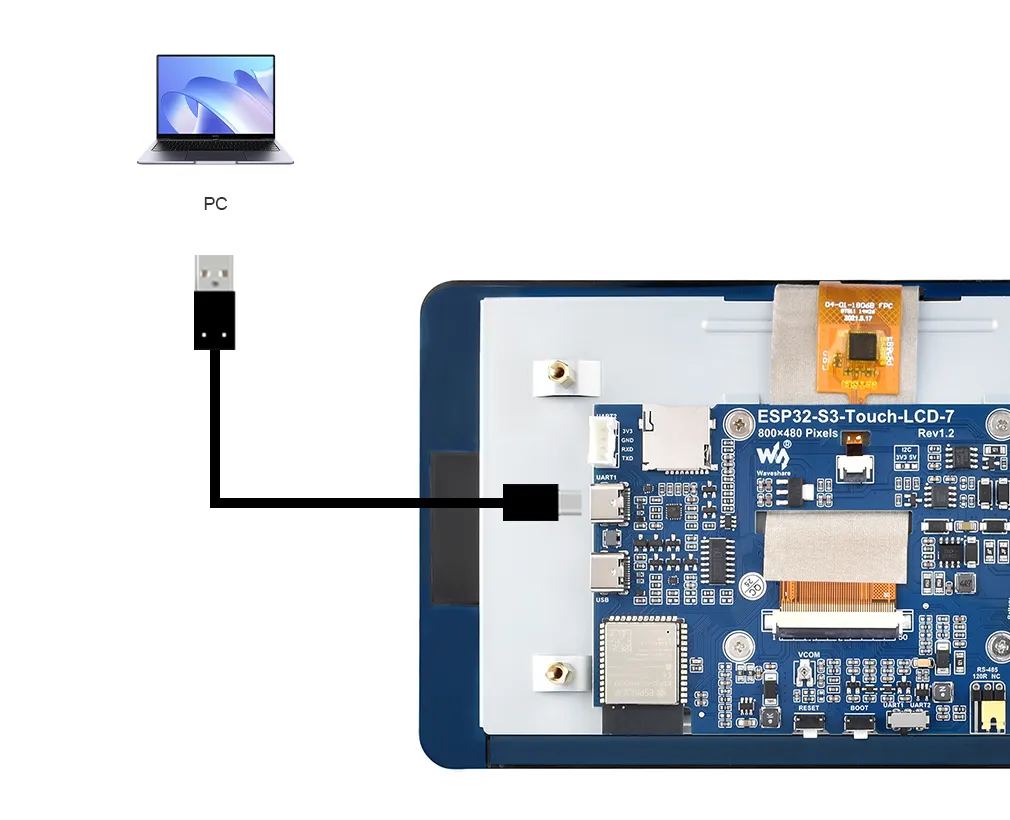
To upload the corresponding code to the ESP32-S3, you need to connect the USB port of the ESP32-S3-Touch-LCD-7 to the computer's USB port using a Type-C to Type-A cable:
Example
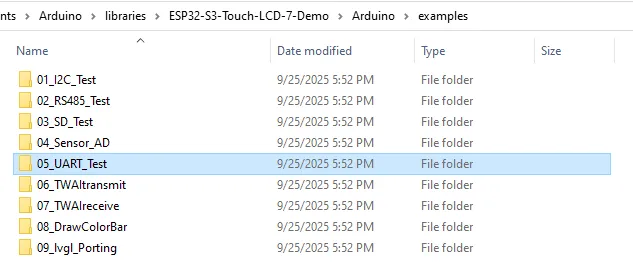
Please download the example package from the following address: ESP32-S3-Touch-LCD-7 Example (if already downloaded, simply open the corresponding folder).
After extracting the example package, open the corresponding 05_UART_Test folder.
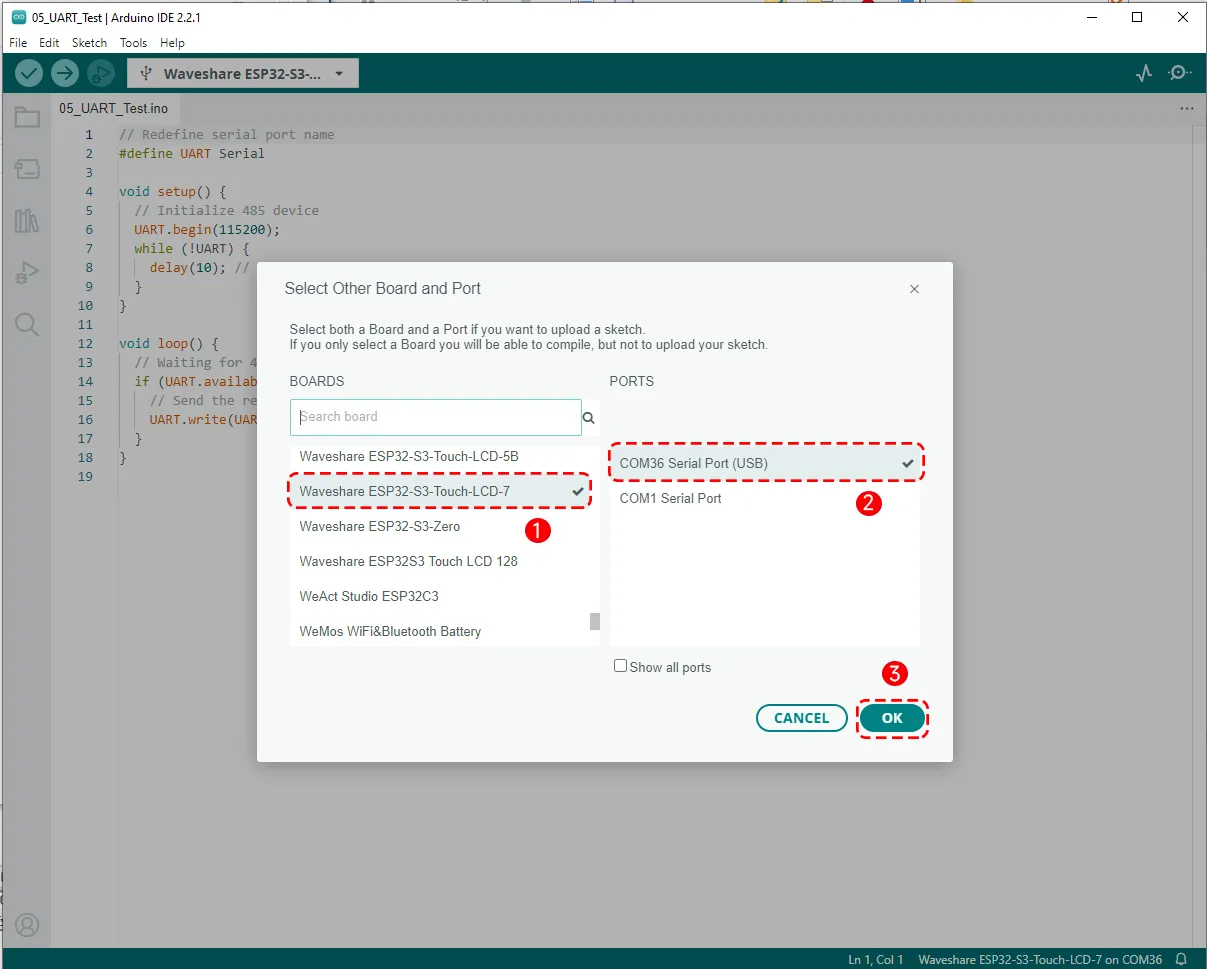
Open the UART_Test.ino code.

Select the board model "Waveshare ESP32-S3-Touch-LCD-7" and the port:
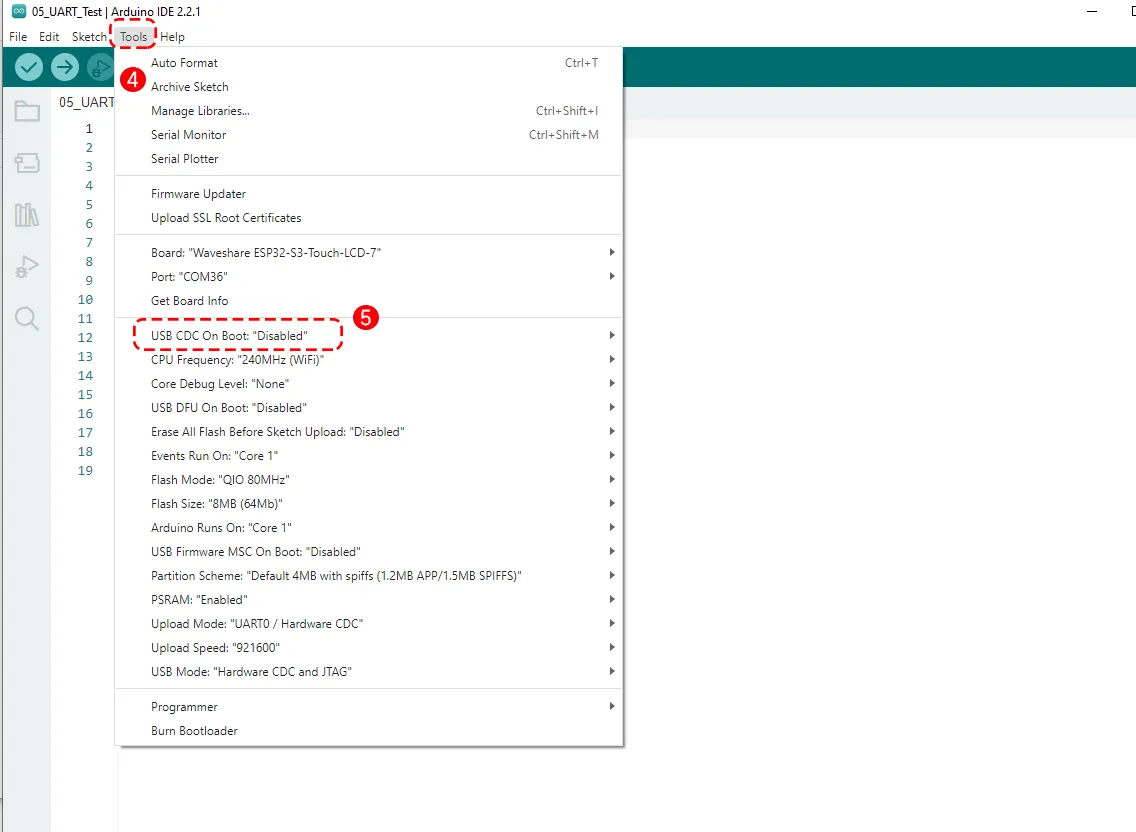
Then set the board parameters. Note that "USB CDC On Boot" must be set to "Disabled" so that the serial print information is output from the UART port.
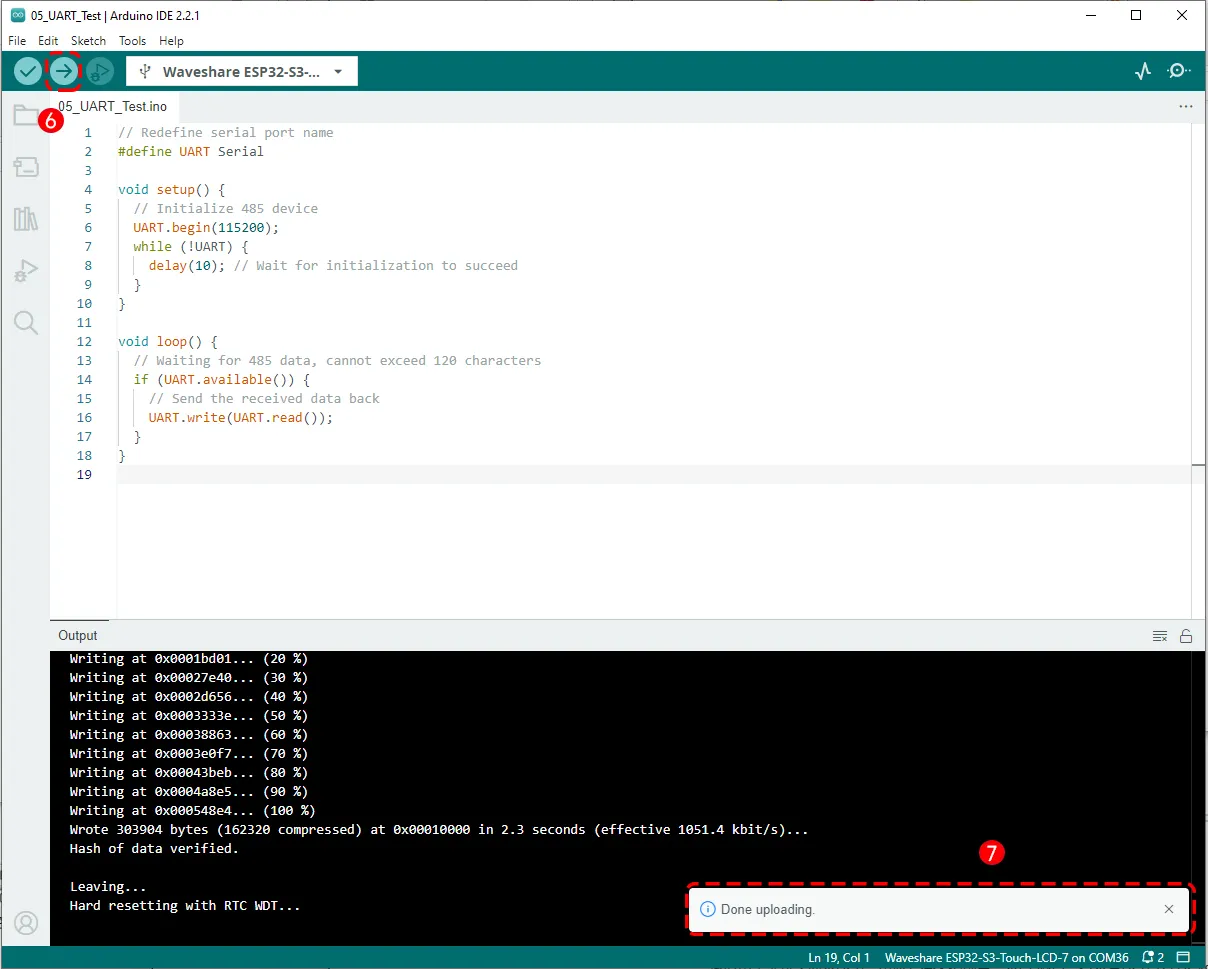
Then click the Upload button to upload the program, and wait for the upload to complete.
Running Results
Unplug the USB cable from the ESP32-S3-Touch-LCD-7 and connect it to the UART1 Type-C interface, so that UART1 is connected to the computer's USB port.
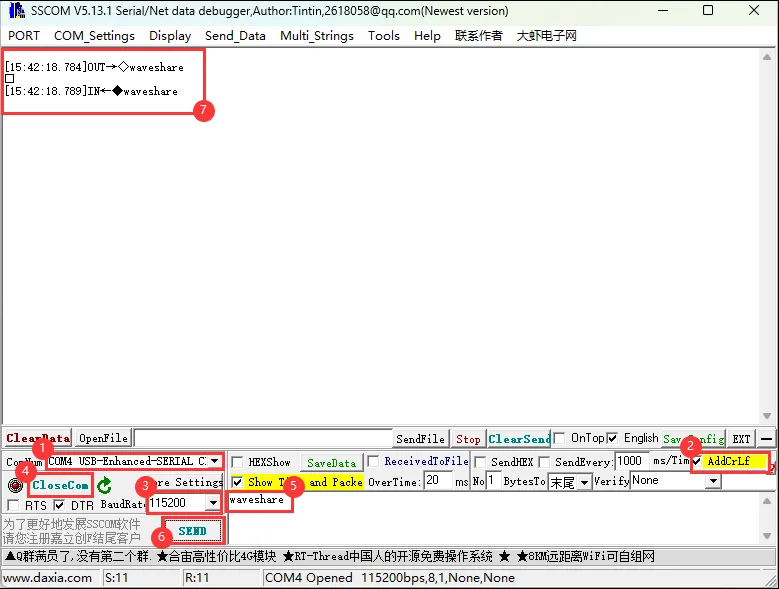
Open the SSCOM serial communication tool, configure it as shown below, and send data to the serial port of the ESP32-S3-Touch-LCD-7. The same data will be received back, completing a simple serial echo test.
Code Review
#define UART Serial
Create an alias UART for Serial to improve code readability and facilitate later modifications. If you need to switch to Serial1/Serial2, just change this line.
    void setup() {
    UART.begin(115200);
    while (!UART) {
        delay(10); // Wait for initialization to succeed
    }
Initializes serial communication with a baud rate of 115200. The while (!UART) loop waits for the serial port to be ready; on some platforms, serial initialization takes time, and this loop ensures that the serial port is fully ready before proceeding.
    void loop() {
    if (UART.available()) {
        UART.write(UART.read());
    }
UART.available() checks whether there is data in the receive buffer. If data is available, the program enters the if statement: UART.read() reads one byte from the buffer, and UART.write() sends that byte back. This is the classic "serial echo" function.