Web Server
The ESP32 has built-in Wi-Fi capabilities that can serve other devices in the network as a web server. By running a web server on ESP32, a browser-based user interface can be created for monitoring sensor data or controlling device status, which is one of the fundamental features for implementing IoT applications.
1. Web Server in MicroPython
In MicroPython, the built-in socket module is typically used to create a Web server. While there are third-party libraries like Microdot that provide a higher-level wrapper, using socket offers a deeper understanding of the basic principles of the HTTP protocol and network communication. It requires no additional libraries to install, making it ideal for beginners.

The basic workflow of a Web server is as follows:
- Create a Socket: Establish an endpoint for network communication.
- Bind: Bind the socket to a specific IP address and port (typically port 80 for HTTP).
- Listen: Start listening for connection requests from clients (e.g., web browsers).
- Accept Connection: When a client connects, establish a connection channel.
- Receive Request: Read the HTTP request message sent by the client.
- Send Response: Send an HTTP response message (containing HTML pages, etc.) based on the request content.
- Close Connection: Disconnect from the client.
2. Example 1: Basic Web Services (STA Mode)
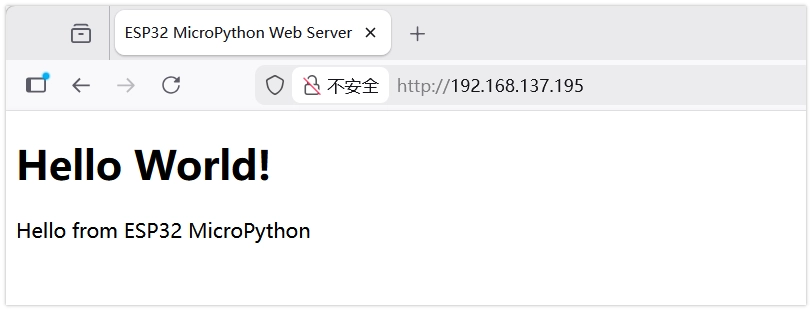
Create a basic web server in STA mode to display a static page containing "Hello World!".
2.1 Code
import time
import network
import socket
# Wi-Fi Configuration
SSID = "Maker" # Replace with your Wi-Fi name
PASSWORD = "12345678" # Replace with your Wi-Fi password
def connect_wifi():
wlan = network.WLAN(network.STA_IF)
wlan.active(True)
if not wlan.isconnected():
print('Connecting to network...')
wlan.connect(SSID, PASSWORD)
while not wlan.isconnected():
time.sleep(0.5)
print('.', end='')
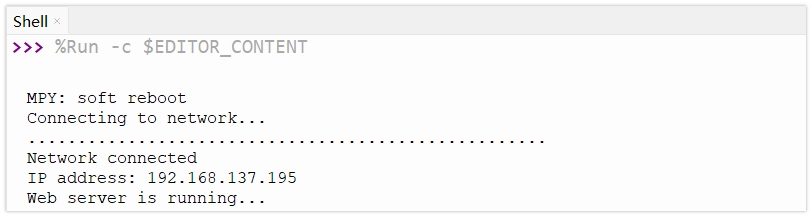
print('\nNetwork connected')
print('IP address:', wlan.ifconfig()[0])
return wlan
def web_page():
html = """<!DOCTYPE html> <html>
<head><meta charset="utf-8" name="viewport" content="width=device-width, initial-scale=1">
<title>ESP32 MicroPython Web Server</title>
</head><body>
<h1>Hello World!</h1>
<p>Hello from ESP32 MicroPython</p>
</body></html>
"""
return html
# Connect to Wi-Fi
connect_wifi()
# Create a Socket
s = socket.socket(socket.AF_INET, socket.SOCK_STREAM)
# Bind to port 80
s.bind(('', 80))
# Start listening
s.listen(5)
print("Web server is running...")
while True:
try:
# Accept a client connection
conn, addr = s.accept()
print('Got a connection from %s' % str(addr))
# Receive the request
request = conn.recv(1024)
# print('Content = %s' % str(request)) # For debugging, prints the full request header
# Send the response
response = web_page()
# Send HTTP response headers
conn.send('HTTP/1.1 200 OK\n')
conn.send('Content-Type: text/html\n')
conn.send('Connection: close\n\n')
# Send HTML content
conn.sendall(response)
# Close the connection
conn.close()
except OSError as e:
conn.close()
print('Connection closed')
2.2 Code Analysis
socket.socket(socket.AF_INET, socket.SOCK_STREAM): Creates a new socket object.AF_INETspecifies the use of the IPv4 address family, andSOCK_STREAMspecifies the use of the TCP protocol.s.bind(('', 80)): Binds the socket to the specified IP address and port.''means binding to all available network interfaces, and80is the standard HTTP service port.s.listen(5): Starts listening for connection requests. The parameter5specifies the maximum number of queued unprocessed connections allowed before rejecting new ones.s.accept(): Blocks program execution until a new client connection request arrives. Once a connection is made, it returns a new socket objectconn(for communicating with that specific client) and the client's address informationaddr.conn.recv(1024): Receives data from the client.1024specifies the maximum number of bytes to receive at once. The received data is of type bytes.- HTTP Response Headers: Before sending HTML content, HTTP-compliant response headers must be sent first.
HTTP/1.1 200 OKindicates the request was successful, andContent-Type: text/htmlinforms the browser that HTML content follows.
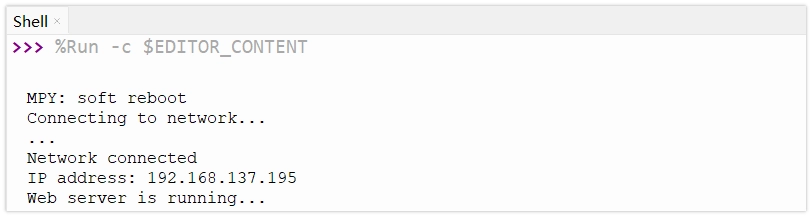
2.3 Expected Output
After modifying the Wi-Fi name and password, run the code. Check the ESP32's IP address in the Shell window of Thonny. Enter this IP address in a web browser to see the "Hello World!" page.
3. Example 2: Controlling an LED via Web Page (STA Mode)
In STA mode, control an LED on/off via web page buttons by parsing the path (URL) in the HTTP request.
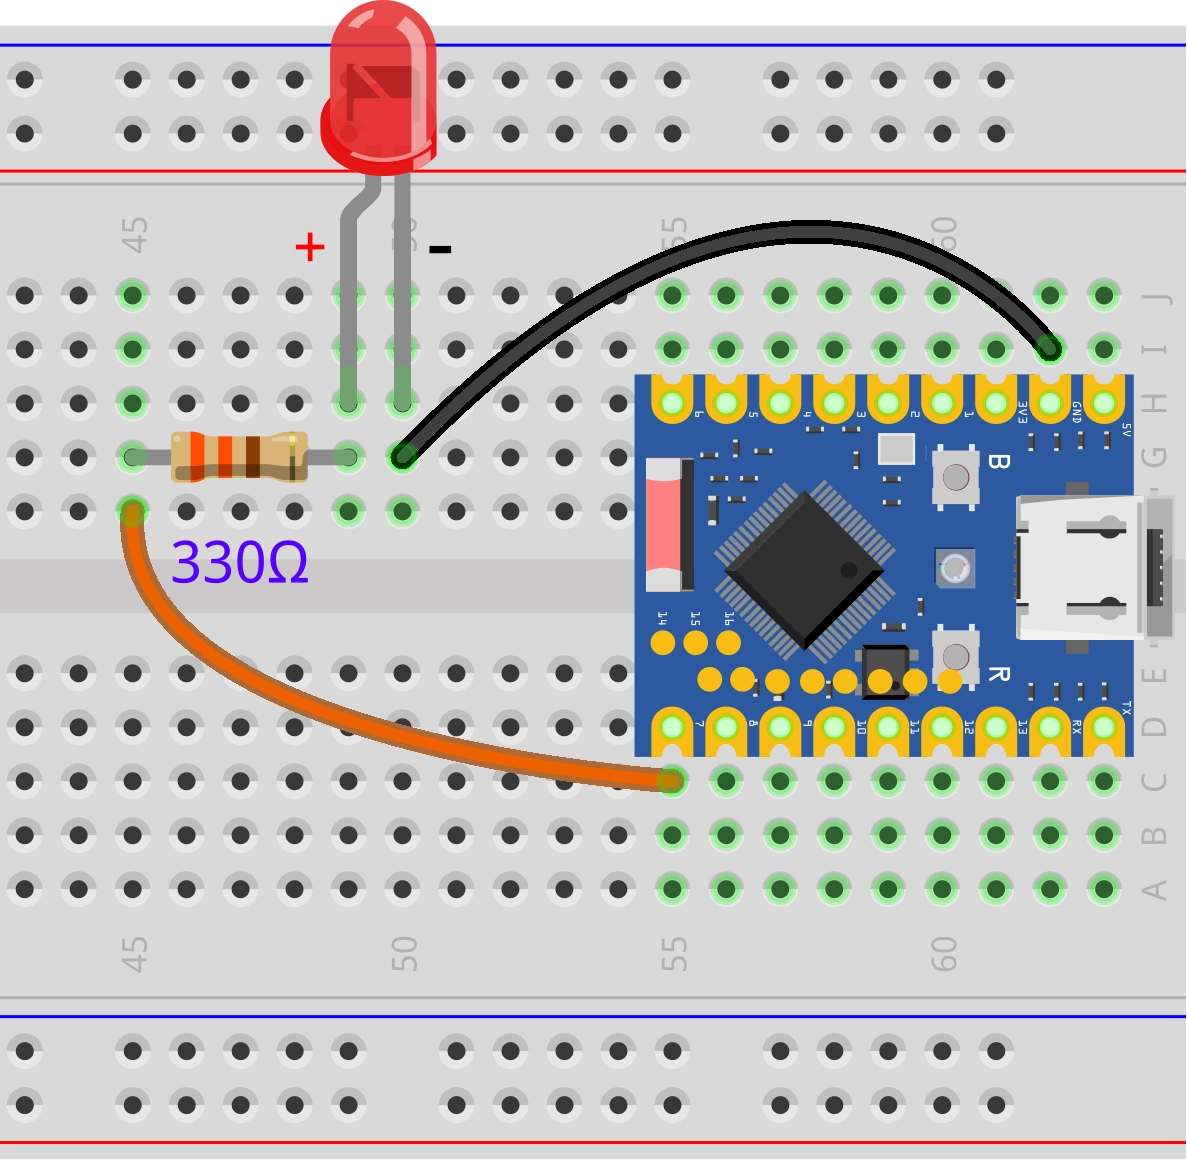
3.1 Circuit Assembly
Components required:
- LED * 1
- 330Ω resistor * 1
- Breadboard * 1
- Wire
- ESP32 development board
Connect the circuit according to the wiring diagram below:
ESP32-S3-Zero Pinout Diagram

3.2 Code
import time
import network
import socket
from machine import Pin

# LED Configuration
led = Pin(7, Pin.OUT)
led.value(0) # Initially off

# Wi-Fi Configuration
SSID = "Maker"         # Replace with your Wi-Fi name (SSID)
PASSWORD = "12345678"  # Replace with your Wi-Fi password

def connect_wifi():
    wlan = network.WLAN(network.STA_IF)
    wlan.active(True)
    if not wlan.isconnected():
        print('Connecting to network...')
        wlan.connect(SSID, PASSWORD)
        while not wlan.isconnected():
            time.sleep(0.5)
            print('.', end='')
    print('\nNetwork connected')
    print('IP address:', wlan.ifconfig()[0])
    return wlan

def web_page():
    if led.value() == 1:
        gpio_state = "ON"
        button_html = '<a href="/ledoff">Turn off the LED</a>'
    else:
        gpio_state = "OFF"
        button_html = '<a href="/ledon">Turn on the LED</a>'

    html = """<!DOCTYPE html><html>
<head><meta name="viewport" content="width=device-width, initial-scale=1">
<title>ESP32S3 Test</title>
</head>
<body><h1>ESP32 Web Server</h1>
<p>GPIO state: <strong>""" + gpio_state + """</strong></p>
""" + button_html + """
</body></html>"""
    return html

# Connect to Wi-Fi
connect_wifi()

# Create a Socket
s = socket.socket(socket.AF_INET, socket.SOCK_STREAM)
s.bind(('', 80))
s.listen(5)

print("Web server is running...")

while True:
    try:
        conn, addr = s.accept()
        print('Got a connection from %s' % str(addr))

        request = conn.recv(1024)
        request = str(request)
        # Check the network request
        # print(request)

        if 'GET /ledon' in request:
            print('LED ON')
            led.value(1)
        elif 'GET /ledoff' in request:
            print('LED OFF')
            led.value(0)

        # Prepare and send the web page response
        response = web_page()
        conn.send('HTTP/1.1 200 OK\n')
        conn.send('Content-Type: text/html\n')
        conn.send('Connection: close\n\n')
        conn.sendall(response)
        conn.close()

    except OSError as e:
        conn.close()
        print('Connection closed')
3.3 Code Analysis
- Request Parsing:
request = str(request): The data received byconn.recv()is in bytes. It's converted to a string for easier processing.if 'GET /ledon' in request: Checks if the request content containsGET /ledon. When a user clicks the "Turn ON" link on the web page, the browser sends a GET request containing this path to the server.- The program executes the corresponding LED control logic by determining whether the URL path is
/ledonor/ledoff.
- Dynamic HTML Generation:
- The
web_page()function dynamically generates HTML code containing different text and links based on the LED's current state (led.value()). - If the LED is on, the generated page shows a "Turn off" link; if the LED is off, it shows a "Turn on" link.
- The
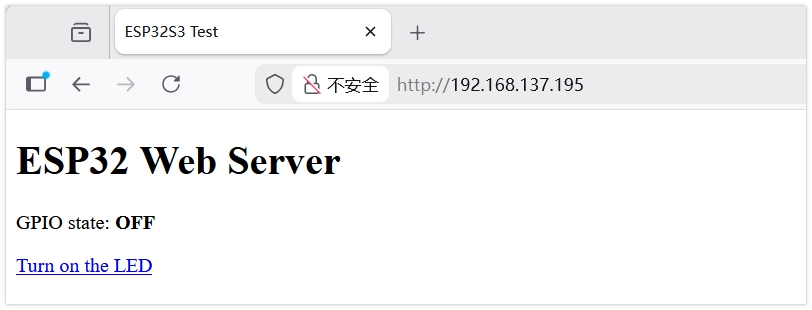
3.4 Expected Output
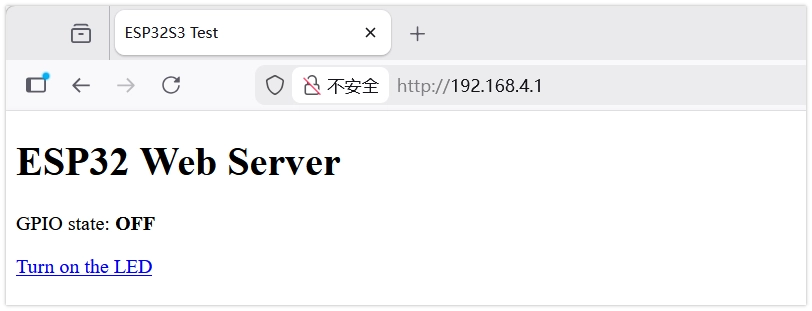
Access the ESP32's IP address. The page will display a large button. Clicking the button controls the LED on/off, and the page refreshes to show the latest LED state.
4. Example 3: Controlling an LED via Web Page (AP Mode)
In AP (Access Point) mode, the ESP32 creates its own Wi-Fi hotspot. Phones or computers can connect to this hotspot to access the web server without relying on an external router.
4.1 Circuit Assembly
The circuit connection is the same as in Example 2.
4.2 Code
import time
import network
import socket
from machine import Pin
# LED Configuration
led = Pin(7, Pin.OUT)
led.value(0) # Initially off
# Wi-Fi Configuration
SSID = "ESP32-S3-TEST" # Set the hotspot name
PASSWORD = "12345678" # Set the hotspot password (at least 8 characters)
def start_ap():
ap = network.WLAN(network.AP_IF)
ap.active(True)
ap.config(essid=SSID, password=PASSWORD, authmode=network.AUTH_WPA_WPA2_PSK)
while not ap.active():
pass
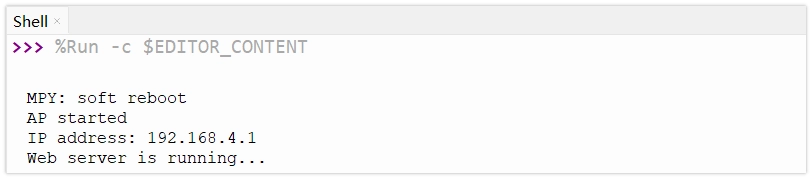
print('AP started')
print('IP address:', ap.ifconfig()[0])
def web_page():
if led.value() == 1:
gpio_state = "ON"
button_html = '<a href="/ledoff">Turn off the LED</a>'
else:
gpio_state = "OFF"
button_html = '<a href="/ledon">Turn on the LED</a>'
html = """<!DOCTYPE html><html>
<head><meta name="viewport" content="width=device-width, initial-scale=1">
<title>ESP32S3 Test</title>
</head>
<body><h1>ESP32 Web Server</h1>
<p>GPIO state: <strong>""" + gpio_state + """</strong></p>
""" + button_html + """
</body></html>"""
return html
start_ap()
s = socket.socket(socket.AF_INET, socket.SOCK_STREAM)
s.bind(('', 80))
s.listen(5)
print("Web server is running...")
while True:
try:
conn, addr = s.accept()
print('Got a connection from %s' % str(addr))
request = conn.recv(1024)
request = str(request)
# Check the network request
# print(request)
if 'GET /ledon' in request:
print('LED ON')
led.value(1)
elif 'GET /ledoff' in request:
print('LED OFF')
led.value(0)
# Prepare and send the web page response
response = web_page()
conn.send('HTTP/1.1 200 OK\n')
conn.send('Content-Type: text/html\n')
conn.send('Connection: close\n\n')
conn.sendall(response)
conn.close()
except OSError as e:
conn.close()
print('Connection closed')
4.3 Code Analysis
network.WLAN(network.AP_IF): Creates a WLAN object, specifying the use of the AP (Access Point, hotspot) mode interface.ap.active(True): Activates the AP interface, starting the wireless hotspot functionality.ap.config(...): Configures hotspot parameters.essid: Sets the hotspot name (SSID).password: Sets the hotspot password.authmode: Sets the authentication mode; here, WPA/WPA2 PSK security mode is used.
- IP Address: In AP mode, the ESP32's default IP address is typically
192.168.4.1.
4.4 Expected Output
- Upload the code.
- Use a phone or computer to search for and connect to the Wi-Fi named "ESP32-AP-Test" (password: 12345678).
- Enter
192.168.4.1. - You will see the control page and can control the LED.