Raspberry Pi Pico Arduino Getting Started
This tutorial introduces Arduino and guides you through setting up the Arduino development environment for Pico.
The core logic of this tutorial applies to all RP series development boards. However, all operational steps are explained using the Raspberry Pi Pico as an example. If you are using a development board of another model, please modify the corresponding settings according to the actual situation.
1. What is Arduino IDE
The Arduino IDE is an open-source development environment. In addition to supporting Arduino microcontrollers, it is also compatible with various third-party development boards, including the Raspberry Pi Pico, enabling developers to conveniently write and upload code to these powerful chips for various projects. It boasts a rich collection of libraries and example code and is widely used in prototyping and education. The following sections will explain how to install and use the Arduino IDE for development.
2. Download and Install Arduino IDE
-
Go to Arduino official website to download the Arduino IDE installer.

-
Run the installer to install the Arduino IDE. It is recommended to use the default settings during installation and choose a path containing only English characters.
warningAn installation path containing special characters may cause exceptions.
3. Set up Arduino IDE
-
Start Arduino IDE after installation.
-
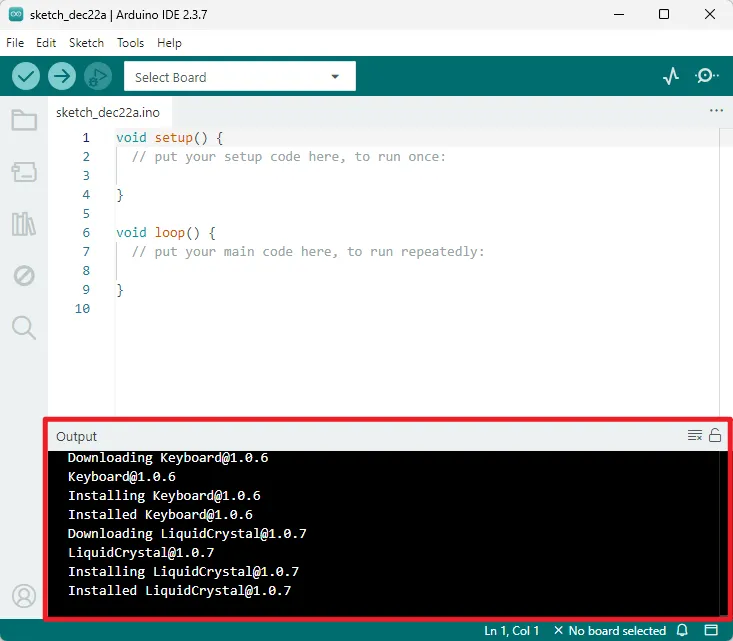
Upon the first launch, the IDE may automatically download and install core library files and drivers. If the operating system prompts for driver installation or network security permissions, it is recommended to allow them. The output window information shown in the figure below indicates the installation process and is normal; no action is required.
-
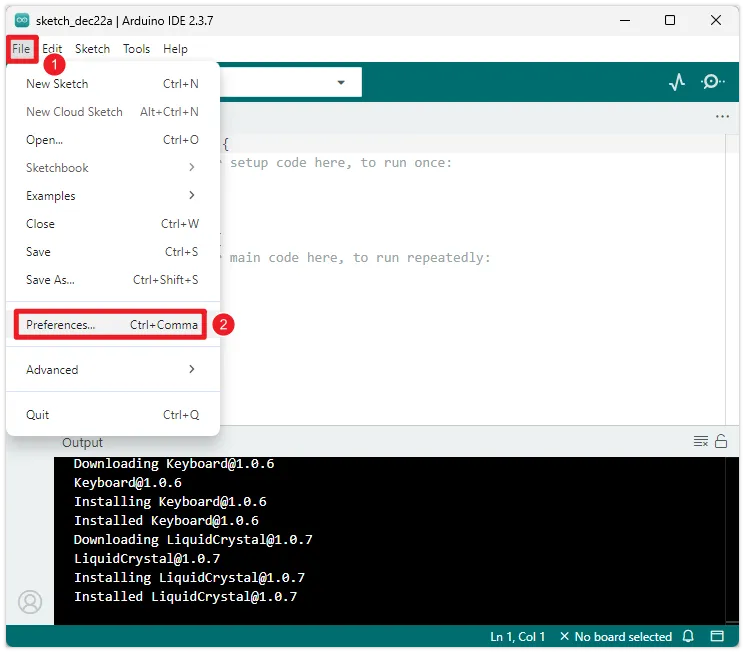
The Arduino IDE displays the English interface by default, but supports switching to other languages. Click "File -> Preferences" to open the settings.
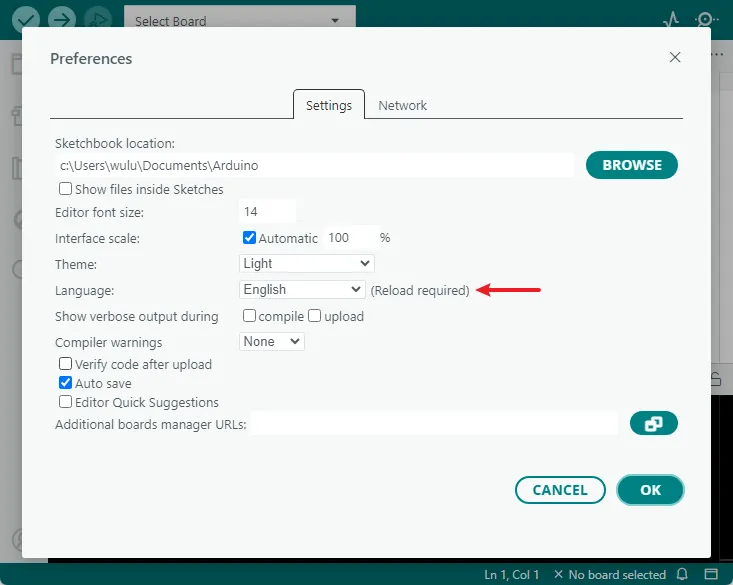
In the settings interface, find the "Language" option, select your preferred language, and then click "OK". The Arduino IDE will automatically restart and switch to the selected language interface.
-
In addition, you can also adjust the interface scale, font size, theme style, and default save location of sketches(program files) in "Preferences".
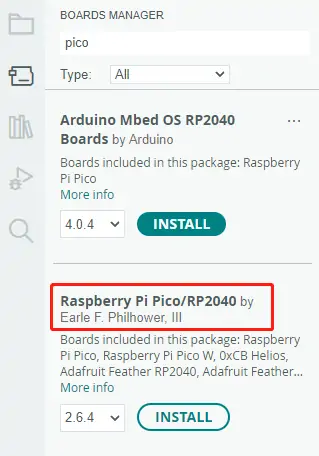
4. Install RP Series Development Board Libraries
To develop for RP series boards using the Arduino IDE, you need to add the relevant configuration for RP series boards and install the related libraries.
-
Open "File" -> "Preferences", find "Additional Board Manager Address" in the "Settings" interface, paste the following link and click OK:
tipThis link includes configurations for RP2040, RP2350, and other board models. For the latest board files, please visit arduino-pico
https://github.com/earlephilhower/arduino-pico/releases/download/4.5.2/package_rp2040_index.json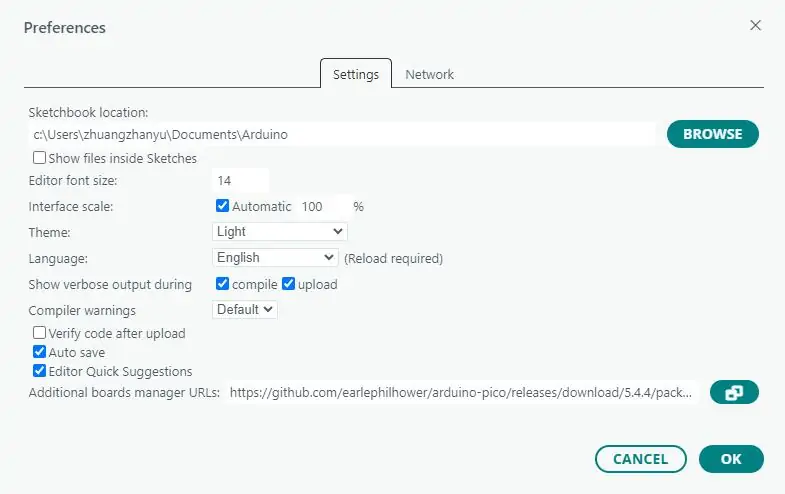 warning
If you already have an ESP32 board URL, you can separate the URLs with a comma, as shown below:
https://dl.espressif.com/dl/package_esp32_index.json,https://github.com/earlephilhower/arduino-pico/releases/download/4.5.2/package_rp2040_index.json -
Open the "Board Manager", search for "pico" and install it. After installation, restart the Arduino IDE to use it
5. First Program Upload
-
Hold down the BOOTSET button on the Pico board, connect the Pico to your computer via Micro USB, and release the button after a removable disk is recognized.
tipDevelopment boards with the RP2040 chip will be recognized as RPI-RP2, while those with the RP2350 chip will be recognized as RP2350.
-
Download the example program and open the path:
"File" -> "Examples" -> "01.Basics" -> "Blink"
-
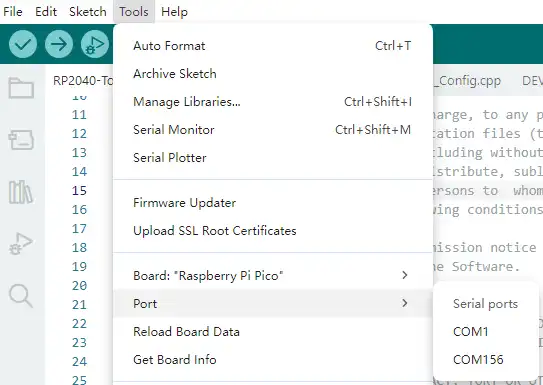
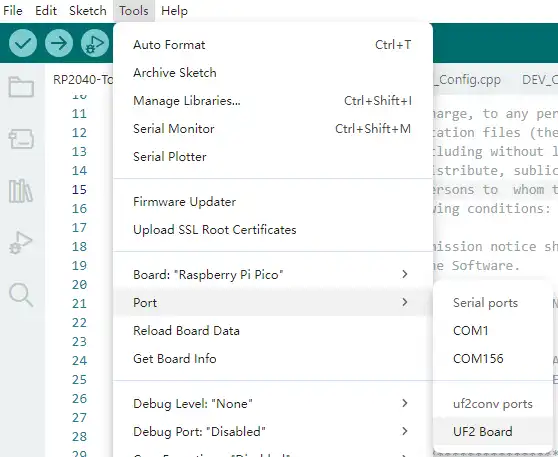
Click "Tools" -> "Port", and note the existing COM ports (do not select one yet).
-
Connect the development board with a USB cable. Go to "Tools" -> "Port" again. For the first connection, select the UF2 Board.
-
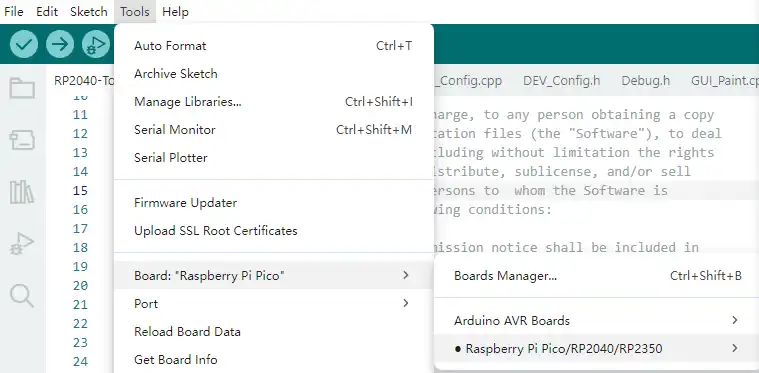
Click "Tools" -> "Board" -> "Raspberry Pi Pico", and select the corresponding model based on your development board (e.g., Raspberry Pi Pico, Raspberry Pi Pico 2, etc.).
-
After the settings are complete, click the ➡ button in the top-left corner to flash the program.

-
After the flashing is complete, click "Tools" -> "Port" again and connect to the newly added COM port.