Raspberry Pi Pico C/C++ Getting Started
This tutorial will introduce how to use the Pico VS Code extension for C/C++ development and guide you through configuring a C/C++ development environment based on the Pico SDK.
The core logic of this tutorial applies to all RP series development boards. However, all operational steps are explained using the Raspberry Pi Pico 2 as an example. If you are using a development board of another model, please modify the corresponding settings according to the actual situation.
1. What is Pico C/C++ Development
C/C++ development for the Raspberry Pi Pico is based on the official Pico SDK, a C/C++ software development kit specifically designed for Pico series chips such as the RP2040 and RP2350. The Pico SDK provides a rich set of API libraries for controlling peripherals such as GPIO, I2C, SPI, PWM, and ADC, as well as advanced features like multi-core processing, timers, and DMA.
To simplify the setup and use of the C/C++ development environment, the Raspberry Pi team has released the Pico VS Code extension. This extension integrates the following features:
- One-Click Installation: Automatically installs and manages development dependencies such as the Pico SDK, CMake, and compiler toolchain.
- Project Management: Quickly create, import, and configure C/C++ projects through a graphical wizard.
- Compilation and Building: Integrates CMake and Ninja build systems for one-click compilation and UF2 firmware generation.
- Flashing and Debugging: Supports UF2 firmware flashing and enables breakpoint debugging, single-step execution, and variable inspection via OpenOCD.
- Cross-Platform Support: Provides a unified development experience on Windows, macOS, and Linux.
- This tutorial is applicable to the Raspberry Pi Pico, Pico 2, and all RP series development boards developed by Waveshare Electronics.
- The installation tutorial uses Windows 11 as the default example. For other operating systems, please refer to the official Raspberry Pi tutorial.
2. Install the Visual Studio Code Editor
-
Download and install Visual Studio Code.
-
During installation, it is recommended to check the option "Add 'Open with Code' action to Windows Explorer file context menu”.
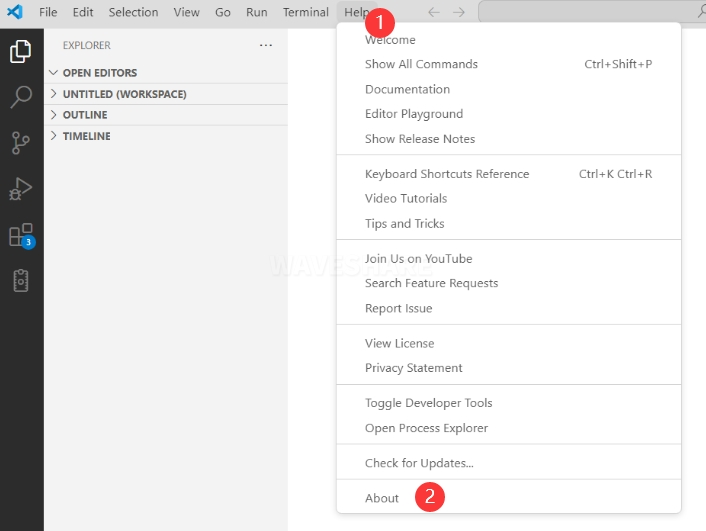
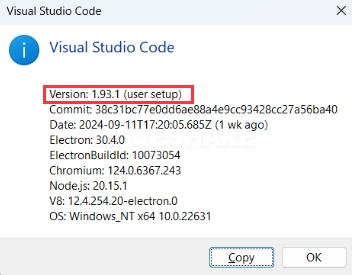
tipIf VS Code is already installed, please check if the version is v1.87.0 or higher.
3. Installing Pico Extension
-
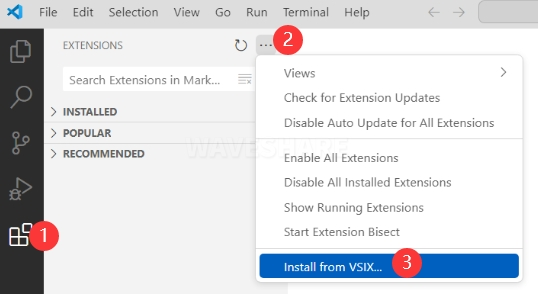
Click on Extensions and select "Install from VSIX".
-
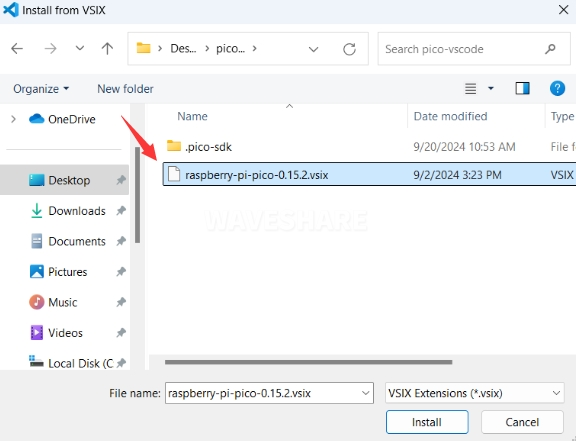
Select the software package with the .vsix extension and click Install.
-
VS Code will then automatically install the raspberry-pi-pico extension and its dependencies. You can click Refresh to view the installation progress.
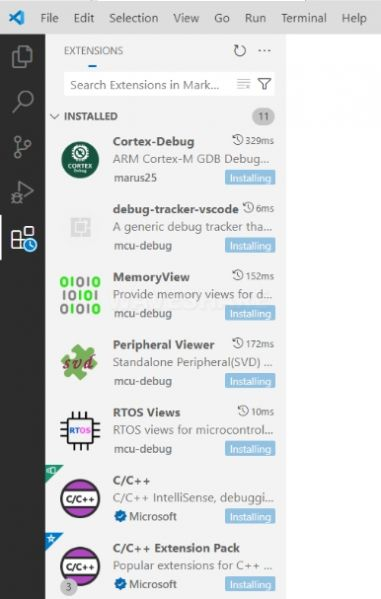
-
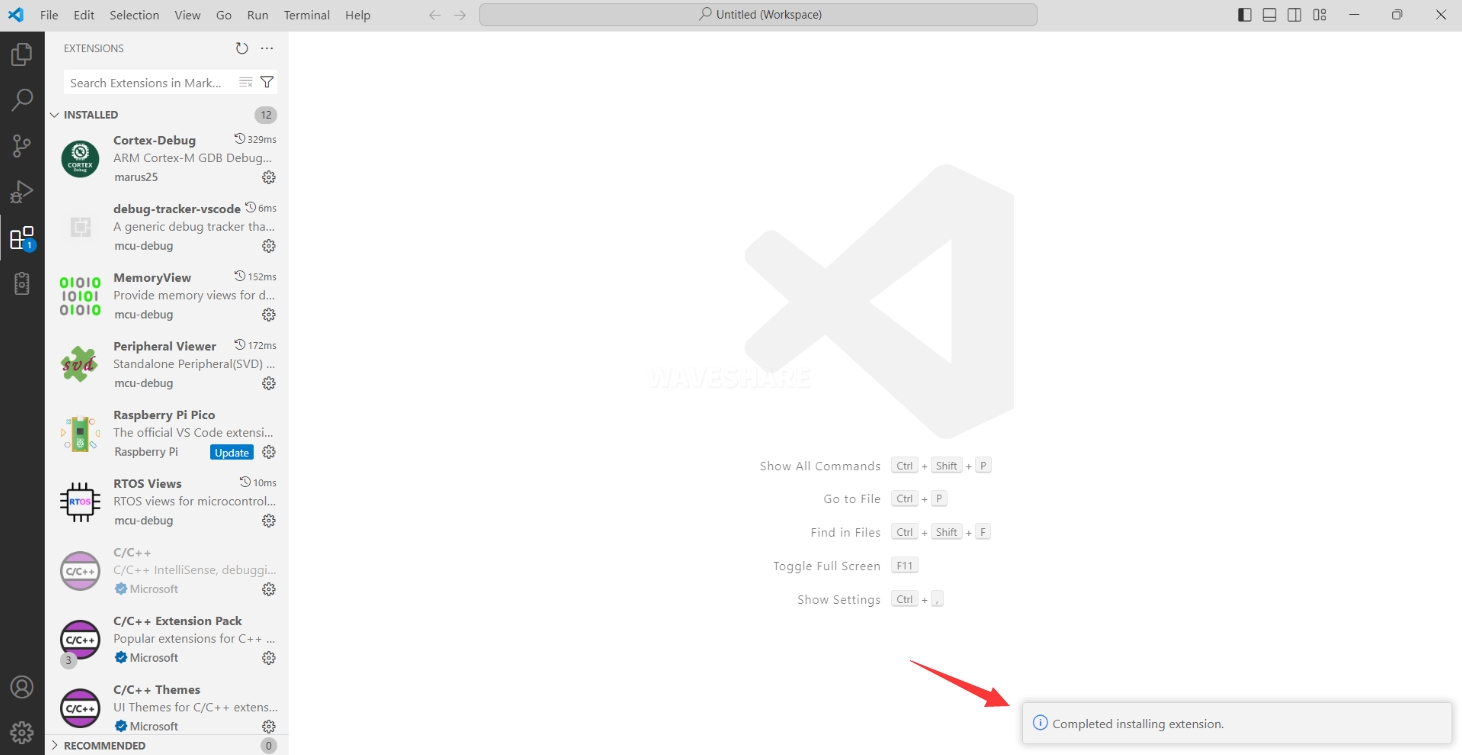
When "Completed installing extension." is shown in the bottom right corner, close VS Code.
-
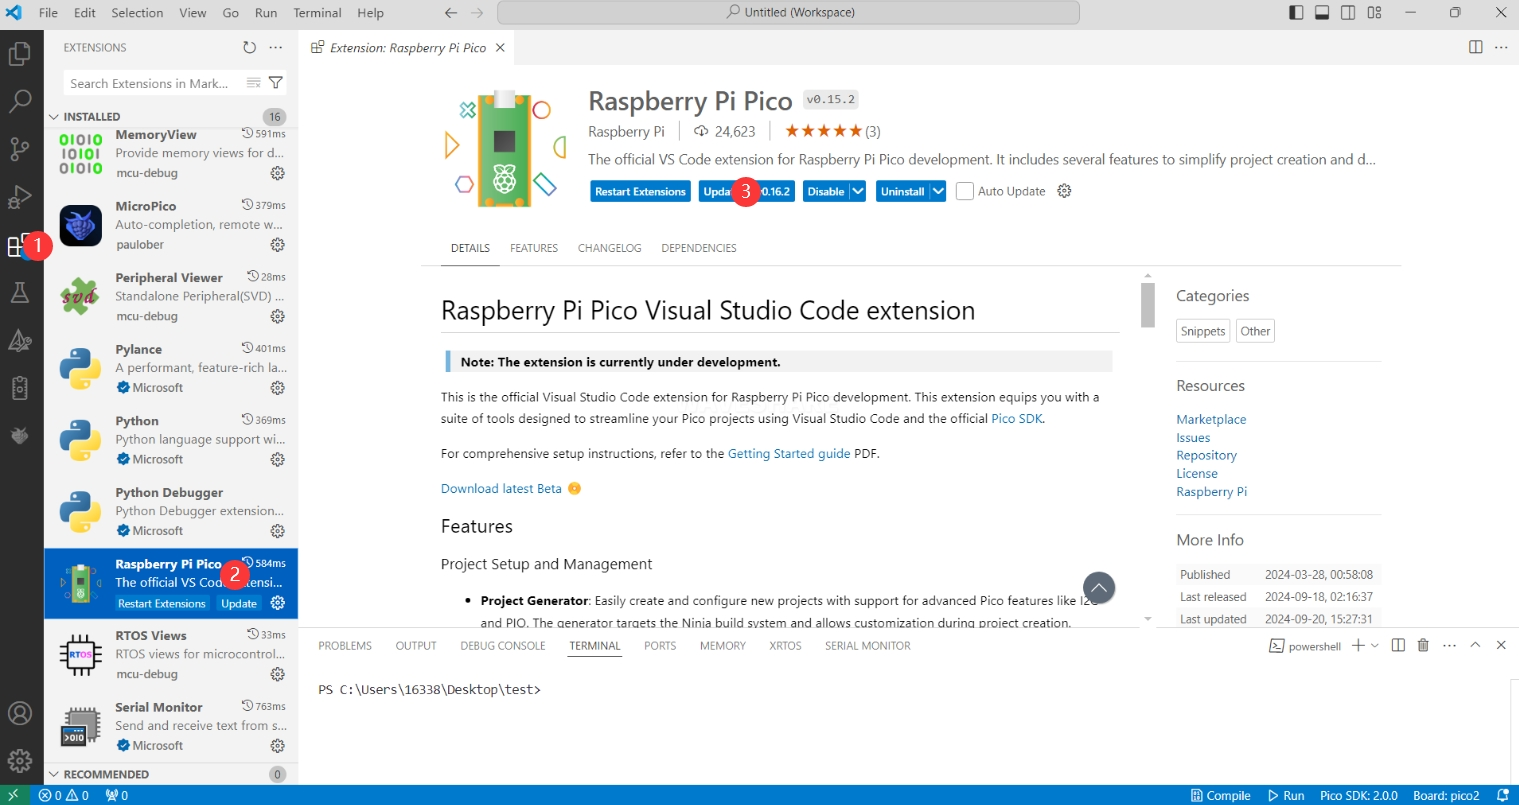
The extension version in the offline package is 0.15.2. After installation, update it to the latest version.
4. Configuring the C/C++ Development Environment
-
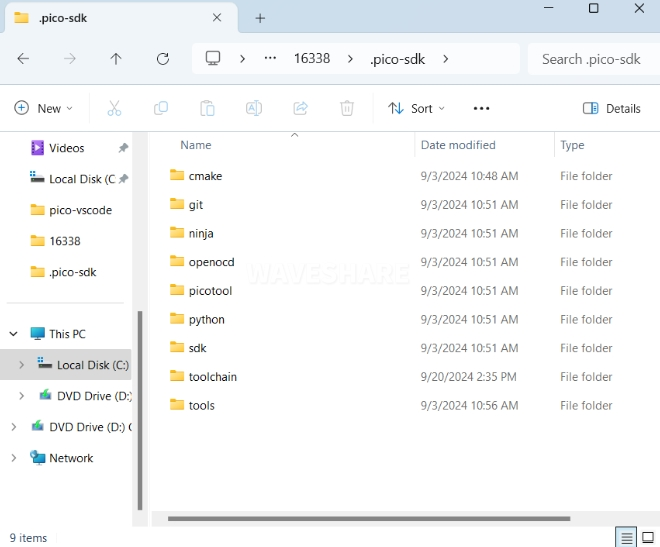
Open the directory
C:\Users\YourUsername, and copy the entire.pico-sdkfolder to this directory.
-
Copy completed.
-
Open VS Code and configure the various paths in the Raspberry Pi Pico extension settings.
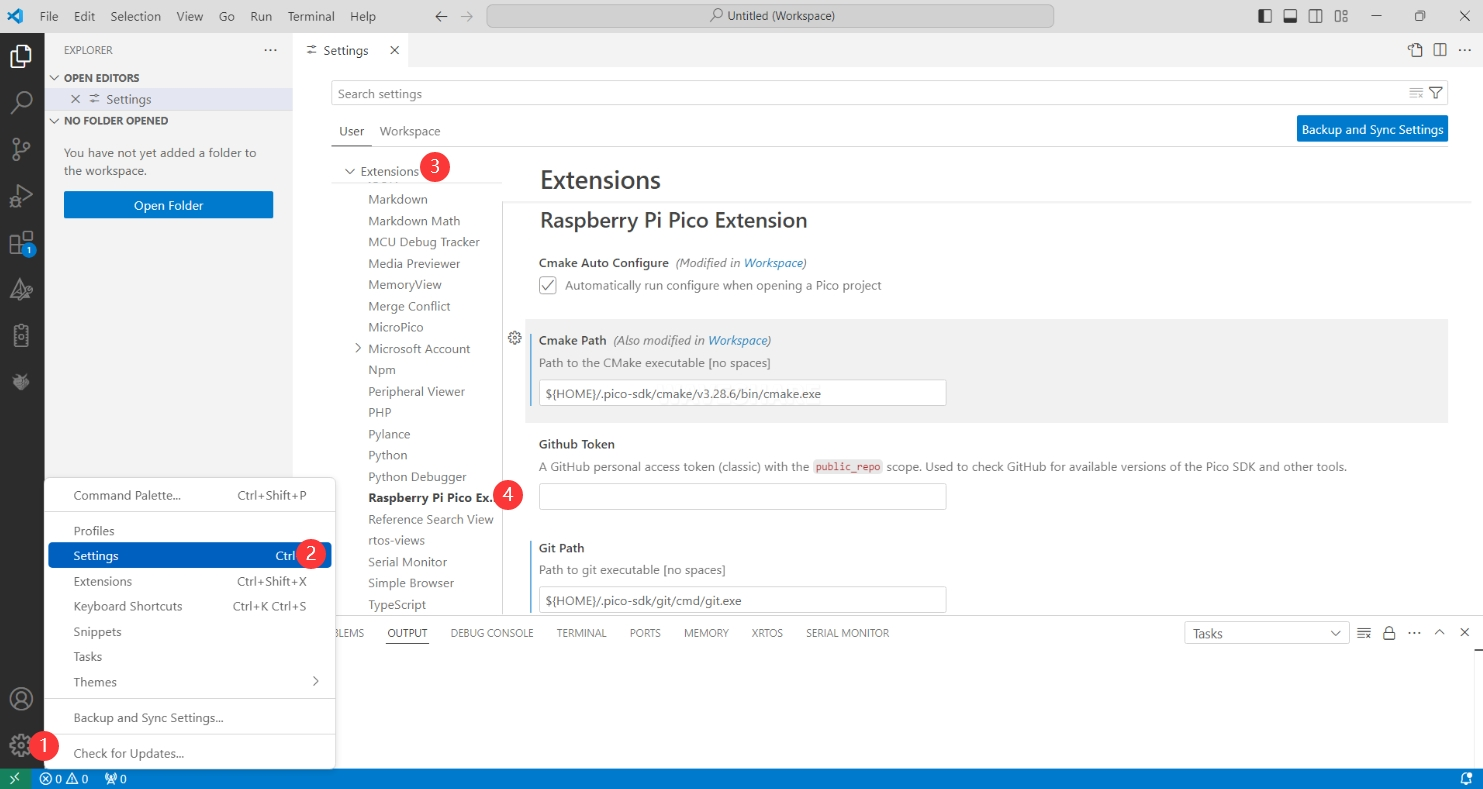
The configuration is as follows:
Cmake Path:
${HOME}/.pico-sdk/cmake/v3.28.6/bin/cmake.exe

Git Path:
${HOME}/.pico-sdk/git/cmd/git.exe

Ninja Path:
${HOME}/.pico-sdk/ninja/v1.12.1/ninja.exe

Python3 Path:
${HOME}/.pico-sdk/python/3.12.1/python.exe
5. Creating a New Project
-
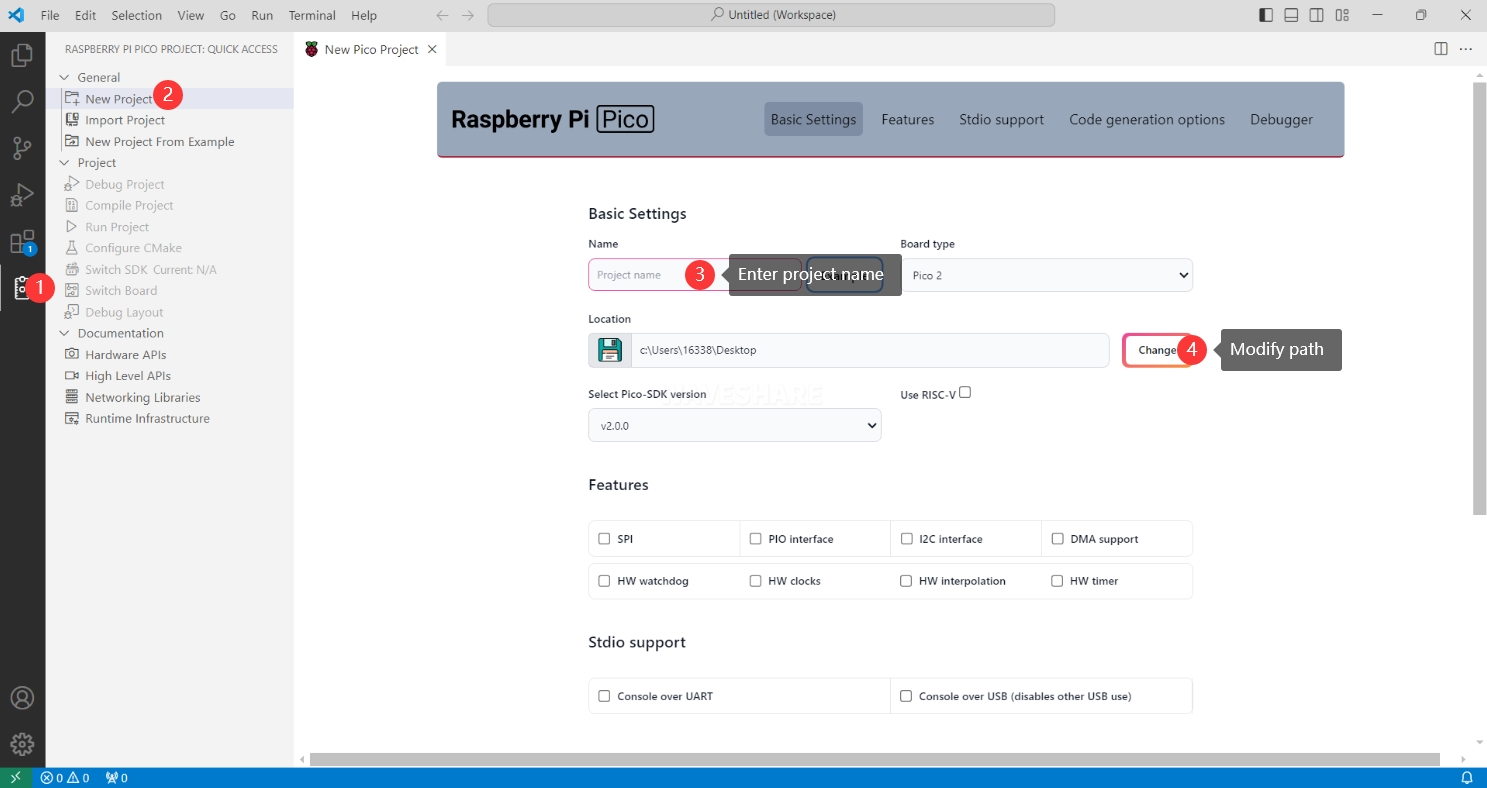
After the configuration is complete, you can create a new project for testing. Enter the project name, select the save path, and then click Create to create the project. If you want to use the official example code, you can click Example next to the project name to select it.
-
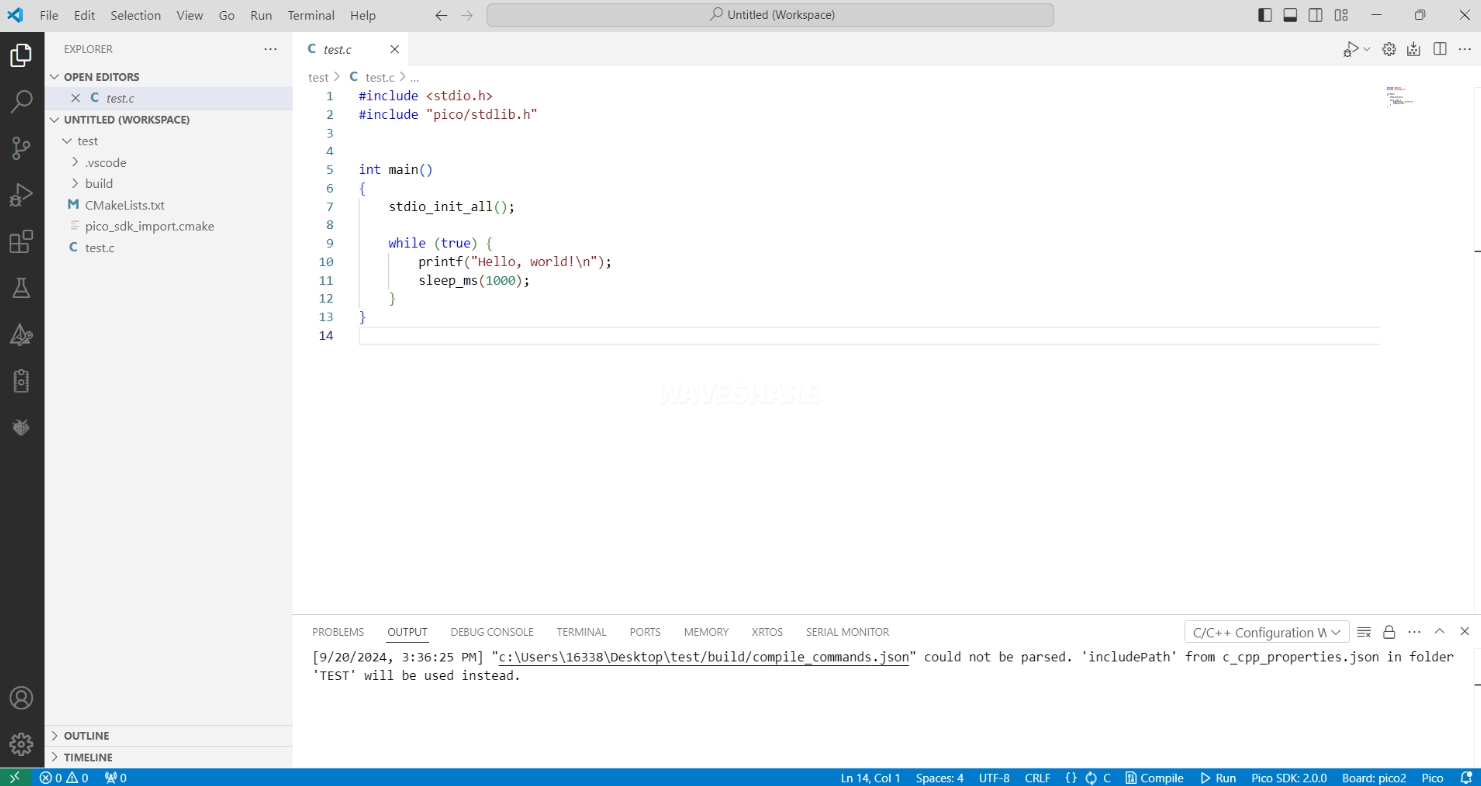
A project successfully created.
6. Compiling C/C++ Projects
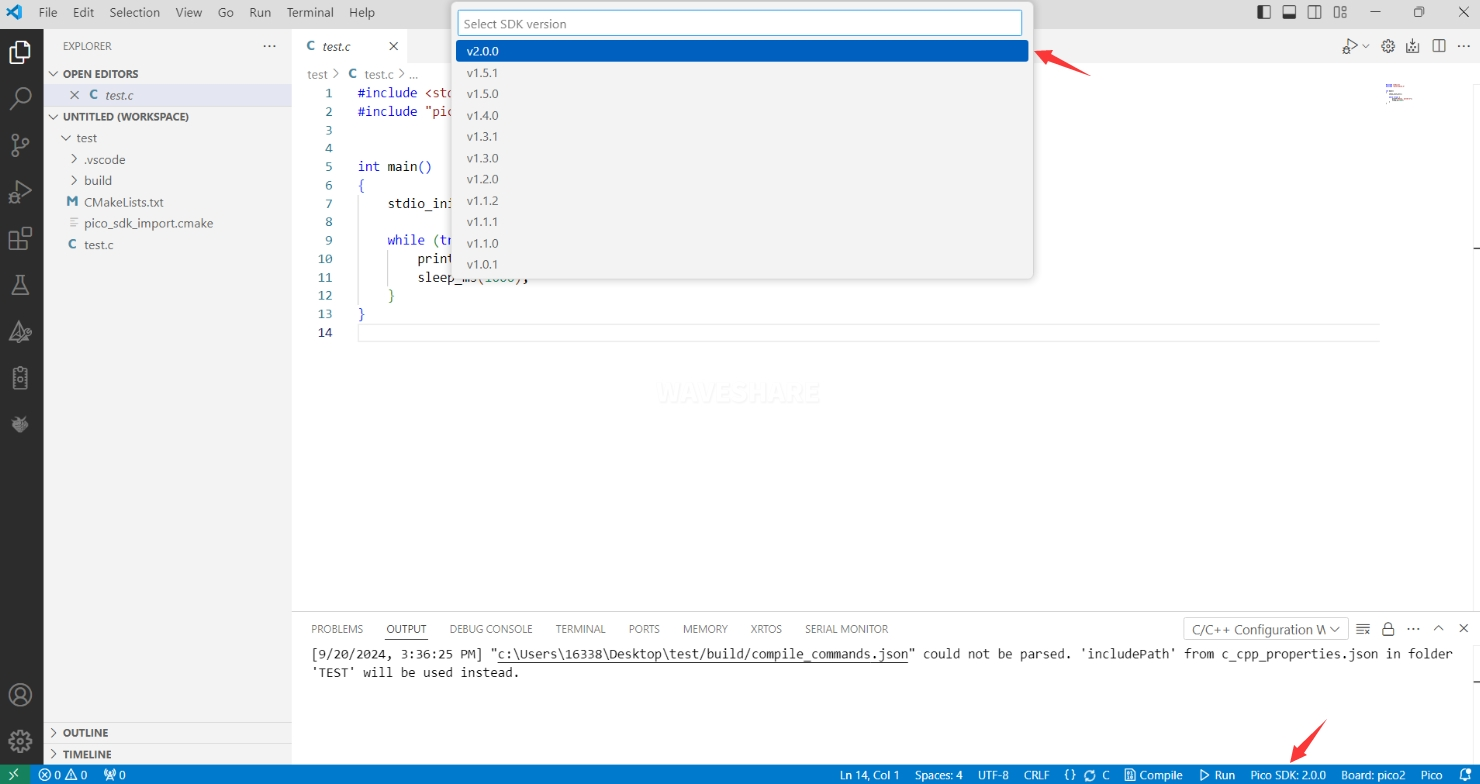
-
When compiling for the first time, you need to select the Pico SDK version.
-
Select Yes for advanced configuration.

-
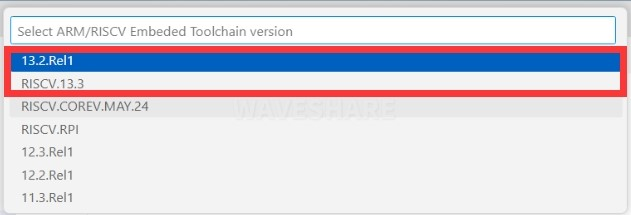
Select the cross-compilation toolchain:
- 13.2.Rel1: Suitable for ARM cores (Pico, Pico W, etc.)
- RISCV.13.3: Suitable for RISC-V cores (RISC-V mode of Pico 2)
Choose the appropriate toolchain based on your development board and requirements.
-
Select the CMake version as Default (using the path configured previously).

-
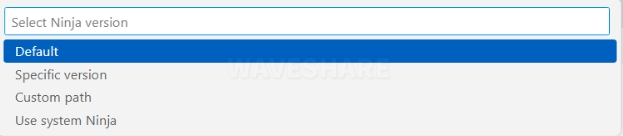
Ninja build tool version selection: Default
-
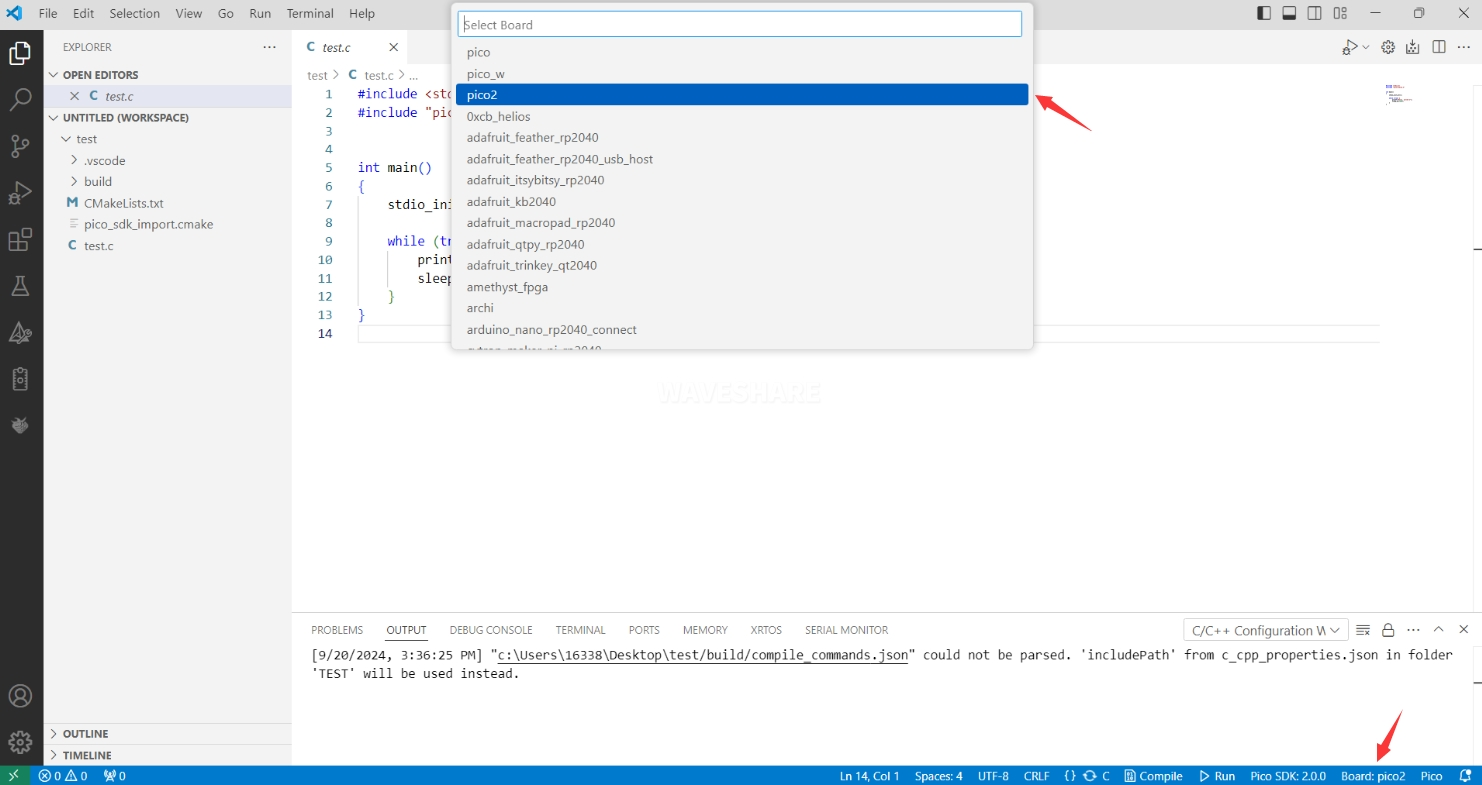
Select the development board.
-
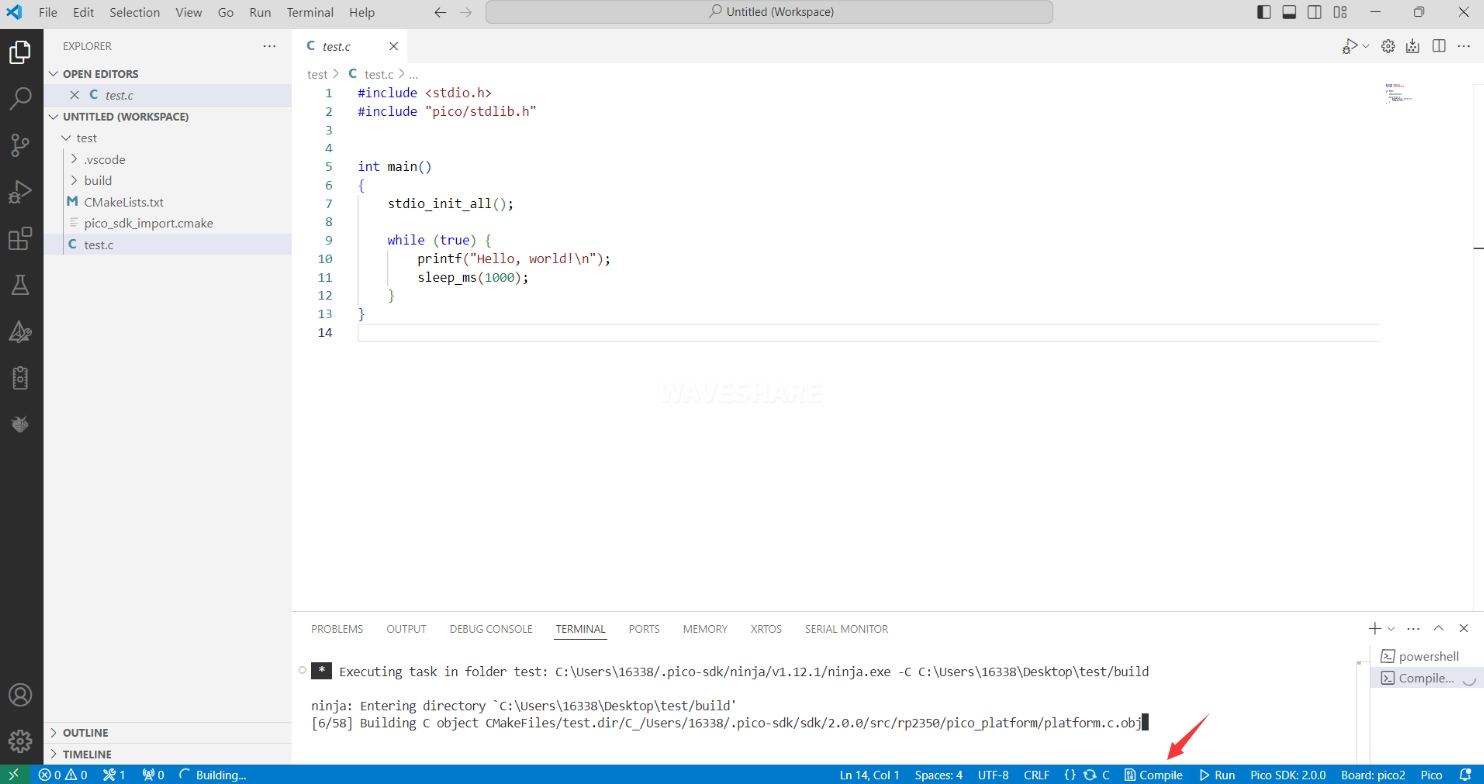
After completing the configuration, click the Compile button to start compiling.
-
After successful compilation, a firmware file in
uf2format will be generated in thebuilddirectory of the project.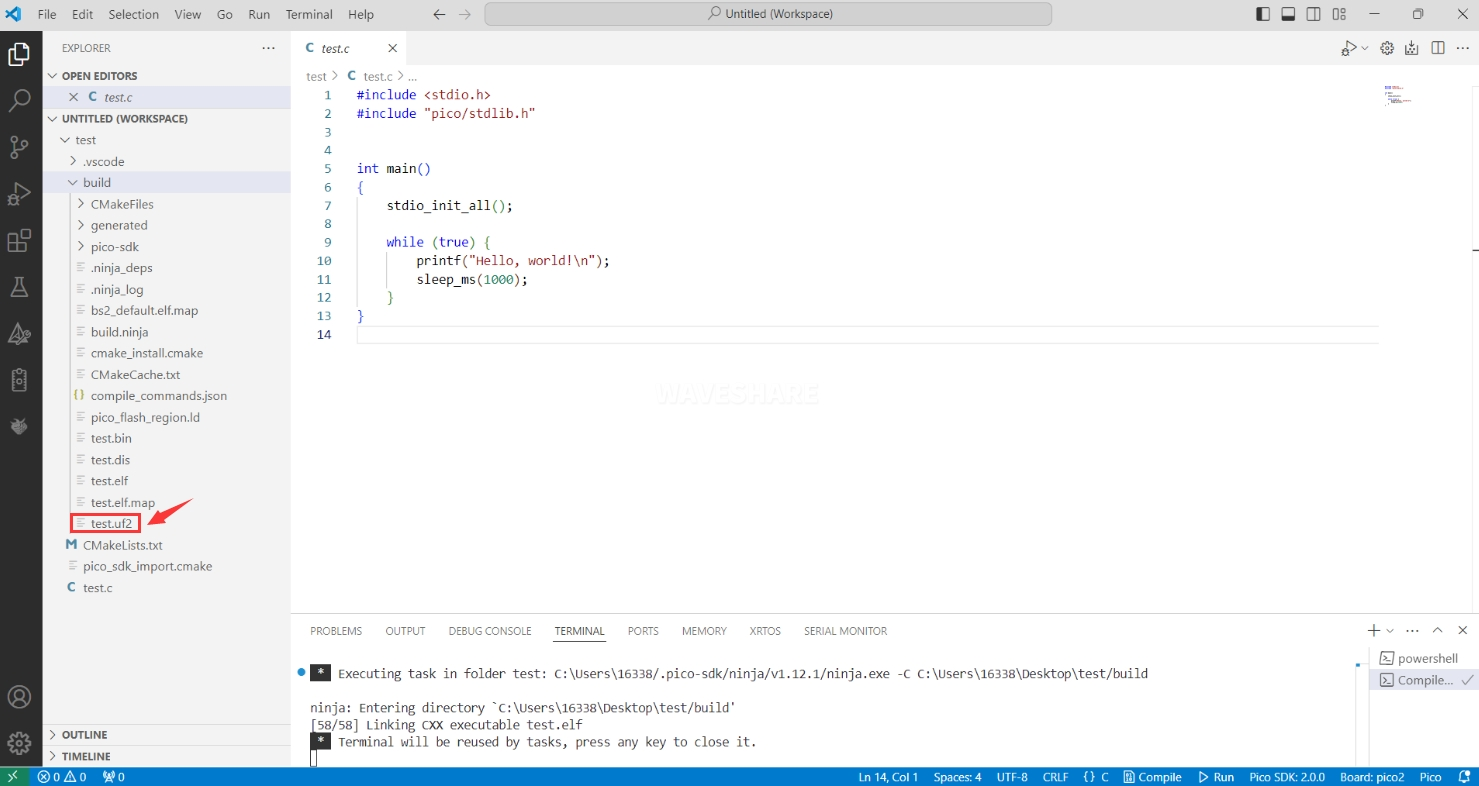
7. Flashing the Firmware
Two methods are available for flashing the compiled firmware onto the development board:
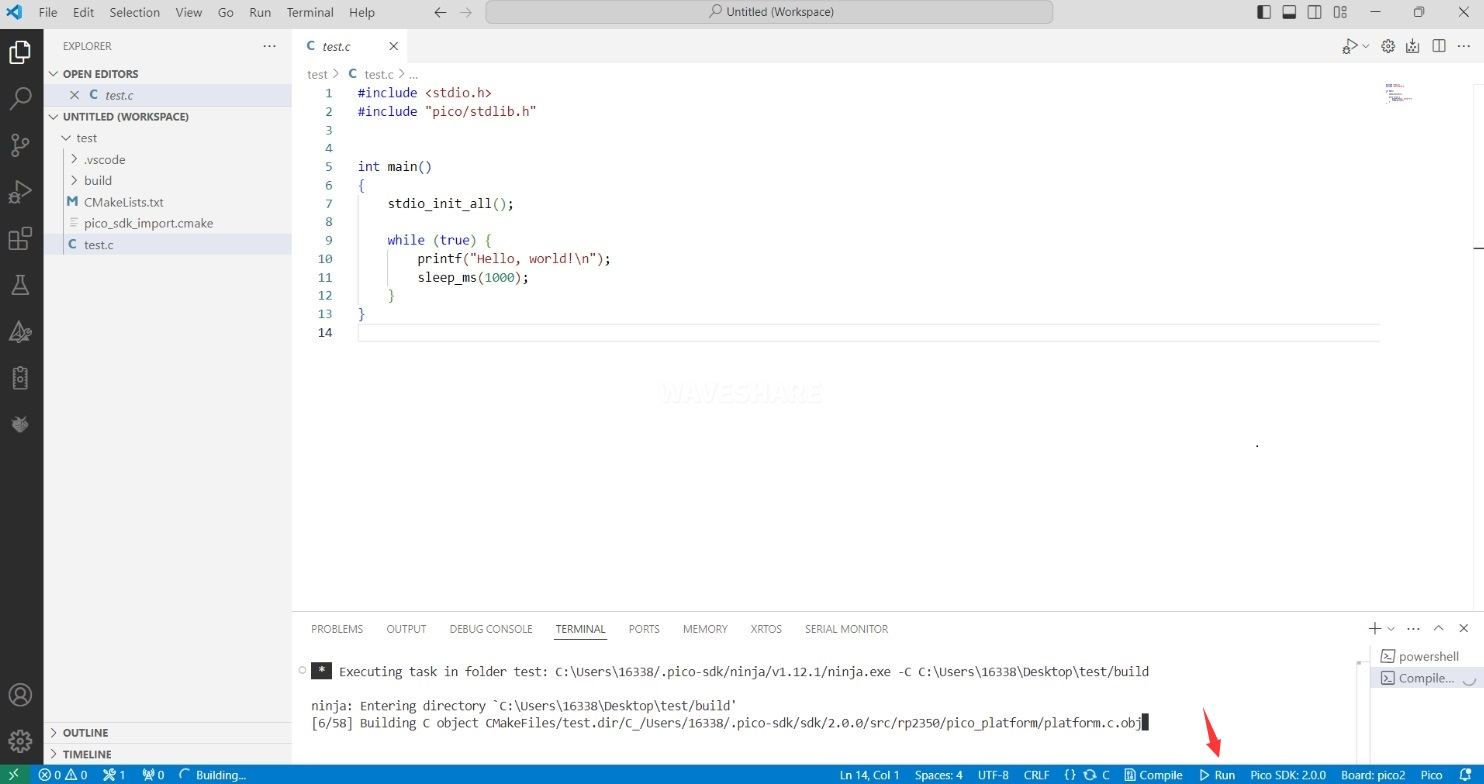
-
Flashing using the Pico VS Code plugin Connect the development board to your computer and click "Run" to directly flash the firmware.
-
Manually flashing the firmware
1. Press and hold the Boot button.
2. Connect the development board to the computer.
3. Then the computer will recognize the development board as a USB device.
4. Copy the uf2 format file to the USB drive. The device will then automatically reboot, completing the firmware flash.
8. Importing C/C++ Project
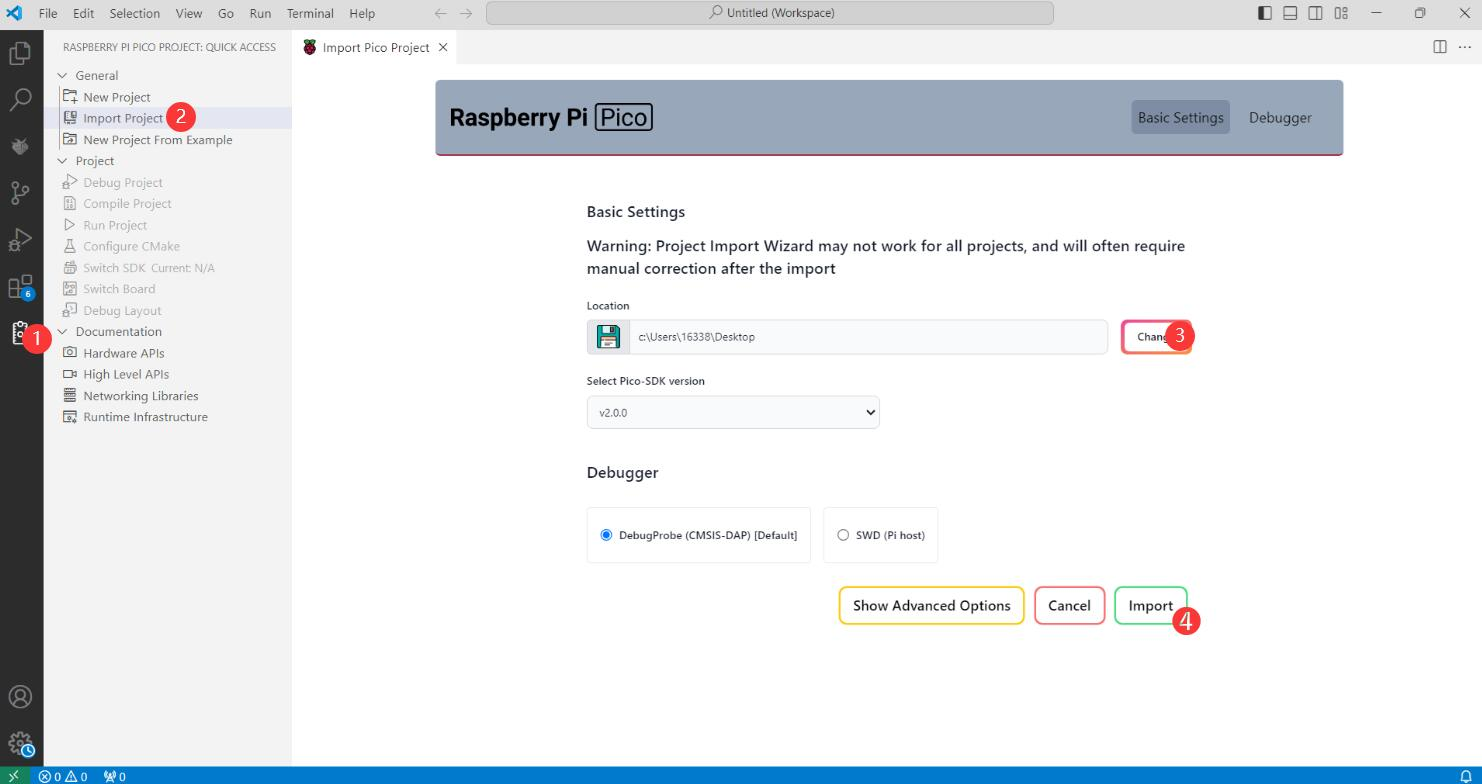
-
In the Pico VS Code extension, select "Import Project," and then choose the directory where your project is located.
-
Important Note: The
CMakeLists.txtfile in the imported project must not contain any Chinese characters (including in comments), otherwise the import may fail. -
Development Board Configuration: After importing the project, you need to check if the
CMakeLists.txtfile contains the development board configuration code. The following configuration is required for proper switching between Pico and Pico 2: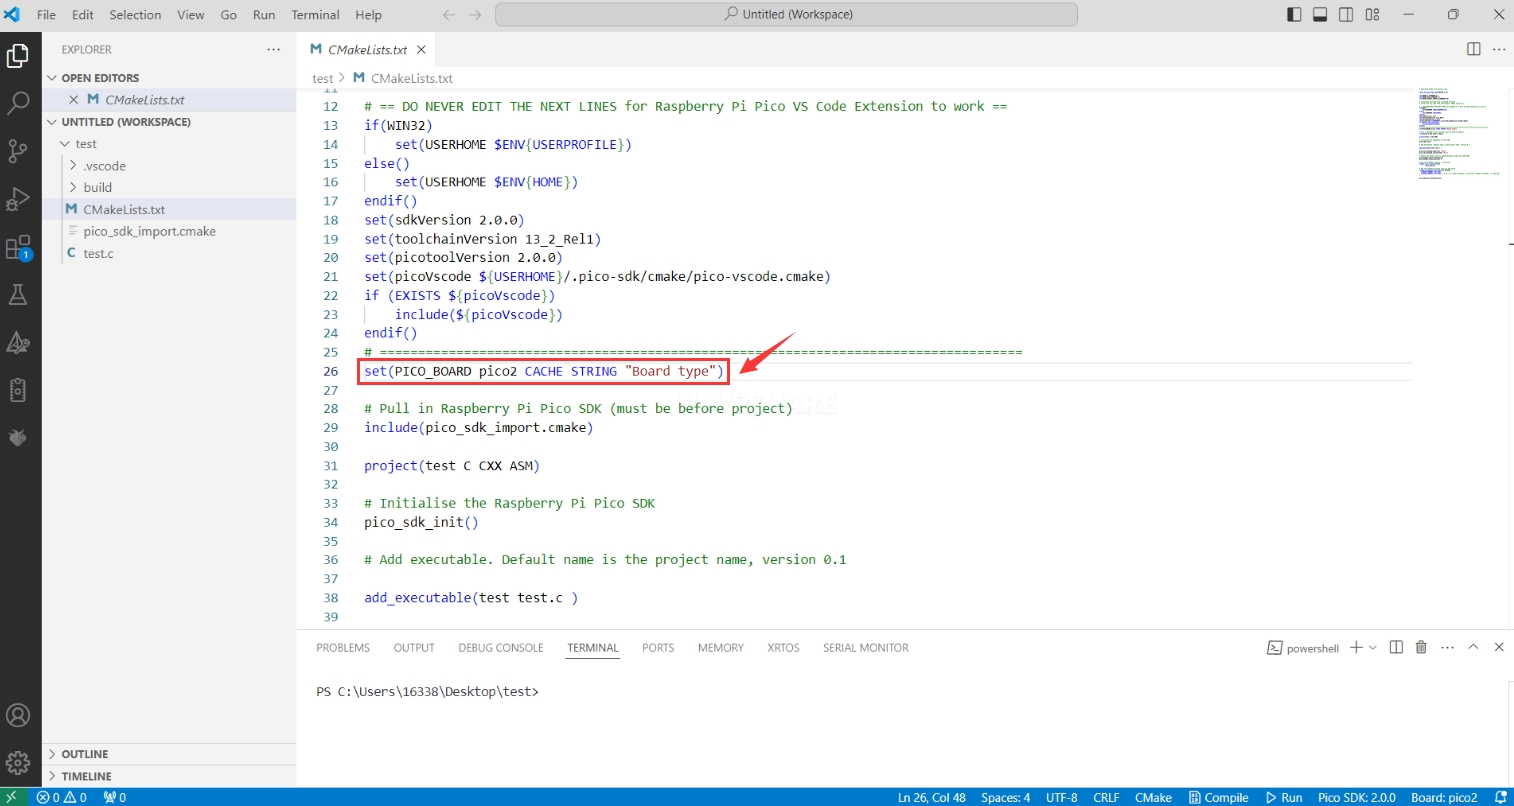
set(PICO_BOARD pico2 CACHE STRING "Board type")tipIf this configuration is not present in
CMakeLists.txt, even if Pico 2 is selected in VS Code, the compiled firmware will still be for the original Pico.