Section 1 Set Up Environment
This lesson introduces the core concepts of ESP-IDF and walks through setting up the official ESP32 development framework (ESP-IDF) in VS Code, establishing the foundation for subsequent project development.
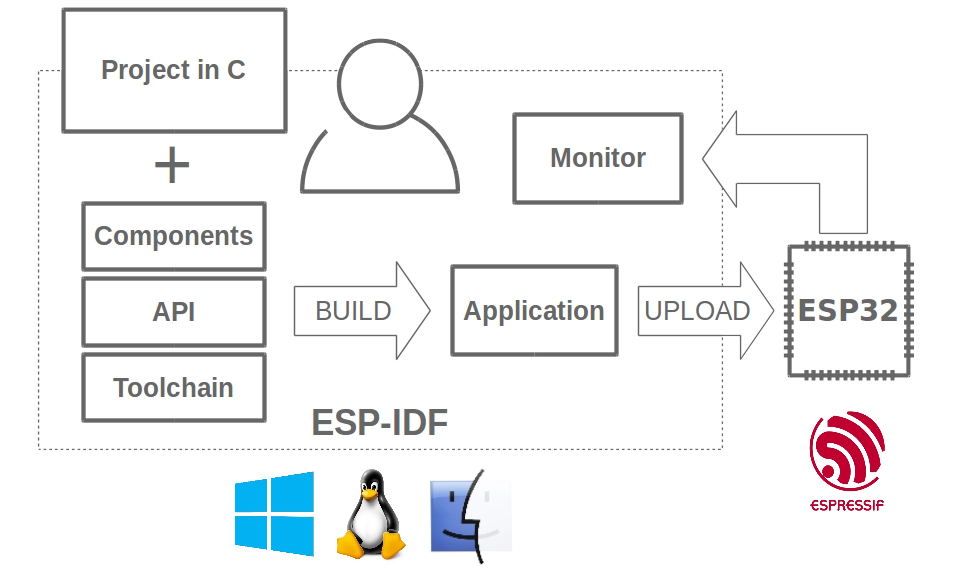
1. What Is ESP-IDF?
ESP-IDF (Espressif IoT Development Framework) is the official IoT development framework from Espressif, supporting the ESP32, ESP32-S, ESP32-C, ESP32-H, and ESP32-P series chips.
Built on C/C++, it provides a complete software development toolchain — including a compiler, debugger, and flashing tools — enabling developers to fully harness the capabilities of the ESP32 series.
Official repository: https://github.com/espressif/esp-idf
2. Why Choose ESP-IDF?
Many developers get started with ESP32 through Arduino or MicroPython, which are well-suited for rapid prototyping and simple projects. However, when it comes to building more complex, stable, and high-performance commercial products, ESP-IDF is the go-to choice for professional development. It offers deeper hardware control, better performance, and production-grade features such as secure boot and OTA firmware updates.
Key advantages of ESP-IDF:
- First-Class Official Support: As Espressif's core development framework, ESP-IDF receives the highest maintenance and compatibility priority. New chips, features, and standards (such as Matter) are typically implemented in ESP-IDF first, giving developers early access to the latest technologies.
- Built-in FreeRTOS: ESP-IDF integrates the FreeRTOS kernel, supporting multi-task concurrency and real-time scheduling. Developers can easily create multiple independent tasks (e.g., Wi-Fi connectivity, sensor data acquisition, UI rendering) to build sophisticated IoT applications.
- Fine-Grained Hardware Control and Comprehensive Feature Set: ESP-IDF provides full access to hardware resources and low-level APIs, making it ideal for developers who need advanced features, low-level optimization, and complex projects. Compared to platforms like Arduino, it allows flexible system configuration, performance tuning, and implementation of more advanced functionality.
- High Performance and Component-Based Architecture: ESP-IDF organizes code around "components." Through the ESP Registry component management platform, developers can easily discover, integrate, and maintain third-party or official components, improving development efficiency and long-term project maintainability.
- Production-Ready and Commercial-Grade Development: ESP-IDF supports OTA updates, secure boot, flash encryption, and partition management — making it well-suited for mass production deployment and long-term maintenance, and meeting the security and maintainability requirements of commercial products.
3. Setting Up the ESP-IDF Development Environment
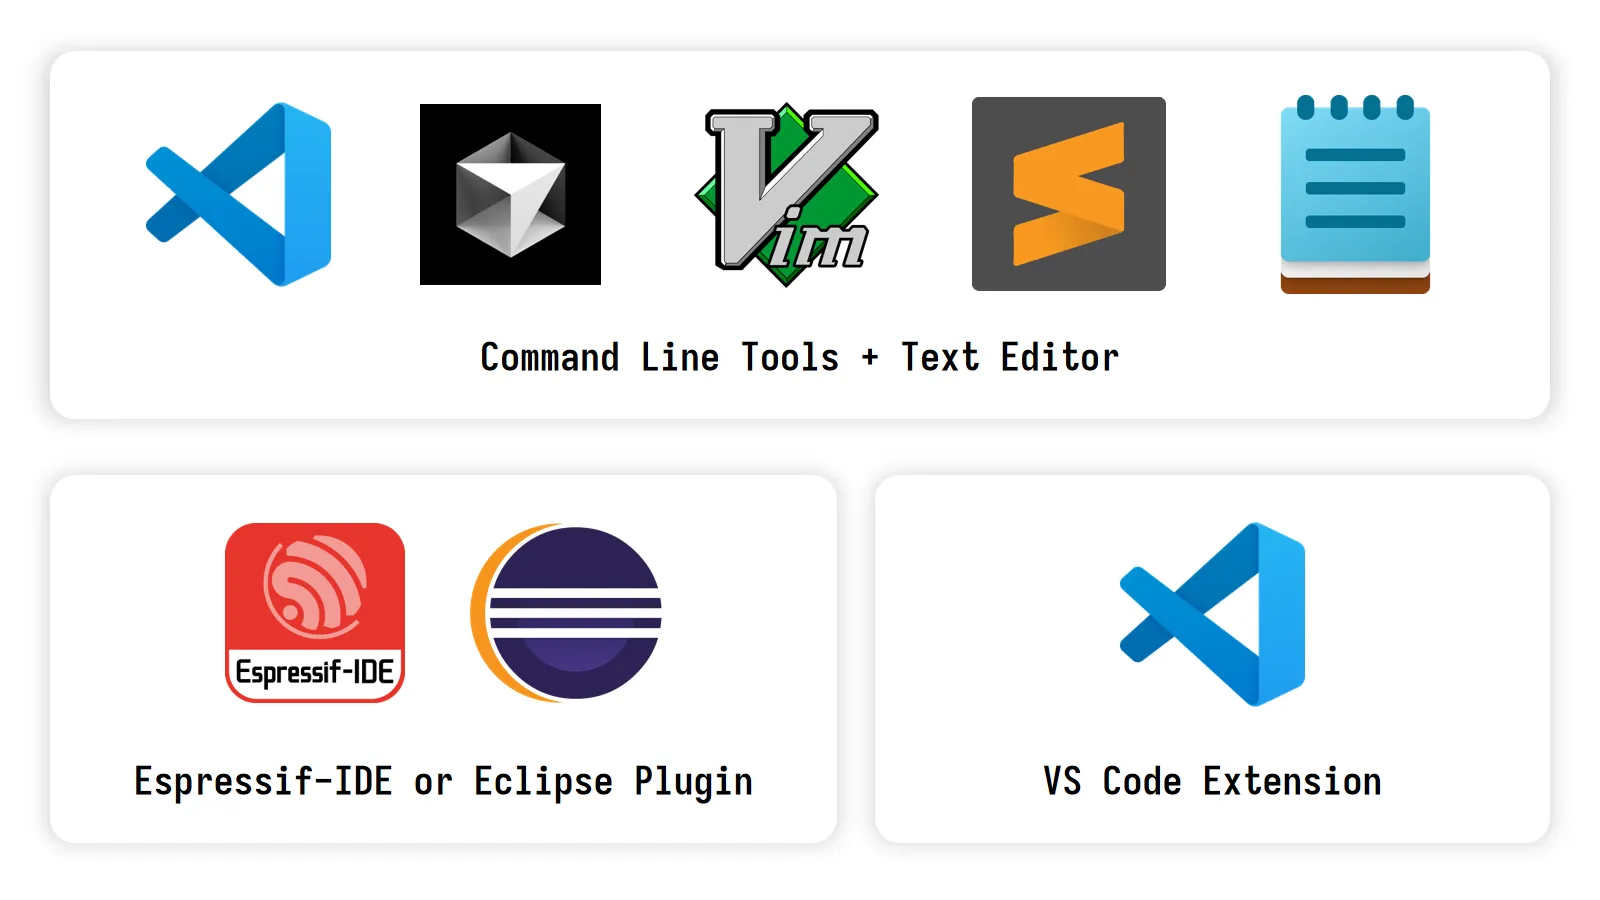
There are several main ways to develop for ESP32 with ESP-IDF:
- ESP-IDF Command-Line Tools: Set up a command-line environment using the official installer or scripts, and use the
idf.pytool for project configuration, building, flashing, and monitoring. Pair with any text editor of your choice. - Eclipse Plugin (Espressif-IDE): An Eclipse CDT-based IDE with a built-in ESP-IDF toolchain and plugins, supporting a complete end-to-end workflow including project creation, building, flashing, debugging, and monitoring. Best suited for developers with embedded experience who are already familiar with Eclipse.
- VS Code Extension: Install the official Espressif ESP-IDF extension in Visual Studio Code. It integrates project management, building, flashing, monitoring, and debugging in one place, with automatic detection of ESP-IDF and related toolchains.
We recommend the VS Code + ESP-IDF Extension setup — it is currently the most popular and beginner-friendly approach.
3.1 Installing the ESP-IDF Development Environment
- Supported Systems: This section uses Windows 10/11 as the reference platform. For Mac/Linux, refer to the official documentation.
- Demo Version: This guide demonstrates an offline installation of ESP-IDF v6.0 using the EIM installer.
-
Go to the ESP-IDF Installation Manager page to download the ESP-IDF Installation Manager (EIM) — Espressif's latest cross-platform installation tool. The steps below demonstrate how to use its offline installation feature.
On the page, click the Offline Installer tab, then use the filter options to select the Windows operating system and the latest stable v6.0 version.
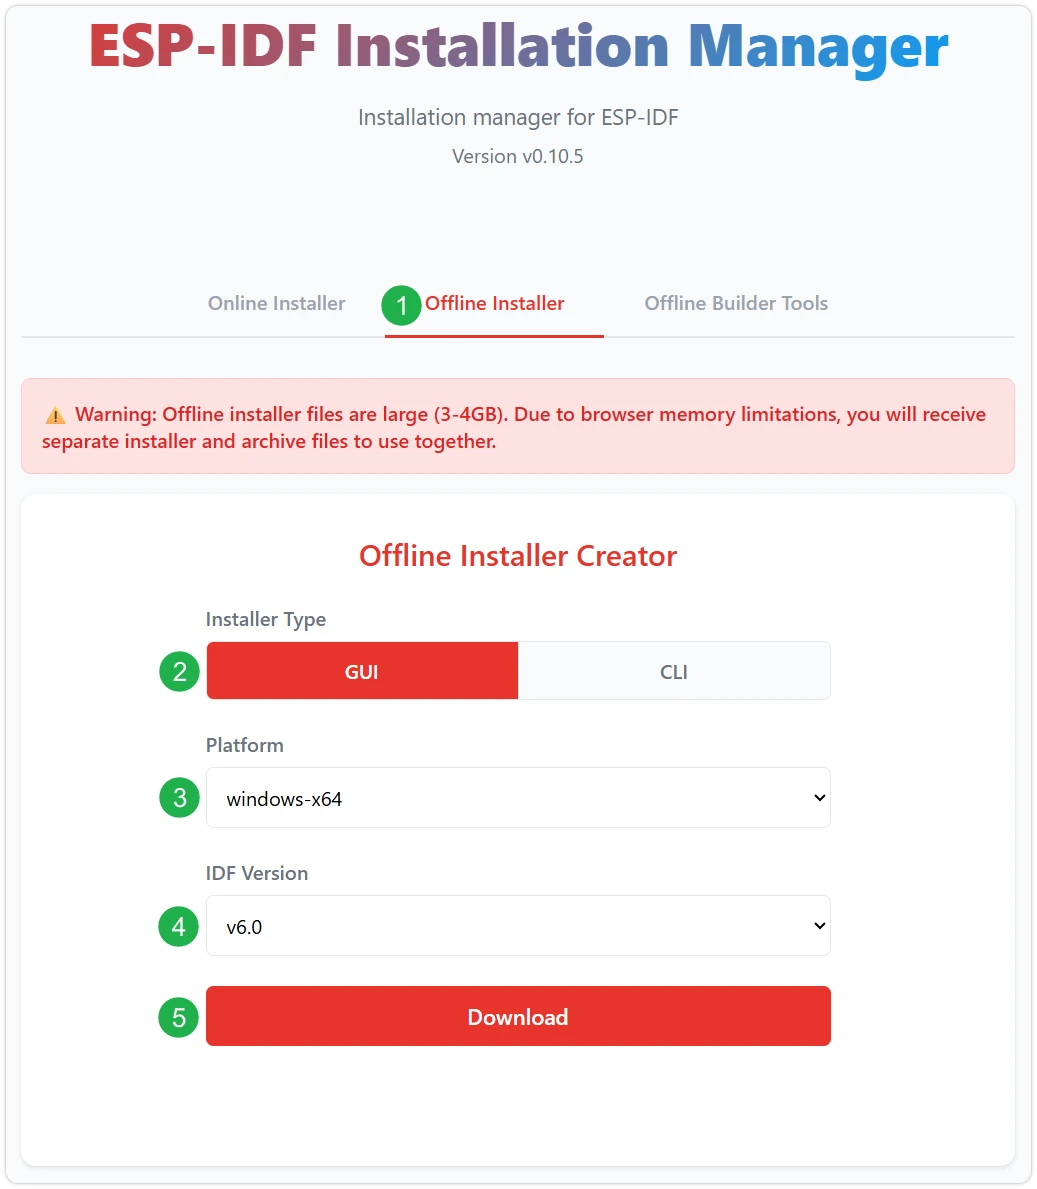
Once your selection is confirmed, click the download button. Your browser will automatically begin downloading two files simultaneously: the ESP-IDF offline package (.zst) and the ESP-IDF installer (.exe).
Wait for both files to finish downloading.
-
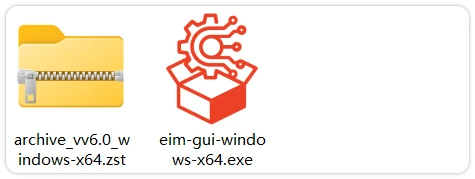
Once the download is complete, double-click to run the ESP-IDF Installer (eim-gui-windows-x64.exe).
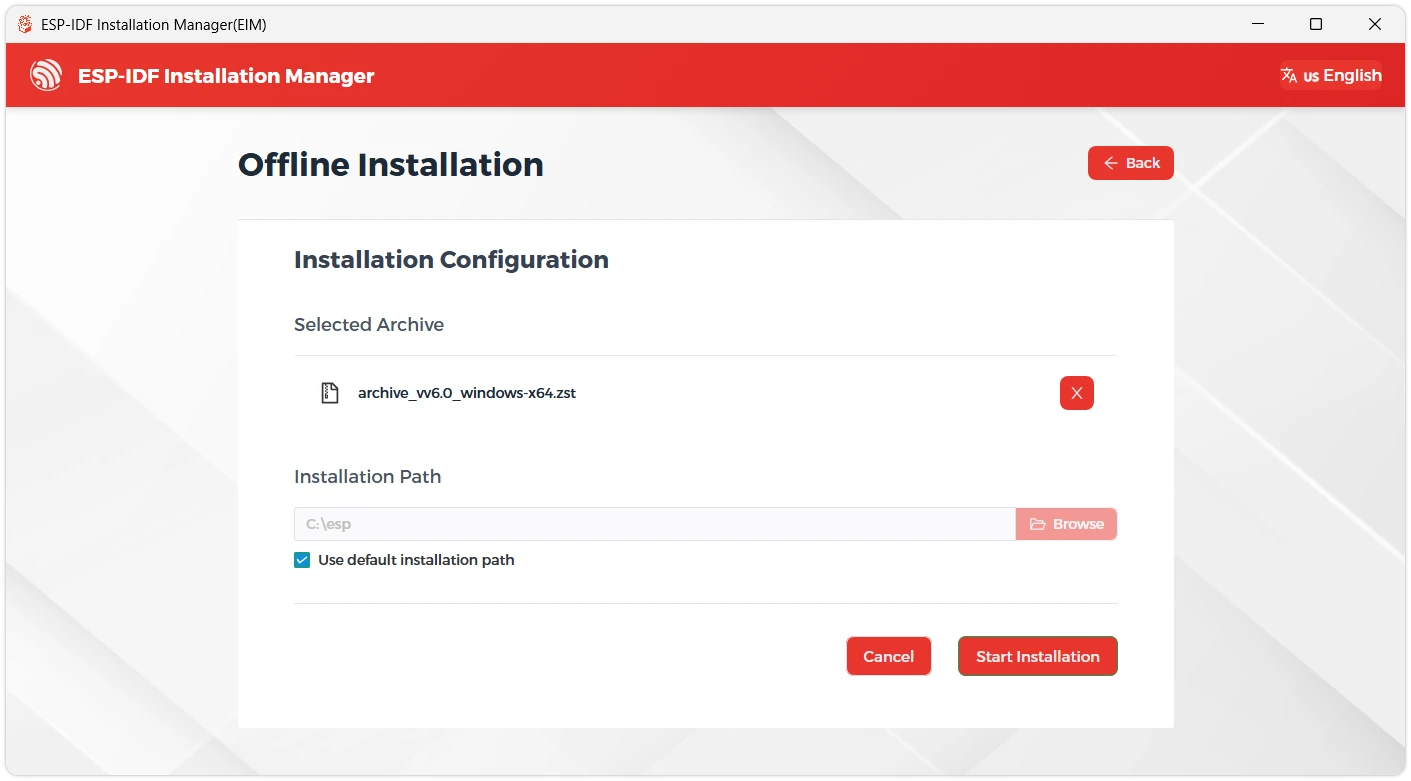
The installer will automatically detect whether the offline package is present in the same directory. Click Install from Archive.

Next, choose an installation path. The default path is recommended; if you need a custom location, make sure the path contains non-ASCII characters (e.g., Chinese characters) or spaces. Once confirmed, click Start Installation.
-
When the following screen appears, ESP-IDF has been installed successfully.

-
Verify the development environment:
Locate the IDF_v6.X_Powershell shortcut on your desktop — this is a dedicated command-line terminal with the ESP-IDF environment pre-configured.

In this terminal, type
idf.py --versionand press Enter. If the ESP-IDF version number is displayed, the build and development environment is ready to use.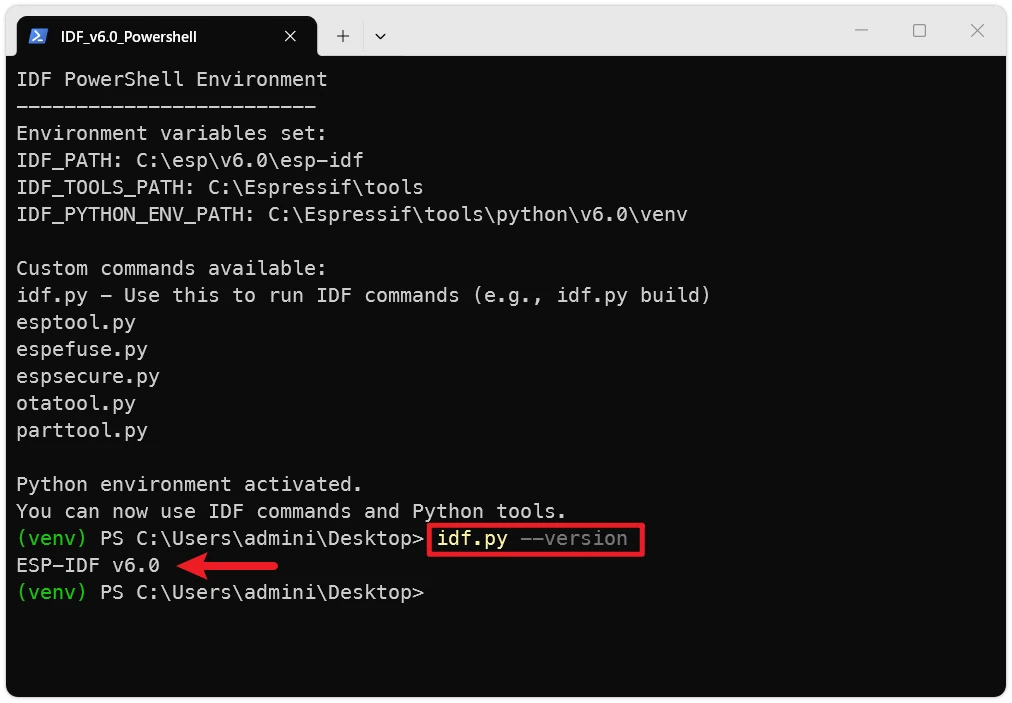
-
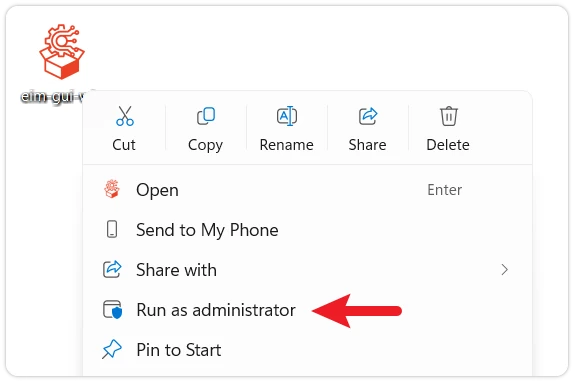
It is also recommended to install the drivers.
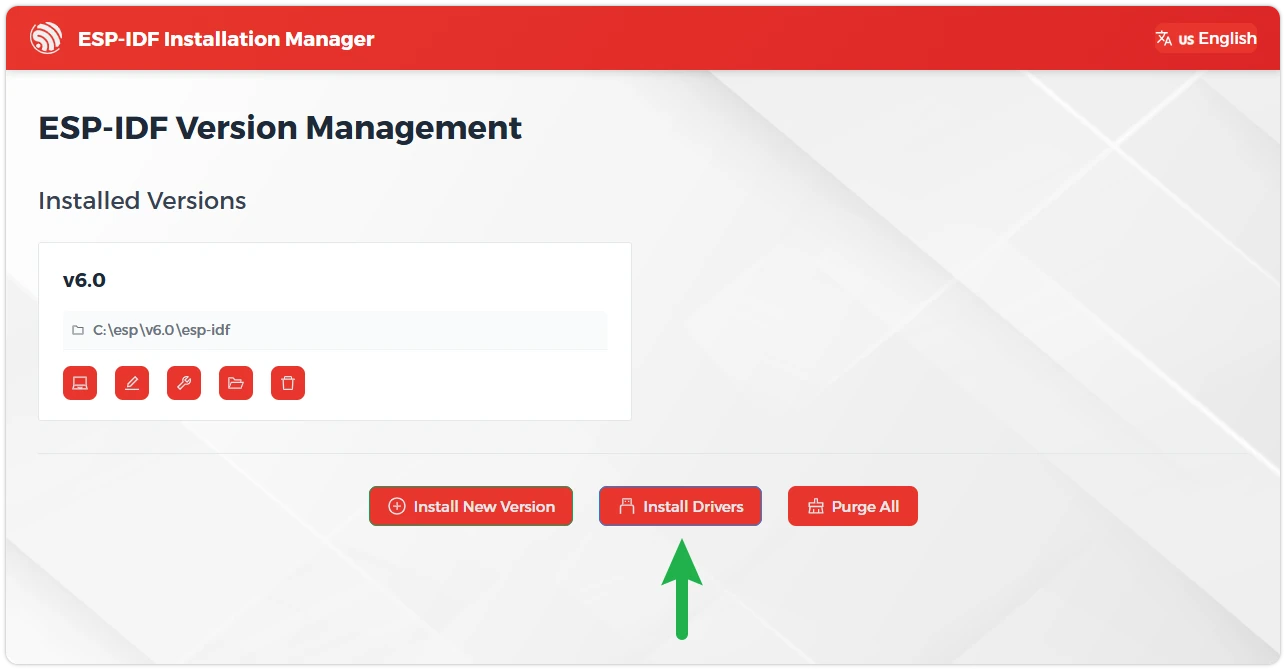
Close the current installer window, then relaunch the ESP-IDF Installation Manager with administrator privileges. On the ESP-IDF version management page, click Install Drivers.
3.2 Installing Visual Studio Code and the ESP-IDF Extension
-
Download and install Visual Studio Code.
-
During installation, it is recommended to check Add "Open with Code" action to Windows Explorer file context menu for quick access to project folders.
-
In VS Code, click the
 Extensions icon in the Activity Bar (or press Ctrl + Shift + X) to open the Extensions view.
 -
Search for ESP-IDF, find the ESP-IDF extension, and click Install.

-
When the ESP-IDF extension version is ≥ 2.0, it will automatically detect and recognize the ESP-IDF environment installed in the previous steps — no manual configuration required.
4. VS Code ESP-IDF Extension Interface Overview
After opening an ESP-IDF project, the extension loads and displays a toolbar at the bottom of the VS Code window, as shown below:

- ① ESP-IDF Version: Displays and switches the ESP-IDF version used by the current project.
- ② Select Flash Method: Selects the flashing interface for the project — DFU, JTAG, or UART.
- ③ Select Port: Selects the serial port used for ESP-IDF tasks such as flashing or monitoring.
- ④ Set Espressif Device Target: Sets the target chip (
IDF_TARGET) for the current project, equivalent to runningidf.py set-target. Select the appropriate chip model here. - ⑤ SDK Configuration Editor: Opens the graphical UI for ESP-IDF project settings, equivalent to
idf.py menuconfig. - ⑥ Full Clean: Deletes the build directory of the current ESP-IDF project.
- ⑦ Build Project: Builds the project using
CMakeandNinja-build. - ⑧ Flash Device: Flashes the compiled binary from the current project to the target device.
- ⑨ Monitor Device: Starts serial communication between the computer and the Espressif device, equivalent to
idf.py monitor. - ⑩ Debug: Launches the debugger.
- ⑪ Build, Flash, and Monitor: Builds the project, flashes the binary to the device, and starts the monitor terminal — similar to running
idf.py build flash monitor. - ⑫ Open ESP-IDF Terminal: Opens a terminal with
IDF_PATHand the Python virtual environment activated.
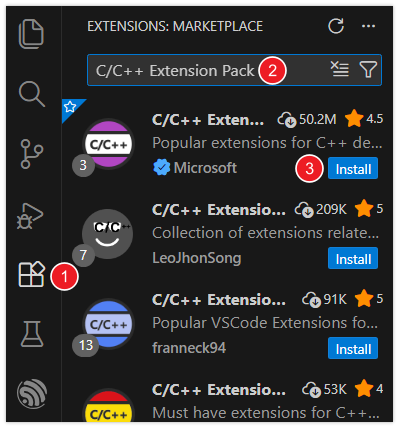
5. Installing the C/C++ Extension
For code navigation and C/C++ syntax highlighting, the Microsoft C/C++ extension is recommended.
-
In VS Code, click the
icon in the Activity Bar (or press Ctrl + Shift + X) to open the Extensions view. -
Search for and install the C/C++ Extension Pack.
6. Appendix: Core Toolchain Overview
The ESP-IDF development workflow is powered by a set of underlying tools. Here is a brief overview to give you a general picture:
-
idf.pyThe top-level command-line tool for ESP-IDF. It provides developers with a unified, convenient interface that wraps the underlying build system (CMake), compiler (Ninja), flashing tool (esptool.py), and debugger.
Common commands at a glance:
- Create a new project:
idf.py create-project <project name> - Select the target chip:
idf.py set-target <target> - Launch the graphical configuration tool:
idf.py menuconfig - Build the project:
idf.py build - Flash the project:
idf.py flash
- Create a new project:
-
Kconfig / menuconfig
A component configuration system originating from the Linux kernel. ESP-IDF uses the Kconfig mechanism to manage the large number of configurable options in a project. By running
idf.py menuconfig, developers launch a text-based user interface (TUI) where they can enable or disable components, configure network parameters, adjust log levels, and more. All settings are saved to asdkconfigfile in the project root directory and made available to source code as macro definitions at compile time. -
An open-source, cross-platform build system automation tool. In ESP-IDF, it parses the
CMakeLists.txtfiles in your project, manages source files, component dependencies, compiler options, and linker scripts, and generates the build instructions required by the chosen build tool (such as Ninja). -
A small, speed-focused build system. After CMake generates build rules during the configuration phase, Ninja is used by default to execute them efficiently. Its main strength is extremely fast incremental builds: it precisely determines which files have changed since the last compilation and recompiles only those, significantly reducing build times during development.
-
A Python utility for communicating with the ROM bootloader on Espressif chips. Its core functions include flashing compiled firmware binaries (
.binfiles) to the chip's flash memory, reading chip information (such as the MAC address), erasing flash, and performing other low-level flash read/write operations. Theidf.py flashcommand internally callsesptool.pyto carry out the actual flashing.